


20
GB
PLEASE PHONE US TO REGISTER YOUR APPLIANCE AND ACTIVATE YOUR PARTS GUARANTEE ON 08448 24 24 24
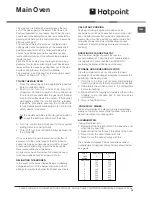
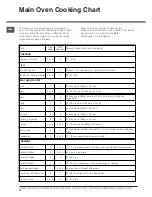
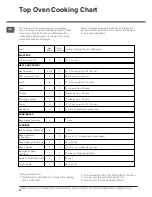
The following times and setting are for guidance
only. You may wish to alter the setting to give a result
more to your satisfaction. When a different setting
to that shown below is given in a recipe, the recipe
instructions should be followed.
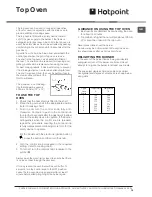
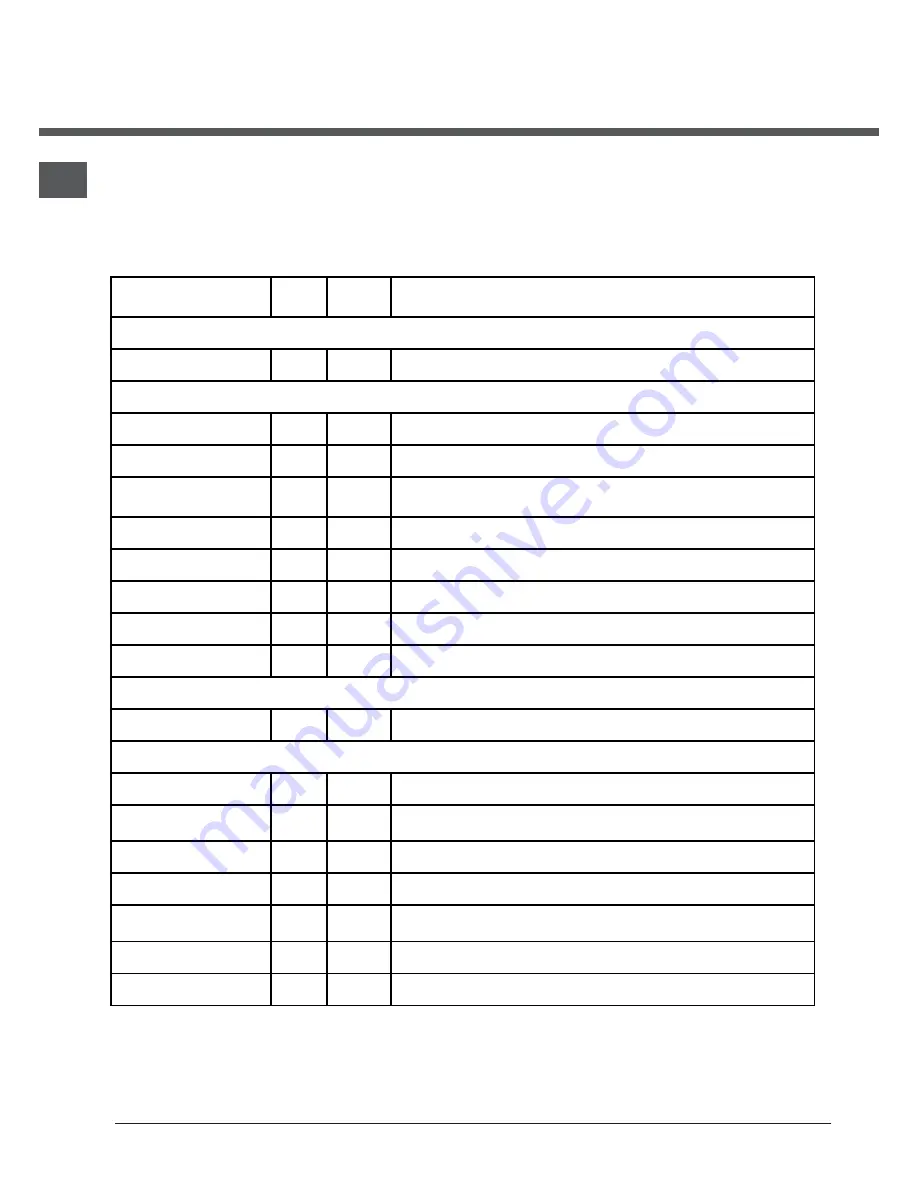
Top Oven Cooking Chart
If using aluminium foil:
1. Remember it is important to increase the cooking
time by one third.
2. Do not allow the foil to touch the sides of the oven.
3. Do not cover the oven interior with foil.
4. Do not cover the oven shelves with foil.
Allow 15 minutes preheat for best results. Always turn
the thermostat knob to Mark 8 first, before turning back
to the required Gas Mark.
Food
Gas
Mark
Shelf
Positions
Approx. Cooking Time and Comments
STARTERS
Oily and white fish
5
2
20 - 30 mins.
MEAT AND POULTRY
Beef (medium)
4 or 5
3
25 - 30 mins per lb + 25 - 30 mins.
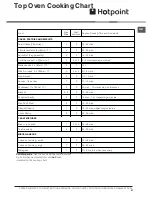
Ham (covered in foil)
5
3
40 mins per lb + 40 mins
Lamb
5
3
30 - 35 mins per lb + 30 mins.
Pork
5
3
40 mins per lb + 40 mins.
Chicken
5
3
25 mins per lb + 25 mins.
Duckling & Goose
5
3
25 mins per lb + 25 mins.
Turkey
4
3
15 - 20 mins per lb + 15 - 20 mins.
Casseroles
3
3
2 - 4 hrs. depending on meat used
VEGETABLES
Baked jacket potatoes
5
2
1 ½ hrs.
PUDDINGS
Milk Puddings (500ml/1pt)
3
2
1 ½ hrs.
Baked Custard
(500ml/1pt)
3
2
45 mins - 1 hr. in bain-marie of cold water
Baked Sponge Puddings
4
2
30 - 45 mins
Baked Apples
3
2
45 mins - 1 hr. depending on size
Meringue Topped
Puddings
1
2
25 mins until tinged with brown
Apple Tart (1x205 mm)/8")
6
2
60 mins
Fruit Crumble
5
2
45 - 50 mins


