background image

6

D

ISHWASHER

Installation

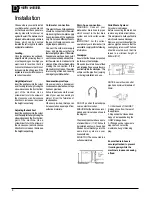
Cold water connection.

This electric household appliance
should be connected to the water
mains using the cold water supply
hose provided with the appliance
only. Do not use a different hose. In
the event of replacements, use
original spare parts only.

Connect the cold water supply
hose,  and making sure that it is
fastened tightly in place .  If the water
hoses are new or have been out of
use for an extended period of time,
let the water run to make sure it is
clear and free of impurities before
making the connection. If this
precaution is not taken, the water
inlet could get blocked, causing
damage to your dishwasher.

Choose where you want to install
your dishwasher, you can place it
so that its sides or back panel are
side by side with furniture or up
against the wall. The dishwasher is
provided with water supply and drain
hoses, which can be directed
towards the left or right to facilitate
appropriate installation.

Levelling.
Once the appliance is positioned,
adjust the feet by screwing them in
or out depending on how high you
want it and to level it so that it is
horizontal. Make sure that it is not
inclined more than 2 degrees. If the
appliance is level, it will  help ensure
its correct operation.

Height Adjustment
Insert the appliance into the cutout
and then adjust the height using the
screws located on the front bottom
part of the machine. Use a
screwdriver to turn the screws in
the clockwise or anti-clockwise
direction to increase or decrease
the height respectively.

Adjusting the back Feet
Insert the appliance into the cutout
and then adjust the height using the
screws located on the front bottom
part of the machine. Use a
screwdriver to turn the screws in
the clockwise or anti-clockwise
direction to increase or decrease
the height respectively.

Drain hose connection.
WARNING: Connect your
dishwasher drain hose to pipes
which connect to the foul drain
system and not to surface water
drains.
IMPORTANT: For the correct
operation of your dishwasher, it is
essential to comply with the following
information:-

Standpipe:
Ensure that the hose is not pushed
too far down the standpipe.
If the end of your drain hose is fitted
with ‘retaining flaps’, ensure they are
inserted fully into the standpipe.  This
will prevent the pipe from jumping
out during installation and use.

DO NOT position the standpipe
near an electrical outlet.
ENSURE that the drain hose is not
kinked and it is routed as shown in
the diagram.

The standpipe should have a bore
of at least 38mm (11/2”). It should
be installed as shown, have a trap
fitted and must discharge into the
same drain system as your
household sink.
It MUST NOT be connected to a
surface water drain.

Sink Waste System:
For under sink drainage:
Before connecting the drain hose,
remove any internal restrictions -
This will prevent a build up of debris
which could cause a blockage.
Remove any restrictions from the
waste spigot and ensure that the
sealing bung is removed. The hose
should be routed, such that it is
raised to a minimum height of
800mm (31/2”).

NOTE: Ensure the sink outlet
pipe has a minimum diamtere of
32mm.

1. Untie the end of the GREY
drainage hose from the rear of
the appliance.
2. Reposition the ‘Hooked End
Support’ as required along the
GREY drainage hose.
3. If fitting an under sink waste
disposal unit, cut out the
membrane, bung or blanking
plug.

Ensure the drain hose is
securely attached, to prevent
it coming away while the
machine is in use and causing
a flood.

Condensation-proof tape.
On some models, a transparent
condensation-proof adhesive tape
has been provided.
It should be stuck onto the lower
side of your wooden worktop to
protect it from the formation of
condensation.
When not provided, this tape can
be requested as a spare part from
authorised retailers.

Summary of Contents for BFI620

Page 1: ...Instructions for Installation and Use Dishwasher Model BFI620 ...

Page 2: ...2 D ISHWASHER ...

Page 3: ...come familiar with the appliance and safety warnings If the Book is lost or damaged a copy may be obtained from MerloniElettrodomesticiUKLtd MorleyWay Peterborough PE29JB Electrical Connection For Your Safety Installation Getting to know your Dishwasher The Controls How to use your Dishwasher Programme Chart Before Using your Dishwasher Loading your Dishwasher Care and Cleaning Troubleshooting Inf...

Page 4: ...illbemade Itisstronglyadvisedthatthisworkiscarriedout byaqualifiedelectrician Ifthedomesticwiringincludesaresidualcurrent operatedcircuit breaker ensurethatitconformstothelatestregulations Safety Information Atthetimeofdelivery Allfunctionsofyourdishwasherhavebeenthoroughlytestedatthe factory Asmallnumberofwatermarksmayhavebeenleftasa result theywilldisappearwhentheapplianceisusedforthefirsttime T...

Page 5: ...tthe openingsontheundersideare notobstructed 9 Do not touch the heating elementduringorstraightafter awashcycle 10 Iftheappliancemalfunctions turnoffthewaterinlettapand disconnecttheplugfromthe wallsocket Thenreadthe sectionentitled Troubleshooting Ifyou cannotresolvetheproblem thencallHotpointService seeKEYCONTACTS back page Installationmustbeperformedbyaqualifiedtechnician incompliance withthere...

Page 6: ...espectively Drain hose connection WARNING Connect your dishwasher drain hose to pipes which connect to the foul drain system and not to surface water drains IMPORTANT For the correct operationofyourdishwasher itis essentialtocomplywiththefollowing information Standpipe Ensurethatthehoseisnotpushed toofardownthestandpipe Iftheendofyourdrainhoseisfitted with retainingflaps ensuretheyare insertedfull...

Page 7: ...ket F Topsprayarm G Basketheightadjuster H Lowerbasket I Bottomspray arm J Saltcontainercap K Washingfilter L Detergentandrinseaid dispenser Thisdishwasherconformstothe followingEuropeanCommunity Directives 73 23 EECof19 02 73 Low Voltage andsubsequent modifications 89 336 EECof03 05 89 Electromagnetic Compatibility andsubsequent modifications 97 17 CE Labelling P A B M Technical characteristics W...

Page 8: ...on P pressedinfroapproxi mately5seconds untilyou hear3 shortbeeps Indicatorlight M willgoouttoshow allthesettingswillhavebeencan celled Youarenowfreetore set thecorrectwashcycle You ve left out a dish Interruptthewashcyclebyopening thedoor carefully theninsertthe dishyouhadforgotten Whenyoushutthedoorthecycle willstartupfromwhereyouinter ruptedit Cycle end Theendofthewashcycleisindi cated by 2 sho...

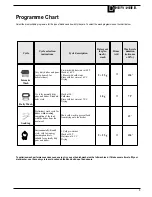
Page 9: ...K ZDVK 5LQVH LG DVK F FOH GXUDWLRQ WROHUDQFH QWHQVLYH DVK 9HU GLUW GLVKHV DQG SDQV QRW WR EH XVHG IRU GHOLFDWH LWHPV 3UH ZDVK ZLWK KRW ZDWHU DW DVK DW 5LQVHV ZLWK FROG ZDWHU 5LQVH ZLWK KRW ZDWHU DW U LQJ J DLO DVK FOH IRU QRUPDOO GLUW SDQV DQG GLVKHV 6WDQGDUG GDLO F FOH DVK DW ROG ULQVH 5LQVH ZLWK KRW ZDWHU DW U LQJ J 6RDNLQJ 3UHOLPLQDU ZDVK F FOH IRU GLVKHV ZKLOH DZDLWLQJ FRPSOHWLRQ RI WKH ORDG Z...

Page 10: ... the salt firstfillthecontainerupwith water youwon thavetodothis againnexttime 3 Putthedishwasherfunnelonthe holeandpourinapproximately twokilosofsalt Itisnormalthat some water comes out of the container 4 Screw the cap back in place carefully Low Salt indicator Thisgreendeviceislocatedatthe centreofthecapforthedecalcifi cation cartridge and it indicates whetherthecontainerisfull Whentheindicatori...

Page 11: ...cedifthe dishesarestickyoryoucan seewhitestreaks WerecommendGlist3in1foruseinallHotpointdishwashers Brilliantcleaningisguaranteedwith Glist3in1 HotpointonlyrecommendsGlist3in1Dishwashertabletstogiveoutstandingcleaningand care It is important to use detergent specially designed for domestic dishwashers Always follow the manufacturersinstructions Glist3in1advanceddishwashertabletswithactiveenzymesar...

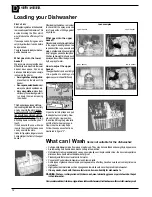
Page 12: ...sses tea cupsandcoffeecups saucersand plates shallowsaladbowls slightly dirtyfryingpansandshallowpans Positionlightweightdishesinsuch aswayastoavoidtheirbeingmoved bythesprayofwater How to adjust the upper basket Theupperbasketcanbesetinhigh or low position to enable you to organiseyourdisheseffortlessly Load examples upper basket lower basket upper basket Open the rail stop flaps and pull thebask...

Page 13: ...er Beforeusingthedishwasheraftera longbreak pluginandswitchonat theelectricalsocket Reconnectthe inlethoseandturnonthewater supply tap Check there are no depositsofrustinsidethewater pipe ifthereareallowwatertorun from the supply tap for a few minutes Moving the appliance Drainwaterfromthedishwasher Secure all loose parts Only transportinanuprightposition Ifnotkeptuprightduringtransport anywaterre...

Page 14: ...suchmarks Error messages Yourdishwasherisequippedwitha safetysystemwhichisabletode tectoperatingfaults Thesefaultsarereportedbyoneor twocycleindicatorlights M flash ingrapidly Takeanoteofwhichlights areflashing turntheapplianceoff andcallHotpointServicefortechni calassistance Tap off alarm Ifyouhaveforgottentoturnthewa tertapon yourappliancewillre mindyouofthisbysoundingafew shortbeepsforafewminut...

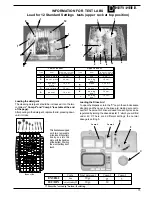
Page 15: ...nd Comp 3 see table at the end of the page After pouring in the detergent replace the lid pressing down until it clicks B 12 8 A C 1 A 4 C 1 D 1 C 1 C 9 i 1 1 f e 2 e 5 5 e k 1 h 12 g 6 g 6 L o w e r b a s k e t U p p e r b a s k e t Ty p e Ite m D ia m e te r Vo lu m a p p rox im a te ly Ty p e Ite m D ia m e te r Vo lu m a p p ro x im a te ly A s o u p e p la te 2 3 c m e c u p 0 2 0 l B d in n ...

Page 16: ...All repairs include a parts and labour guarantee for 12 months from the date of the repair If you require any information or have any questions about your appliance our operators are on hand with help and advice All this ensures that you will receive the best available after sales service possible Extended Warranties UK 08709 088 088 www theservicecentre co uk Republic of Ireland 1850 502 200 Whet...

Page 17: ...the following provisions that your appliance l Has been installed and used correctly in accordance with this instruction booklet l Has been used solely for domestic purposes and is located on domestic premises ie not for commercial or trade use l Has been properly connected to a suitable electrical supply voltage as stated on the appliance rating plate l Has not been subject to misuse accident mod...

Page 18: ...18 D ISHWASHER NOTES ...

Page 19: ...19 D ISHWASHER NOTES ...

Page 20: ...uk Republic of Ireland 1850 302 200 Note Our operators will require the following information Model number Serial number Extended Warranties UK 08709 088 088 Open 8 to 8 Mon Sun www theservicecentre co uk Republic of Ireland 1850 502 200 Genuine Parts and Accessories UK 08709 077 077 Open 8 30 to 5 30 Mon Fri 9 to 12 Sat www theservicecentre co uk Republic of Ireland 01 842 6836 Merloni Elettrodom...

Reviews: