background image

Where to put your  appliance.
Climatic Class can be found on the Rating
Plate and this specifies the ambient
temperatures at which the appliance may be
operated.
Climatic Class 

Permitted Ambient 
Temperature

SN

+10˚C to 32˚C

ST

+18˚C to 38˚C

Avoid locating near anything which gives off
heat, a cooker or radiator for example or in a
position where sunlight is liable to shine
directly onto the appliance. In such a position
your appliance will have to work harder and
will cost more to run and may be damaged by
the heat.
If installation next to a heat source is
unavoidable, use a suitable insulating plate, or
comply with the following minimum
distances:
3cm to an electric cooker,
30cm to an oil or coal-fired cooker.

If the appliance is installed next to another
freezer or refrigerator, observe a minimum
distance of 2cm between the appliances to
prevent condensation.

Appliances with handles must be positioned
55mm, from the wall on the hinge side, so that
the door can be opened by 90˚.

Make sure that the electrical socket is easily
accessible, the best position is at the side of or
above the appliance.

Air Circulation
The heated air must be able to escape
through the rear of the appliance. If the air
flow is obstructed, the refrigerating unit must
work harder, which increases the power
consumption. Therefore NEVER cover the
ventilation slots.

Adjusting the Feet 
Note: An unsteady appliance can cause
problems.
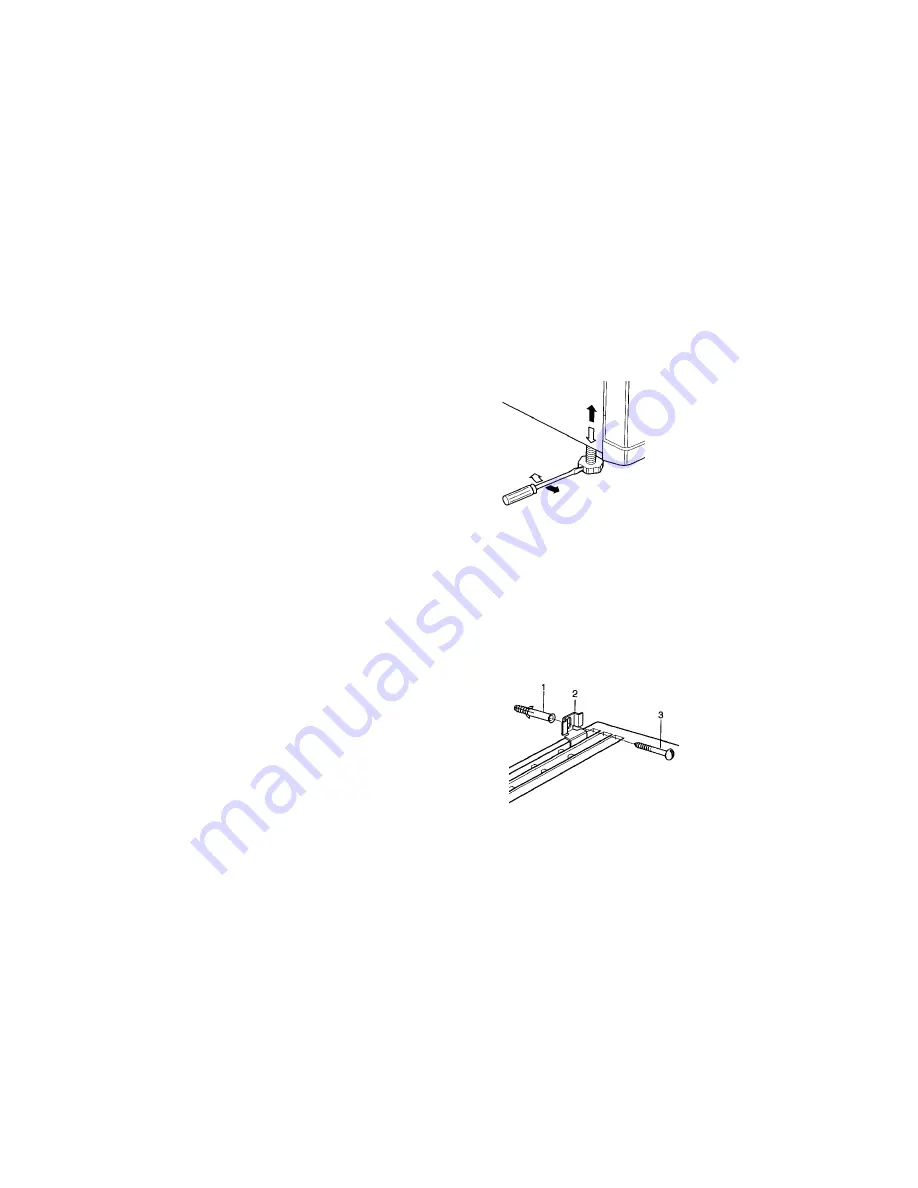
The height adjustable feet have been fully
screwed in at the factory. When installing the
appliance use a screwdriver to adjust the feet.
Unscrew the feet initially by 5mm, place the
appliance in its final position and continue to
adjust the feet until the appliance is standing
firm and is level (use a spirit level to check).

Securing the Appliance
Once in its final position and level, the
appliance must be fixed to the wall to prevent
it from tilting forward.

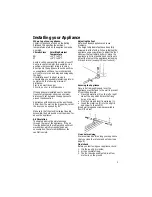
Place the metal lug (2) on the left or right 
side of the air grid and mark the fixing 
hole on the wall.

Drill the hole and insert a wall plug (1).

Insert the metal lug (2) into the air grid 
and screw to the wall (3).

(Size 5 wall plugs and screws are available
from DIY stores).

Clean before Using
We recommend before using your appliance
that you clean the interior and exterior (see
page 9).

Final check
Before you start using your appliance, check:
1. It is thoroughly dry inside,
2. Air can circulate freely,
3. The feet have been adjusted, ie. all  four 

are firmly on the ground

5

Installing your Appliance

Summary of Contents for FZ92P

Page 1: ...Installation and User Handbook Freestanding Frost Free Freezer Model FZ92P It is essential that you read through this instruction book carefully before you first use your appliance...

Page 2: ...cribed in these operat ing instructions and that any repairs and work on the appliance are only carried out by an authorised service office Disposal Notes The packaging is designed to protect the appl...

Page 3: ...Live If you change the plug the colour of wires in the mains lead may not correspond with the colour of the markings identifying terminals in the plug You should therefore wire it as shown Changing th...

Page 4: ...B must be in front of the door switch C Changing the door handle Follow the pictorial instruction below in numerical order Attaching the base panel The base panel 1 is enclosed with the appliance and...

Page 5: ...air must be able to escape through the rear of the appliance If the air flow is obstructed the refrigerating unit must work harder which increases the power consumption Therefore NEVER cover the venti...

Page 6: ...ins On Off Switch 2 Temperature Display 3 The Alarm Display 4 Fast freeze Display 5 Temperature Selection Button 6 Fast Freeze Button 7 Alarm Cancel Button Maximum Freezer Capacity Food should be froz...

Page 7: ...econds The display will then return to show the current temperature in the freezer compartment without flashing The Alarm Display 3 This will illuminate and the warning tone sounds simultaneously when...

Page 8: ...r ices should not be given to children directly from the freezer The low temperature may cause freezer burns on their lips Store ice cream towards the top of the freezer and remove from the freezer 15...

Page 9: ...ipe the exterior surface dry thoroughly Use a vacuum cleaner to remove dust from underneath the appliance and around the air grille at the base to prevent it becoming blocked You do not need to remove...

Page 10: ...d must be used or cooked and refrozen The refrigerating unit in the No Frost system is covered in so much ice that it can no longer defrost automatically Remove all stored food wrap and place in a coo...

Page 11: ...e offer a number of payment methods cheque credit card switch cash or by taking advantage of one of our Service Cover Plans you can spread the cost by direct debit For further details call 08709 088 0...

Page 12: ...e appliance Clear and concise details of the query or fault Place and Date of purchase Please keep the receipt as evidence will be required when the engineer calls Extended Warranty To join UK 08709 0...

Reviews: