background image

 PROBLEM SOLVER

(continued)

PROBLEM

SPOTS AND

 ON

GLASSES 

CLOUDINESS ON

 OF 

POSSIBLE CAUSE

Spotting can   

 by   these things:

● 

Extremely hard water, (See How to Choose and Use Detergent section.)

● 

Low 

inlet water temperature. (See How to Test Water Temperature section.)

● 

Overloading the dishwasher.

● 

Improper loading. (See Loading section.)

● 

Old 

or damp powder detergent.

● 

Phosphate level in detergent too low. (See How to Choose and Use

Detergent section.)

● 

Rinse agent dispenser empty, (See 

 to Use a Rinse Agent section.)

● 

Too 

 detergent. (See How to Choose and Use Detergent section.)

Local 

water conditions and personal preferences vary. Try several brands of

detergents   find one that gives the best results for you. A liquid dishwasher

detergent may help reduce filming.

To remove stubborn 


 from glassware:

1. 

Remove all metal utensils from the dishwasher.

2. Do not add detergent.
3. Select 

 WASH cycle.

4. Start the dishwasher and allow to run for 18 to 22 minutes. The dishwasher will

now be in the main wash.

5. Then open the door and pour 2 

cups 

(500 

ml) of white vinegar into the bottom of

the dishwasher.

6. Close the door and allow to complete the cycle.


 doesn’t work: 

 as above, except use 1/4 cup (60 ml) of citric

acid crystals instead of 

 (Most drugstores carry citric acid crystals. If yours

doesn’t, 

 GE Factory Service.)

 a vinegar or citric acid crystal rinse more than twice a month? Consider a home

water softener.

 vinegar or 

 acid crystal rinse doesn’t work, the cloudiness is “etching.”

The 

 cannot be removed.

 can be prevented: 

Use less 

detergent   you have soft water. Wash glassware 

the shortest cycle that will get them 

Water temperature entering dishwasher exceeds 

Rough handling can cause chipping. Load with care. 

Make sure glassware and china

are secure and can’t 

 loose. (See Loading section.) Make sure 

 glasses and

stemware will clear the top of the tub when you push the rack into the dishwasher.

Always use the top rack for delicate items.

14

Summary of Contents for HDA150

Page 1: ...sumer Services 19 Safety Instructions 3 Cycle Features 4 5 User Maintenance Instructions 11 Detergent Detergent Guide 7 Warranty Back Cover Dispenser Cups 7 Water Temperature 6 Energy Saving Tips 2 Wi...

Page 2: ...effect on the results you get The following are examples Please see the Operating Instructions Tips for more information WASH HEAT BOOST OPTION use with heavily soiled loads e extends cycle to heat wa...

Page 3: ...per with controls Do not touch the heating element during or immediately after use Do not operate your dishwasher unless all enclosure panels are properly in place s Do not abuse sit on or stand on th...

Page 4: ...gh performance on normal soils WATER SAVER For dishes with light soils This cycle saves water by using 3070 less water than the NORMAL WASH cycle G RINSE HOLD For rinsing partial loads which will be w...

Page 5: ...ash cycle time HEATED DRY OFF Drying heater is turned off Dishes dry naturally ENERGY SAV G TWS Operate dishwasher only when it s full Let the If you don t need your dishes right away allow dishes acc...

Page 6: ...LL line T Replace the cap The dispenser R Full automatically releases the rinse agent into the final rinse water Helpful hink If outside temperatures are unusually low or if your water travels a long...

Page 7: ...d c rotate the Cycle Indicator Dial afill turn to the OFFposition When the closed cup Grasp handle contains soap it is best that the door be in rotate and close tightly a partially open position befor...

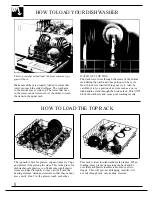
Page 8: ...of an item such as a pot or dish handle extend through the bottom rack This could block the wash arm and cause poor washing results HOW TO LOAD THE TOP RACK The top rack is best for glasses cups and...

Page 9: ...pans and casseroles MUST be loaded in the bottom rack facing down Prop broiler pans and racks along the edge Put flatware in the removable basket with handles up to protect your hands Mix knives fork...

Page 10: ...of the set Load securely to prevent movement Check your manufacturer s instructions for your crystal Do not wash in dishwasher Damage to dishwasher and discoloration or staining of dishwasher may resu...

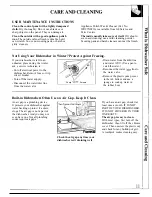
Page 11: ...eaker Turn off the water supply Disconnect the water inlet line from the water valve Pump C ver Screws Drain water from the inlet line and water valve Use a pan to catch the water Reconnect the water...

Page 12: ...aint a panel with a color of your own choice How to Change the Door Panel 1 T e out trim screws on either side of the dishwasher door Remove the side trim 2 Slide the door panel out Careful edges may...

Page 13: ...ng your dishwasher Plugged air gap See Care and Cleaning section Improper rack loading See Loading section Choose another cycle to give you longer washing time Water may not be reaching the detergent...

Page 14: ...t HEAW WASH cycle 4 Start the dishwasher and allow to run for 18 to 22 minutes The dishwasher will now be in the main wash 5 Then open the door and pour 2 cups 500 ml of white vinegar into the bottom...

Page 15: ...sher Pump out water by slowly turning the control dial until a drain period is reached Repeat if necessary Suds can cause unit to ovefiow That s why it s so important to use a detergent that s designe...

Page 16: ...NOTES 16...

Page 17: ...NOTES 17...

Page 18: ...mer Relations pleased If for some reason you are not happy with the Hotpoint service you receive here are three steps to follow for Appliance Park further help Louisville KY 40225 FIRST contact the pe...

Page 19: ...rs with impaired hearing or speech who have Braille controls for a variety of access to a TDD or a conventional teletypewriter may Hotpoint appliances and a call 800 TDD GEAC 800 833 4322 to request b...

Page 20: ...VERED Service trips to your home to teach Replacement of house fuses or you how to use the product resetting of circuit breakers Read your Use and Care material Cleaning or servicing of air gap If you...

Reviews: