background image

Auto Roast Guide

● 

Use containers and coverings as directed at 

 Place probe correctly in

roast before cooking.

● 

Recommended codes are also shown inside oven on Auto Roast guide.

Food

Beef

Tender Roast

Rare
Medium
Well

Pork

Loin Roast
Precooked Ham

Poultry

Whole Chicken (3 
Whole Turkey (up to 12 

(Insert probe into meatiest
area of inner thigh from
below end and 

 to leg.)

Turkey Breast

(Insert probe horizontally
into meatiest area. )

1

2
3

4

1

5
5

4

1 15°
125°
145°

175°

 15°

190°
190°

175°

Approximate Time
minutes per pound

10-13
13-15

14-17
12-1s

*Recommended standing time before serving.

Automatic 

 Guide 

 Roast code 6)

Food

Time/Hours

Beef

Pot Roast

5-7

I

Chili

S-8

Chicken

Stewing

4-6

3-4

I

Ham or Pork

Roast

4-6

soup

7-1o

I

Split Pea

5-7

I

10-12
10-12

10-12

Hold*

o
0

5-1o

10

0

10

10-1s

10-1s

Comments

Add enough liquid to just cover meat.
If adding vegetables, make sure they are
completely covered by liquid,

Precook meat. Place probe 1 inch from

top surface. Stir after 3 hours, if possible,

Add 4 cups liquid. Insert probe into
meatiest area of inner thigh from below
end and parallel to leg. Turn over after

1/2 of time.

Same procedure as above.

Automatic Simmer
(Auto Roast code 6)

The cookbook has information on
automatic simmering, including
guides and recipes.

Total time includes time to bring
food to 180°F., and hold at that
temperature until done.

Set Automatic Simmer like Auto
Roast as explained on page 12.
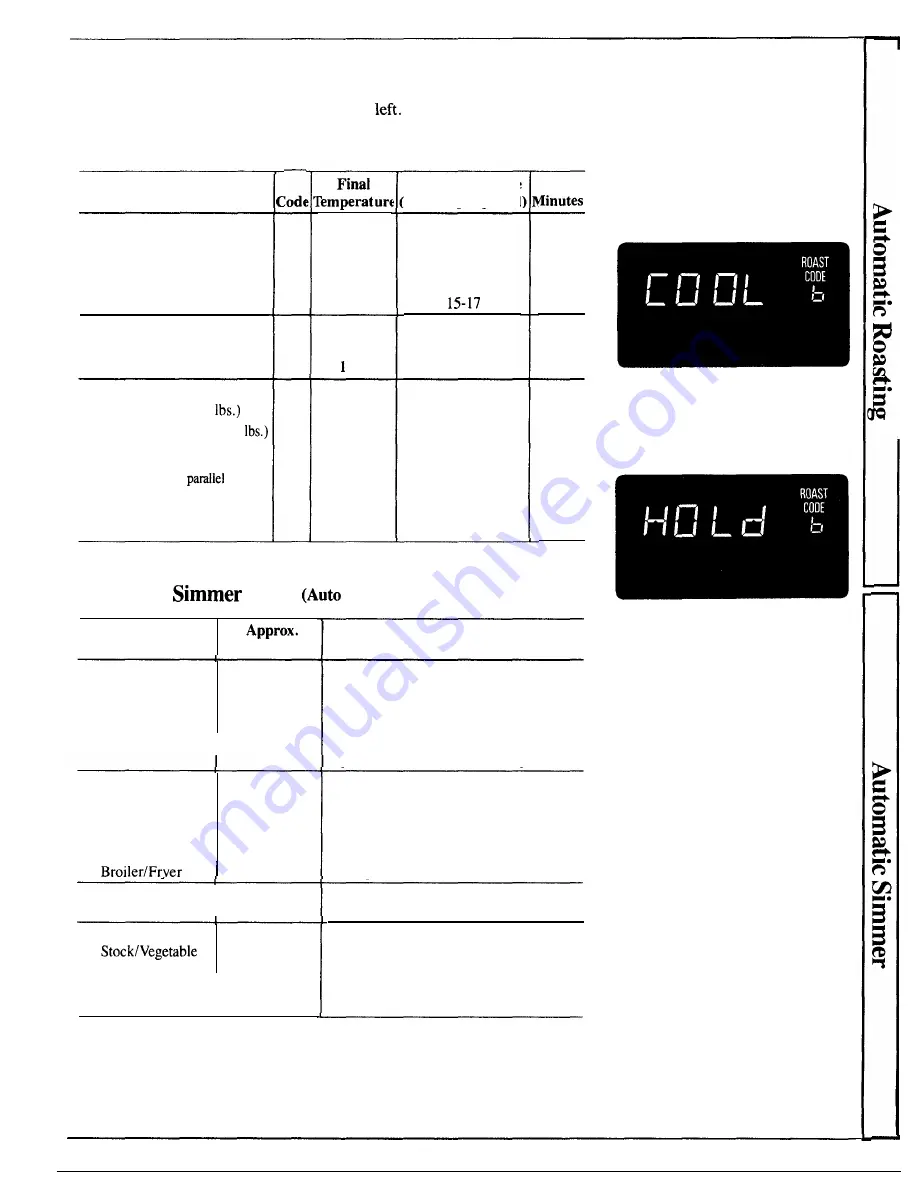
Display shows “COOL” until food is
80°F., then shows food
temperature, counting up to 180°F.

The oven switches to Hold at

180°F., until you remove food and

turn the oven off. If stirring is

recommended, you can reset the

oven by retouching the START pad.
Touch the CLEAR/OFF pad after
cooking.

Add 4 cups liquid.

Make sure that vegetables and meat are

covered by liquid. Stir every 3 hours.
Add enough liquid to cover peas at least
2 inches. Stir after 3 hours.

13

Summary of Contents for RK962G

Page 1: ...ture Probe 12 14 29 Broiling Broiling Guide 25 26 Time Cook 15 Control Settings 19 Timer 18 Delay Stop Start 21 Model and Serial Numbers 2 Door Removal 31 Problem Solver 33 34 Light Bulb Replacement 19 30 Safety Instructions 3 5 Roasting Roasting Guide 23 24 Warranty Back Cover Self Cleaning Instructions 27 28 Shelves 19 Thermostat Adjustment 30 Timer 19 Vent Duct 30 Microwave Oven 9 18 Auto Defro...

Page 2: ... and serial numbers This appliance must be registered Pl e be certain that it is Write to Hotpoint Range Product Service Appliance Park Louisville KY40225 If you received a damaged cooking center Immediately contact the dealer or builder that sold you the cooking center Save time and money Before you request service check the Problem Solver on pages 33 and 34 It lists causes of minor operating pro...

Page 3: ...pliance close supervision is necessary when used by children Do not leave children alone children should not be left alone or unattended in area where appliance is in use They should never be allowed to sit or stand on any part of the appliance Q Don t allow anyone to climb stand or hang on the door They could damage the oven CAUTION ITEMS OF INTEREST TO CHILDREN SHOULD NOT BE S RED IN CABINETS AB...

Page 4: ...ated beverages Even if the container is open pressure can build up This can cause the container to burst possibly resulting in injury c Use metal only as directed in cookbook Foil strips as used on meat roasts are helpful when used as shown in cookbook TV dinners maybe microwaved in foil trays less than 3 4 high remove top foil cover and return tray to box When using metal in microwave oven keepme...

Page 5: ... hot Do not use microwave browning dish on shelf The shelf could overheat Self Cleaning hwer Oven Stand away from the oven when opening oven door The hot air or steam which escapes can cause burns to hands face and or eyes Don t heat unopened food containers in the oven Pressure could bdd up and the container could burst causing an injury Keep oven vent ducts unobstructed Keep oven free from greas...

Page 6: ...e sure all cookware used in your microwave oven is suitable for microwaving Most glass casseroles cooking dishes measuring cups custard cups pottery or china dinnerware which does not have metallic trim or glaze with a metallic sheen can be used Some cookware is labeled suitable for microwaving If you are not sure if a dish is microwave safe use this test Place in the oven both the dish you are te...

Page 7: ...s U Auto Roast and Auto Defrost Guides Quick reference for codes for many frequently prepared foods Cooking Comple Reminder For all AUTO ROAST codes except codes 6 and 7 TIME COOK and DEFROST cycles To remind you that you have food in the oven the oven wfll beep once a minute until you either open the door or touch the CLEAR OFF pad I w o U L A 4 o I I Self Cleaning bwer Oven Model R 62G U Oven Se...

Page 8: ...it shuts off the microwave oven and erases all microwave settings except time of day 8 8 MIN SEC TIMER This feature uses no microwave energy It functions as a kitchen timer a hold timer after defrost or as a delay timer before microwave time or temperature cooking See page 18 9 CLOCK Touch this pad to enter time of day or check time of day while cooking To set clock first touch CLOCK pad and then ...

Page 9: ...g Defrosting ps Foods frozen in paper or plastic can be defrosted in the package Family size prepackaged frozen entrees can be defrosted and microwaved If the food is in a foil container transfer it to a microwave safe dish c For even defrosting some foods need to be broken up or separated part of the way through the defrosting time Check the cookbook for other defrosting tips Questions and Answer...

Page 10: ...eight For example touch number pads 1 and 2 for weight of 1 2 pounds 1 pound 3 ounces see Conversion Guide at right Display shows AUTO for 4 seconds and then START flashes 5 Touch START pad Display shows DEF TIME CODE 2 1 2 LBS and defrosting time counting down Note If ERROR appears on display check the Code Guide Make sure weight corresponds to code Number Twice during defrosting the oven beeps 3...

Page 11: ...pieces 2 Poultrv 0 1 6 0 lbs Whole Chicken Turn over and 10 minutes shield run cold water in cavity Turkey Breast Turn over Shield where 20 minutes in breast side up necessary refrigerator Chicken Pieces Turn over Separate and remove 5 minutes defrosted pieces Cornish Hens Remove wrapper 10 minutes whole and turn over run cold water in cavity Cornish Hens split Turn over 5 minutes 3 Seafood 0 1 3 ...

Page 12: ...d 1 2 cup water to roast dish and cover with wax paper Allow room for the probe when covering Place meat in oven with probe to the right Insert cable end of probe firmly into receptacle on oven wall How to Auto Roast Beef to Medium 1 Touch AU ROAST pad AUTO appears on display and ENTER ROAST CODE flashes Touch number pad 2 ROAST CODE 2 appears on display and START flashes Touch START pad Display s...

Page 13: ... 1s 10 1s Comments Add enough liquid to just cover meat If adding vegetables make sure they are completely covered by liquid Precook meat Place probe 1 inch from top surface Stir after 3 hours if possible Add 4 cups liquid Insert probe into meatiest area of inner thigh from below end and parallel to leg Turn over after 1 2 of time Same procedure as above Automatic Simmer Auto Roast code 6 The cook...

Page 14: ...4 Touch 1 2 and 5 for 125 F MICRO TEMP COOK 125F and POWER 10 show on display Step 5 Touch the POWER LEVEL pad ENTER POWER flashes Touch 5 for medium power MICRO TEMP COOK 125F and POWER 5 show on display Step 6 Touch the START pad If the internal temperature of the roast is less than 80 F the display will show COOL if the internal temperature of the roast is 80 F or above the display will show th...

Page 15: ...oking time Touch 1 2 and O for one minute and 20 seconds MICRO COOK TIME flashes and POWER 10 and 1 20 appear on display Because automatic power level 10 is recommended for this cup of How to Change Power hvel After setting the cooking time touch the POWER LEVEL pad then touch desired number for new power level Step 6 Touch the START pad Step 7 MICRO COOK TIME 1 the first power level and the first...

Page 16: ...loaf dishes or 9 inch pie plates Do not use the oven shelf to cook batters and dough foods and uncooked foods which need to be prepared from scratch Follow the cookbook s directions in cooking Leftovers may be placed in small these foods individual ceramic or plastic bowls Use pot holders when handling foods heated together with the oven shelf especially when heating larger amounts of food The ext...

Page 17: ... varying rates you may need to start reheating a large or dense food a few minutes ahead of time then add smaller or less dense foods Alternately if one of the foods you are heating seems undercooked but the others are heated satisfactorily let the underheated food continue cooking Heat or reheat different types of food at High 10 To determine heating times add times for all foods together See Hea...

Page 18: ...10 minutes and then Time Cook for 25 minutes Here s how to do it Step 1 Take casserole from freezer and place in oven Step 2 Touch TIME DEFROST The display shows O and POWER 3 ENTER MICRO DEF TIME flashes Step 3 Touch pads 1 5 0 and O for 15 minutes defrosting time ti OO appears on display Defrosting is automatically set on power level 3 but can be changed by touching the POWER LEVEL pad and the d...

Page 19: ...orts and push toward rear of oven until it falls into correct position under shelf supports Shelf Positions The controls for the oven are marked OVEN SET and OVEN TEMP The OVEN SET control has settings for BAKE TIME BAKE BROIL CLEAN for lower oven and OFF When you turn the knob to the desired setting the proper heating units are then activated for that operation The OVEN TEMP control maintains the...

Page 20: ...rol allows you to set the oven to turn on or off automatically at specific times that you set Examples of Immediate Start oven turns on now and you set it to turn off automatically or Delay Start and Stop setting the oven to turn on automatically at a later time and turn off at a preset stop time will be described How to Set tiediate Start and Automatic Stop N E Before beginning make sure the oven...

Page 21: ... Enter Bake Stop Time and O appear on display Step 5 Touch number pads 7 0 and O to enter 7 00 for the time you want the oven to turn off 7 00 and Bake Stop Time are displayed Step 6 Touch the START pad The oven automatically figures the start time so oven will turn off when you want baking to be completed 4 00 and Bake Start Time are displayed In this example baking will begin at 4 00 and oven wi...

Page 22: ...e Pan Shiny Metal Pan with satin finish bottom Shiny Metal Pan with satin finish bottom Metal or Glass Loaf Puns Metal or Glass Pans Cookie Sheet Cookie Sheet Cc okie Sheet Glass or Metal Parr Glass Custard Cups or Casserole set in pan ofhnt water Glass Custard Cups or CasserOk Foil Pan on Cookie Sheet Spread tocrustedges Glass or Satin finish Metal Glass or Satin f inish Metal Glass or Satin fini...

Page 23: ... on pages 20 and 21 to set oven to turn on and off automatically Remember that food will continue to cook in the hot oven and therefore should be removed when the desired internal temperature has been reached For Frozen Roask Q Frozen roasts of beef pork lamb etc can be started without thawing but allow 10 to 25 minutes additiond time per pound 10 minutes additional time per pound for roasts under...

Page 24: ...s them easier to carve Internal temperature will rise about 5 to 10 F to compensate for the increase in temperature if desired remove the roast from the oven when its internal temperature is 5 to 10 F less than temperature shown on the Roasting Guide Oven Temperature 325 325 325 325 325 325 325 350 325 Doneness Rare Medium Well Done Rare Medium Well Done Well Done Well Done To Warm Well Done Well ...

Page 25: ... may be lined with foil and broiler rack may be covered with foil for broiling ALWAYS BE CERTAIN TO MOLD FOIL THOROUGHLY TO BROILER RACK AND SLIT FOIL CONFORM WITH SLITS IN RACK Broiler rack is designed to minimize smoking and spattering and to keep drippings cool during broiling Do not stop fat and meat juices from draining into the broiler pan This prevents the broiler rack from serving its purp...

Page 26: ...ge in single layer Grmrnd Beef Well Done I I lb 4 patties l z to in thick c Space evenly Up to 8 patties tike about same time I 7 4 5 Beef Steaks Rare Medium Well Done I l inch thick c 7 7 9 9 Steaks less than 1 inch cook through before browning Pan frying is recommended Slash fat 1 to I k Ibs c c I in thick c 2 to 2fi Ibs c c 13 13 10 7 8 15 14 16 25 20 25 Rare Medium Well Done Chicken 1 whole A ...

Page 27: ... final position when the CLEAN location is reached Step 2 Slide Latch Handle to the right as far as it will go 3 00 CLEAN TIME and OVEN DOOR LATCHED appear on display The oven is programmed to clean for 3 hours but you may change the cleaning time to 1Y2 to 4 2 hours by first touching the CLEAR pad and then the number pads E EE appears on display if you enter a clean time less than 1 Y2 or more th...

Page 28: ...gs or broilings the LOCKED light may come on The oven door can t be latched for self cleaning while the LOCKED light is on If this happens let the oven cool until the LOCKED light goes off Then the oven door can be latched for self cleaning Q What should I do if excessive smoking occurs during cleaning A This is caused by excessive soil and you should switch the OVEN SET knob to OFF Open windows t...

Page 29: ... grille by removing the 3 screws on top and the 3 screws on the bottom of the grille using a blade type screwdriver The lamp is located on the Icft side behind the grille Gently twist the bulb to break the white silicone adhesive attached to the bulb and socket present to prevent damage during shipping Unscrew the bulb and replace with a bulb of the same type and wattage available from your Hotpoi...

Page 30: ...mostat Rotate OVEN TEMP knob to CLEAN position and pull knob off the shaft revealing area behind knob Insert the tip of a 3 16 standard screwdriver into the indented area directly under the notch and turn in the desired direction Be careful not to scratch glass control panel To increase oven temperature move dial one notch counterclockwise To lower oven temperature move dial one notch clockwise Ea...

Page 31: ...WITH SLITS IN THE RACK Stopping fat and meat juices from dr inin into the broiler pan prevents the rack from serving its purpose and MAY LET JUICES BECOME HOT ENOUGH TO CATCH FIRE Removable Oven Door To remove door open to BROIL position or where you feel hinges catch slightly Grasp door at sides lift door up and away from hinges To replace door grasp door at sides Line up door with hinges and pus...

Page 32: ...emoved do not allow water to run down inside the surface of glass while clc rrin DO NorI USE steel wnol abrasives ammonia acids or commercial oven cleaners Tbcsc might damage the t inish DO NOT USF cleaning pnwders nr harsh abrasives rhcsc might scratch the enamel Wash rinse and then polish with a dry cloth If acids should spill on the oven while it is hot use a dry paper towel or cloth to wipe up...

Page 33: ... fan is used during self cleaning of Conventional Oven to keep components cool Microwave power is not on Probe not inserted properly into oven receptacle or food Probe not used although AU ROAST pad has been touched c When using Auto Roast code 7 to Temp Cook Hold you have entered a temperature of less than 80 F or more than 199 F I 1 I Conventional Oven PROBLEM POSSIBLE CAUSE AND REMEDY OVEN WILL...

Page 34: ...nt was not used when needed to slow down browning s Oven too hot to accept cleaning instructions Latch Handle is not moved all the way to the right Excessive spills spatters and soil deposits are not being cleaned up prior to self cleaning START pad not touched Turn OVEN SET knob to CLEAN Glowing Locked Light after knob is turned indicates oven is too hot from previous use and door won t latch To ...

Page 35: ...int product warranty expires Purchase a GE contract while your warranty is still in effect and you ll receive a substantial discount With a multiple year con tract you re assured of future service at today s prices Telecommunication Device for the Deti Parts andAccessories 800 626 2002 Individuds qualified to service their ow appliances can have needed parts or accessories sent direcdy to their ho...

Page 36: ...NERAL ELECTRIC HOTPOINT FACTORY SERVICE or HOTPOINT CUSTOMER CARE SERVICE WHAT IS N COVERED Service trips to your home to teach you how to use the product Read your Use and Care material If you then have any questions about operating the product please contact your dealer or our Consumer Affairs office at the address below or call toll free The GE Answer Center 800 626 2000 consumer information se...

Reviews: