Start-up and use
WARNING!
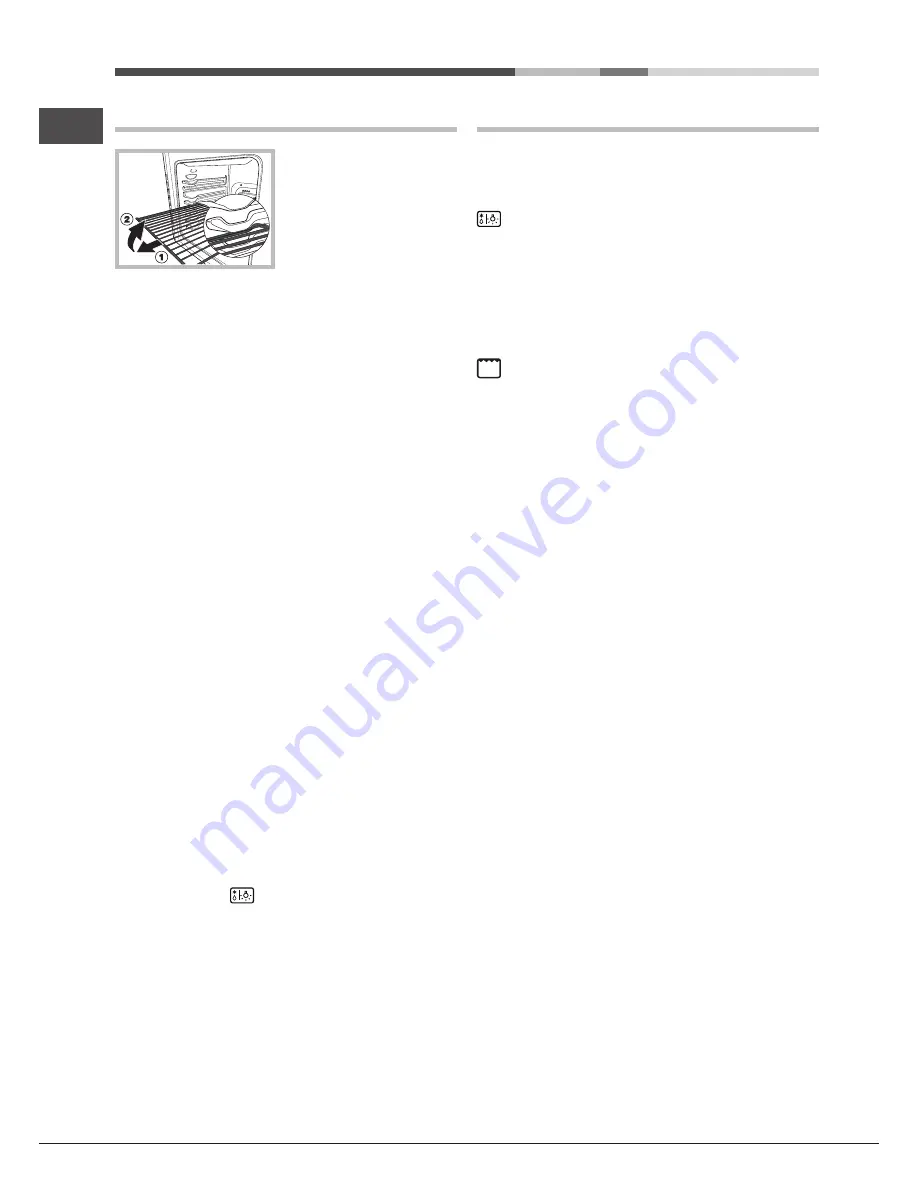
The oven is provided
with a stop system to extract the racks
and prevent them from coming out of
the oven (1).As shown in the drawing,
to extract them completely, simply lift
the racks, holding them on the front
part, and pull (2).
!
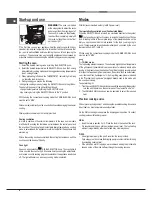
The first time you use your appliance, heat the empty oven with its door
closed at its maximum temperature for at least half an hour. Make sure that
the room is well ventilated before switching the oven off and opening the
oven door. The appliance may emit a slightly unpleasant odour caused by
protective substances used during the manufacturing process burning away.
Starting the oven
1. Select the desired cooking mode by turning the SELECTOR knob.
2. Select the desired temperature with SELECTOR knob. See the Cooking
advice table for cooking modes and the suggested cooking temperatures
(see Cooking Modes)
3. When preheating is finished, the THERMOSTAT indicator light will stay
on: place the food in the oven.
4. During cooking you may do the following:
- change the cooking mode by turning the SELECTOR knob to the grill icon.
Then select the power of the grill with the grill knob.
- change the temperature by turning the SELECTOR knob.
- stop cooking by turning the SELECTOR knob to the “0” position.
!
While using the conventional cooking mode the VARIABLE GRILL knob
must be set to “MAX”.
!
Never put objects directly on the oven bottom to avoid damaging the enamel
coating.
!
Always place cookware on the rack(s) provided.
Cooling ventilation
In order to cool down the external temperature of the oven, some models
are fitted with a cooling fan that blows out air between the control panel and
the oven door. The cooling fan will not activate straight away when a cooking
mode is selected and the appliance is cold,but only after the appliance has
warmed up.
!
Once the cooking has been completed, the cooling fan remains on until the
oven has cooled down sufficiently.
Oven light
It goes on when selecting
with the SELECTOR knob. The oven light will
come on within the oven cavity. At the same time the cooling fan will activate,
and remain on until a cooking program is selected or the appliance is switched
off. The light will remain on when any cooking mode is selected.
Modes
!
GRILL (recommended: set only to MAX power level);
Thermostatically controlled oven (Fan Assisted Mode)
When the SELECTOR knob is turned in a clockwise direction to the symbol
the fan and oven light will come on to assist in the defrosting of frozen
food. Rotating further to the complete range of temperatures shown on the
dial you can choose which is most suitable for the food you are going to
cook. The temperature is reached automatically and controlled by the oven
thermostat (from 60°C to MAX).
!
While using the conventional cooking mode the VARIABLE GRILL knob
must be set to “MAX”.
GRILL mode
The top heating element comes on. The extremely high and direct temperature
of the grill makes it possible to brown the surface of meats and roasts while
locking in the juices to keep them tender. The grill is also highly recommended
for dishes that require a high temperature on the surface: such as beef steaks,
veal, rib steak, filets, hamburgers etc... Some grilling examples are included
in the “Practical Cooking Advice” paragraph. Always cook in this mode with
the oven door closed.
To operate the grill:
1. Turn the oven SELECTOR knob clockwise until the required grilling symbol
is in line with the mark on the control panel. The element is now “on”.
2. The VARIABLE GRILL knob can now be operated to select the required
heat.
Practical cooking advice
!
Do not place racks in position 1 and 5 during fan-assisted cooking. Excessive
direct heat can burn temperature sensitive foods.
!
In the GRILL cooking modes, place the dripping pan in position 1 to collect
cooking residues (fat and/or grease).
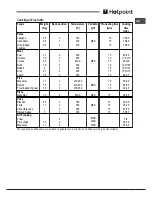
GRILL
• Insert the rack in position 3 or 4. Place the food in the centre of the rack.
• We recommend that you set the maximum power level. The top heating
element is regulated by a thermostat and may not always be on.
PIZZA
• Use a light aluminium pizza pan. Place it on the rack provided.
For a crispy crust, do not use the dripping pan (prevents crust from forming
by extending cooking time).
• If the pizza has a lot of toppings, we recommend adding the mozzarella
cheese on top of the pizza halfway through the cooking process.
6
GB


