43 of 49
Service Manual UK
Indesit
Company
English
E)
Control Panel
1.
Remove the oven from the cabinet (A).
2.
Disconnect the wiring from the display board.
3.
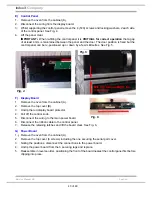
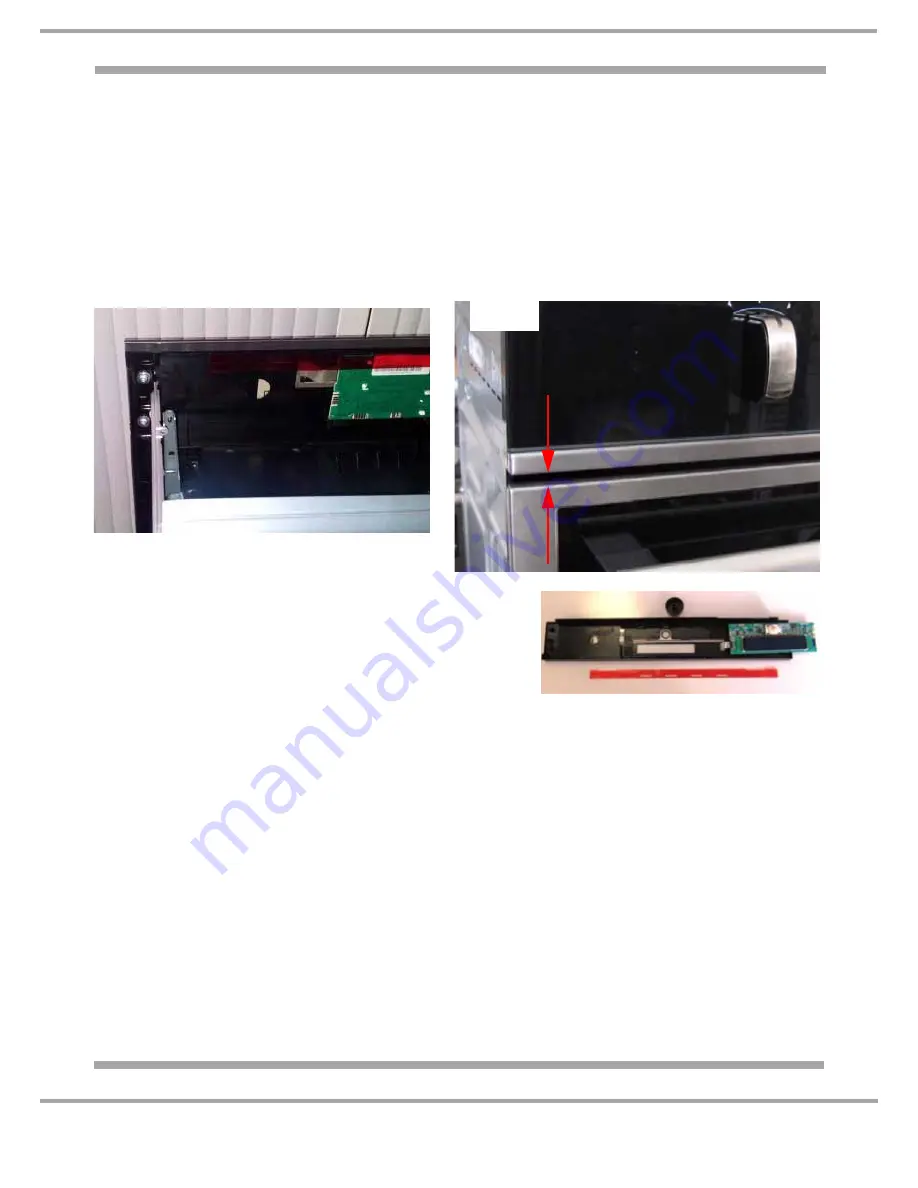
Whilst supporting the control panel remove the 4 (T20) screws and locking washers, 2 each side
of the control panel. See Fig. 4.
4.
Lift the panel clear.
IMPORTANT:-
When re-fitting the control panel it is
CRITICAL for correct operation
that a gap
of at least 4 mm is maintained between the panel and the door. The door position is fixed but the
control panel can be re-positioned up or down by a few millimetres. See Fig. 5.
F)
Display Board
1.
Remove the oven from the cabinet (A).
2.
Remove the top cover (B).
3.
Unclip the red display board protector.
4.
Pull off the control knob.
5.
Disconnect the wiring to the main power board.
6.
Disconnect the ribbon cable to the control panel.
7.
Release the retaining latches and lift the board clear. See Fig. 6.
G) Power Board
1.) Remove the oven from the cabinet (A).
2.
Remove the top cover (6 screws) including the one securing the serial port cover.
3.
Noting the positions, disconnect the connections to the power board.
4.
Unclip the power board from the 3 securing tags and replace.
5.
Reassemble in reverse order, positioning the front of the board nearest the control panel first before
clipping into place.
Min of 4 mm gap MUST be
maintained
Fig. 4
Fig. 5
Fig. 6


