background image

When you are cooking, keep
children away from the vicinity
of the oven.

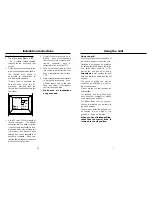
Oven ignition

Push in and turn the oven control knob
anticlockwise to gas mark 9.
When the oven is switched on the
oven light will come on automatically.
It can take up to 60 seconds for the
oven burner to come on to full rate,
and the oven burner may not come on
to full rate unless the oven door is closed.
The automatic ignition will continue to
spark for a short time after the burner
has lit until the flame is established.
Adjust to the required setting.
To switch off, return the control knob to
the “

” off position.

Zones of heat

The temperature at the centre of the
oven corresponds with the selected
Gas Mark and is slightly higher
towards the top of the oven and
slightly lower towards the oven base.
These zones of heat can be useful as
different dishes requiring different
temperatures may be cooked at the
same time - eg; the temperature at the
oven base is suitable for cooking baked
vegetables, baked fruit, milk pudding,
etc, and for warming bread rolls,
soup, coffee, or ovenproof plates and
dishes.

In the event of the burner flames being
accidentally extinguished, turn off the
burner control and do not attempt to
re-ignite the burner for at least one minute.
If it is found over a period of time that
the oven becomes hotter when used at
a particular gas mark, the thermostat
may need to be replaced.

Preheating

The oven must be preheated for 15
minutes when reheating frozen or
chilled food, and we recommend
preheating for yeast mixtures, batters,
soufflés and whisked sponges.  
If you are not preheating the oven, the
cooking times in the Baking Guide
may need to be extended, as they are
based on a preheated oven.

8

Using the Oven

i)

When installed in a typical
600mm deep built in housing unit,
the false back should be removed
from the housing unit to provide the
necessary depth for installation.

ii) When the false back is removed, it

is normally the case that the support
shelf for the appliance leaves a
gap between the back edge and
the wall of approximately 80mm.

iii)  If no gap occurs between the back

edge of the shelf and the wall
behind the unit, we recommend
that a gap of at least 30mm is
made by shortening the shelf.

iv) When installing the appliance

below a worktop, there must be a
minimum ventilation area of 60cm

2

below the appliance, in either
area (1) or (2), as indicated below.
There must be a 5mm gap
between the front top edge of the
oven and the underside of the
worktop.

Important: 

Do not modify the outer

panels of this appliance in any way.
Ensure that you route all mains
electrical cables and flexible tubing
well clear of any adjacent heat source,
such as an oven, grill or hob.
Ensure that all pipe work is of the
correct rating for both size and
temperature.

Installing the appliance under a
worktop

Where the appliance is installed under
a worktop, with a hob installed above
it, the installation instructions for the
hob must be read  in conjunction with
these instructions.

25

worktop

support shelf

rear wall

front

of oven

5 mm

30 - 80

mm

minimum

ventilation

area 60 cm

2

(1)

(2)

Installation Instructions

Summary of Contents for SY22K

Page 1: ...Merloni Elettrodomestici UK Ltd Morley Way Peterborough PE2 9JB 08 25378 00 10 2003 Users Instruction Installation Book for SY22W SY22K 60cm Gas Oven Grill...

Page 2: ...anisation which protects the interests of gas users If you need advice you will find the telephone number in your local telephone directory under Gas The appliance must be installed and serviced by a...

Page 3: ...mer Clock 14 Cleaning 19 Installation Instructions 21 27 Regulations Standards Ventilation requirements 21 Step 1 Prepare installation 22 Step 2 Connect to gas supply 24 Step 3 Connect to electricity...

Page 4: ...e Regulations 1994 the The Gas Safety Installation Use Amendment Regulations 1996 Failure to comply with these Regulations is a criminal offence Corgi registered installers undertake to work to satisf...

Page 5: ...tric supplies to various components in the event of fan failure If the minute minder and lights do not function and the ignition system stops working the safety device has operated Within an hour the...

Page 6: ...ging All our packaging materials are recyclable and environmentally friendly Please help us to protect our environment by disposing of all packaging in an environmentally friendly manner Please contac...

Page 7: ...e over the appliance or the edge of the worktop Keep all flammable materials such as curtains furnishings clothing away from the appliance Parts of the appliance may be hot during or immediately after...

Page 8: ...grilling should be positioned centrally on the trivet 6 Using the Grill handle grill pan trivet handle position indicators 27 Installation Instructions Step 3 Connect to the electricity supply Warnin...

Page 9: ...have a temperature rise less than 70 C 6 Rigid connections must be accessible to disconnect for servicing Cut a 150mm square hole in the right hand rear corner of the support shelf for the supply pip...

Page 10: ...rozen or chilled food and we recommend preheating for yeast mixtures batters souffl s and whisked sponges If you are not preheating the oven the cooking times in the Baking Guide may need to be extend...

Page 11: ...nto a standard 600mm wide housing unit with minimum internal dimensions as shown 591mm is to the underside of the worktop when the appliance is built under or to the underside of the panel above when...

Page 12: ...ation regulation Particular attention shall be given to the relevant requirements regarding ventilation In your own interest and that of safety it is the law that all gas appliances be installed and s...

Page 13: ...rmed skewer inserted into the centre of the cake If the skewer comes out clean then the cake is cooked Do not attempt to make Christmas cakes larger than the oven can cope with you should allow at lea...

Page 14: ...om 15 20 mins Brandy snaps 4 middle to top 7 18 mins Flapjacks 4 middle to top 20 40 mins Ginger nuts 4 middle to top 10 20 mins Puddings 1l 2 pint dish Rice pudding 2 middle to top 2 21 2 hours Baked...

Page 15: ...guide The times given in the roasting guide are only approximate because the size and age of the bird will influence cooking times as will the shape of a joint and the proportion of the bone Frozen me...

Page 16: ...Warm food should never be placed in the oven if there is a delay period Stews prepared by frying the meat and vegetables first should be cooked as soon as possible or refrigerated prior to placing in...

Page 17: ...lly switch on at the calculated start time of 16 00 hours 4 00 pm 7 A single press of the cook time button shows the cooking time remaining before the oven automatically switches off 8 A U T O A U T O...

Page 18: ...time of day but you can press the minute minder button and the display will show the minutes remaining The tone will sound at the end of the time set to cancel the tone press the minute minder button...

Reviews: