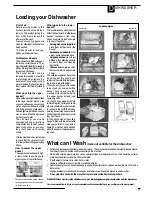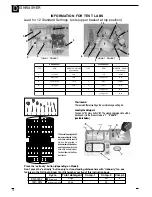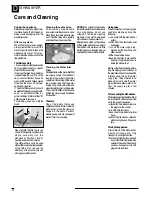
ARISTON DISHWASHER - Instructions for installation and use
7
D
ISHWASHER
First of all.
- Plug in and switch on.
- Turn on the water supply
tap completely.
- Add the correct amount of
detergent.
- Load the baskets correctly.
- Check that the spray arms
rotate freely.
- Close the door securely.
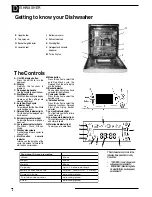
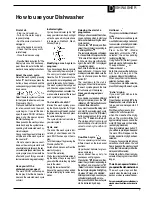
- Press the Stand-by button "A".The
display turns on and 4 dashes ap-
pear, these indicate that the dish-
washer is now awaiting instructions.
Select the wash cycle.
Select the wash cycle by pressing
button "P". Each time you press the
button, a beep will sound and the
corresponding symbols will light up
in sequence.
Select the wash cycle most suitable
for the type of dishes to wash (see
‘Programme Chart’).
Press and hold the Start button "D"
for a few seconds and the wash
cycle begins. If you left the door
open, the word ‘DOOR’ will be dis-
played - shut the door and press
the Start button again.
A beep sounds: the wash cycle has
started and only the symbol corre-
sponding to the selected wash cy-
cle is displayed.
You can see the amount of time left
until the end of the wash cycle on
the counter "L".
- Do not expect a precise count-
down as the wash cycle starts with
an estimated cycle time and the sen-
sor automatically updates this as the
cycle progresses (time would be
affected by such things as water
temperature and degree of soiling).
Indicator lights.
Cycle phase indicator lights "M"
keep you informed. Each will light
up to show you which cycle phase
is in progress: Pre-Wash, Wash,
Rinse or Drying.
Modifying a wash cycle in
progress.
If you have chosen the wrong cycle
- You can modify the wash cycle, if
it has only just started. Keep the
Reset button "D" pressed in for a
few seconds, a prolonged beep will
sound, followed by 3 short beeps.
The wash cycle symbol will go out
and 4 dashes appear to show that
all settings have been cancelled. You
are now able to reselect the correct
wash cycle that you require.
You've left out a dish?
Interrupt the wash cycle by press-
ing the Stand-by button "A". Open
the door and insert the dish you had
forgotten, close the door and press
the same button again.
The cycle will start up from where
you interrupted it.
Cycle end
The end of the wash cycle is indi-
cated by 2 short beeps and the
word ‘END’ flashes up on the dis-
play.
Turn the display off by pressing the
Stand-by button "A".
Switch off and disconnect from the
electricity supply.
Turn off the water tap.
Wait a few minutes before unload-
ing the dishes: they are very hot! If
you wait a little while, they dry better
due to the steam.
Empty the lower basket first.
Ensure the wash cycle has ended
before attempting to remove any
dishes.
How to use your Dishwasher
Delaying the start of a
programme.
When you have loaded the dishes,
you can choose when to start your
dishwasher before setting the wash
cycle desired.
Press button "M" (Mode) and then
select the symbol corresponding to
the Delayed Start
The rectangle alongside will darken
to show selection. Now press button
“S” to select the delayed start by 1
to 24 hours. If you press this button
again, the word ‘OFF’ is displayed
(no selection made).
Each time the button is pressed, a
beep will sound - Once you have
made your selection make sure the
door is shut and press the Start
button "D".
The countdown to the start is
displayed. When this time elapses,
the wash cycle begins and the time
left will come up in the display.
Have you changed your
mind?
If you decide you require a different
delay start period, press the "M"
(Mode) and “S” (Select) buttons and
make a different selection.
If you want to cancel the delay start
and start the selected wash cycle
immediately, press the “S” (Select)
button repeatedly until it is set to
zero. The indicator will turn off.
The delayed start is also reset
automatically, should you fail to
select a wash cycle within 15
seconds.
Half load.
This option is available with all wash
cycles.
Your dishwasher also allows you to
wash half a load (using one basket),
to save water , electricity and deter-
gent (use only half the amount).
Press button "M" (Mode)
repeatedly until symbol "N" is
selected, the corresponding
rectangle will light up.
Using button “S” (Select) you can
decide to wash a half-load on either:
The upper basket or
the lower basket
Each time you press the button you
will hear a beep and the
corresponding symbol will light up.
When no symbol is lit it means no
selection has been made.
Once you have made the selection,
press Start to begin the wash cycle.
“Extra” drying
If you want your dishes to be
perfectly dry:
Open the door, turn knob “M” to the
Reset position, select the basket/s
to be used and delayed start if
required.
Start the wash cycle as normal.
Indicator “G” will show symbol
when it has reached the drying
phase. The symbol will flash for
approximately 4 seconds and the
word OFF appears on the display
(extra drying disabled).
If you immediately press button “I”,
you will hear a prolonged beep and
the word ON will appear on the
display and extra drying has been
selected.
Once you have completed all your
selections, shut the door. You will
hear a beep and the wash cycle will
start, either immediately or after the
delayed start if selected.
Remember that with extra drying
selected the programme will last
longer.
There's been a power failure or
you opened the dishwasher door
The wash cycle stops and then
restarts when the electricity comes
back on or when you close the door.
For your own safety, ensure the door is
closed when the dishwasher is not in
use.
Duo-Wash cycle
This is a special cycle that runs a
different wash on the two basket
positions.
Upper basket: delicate, for glass-
ware and glasses.
Lower basket: heavy duty, for
saucepans and frying pans.
Press button "M" (Mode) and then
select the symbol corresponding to
Duo-Wash and press button "S"
(Select) ‘on’ means it is selected and
the rectangle alongside it will light up,
whereas ‘off’ means it is disabled.
After approximately 5 seconds you
will automatically quit the menu.
Now press Start and the wash cycle
start is indicated by a beep.
Have you left the
dishwasher door open?
The word ‘DOOR’ will flash up on
the display. Shut the dishwasher
door and the selected wash cycle
will start.
Summary of Contents for Ultima DWF70
Page 1: ...Instructions for Installation and Use Ultima DWF70 DWM75 60cm free standing Dishwasher...
Page 13: ...ARISTON DISHWASHER Instructions for installation and use 13 D ISHWASHER User Quick Guide...
Page 16: ...16ARISTONDISHWASHER Instructionsforinstallationanduse D ISHWASHER Notes...
Page 17: ...ARISTON DISHWASHER Instructions for installation and use 17 D ISHWASHER Notes...

