REF PRESSURE = C 00
REF PRESSURE = 00
1 2 3
4 5 6
7 8 9
C 0 E #
0
F
0
C
1 2 3
4 5 6
7 8 9
C 0 E #
0
F
0
C
S E R V I C E H O T L I N E : 8 0 0 . 7 2 7 . 8 5 2 0 H O T R O N I X . C O M
HOTRONIX
®
AIR SWINGER
ADJUST THE PRESSURE
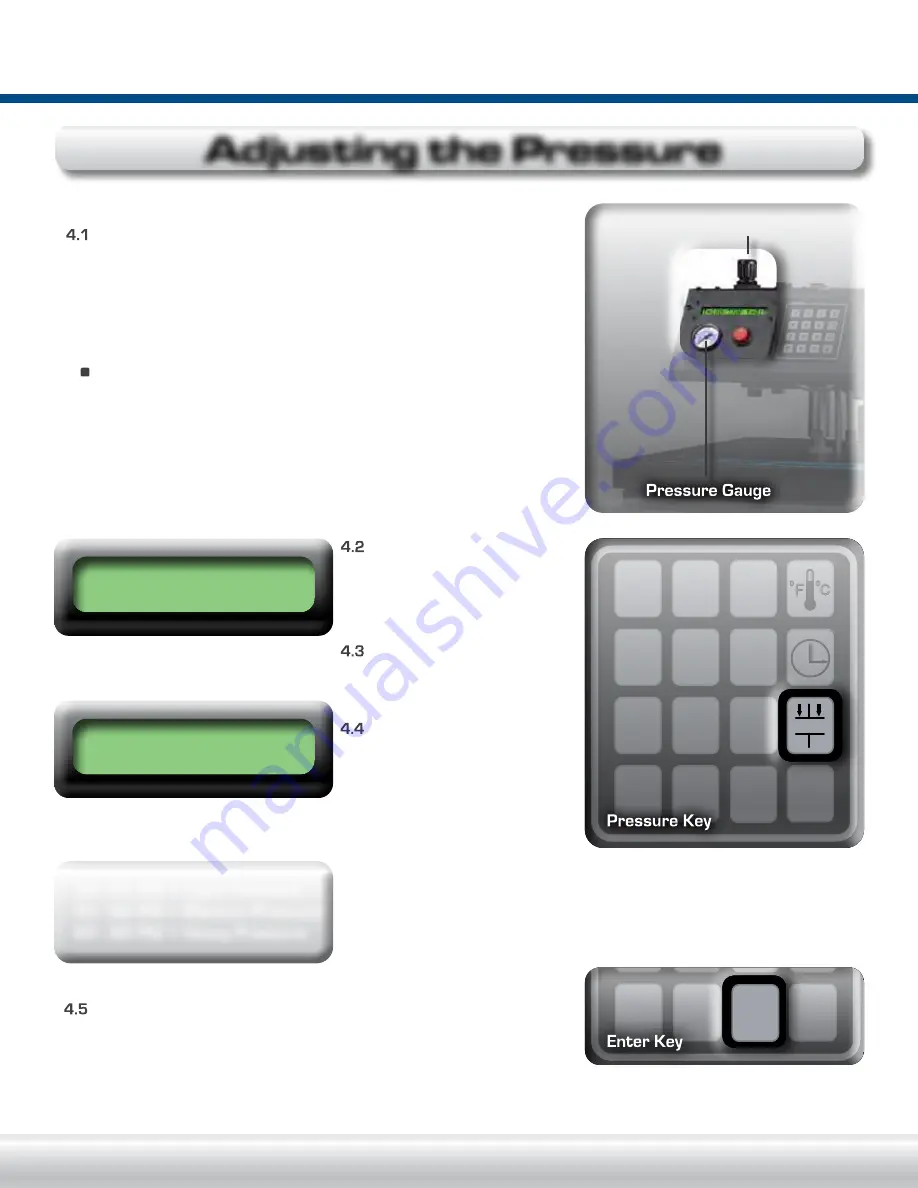
While the platen is heating, Adjust the Pressure by turning the
Pressure Adjustment Knob clockwise to increase the Pressure and
counter clockwise to decrease the Pressure.
NOTE:
The machine may not operate properly at pressure settings
below 20 PSI.
Refer to the Pressure Gauge for the actual pressure setting.
(see diagram to the right).
IMPORTANT:
The display on the Pressure Gauge will follow the
actual pressure when increasing the pressure. When decreasing
the pressure, adjust below the target pressure and turn back up.
Failure to follow this procedure will result in poor print quality.
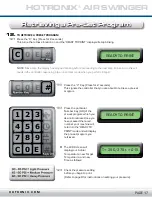
Optional: If you desire to store
a Reference Pressure, press
the Pressure Key.
(Press for two seconds)
Press the Pressure Key again.
(Press for two seconds)
The “C” signals that a
pressure may be entered.
Enter your reference
pressure from 01 to 99 PSI.
Press the “E” Enter Key
when completed.
(Press for two seconds)
NOTE
: Press the Pressure Key once to review Reference Pressure.
(Pressure will be displayed and automatically return to the “Ready To
Print Mode.”) Or press the Pressure Key twice to enter a Reference
Pressure.
Press the “E” Key to exit the Pressure Mode and to return to the
Print Mode.
WARNING:
Structural damage caused by excessive pressure is not covered under the limited warranty!
Adjusting the Pressure
4.
30 - 45 PSI = Light Pressure
45 - 60 PSI = Medium Pressure
60 - 90 PSI = Heavy Pressure
Pressure Adjustment Knob
PAGE 8


