background image

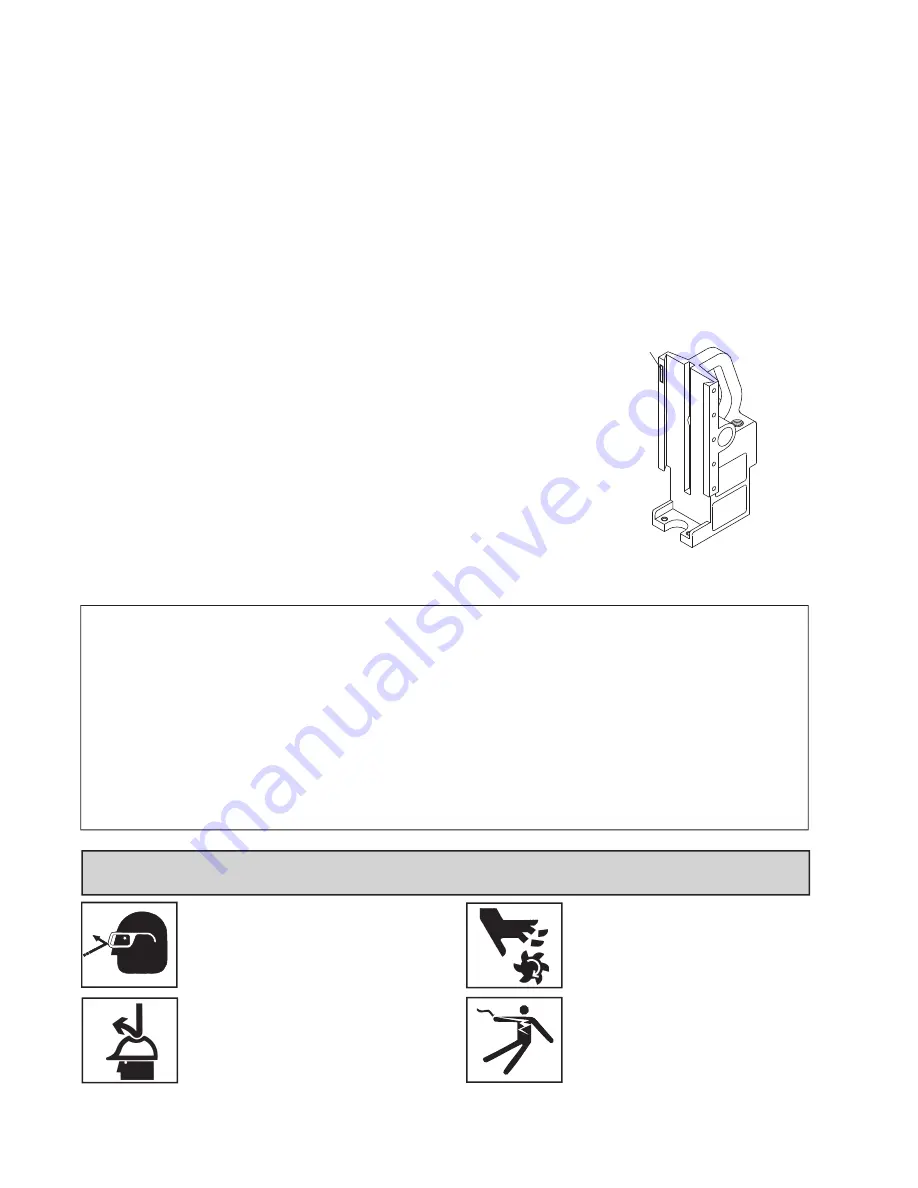
The HMD904 is offered in many versions. Refer to the Serial/Part number 
Label on your housing to direct you to the correct breakdown. 

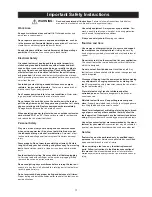
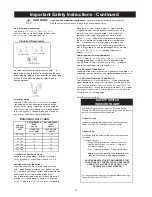
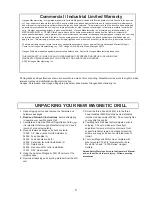
2

HOUGEN

®

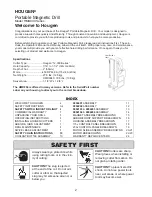
Portable Magnetic Drill

Model HMD904 Series

Always wear eye protection while 
using cutting tools, or in the vicin-
ity of cutting.

CAUTION!

 The slug is ejected 

at the end of the cut. Do not aim 
cutter or arbor so that ejected 
slug may hit someone around, or 
below you.

CAUTION!

 Cutters are sharp. 

Wear gloves when installing or 
removing cutter from arbor. Do 
not grab a rotating cutter.

CAUTION!

 To prevent electric 

shock, do not use power tools 
near wet areas, or where power 
tool may become wet.

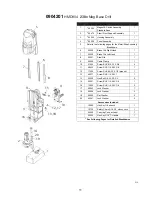
0904201

 ASSEMBLY   


11

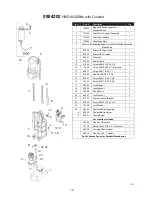
0904202

 ASSEMBLY   


12

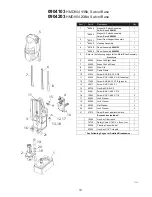
0904103

 & 

0904203

 ASSEMBLY 


13

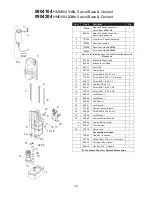
0904104

 & 

0904204

 ASSEMBLY 


14

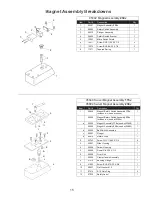
MAGNET ASSEMBLY BREAKDOWNS   

15

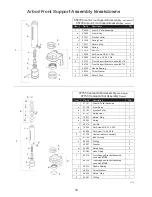
ARBOR/FRONT SUPPORT BREAKDOWN 

16

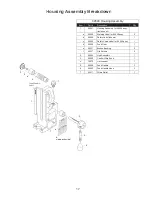
HOUSING ASSEMBLY BREAKDOWN   

17

115v CONTROL PANEL BREAKDOWN   

18

230v CONTROL PANEL BREAKDOWN   

19

MOTOR SLIDE ASSEMBLY BREAKDOWNS 

20-21

MOTOR BREAKDOWNS  


22-23

WARRANTY REPAIR CENTERS 


24

SAFETY FIRST

Welcome to Hougen

Congratulations on your purchase of the Hougen

®

 Portable Magnetic Drill .  Your model is designed to 

produce superior holes quickly and effi ciently.  Through constant innovation and development, Hougen is 
committed to provide you with hole producing tools and products to help you be more productive.

Before attempting to operate your new Portable Magnetic Drill, please read all instructions fi rst.  These in-
clude the Operator’s Manual and Warning Label on the unit itself.  With proper use, care, and maintenance, 
your model will provide you with years of effective hole drilling performance.  Once again, thank you for 
selecting our product and welcome to Hougen. 

WELCOME TO HOUGEN  


2

SAFETY INSTRUCTIONS 


3-4

SAFETY SWITCH INDICATOR LIGHT  4

COMMERCIAL WARRANTY 


5

UNPACKING YOUR DRILL 


5

OPERATING INSTRUCTIONS   

6

INSTALLING HOUGEN CUTTERS 

7

ARBOR & GIBS  ADJUSTMENT  

7

DRILL MAINTENANCE   

             8

SWIVEL BASE ADJUSTMENT   

9

SAFETY CHAIN INSTRUCTIONS 

10

COOLANT BOTTLE ASSEMBLY 

10

INDEX

Cutter Type........................Hougen “12,000-Series”
Hole Capacity....................7/16” to 1-1/2” (12mm-38mm)
Depth of Cut......................2” (50mm)
Motor.................................450 RPM, 8A (115v) 4A (230v)
Net Weight.........................27.5 lbs. (12.5kg) 


    HMD904S  30.5 lbs. (13.8kg)

Swivel Area........................1-1/8” W x 1-3/8” L 

Specifi cations

���������������
�����

Summary of Contents for HMD904 SERIES

Page 1: ...BLE MAGNETIC DRILL OPERATOR S MANUAL COVERS DRILL PART NUMBER 0904201 0904202 0904103 0904203 0904104 0904204 FOR USE WITH 12 000 SERIES HOUGEN FOR USE WITH 12 000 SERIES HOUGEN CUTTERS CUTTERS HMD904 SERIES ...

Page 2: ...lcome to Hougen Congratulations on your purchase of the Hougen Portable Magnetic Drill Your model is designed to produce superior holes quickly and efficiently Through constant innovation and development Hougen is committed to provide you with hole producing tools and products to help you be more productive Before attempting to operate your new Portable Magnetic Drill please read all instructions fi...

Page 3: ...3 Important Safety Instructions WARNING WARNING W Read and understand all instructions Failure to follow all instructions listed below may result in electrical shock fire and or serious personal injury ...

Page 4: ...l operation the safety switch light will be green Motor On and Off Switches function normally If light is Red A condition with the safety switch exists that needs to be corrected Possible causes Safety Switch is defective Have drill serviced Uneven work surface or material Check work surface for flatness Dirt or chips under magnet Clean work surface Material should be a least 3 8 thick Material thi...

Page 5: ...ITNESS FOR A PARTICULAR PURPOSE 2008 Hougen Manufacturing Inc Commercial Industrial Limited Warranty Photographs and Specifications shown are accurate in detail at time of printing Manufacturer reserves the right to make improvements and modifications without prior notice Hougen Rotabroach and Hougen Edge are proprietary trademarks of Hougen Manufacturing Inc UNPACKING YOUR NEW MAGNETIC DRILL 1 Open...

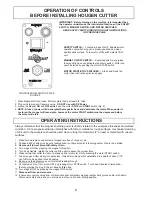
Page 6: ...FF by pressing the magnet OFF switch 11 Disconnect from power source 12 If necessary remove chips from cutter and magnet preferably wearing leather work gloves and or with pliers Disconnect safety chain and you are ready to move unit to new drilling position 6 OPERATION OF CONTROLS BEFORE INSTALLING HOUGEN CUTTER IMPORTANT Before turning on the machine it is important that the operator understands...

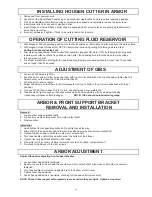
Page 7: ... through slots in Arbor Cutting fluid should not leak out 3 Test metering capabilities of Arbor Cutter Pilot assembly magnet ON motor OFF by feeding the Arbor gently toward work surface until pilot is pushed up into Cutter thus allowing fluid to filter down onto work surface through groove in pilot 4 For proper lubrication all cutting fluid in reservoir should empty onto work surface in no less than 1...

Page 8: ...he bearing in the front support bracket with grease Use Shell Cyprina RA or equivalent HINTS FOR SMOOTHER OPERATION REMEDIES FOR HOLEMAKING PROBLEMS 1 Trouble Magnetic base won t hold effectively to work a Cause Chips or dirt under magnet Remedy Clear area of chips and dirt b Cause Irregular surface on bottom of magnet or on workpiece Remedy Lightly surface grind the bottom of the magnet flat and o...

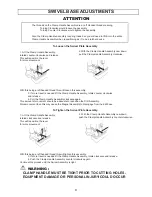
Page 9: ...ith this being a left handed thread this will tighten this assembly 3 If more travel is needed lift the Clamp Handle Assembly rotate clockwise and release 4 Push the Clamp Handle Assembly counter clockwise again Continue this process until the Swivel Assembly is tight WARNING 2 With the Clamp Handle Assembly now down pull the Clamp Handle Assembly clockwise 2 With the Clamp Handle Assembly now dow...

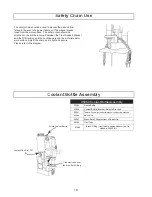
Page 10: ...cket and the Drll Housing and then continue around the material and or work surface Adjust the chain so it is tight and secure Please refer to the diagram Safety Chain Use Safety Chain Use 05060 Coolant Bottle Assembly 05064 Round Bottle 05059 Coolant Botttle Bracket Bottle to Bracket 05061 Thumb Screw holds bottle bracket to mounting bracket 05065 Ball Valve 05067 Brass Barb Fitting bottem of the...

Page 11: ...ew BHC 10 32 X 3 8 4 11 40432 Screw SHC 1 4 28 X 3 8 1 12 17002 Screw SHC 6 32 X 1 2 ground 1 13 40077 Screw SHC 1 4 20 X 1 1 14 02460 Hex Bolt 3 8 24 X 2 3 4 2 15 02461 Screw BHC 1 4 28 X 3 8 1 16 10553 Screw SHC 1 4 20 X 7 8 2 17 90052 Lock Washer 1 18 90028 Lock Washer 3 19 40392 Flat Washer 2 20 40391 Lock Washer 2 Accessories Included 10565 Hex Key 1 8 wrench 1 10730 Safety Chain 3 16 X 5 w S...

Page 12: ...02 Screw SHC 6 32 X 1 2 ground 1 13 40077 Screw SHC 1 4 20 X 1 1 14 02460 Hex Bolt 3 8 24 X 2 3 4 2 15 02461 Screw BHC 1 4 28 X 3 8 1 16 10553 Screw SHC 1 4 20 X 7 8 2 17 90052 Lock Washer 1 18 90028 Lock Washer 3 19 40392 Flat Washer 2 20 40391 Lock Washer 2 21 07163 Coolant Inducer Bracket 1 22 40038 Screw SHC 10 32 X 5 8 1 23 10560 Lock Washer 1 24 05060 Coolant Bottle Assembly 1 a 05059 Coolan...

Page 13: ... 41044 Screw BHC 10 32 X 3 8 4 11 40432 Screw SHC 1 4 28 X 3 8 feed stop 1 12 17002 Screw SHC 6 32 X 1 2 ground 1 13 40077 Screw SHC 1 4 20 X 1 1 14 05736 Hex Bolt 3 8 24 X 2 2 15 02461 Screw BHC 1 4 28 X 3 8 1 16 10553 Screw SHC 1 4 20 X 7 8 2 17 90052 Lock Washer 1 18 90028 Lock Washer 3 19 40392 Flat Washer 2 20 40391 Lock Washer 2 21 07015 Swivel Base Label lock unlock 1 Accessories Included 1...

Page 14: ...9 02420 Cable Clamp 1 10 41044 Screw BHC 10 32 X 3 8 4 12 17002 Screw SHC 6 32 X 1 2 ground 1 13 40077 Screw SHC 1 4 20 X 1 1 14 05736 Hex Bolt 3 8 24 X 2 2 15 02461 Screw BHC 1 4 28 X 3 8 1 16 10553 Screw SHC 1 4 20 X 7 8 2 17 90052 Lock Washer 1 18 90028 Lock Washer 3 19 40392 Flat Washer 2 20 40391 Lock Washer 2 21 07163 Coolant Inducer Bracket 1 22 40038 Screw SHC 10 32 X 5 8 1 23 10560 Lock W...

Page 15: ...ety Switch Assembly 115v includes a c used w 05648 1 05895 Magnet Safety Switch Assembly 230v includes a c used w 05894 a 05650 Magnet Assembly 115v used w 05648 1 05896 Magnet Assembly 230v used w 05894 1 b 05652 Ball Switch Assembly 1 c 05653 Plunger 1 d 05670 Retain Ring 1 2 05743 Screw FHC 1 4 20 X 3 4 6 3 05657 Slide Housing 1 4 05656 Swivel Housing 1 5 02898 Dowel Pin 3 16 X 1 2 1 6 05658 Pi...

Page 16: ...ly non Swivel 07156 Coolant Arbor Assembly Swivel Item Part Description Qty 1 07157 Arbor Collar Assembly 1 a 07159 Arbor Body 1 b 07162 Ejection Collar 1 c 07161 Spring Seat 1 d 10517 Retain Ring 2 e 05049 Spring 1 f 40312 Roll Pin 1 g 10506 Set Screws 3 8 24 X 305 2 i 05628 Set Screw 1 4 28 X 3 8 2 2 07158 Coolant Inducer Assembly 1 j 07160 Inducer Ring 1 k 40300 O Ring 2 l 40301 Washer 2 m 4030...

Page 17: ...9 Safety Label shown 1 c 04553 Safety Chain Label for 04540 assy 1 d 40229 Feed Gear 1 e 40231 Bronze Bushing 2 f 40237 Gib Screws 5 2 40254 Hub Assembly 1 3 05839 Comfort Grip Knob 1 4 10679 Flat Washer 1 5 04558 Feed Handle 3 6 04532 Feed Handle Knob 3 7 02411 Strain Relief 1 1 2 3 4 5 6 7 d e f Housing Assembly Breakdown Housing Assembly Breakdown ...

Page 18: ...Motor ON Switch 1 12 01335 Motor OFF Switch 1 13 05205 Green Wire Assembly 1 14 07011 Faceplate 1 15 02548 Stand Off 3 16 x 9 16 LG 3 16 90571 Power Cord 1 17 90690 Cable Tie 1 not shown RED ANODE WHITE WIRE Control Panel Breakdown 115v Control Panel Breakdown 115v J8 J7 Green Ground To Housing From L E D Bulb To J3 Motor White Wire Motor Black Wire Safety Switch Magnet Wires Power Cord Green Grou...

Page 19: ...ear Lens 1 13 90690 Cable Tie 1 14 01226 Switch Guard 1 15 05205 Wire Harness board to housing 1 16 01228 Red Switch Cover 1 17 02409 Green Switch Cover 1 18 05926 Circuit Breaker 1 19 05928 Rubber Boot Seal 1 not shown 1 2 3 4 5 6 7 8 10 11 12 14 16 17 18 19 Control Panel Breakdown 230v Control Panel Breakdown 230v J8 J7 Green Ground To Housing From L E D Bulb To J3 Motor White Wire Motor Black W...

Page 20: ...e Holder Bracket 1 12 05988 Screw FHC 10 32 X 1 2 2 230v Motor Slide Assembly 0904203 0904204 Item Part Description Qty 1 07181 Motor Assembly 230v includes a g 1 a 04527 Motor Label 1 b 04042 Specs Label 07180 assembly 1 c 02413 Motor Cord 1 d 11053 Screw BHS 8 32 X 3 16 1 e 10538 Lock Washer 1 f 04502 Inspection Cover 1 g 75289 Screw Pan Head M5 X 8MM 2 2 05824 Slide 07180 assembly 1 3 05825 Rac...

Page 21: ...9 Screw Pan Head M5 X 8MM 2 2 05824 Slide Swivel Base 1 3 05825 Rack Gear Swivel Base 1 4 02422 Motor Cord Bracket 1 5 41044 Screw BHC 10 32 X 3 8 4 6 75156 Screw SHC M6 X 1 X 15mm 4 7 40038 Screw SHC 10 32 X 5 8 2 8 90077 Screw BHC 10 32 X 1 2 1 9 10560 Lock Washer 3 10 90028 Lock Washer 4 items 11 and 12 are used with the 0904104 11 05057 Bottle Holder Bracket 1 12 05988 Screw FHC 10 32 X 1 2 2 ...

Page 22: ...t 1 17601 Gear Housing 1 17621 Carbon Brush Pair 1 17602 Ball Bearing 2 17622 Brush Cap 2 17603 Ball Bearing 1 17623 Pan Head Screw 2 17604 Ball Bearing 1 17624 Pan Head Screw Short 2 17605 Ball Bearing 1 17625 Pan Head Screw Long 2 17606 Dust Seal 1 17626 Retaining Ring 1 17607 1st Inter Gear Assy 1 17627 Retaining Ring 1 17608 2nd Inter Gear Assy 1 17628 Field 115v 1 17609 Spur Gear 1 17630 Arma...

Page 23: ...1 Gear Housing 1 17621 Carbon Brush Pair 1 17602 Ball Bearing 2 17622 Brush Cap 2 17603 Ball Bearing 1 17623 Pan Head Screw 2 17604 Ball Bearing 1 17624 Pan Head Screw Short 2 17605 Ball Bearing 1 17625 Pan Head Screw Long 2 17606 Dust Seal 1 17626 Retaining Ring 1 17607 1st Inter Gear Assy 1 17627 Retaining Ring 1 17608 2nd Inter Gear Assy 1 17629 Field 1 17609 Spur Gear 1 17631 Armature 1 17610 ...

Reviews: