Houston Radar PD420 User Manual
Page 28 of 46
PD420 Basic Application Setup
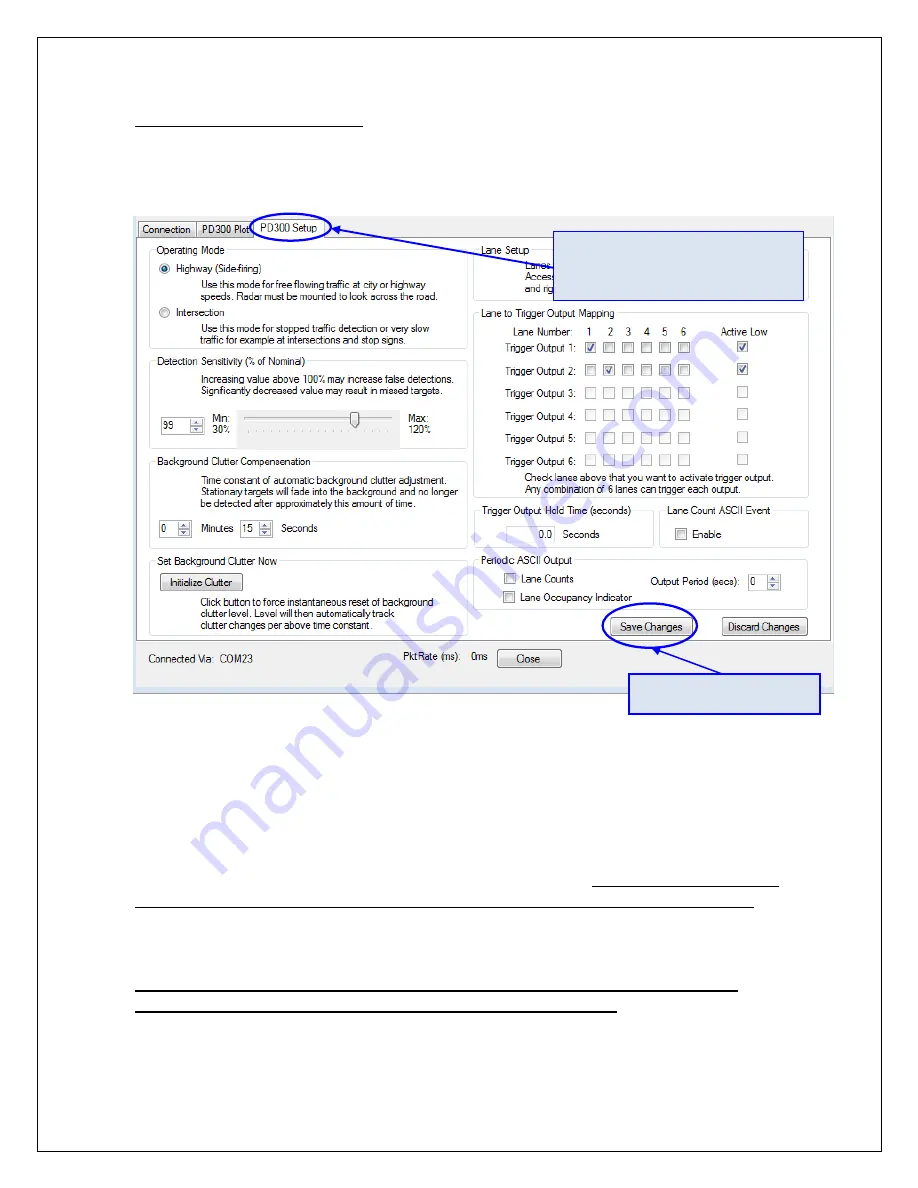
STEP #1: Select Application Mode and background clutter adjustment time
constant
.
See the section on clutter map earlier for a detailed explanation of this setting.
STEP #2: Initialize clutter to correct startup value.
The PD420 continuously adjusts clutter to changes in the background with the time
constant specified above. However, to facilitate immediate view of real time targets and
lane setup, it’s advantageous to set the initial clutter level to eliminate fixed targets when
no real targets are present in the radar’s view.
To do this, ensure radar is securely mounted in desired position, wait for the field in front
of the radar to clear of any real targets and then click on the “Initialize Clutter” button in
the screen shown above. If you now click over the “PD420 Plot” window, no new targets
should be streaming from the x=0 (right most) side. Of course you may still have older
targets showing on the plot but they will scroll off eventually off the left side of the chart.
You should re-initialize clutter if you make any changes to the radar mounting
(height or angle) or operating mode (Highway or Intersection).
After connecting to the radar, click on the
PD420 Setup tab. The GUI will read the
current radar configuration and allow you
to edit and save it.
Click on “Save Changes” to
save the settings to the PD420.


