background image


Protect  the  batteries  from  intense  heat.  Remove  the  exhausted  batteries  from  the  weather  station.  This  will 

avoid damage that can be caused by leakage. 


Always replace all the batteries simultaneously. Do not use different types or brands of batteries or batteries 

with different capacities. 


When inserting the batteries, ensure correct polarity (+/-). 

Suggest not use rechargeable batteries which not providing the required voltage. 

Do not use abrasive or solvent-based products to clean the weather station 


FCC STATEMENT 

This device complies with Part 15 of the FCC Rules. Operation is subject to the 

following two conditions: (1) This device may not cause harmful interference, and (2) 

This device must accept any interference received, including interference that may 

cause undesired operation. 

WARNING  Changes  or  modifications  not  expressly  approved  by  the  party  responsible  for 

compliance could vo

id the user’s authority to operate the equipment. 

NOTE This equipment has been tested and found to comply with the limits for 

a Class B digital device, pursuant to Part 15 of the FCC Rules. These limits are 

designed to provide reasonable protection against harmful interference in a 

residential installation. 

This equipment generates, uses and can radiate radio frequency energy and, if not 

installed and used in accordance with the instructions, may cause harmful interference 

to radio communications. However, there is no guarantee that interference will not 

occur in a particular installation. If this equipment does cause harmful interference 

to radio or television reception, which can be determined by turning the equipment 

off and on, the user is encouraged to try to correct the interference by one or more 

of the following measures: 

Reorient or relocate the receiving antenna. 

Increase the separation between the equipment and receiver. 

Connect the equipment into an outlet on a circuit different from that to which the 

receiver is connected. 

Consult the dealer or an experienced radio / TV technician for help. 


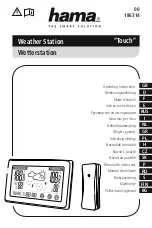
Summary of Contents for AOK-2039B

Page 1: ...peration before using the instrument Keep the manual for future reference and pass it on with the device if you pass on the device to other users NOTE Always remember to use high quality batteries cha...

Page 2: ......

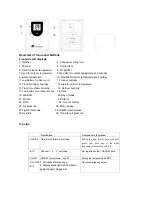
Page 3: ...17 Low battery for outdoor sensor 18 Time 19 WEEKS 20 Day of week 21 Month 22 Alarm 23 Date 24 Hour of history 25 Air pressure 26 Moon phase 27 Light a b c mode 28 Outdoor temperature 29 Icy alert 30...

Page 4: ...le pass through the hole in the stand plug the power cable to the power jack and plug the power adapter into a suitable power outlet NOTE It is recommended to insert the battery as a backup power Remo...

Page 5: ...ries inserted the main unit will lose all the weather data Every time the outdoor sensor batteries are replaced the sensor will synchronize with the main unit again You must press the CH key for more...

Page 6: ...sensor You can read the data of up to 3 sensors at one weather station Use the sliding switch for each outdoor sensor to select the outdoor sensor channel Press the key CH in main unit to select a cha...

Page 7: ...er time and enter the Winter time at 2AM on the first Sunday of November Daily alarm set up Press MODE to switch to Alarm1 mode A1 and the alarm time displayed Press and hold the key MODE for 3 second...

Page 8: ...onfirm Temperature lower limit and the icon displayed press MEM or HISTORY to set the lower alert temperature Pess the key ALERT to confirm Information The clock automatically exit setting mode if no...

Page 9: ...00 m 10 m increment press SNOOZE LIGHT to confirm After setting the altitude use MEM or HISTORY buttons to set the weather forecast icon press SNOOZE LIGHT to confirm For accurate barometric pressure...

Page 10: ...health and home environment Comfortable If the indoor humidity is within 40 70 RH and the temperature within 20 28 C the icon comfortable environment will be displayed Dry If the indoor humidity is l...

Page 11: ...r shows 7S automatic cycle Manually press MODE to confirm the color and quit the automatic change mode the program does not set the automatic exit Backlight color switch RED GREEN BLUE LIGHT GREEN PUR...

Page 12: ...Italian Dutch Spanish Danish Dual alarm with snooze function 5 minutes alarm interruption Power supply 3 X AAA UM 4 LR03 1 5V batteries DC 5 0V power adapter 7 colors back light display RED GREEN BLUE...

Page 13: ...ot intended for use by persons including children whose physical sensory or mental disability or lack of experience and expertise prevents safe use unless they are supervised or instructed regarding u...

Page 14: ...s authority to operate the equipment NOTE This equipment has been tested and found to comply with the limits for a Class B digital device pursuant to Part 15 of the FCC Rules These limits are designe...

Reviews: