background image

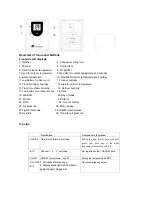
2.  Place the sensor near the main unit in order to establish an effective wireless transmission. Do not 

place the sensor outside until the transmission have be confirmed.   

3.  Observe the indoor unit


LCD screen to see OUT temperature and humidity displayed to confirm the 

transmission completed 


NOTES: 


First plug in the adaptor or insert the batteries of main unit, then insert the batteries of the outdoor sensor 

in 3 minutes after the main unit is powered on, to assure of the sensor data received well. 

In case of the outdoor sensor data received failure, please press 

CH

” 

key for more than 3 seconds to 

synchronize the RF signal. 


Every time the power adaptor unplugged and with no batteries inserted, the main unit will lose all the 

weather data. 


Every time the outdoor sensor batteries are replaced, the sensor will synchronize with the main unit again. 

You must press the 

CH

” 

key for more than 3 seconds to synchronize the RF signal. 


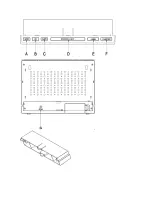
Mounting the main unit 

The main unit can be placed onto any flat surface or wall mounted at the desired location by hanging hole, It is 

important to check that the radio signals (from the sensors and from the DCF77 time signal) can be received 

before mounting. 


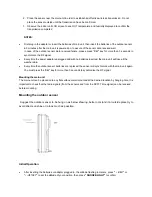
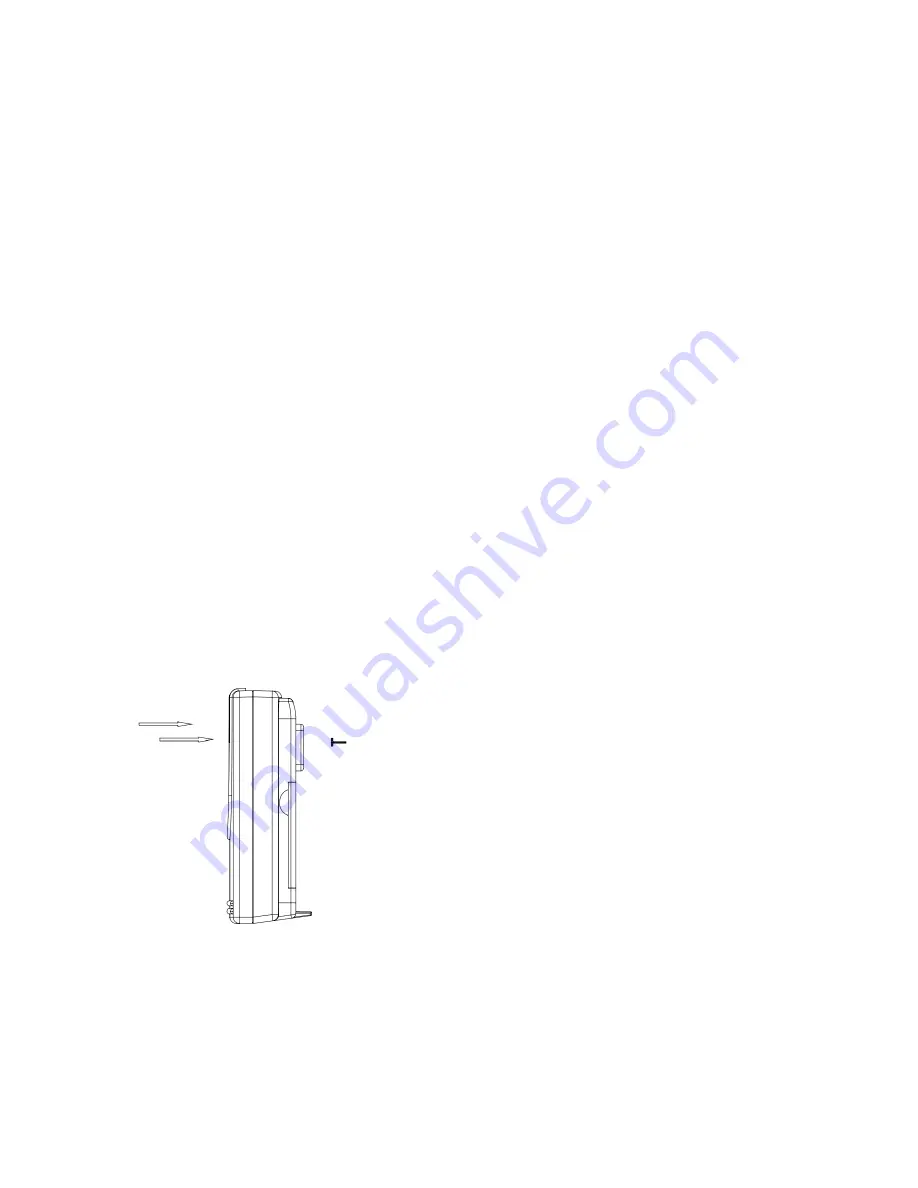
Mounting the outdoor sensor


  Suggest the outdoor sensor to be hung on as below showing, better not stand it at outside place,try to 

avoid direct sun shine or rain as much as possible. 
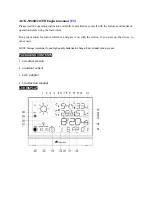


Initial Operation 


After inserting the batteries or adaptor plugged in, the altitude flashing in meters, press 


•MEM


 or 

•HISTORY


 to set the altitude of your position, then press 

”SNOOZE

LIGHT

 to confirm 

Summary of Contents for AOK-2039B

Page 1: ...peration before using the instrument Keep the manual for future reference and pass it on with the device if you pass on the device to other users NOTE Always remember to use high quality batteries cha...

Page 2: ......

Page 3: ...17 Low battery for outdoor sensor 18 Time 19 WEEKS 20 Day of week 21 Month 22 Alarm 23 Date 24 Hour of history 25 Air pressure 26 Moon phase 27 Light a b c mode 28 Outdoor temperature 29 Icy alert 30...

Page 4: ...le pass through the hole in the stand plug the power cable to the power jack and plug the power adapter into a suitable power outlet NOTE It is recommended to insert the battery as a backup power Remo...

Page 5: ...ries inserted the main unit will lose all the weather data Every time the outdoor sensor batteries are replaced the sensor will synchronize with the main unit again You must press the CH key for more...

Page 6: ...sensor You can read the data of up to 3 sensors at one weather station Use the sliding switch for each outdoor sensor to select the outdoor sensor channel Press the key CH in main unit to select a cha...

Page 7: ...er time and enter the Winter time at 2AM on the first Sunday of November Daily alarm set up Press MODE to switch to Alarm1 mode A1 and the alarm time displayed Press and hold the key MODE for 3 second...

Page 8: ...onfirm Temperature lower limit and the icon displayed press MEM or HISTORY to set the lower alert temperature Pess the key ALERT to confirm Information The clock automatically exit setting mode if no...

Page 9: ...00 m 10 m increment press SNOOZE LIGHT to confirm After setting the altitude use MEM or HISTORY buttons to set the weather forecast icon press SNOOZE LIGHT to confirm For accurate barometric pressure...

Page 10: ...health and home environment Comfortable If the indoor humidity is within 40 70 RH and the temperature within 20 28 C the icon comfortable environment will be displayed Dry If the indoor humidity is l...

Page 11: ...r shows 7S automatic cycle Manually press MODE to confirm the color and quit the automatic change mode the program does not set the automatic exit Backlight color switch RED GREEN BLUE LIGHT GREEN PUR...

Page 12: ...Italian Dutch Spanish Danish Dual alarm with snooze function 5 minutes alarm interruption Power supply 3 X AAA UM 4 LR03 1 5V batteries DC 5 0V power adapter 7 colors back light display RED GREEN BLUE...

Page 13: ...ot intended for use by persons including children whose physical sensory or mental disability or lack of experience and expertise prevents safe use unless they are supervised or instructed regarding u...

Page 14: ...s authority to operate the equipment NOTE This equipment has been tested and found to comply with the limits for a Class B digital device pursuant to Part 15 of the FCC Rules These limits are designe...

Reviews: