FOR SUPPORT CALL: (888) 323 - 3151
5
FIRST TIME SETUP
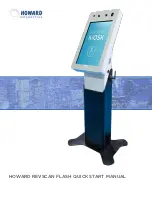
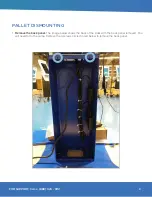
1. Unbox your new RevScan Flash kiosk. Refer to the “RevScan Palette Dismount Guide” for information on
how to do this.
2. Place the unit where it will be used and plug unit into a power outlet.
3. The unit will boot up and launch the software automatically.
4. Once the software has launched, you should see a human outline on a grey background while the camera
module starts up. After initialization, you should see yourself on screen through the webcam.
5. Upon startup, the software will say “Initializing camera module”, this should only take a few minutes. Once
you can see yourself in the kiosk camera, you are ready to take temperatures!
6. It is recommended you connect your unit to the internet through either Ethernet or WiFi.
TIPS FOR SUCCESSFUL SCANNING
- The recommended distance from the camera is 4 feet. It is recommended that you mark the floor where the
user should stand (Note: this may be slightly to the left or right of the center of the unit).
- It is recommended to only have one person in frame at a time.
- If the software requests, “Please, step closer to 4 feet.” Have the user lean forward and ensure they are on
the designated mark.
- If the software is not reacting to the user:
- First, have the user step out of view and then back in.
- While the system is capable of reading users wearing glasses or hats, there may be an issue if the
user is wearing both. Please, ask the user to remove one or both items and try again.
- Similarly, if a person’s hair is covering their forehead it is recommended they move their hair out of
their face momentarily.
- Lastly, make sure the user’s face mask is a 1/2 inch below the user’s eyes (but still covering their
nose).


