GEA19684 ISRB_2008 rev._11.15
4
Installation
Roots blowers & exhausters are treated after factory assembly
to protect against normal atmospheric corrosion. The maxi-
mum period of internal protection is considered to be one year
under average conditions, if shipping plugs & seals are not
removed. Protection against chemical or salt water atmosphere
is not provided. Avoid opening the unit until ready to start
installation, as corrosion protection will be quickly lost due to
evaporation.
If there is to be an extended period between installation and
start up, the following steps should be taken to ensure corro-
sion protection.
•
Coat internals of cylinder, gearbox and drive end
bearing reservoir with Nox-Rust VCI-10 or equivalent.
Repeat once a year or as conditions may require. Nox-
Rust VCI-10 is petroleum soluble and does not have to
be removed before lubricating. It may be obtained from
Daubert Chemical Co., 2000 Spring Rd., Oak Brook, Ill.
60521.
•
Paint shaft extension, inlet and discharge flanges, and
all other exposed surfaces with Nox-Rust X-110 or
equivalent.
•
Seal inlet, discharge, and vent openings. It is not
recommended that the unit be set in place, piped to
the system, and allowed to remain idle for extended
periods. If any part is left open to the atmosphere, the
Nox-Rust VCI-10 vapor will escape and lose its effec-
tiveness.
•
Protect units from excessive vibration during storage.
•
Rotate shaft three or four revolutions every two weeks.
•
Prior to start up, remove flange covers on both inlet and
discharge and inspect internals to insure absence of
rust. Check all internal clearances. Also, at this time, re-
move gearbox and drive end bearing cover and inspect
gear teeth and bearings for rust.
Because of the completely enclosed unit design, location of
the installation is generally not a critical matter. A clean, dry
and protected indoor location is preferred. However, an out-
door location will normally give satisfactory service. Important
requirements are that the correct grade of lubricating oil be
provided for expected operating temperatures, and that the
unit be located so that routine checking and servicing can be
performed conveniently. Proper care in locating driver and
accessory equipment must also be considered.
Supervision of the installation by a Roots Service Engineer is
not usually required for these units. Workmen with experience
in installing light to medium weight machinery should be able
to produce satisfactory results. Handling of the equipment
needs to be accomplished with care, and in compliance with
safe practices. Unit mounting must be solid, without strain or
twist, and air piping must be clean, accurately aligned and
properly connected.
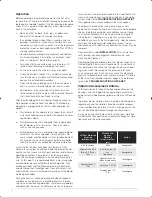
Bare-shaft Units:
Two methods are used to handle a unit
without base. One is to use lifting lugs bolted into the top of
the unit headplates. Test them first for tightness and fractures
by tapping with a hammer. In lifting, keep the direction of
cable pull on these bolts as nearly vertical as possible. If lifting
lugs are not available, lifting slings may be passed under the
cylinder adjacent to the headplates. Either method prevents
strain on the extended drive shaft.
Packaged Units:
When the unit is furnished mounted on a
baseplate, with or without a driver, use of lifting slings passing
under the base flanges is required. Arrange these slings so
that no strains are placed on the unit casing or mounting feet,
or on any mounted accessory equipment.
DO NOT
use the
lifting lugs in the top of the unit headplates.
Before starting the installation, remove plugs, covers or seals
from unit inlet and discharge connections and inspect the inte-
rior completely for foreign material. If cleaning is required, finish
by washing the cylinder, headplates and impeller thoroughly
with a petroleum solvent. Turn the drive shaft by hand to
make sure that the impellers turn freely at all points. Anti-rust
compound on the connection flanges and drive shaft exten-
sion may also be removed at this time with the same solvent.
Cover the flanges until ready to connect piping.
Mounting
Care will pay dividends when arranging the unit mounting. This
is especially true when the unit is a “bare-shaft” unit furnished
without a baseplate. The convenient procedure may be to mount
such a unit directly on a floor or small concrete pad, but this gen-
erally produces the least satisfactory results. It definitely causes
the most problems in leveling and alignment and may result in a
“Soft Foot” condition. Correct soft foot before operation to avoid
unnecessary loading on the casing and bearings. Direct use of
building structural framing members is not recommended.
For blowers without a base, it is recommended that a well
anchored and carefully leveled steel or cast iron mounting
plate be provided. The plate should be at least 1 inch (25 mm)
thick, with its top surface machined flat, and large enough to
provide leveling areas at one side and one end after the unit is
mounted. It should have properly sized studs or tapped holes
located to match the unit foot drilling. Proper use of a high
quality machinist’s level is necessary for adequate installation.
With the mounting plate in place and leveled, set the unit
on it without bolting and check for rocking. If it is not solid,
determine the total thickness of shims required under one foot
to stop rocking. Place half of this under each of the diagonally-
opposite short feet, and tighten the mounting studs or screws.
Rotate the drive shaft to make sure the impellers turn freely.
If the unit is to be direct coupled to a driving motor, consider
the height of the motor shaft and the necessity for it to be
aligned very accurately with the unit shaft. Best unit arrange-
ment is directly bolted to the mounting plate while the driver
is on shims of at least 1/8 inch (3mm) thickness. This allows
adjustment of motor position in final shaft alignment by varying
the shim thickness.
Aligning
When unit and driver are factory mounted on a common
baseplate, the assembly will have been properly aligned and is to
be treated as a unit for leveling purposes. Satisfactory instal-
lation can be obtained by setting the baseplate on a concrete
slab that is rigid and free of vibration, and leveling the top of the
base carefully in two directions so that it is free of twist. The slab
must be provided with suitable anchor bolts. The use of grouting
under and partly inside the leveled and shimmed base is recom-
mended.
GEA19684_ISRB-2008_Tri-RAM_rev02.16.indd 4
15/02/2016 11:17:05
Summary of Contents for Roots Tri-RAM 409
Page 1: ...www howden com RootsTM Tri RAMTM Tri lobe Blowers Installation Operation Maintenance Manual ...
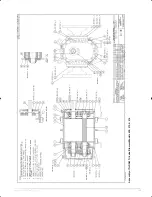
Page 15: ...15 GEA19684 ISRB_2008 rev _11 15 Assembly of Tri RAM Tri Lobe Blowers Models 409 413 416 ...
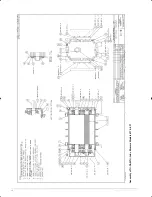
Page 16: ...GEA19684 ISRB_2008 rev _11 15 16 Assembly of Tri RAM Tri Lobe Blowers Models 617 621 ...
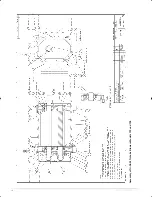
Page 18: ...GEA19684 ISRB_2008 rev _11 15 18 Assembly of Tri RAM Tri Lobe Blowers Models 722 and 728 ...
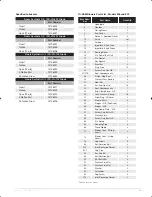
Page 20: ...GEA19684 ISRB_2008 rev _11 15 20 Assembly of Tri RAM Tri Lobe Blowers Models 826 832 ...


