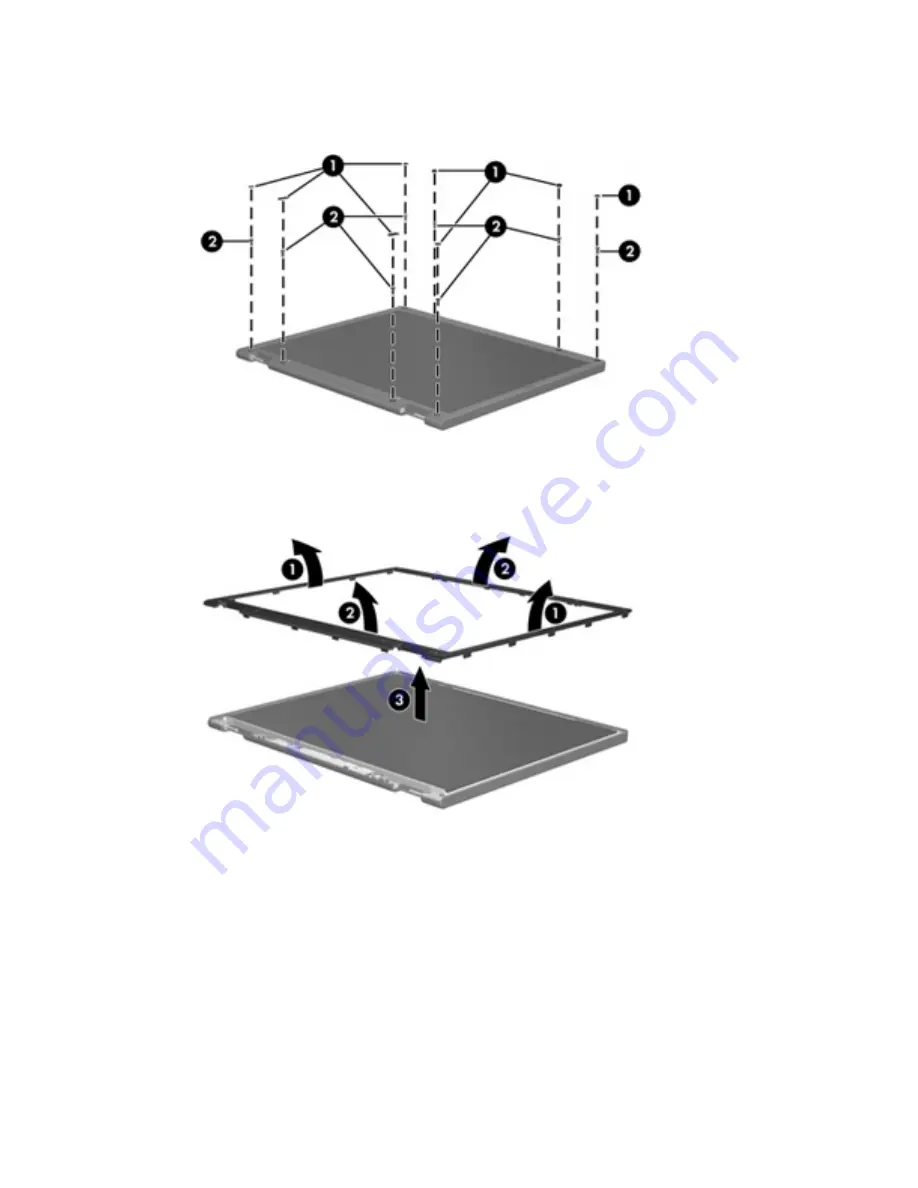
Perform the following steps to disassemble the display assembly:
1.
Remove all screw covers
(1)
and screws
(2)
that secure the display bezel to the display assembly.
2.
Lift up and out on the left and right inside edges
(1)
and the top and bottom inside edges
(2)
of the
display bezel until the bezel disengages from the display assembly.
3.
Remove the display bezel
(3)
.
4.
Remove all screws
(1)
that secure the display panel assembly to the display enclosure.
Display 137
Summary of Contents for 4710s - ProBook - Core 2 Duo 2.53 GHz
Page 1: ...HP ProBook 4710s Notebook PC Maintenance and Service Guide ...
Page 4: ...iv MSG revision history ...
Page 6: ...vi Safety warning notice ...
Page 123: ...Where used 1 screw that secures the USB board to the computer Phillips PM2 5 3 0 screw 113 ...
Page 151: ...22 Remove the LCD panel 23 Recycle the LCD panel and backlight Display 141 ...
Page 157: ......


