2-8
Removal and Replacement
HP Omnibook 6000/6100
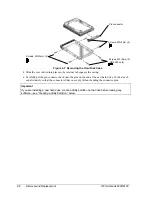
Figure 2-7. Removing the Hard Disk Case
•
Slide the cover down into place so the retainer tab engages the casing.
•
Carefully put the pin connector back onto the pins on the end of the new hard drive. Work at each
end alternately so that the connector slides on evenly without bending the connector pins.
Important
If you are installing a new hard drive, create a Utility partition on the drive before loading any
software—see “Creating a Utility Partition,” below.
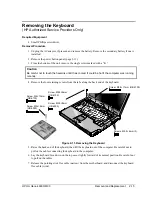
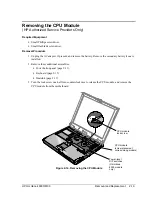
Pin connector
Screws, M3×3mm (2)
Screws, M3×3mm (2)
Screws, M2×4mm (2)
(OB 6000 only)
Summary of Contents for 6100
Page 1: ... HP Omnibook 6000 6100 Service Manual ...
Page 22: ......
Page 60: ......
Page 94: ...4 2 Replaceable Parts HP Omnibook 6000 6100 Figure 4 1 Exploded View ...
Page 108: ......
Page 113: ......
Page 114: ...Part Number F3257 90025 Printed in U S A 6 01 ...


