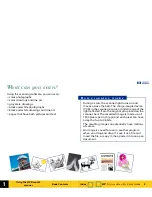
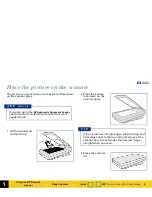
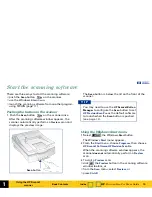
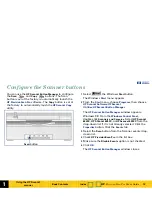
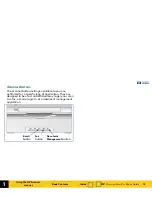
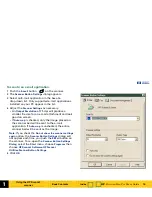
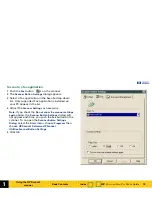
background image

+$%&

HP PrecisionScan Pro

User’s Guide

1

Using the HP ScanJet scanner

2

A tour of the scanning software

3

Scanning pictures

4

Adjusting images of pictures

5

Scanning text

6

Saving scanned images

7

Scanning transparencies

Index

Summary of Contents for 6300C - ScanJet - Flatbed Scanner

Page 1: ...ionScan Pro User s Guide 1 Using the HP ScanJet scanner 2 A tour of the scanning software 3 Scanning pictures 4 Adjusting images of pictures 5 Scanning text 6 Saving scanned images 7 Scanning transparencies Index ...

Page 2: ...mage in the preview Automatic sensing of output type Automatic sensing of optimal exposure color black and white threshold sharpen level and resolution for images of pictures Drag and drop the image to another program or to the desktop Scale and size the image prior to exporting it to a program or a file Return to the preview image without rescanning Tools for adjusting exposure color black and wh...

Page 3: ... laws RESTRICTED RIGHTS LEGEND U S Government Restricted Rights The Software and any accompanying documentation have been developed entirely at private expense They are delivered and licensed as commercial computer software as defined in DFARS 252 227 7013 Oct 1988 DFARS 252 211 7015 May 1991 or DFARS 252 227 7014 Jun 1995 as a commercial item as defined in FAR 2 101 a or as Restricted computer so...

Page 4: ... in the yellow bar at the bottom of the page Page backward one page Press Shift Enter or PgUp or Click in the yellow bar at the bottom of the page Jump to a different part of the document Click when the pointer looks like Undo a jump Click in the toolbar or Right click to display the dropdown Acrobat Reader menu then select Go Back Re do a jump Click in the toolbar or Right click to display the dr...

Page 5: ...solution tool 31 Sharpen Level tool 33 Dimensions tool 34 Exposure Adjustment tool 36 Color Adjustment tool 37 Black White Threshold tool 38 Invert tool 39 Use Transparency Adapter Tool 40 Online Help 41 Save and re use adjustment settings 44 Set preferences 47 3 Scanning pictures 55 Basic steps for scanning pictures 56 Preview scan 57 Create a selection area 58 Zoom scan 63 Return to the preview ...

Page 6: ...g text 97 Scan and convert a block of text 98 Scan a whole page 101 6 Saving scanned images 102 How you can use the image 103 Print the image 104 Scan to a destination 105 Drag and drop to another program 106 Drag and drop to the Desktop 107 Copy to the Clipboard 108 Save to a file 109 7 Scanning transparencies 112 The 35mm slide adapter 113 Scan the slide 114 Active Transparency Adapter 115 Index...

Page 7: ...1 Using the HP ScanJet scanner 1 8 What can you scan 9 Place the picture on the scanner 10 Start the scanning software 12 Configure the Scanner buttons ...

Page 8: ...anner light turns on and moves across the bed The charge couple device CCD in the scanner records a digital image of the light reflected from the original you placed on the scanner bed The recorded image is made up of 1200 pixels per inch ppi and each pixel can have a depth of up to 36 bits The resulting image can potentially have millions of colors An image is saved for use in another program whe...

Page 9: ...the scanner lid and hold it up 2 Place the picture face down on the scanner glass 3 Close the scanner lid If you are using the HP Automatic Document Feeder see the online manual HP Automatic Document Feeder Guide A D F u s e r s If the picture has straight edges place the top and right edges next to the top and right edges of the scanner bed This will make the preview image straight when you scan ...

Page 10: ... image The Scan button is below the lid on the front of the scanner Using the Windows Start menu 1 Select the Windows Start button The Windows Start menu appears 2 From the Start menu choose Programs then choose HP ScanJet Software HP PrecisionScan Pro When the scanning software window appears the scanner does not automatically perform a Preview scan 3 To start a Preview scan click the Preview but...

Page 11: ... performs a Preview scan and displays the preview image 4 Create a selection area in the preview image make necessary adjustments and select Return to application from the Scan menu The final scan occurs and the image is placed in the calling program TWAIN is an industry standard communications protocol for sending instructions to hardware such as a scanner and receiving data back such as an image...

Page 12: ...nu appears 2 From the Start menu choose Programs then choose HP ScanJet Software HP ScanJet Utilities HP ScanJet Button Manager The HP ScanJet Button Manager window appears Windows 98 From the Windows Control Panel double click Scanners and Cameras Select HP ScanJet 6300C HP SCanJet 6350C or HP ScanJet 6390C from the drop down list if it is not already selected Click the Properties button Click th...

Page 13: ... Scanner Buttons The scanner button settings available to you are optimized for a specific type of application They are designed to be a fast and efficient way to get your scan to a fax e mail program or a document management application E mail button Fax button Document Management button ...

Page 14: ... 75 dpi will produce a smaller file size for an e mail attachment and look good on screen If Auto crop is checked only the image placed on the scanner bed will be sent to the e mail application If Auto crop is unchecked the entire scanner bed will be sent as the image Note If you check the Do not show the scanner settings again option the Scanner Button Settings dialog will not appear each time yo...

Page 15: ...t Only supported Fax applications installed on your PC appear in the list 4 Adjust the Scanner Settings as necessary Note If you check the Do not show the scanner settings again option the Scanner Button Settings dialog will not appear each time you push the Fax button on the scanner To re open the Scanner Button Settings Dialog select the Start menu choose Programs then choose HP ScanJet Software...

Page 16: ...op down list Only supported document management applications installed on your PC appear in the list 4 Adjust the Scanner Settings as necessary Note If you check the Do not show the scanner settings again option the Scanner Button Settings dialog will not appear each time you push the Document Management button on the scanner To re open the Scanner Button Settings Dialog select the Start menu choo...

Page 17: ...ntext sensitive pointers 38 Black White Threshold tool 30 Image adjustment tools 39 Invert tool 31 Output Resolution tool 40 Use Transparency Adapter Tool 33 Sharpen Level tool 41 Online Help 34 Dimensions tool 44 Save and re use adjustment settings 36 Exposure Adjustment tool 47 Set preferences ...

Page 18: ...ndow see page 25 Info bar Displays width and height of the output image scale percentage the Output Type currently selected and Help button see page 26 Status bar Displays messages and approximate size of the selection area Image Size see page 27 Image adjustment tools The scanning software has six tools for making adjustments to the image These tools can be placed anywhere on the Windows desktop ...

Page 19: ... dialog box for sending a scan to an application see page 105 Return to application Scans the selection area and sends the image to the TWAIN compatible program that called it see page 11 Save Settings Displays the Save Settings dialog box for saving a set of scanning settings see page 44 Load Settings Displays the Load Settings dialog box for loading a set of saved scanning settings see page 46 P...

Page 20: ... page 61 Clear Selection Esc Removes the selection area page 60 E d i t Toolbar When checked shows the toolbar When not checked hides the toolbar see page 24 Status Bar When checked shows the status bar When not checked hides the status bar see page 27 Info Bar When checked shows the info bar When not checked hides the info bar see page 26 Undo Zoom When viewing a zoomed image displays the existin...

Page 21: ... the selection using colors from a standard Web palette see page 69 System Palette Scans the selection using colors from the 256 Color Web Palette output type palette plus more shades of gray and the 16 VGA colors see page 71 Optimized Palette Scans the selection using colors from a palette that contains pixel colors present in the original see page 70 Spot Color Finds large areas of similar color...

Page 22: ...ts highlights shadows and midtones in the image and displays pixel distribution pixel color and pixel output levels see pages 36 and 77 Color Adjustment When checked shows the Color Adjustment tool which sets color balance hue and color saturation in the image see pages 37 and 87 B W Threshold When checked shows the Black White Threshold tool which sets the threshold and the color channel for an i...

Page 23: ...oach for E mailing Images Explains the steps for e mailing scanned images with HP PrecisionScan Pro see page 42 HP ScanJet Coach for Creating Web Pages Explains the steps for creating web pages with HP PrecisionScan Pro see page 42 Show Me Displays movies from the HP PrecisionScan Pro CD ROM that demonstrate the main features of the scanning software see page 42 User s Guide Displays the HP ScanJe...

Page 24: ...n to a file see page 109 Scan To Scans to a selected application see page 105 Copy Scans and copies the selection to the Clipboard see page 108 Invert Reverses the black and white areas in a black and white image see page 39 Reset Controls Resets the controls in all tools except the Dimensions tool to their optimal default values Print Scans and prints the selection see page 104 HP ScanJet Coach D...

Page 25: ...he selection area When you Preview scan the entire scanner glass area displays in the scanning software window Enlarging the preview area The size of the preview area determines how big the image displays Enlarge the scanning software window when you want to increase the magnification of the view of a zoomed image Preview area A selection area in Preview scan Selection area Zoomed selection area E...

Page 26: ...Book Contents Index Info bar The info bar displays the following information the width of the output image the height of the output image scale of the output image the Output Type currently selected the Help button for HP PrecisionScan Pro Scanning software window info bar ...

Page 27: ...terabytes in the image displayed in the selection area Image Size or a progress bar for showing when the scanner is scanning or the scanning software is processing a command The Image Size shown in the status bar is the number of KB MB GB or TB in the image displayed in the selection area This size is only an estimate of the actual size of the saved file The file size depends on the format used to...

Page 28: ... Windows desktop or to a folder in the Windows Explorer Resize selection area horizontally Drag the mouse from a handle on a side of the selection area to resize the width of the selection area Resize selection area vertically Drag the mouse from a handle on the top or bottom of the selection area to resize the height of the selection area Resize selection area diagonally Drag the mouse from a han...

Page 29: ...s White eyedropper Position this pointer over a light area of the image to see the area s pixel value in the RGB meter and in the pixel distribution histogram in the Exposure Adjustment tool Click to set the Highlights value Black eyedropper Position this pointer over a dark area of the image to see the area s pixel value in the RGB meter and the pixel distribution histogram in the Exposure Adjust...

Page 30: ...ays next to the choice in the Tools menu and the tool appears except for Invert and Use Transparency Adapter Closing a tool Click the Close button in the tool s title bar or from the Tools menu select the name of the tool you want to hide The checkmark disappears and the tool closes The tool s values are still applied to the image Docking a tool Two tools can be docked to the scanning software win...

Page 31: ...ly set to 200 when the True Color output type is selected and set to 300 for the Black White Bitmap raster output type To re apply AutoResolution click in the Output Resolution tool Custom resolution When you choose an output type from the Output Type menu the scanning software automatically applies the optimal output resolution to the image You may override the automatic setting by selecting a di...

Page 32: ... Color or Black White Bitmap raster output types set the value in the Output Resolution tool equal to the resolution of the printer 300 dpi printer 600 dpi printer 1200 dpi printer Resolution tool setting 100 200 300 You can change the resolution settings available in the Resolution tool s list box see page 52 T I P When you change the resolution setting for the image of a picture you will not see...

Page 33: ... the optimal sharpen level After you have drawn a selection area use this tool to select a sharpen level from the list box if necessary reset the sharpen level setting to the optimal value for the current output type The choices in the Sharpen Level list box are listed in order from the least amount of sharpening to the most amount of sharpening None Low Medium High Extreme After you select a new ...

Page 34: ...nt it when you use the image in another program or print it For example you can save a small scanned image from a larger original picture In the Dimensions tool you can set the dimensions of the selection area set the units for the selection area and the output dimensions scale the image to a percentage of the size of the original set the output dimensions of the image for the final scan Original ...

Page 35: ...ded in the final scan select the units you want to work with enlarge or reduce output dimensions of the image for the final scan proportionally by scaling to a percentage of the original s size lock the output dimensions so you can change the dimensions of the selection area without changing the output dimensions To preserve image quality when you use it in another program measure the dimensions o...

Page 36: ...ge exposure settings in the Exposure Adjustment tool the results of the changes can be seen in the preview area T I P After you have drawn a selection area use this tool to adjust highlights in the image adjust shadows in the image adjust midtones in the image adjust output level of white pixels adjust output level of black pixels view black pixels that will be clipped in the final scan view white...

Page 37: ...ol to change the hue by dragging the indicator circle in the Color Wheel with the mouse change the hue by clicking a color s triangle on the Color Wheel to move the indicator circle set color saturation between 0 and 150 the higher the saturation value the brighter the colors change the hue by typing X and Y values for the Color Wheel reset the color controls to the values determined by the scanni...

Page 38: ...ixels above the threshold will be output as white After you have drawn a selection area use this tool to view the distribution of black and white pixels in the selection area set the black and white threshold see page 92 set the color channel set the black and white threshold to the value determined by the scanning software After you change settings in the Black White Threshold tool the results of...

Page 39: ...mages the complementary color is scanned You can invert an image if you save to a raster output types such as TIFF GIF or JPEG Scans saved as B W Vector Text and Text with Images can not be inverted In general Invert is useful for drawings and spot color images When you turn on the Invert option the inverted image is displayed in the preview area T I P Black White Bitmap raster output type Normal ...

Page 40: ...f scanning from the scanner bed When Use Transparency Adapter is checked in the Tools menu the XPA icon appears in the status bar This menu item is available only if the Transparency Adapter is connected See Active Transparency Adapter on page 115 for more details If the menu item is dimmed shut down HP PrecisionScan Pro connect the Active Transparency Adapter to the back of the scanner and re sta...

Page 41: ...ndow or in a tool A popup Help description appears You can also press Shift F1 to display the What s This pointer for the scanning software window To use What s This Help for a tool 1 Click in the title bar of a tool to change the pointer to 2 Click an item in a tool A popup Help description appears HP PrecisionScan Pro Help Use HP PrecisionScan Pro Help to learn about using the scanning software ...

Page 42: ... the scanning software toolbar or from the scanning software Help menu select HP ScanJet Coach for General Scanning HP ScanJet Coach for E Mailing Images or HP ScanJet Coach for Creating Web Pages The HP ScanJet Coach appears Videos Several videos of basic scanning concepts can be accessed from the HP PrecisionScan Pro CD 1 Insert the HP PrecisionScan Pro CD into the CD ROM drive 2 Turn on the com...

Page 43: ...h describes how to use the HP ScanJet Automatic Document Feeder To view an online manual from the Desktop 1 Select the Windows Start button 2 From the Start menu choose Programs then choose HP PrecisionScan Pro HP Online Help and the manual Adobe Acrobat Reader starts and displays the online manual To view an online manual from the scanning software From the scanning software Help menu select the ...

Page 44: ... save a set of settings you give the set of settings a name When you want to use those settings for a different image load the settings using the same name page 46 The settings saved are Output Type Dimensions tool values output size and output scale Output Resolution tool value Sharpen Level tool value Exposure Adjustment tool values Color Adjustment tool values Black White Threshold tool value I...

Page 45: ... appears see page 44 2 Review the settings listed in the Output Settings and the Tools Settings tabs 3 If the settings are acceptable for saving click in the text field of the Save Settings dialog box then type a name for the settings 4 Click Save The Save Settings dialog box closes The named set of settings is saved for future use see page 46 Save Settings dialog box Tools Settings tab ...

Page 46: ...ant to load 3 Review the settings listed in the Output Settings and the Tools Settings tabs 4 If the settings are acceptable for loading click Load The Load Settings dialog box closes The settings are applied to the image Deleting a set of settings 1 From the Scan menu select Save Settings The Save Settings dialog box appears 2 From the list box select the name of the set of settings you want to d...

Page 47: ...see page 48 Selection Area see page 50 Resolution see page 52 Controls see page 53 Text see page 54 Opening the HP PrecisionScan Pro Preferences dialog box From the Scan menu select Preferences The HP PrecisionScan Pro Preferences dialog box appears To activate a checkbox choice in the HP PrecisionScan Pro Preferences dialog box Click the checkbox to place a checkmark in it To activate an option b...

Page 48: ...or enabling a Preview scan when the scanner s Scan button is pushed page 49 best quality scaling page 49 best quality sharpening page 49 maximum pixel depth page 49 To change settings 1 Select the checkboxes you want to turn on or off 2 Click Apply 3 Click another tab or click OK to close the HP PrecisionScan Pro Preferences dialog box All the checkbox choices in this tab are turned on ...

Page 49: ...y scaling is applied to the final scan When this checkbox is not checked scanning is faster because normal quality scaling is applied to the final scan Best Quality Sharpening When this checkbox is checked the highest quality of sharpening is applied to the final scan When this checkbox is not checked scanning is faster because normal quality sharpening is applied to the final scan Maximum Pixel D...

Page 50: ...he best Output Type for the selection area page 51 determine the optimal exposure level for the selection area page 51 determine the optimal color balance and saturation for the selection area page 51 To change settings 1 Select the checkboxes you want to turn on or off 2 Click Apply 3 Click another tab or click OK to close the HP PrecisionScan Pro Preferences dialog box By default when HP Precisi...

Page 51: ...n area contains mostly black and white information Spot Color is applied when the selection area contains large areas of similar color When this checkbox is not checked the scanning software does not change the current output type when a new selection area is created You will need to manually select the appropriate output type from the Output Type menu when you create a new selection area Automati...

Page 52: ... to delete 2 Click Delete 3 Click another tab or click OK to close the HP PrecisionScan Pro Preferences dialog box The Resolution tab of the HP PrecisionScan Pro Preferences dialog box controls the resolution values contained in the Output Resolution tool s list box It has a list of the resolution values currently available in the Output Resolution tool s list box an Add button for adding a resolu...

Page 53: ...nd Black White Threshold tools Using a larger number of bits for the control range results in greater control of compensation for exposure or threshold correction 8 bit readout 0 255 sets the scanner to use 8 bits of tonal resolution per color 10 bit readout 0 1023 sets the scanner to use 10 bits of tonal resolution per color 12 bit readout 0 4095 sets the scanner to use 12 bits of tonal resolutio...

Page 54: ...nces dialog box allows you to select one of the following for the RTF output Framed text Puts the text from the page in frames and attempts to recreate the page formatting as closely as possible to the original Flowed text Eliminates the columns on the page and inserts any images in the text as closely as possible to where they were in the original ...

Page 55: ...anning pictures 3 56 Basic steps for scanning pictures 57 Preview scan 58 Create a selection area 63 Zoom scan 64 Return to the preview image Undo Zoom 65 Set the output dimensions 69 Choose an output type ...

Page 56: ...f you want to save the image as a different size page 65 Choose an Output Type if you need to save the image with different colors For example you could save a color image as a grayscale or a 256 color image page 69 To adjust an image with the True Color or a 256 Color output type Sharpen page 75 Adjust exposure page 77 Adjust color page 87 To adjust an image with the Grayscale output type Sharpen...

Page 57: ...tton Manager is set to communicate with HP PrecisionScan Pro Push the Scan button on the scanner once The scanner performs a Preview scan and the preview image appears in the preview area For information on configuring the HP ScanJet Button Manager see page 12 Using the scanning software to Preview scan You can Preview scan from the scanning software Click the Preview button in the toolbar or from...

Page 58: ...osed by a selection border which you can resize later see page 62 There are several ways to create a selection area click see page 59 draw see page 60 select everything on the scanner glass see page 61 The selection area determines the part of the image that is included in the final scan when you save copy print or drag and drop If no selection area exists you cannot perform drag and drop the enti...

Page 59: ...ith 2 Click A rectangular selection area is created and the parts of the preview image outside the selection area are faded to indicate they will not be included in the final scan To enable clicking to create a selection area enable the Selection Area preference option Automatically create selection area after a mouse click see page 51 T I P A selection border around the picture Selection area ...

Page 60: ...order 3 Release the mouse button Removing the selection area You can delete the selection area so you can create a different one From the Edit menu select Clear Selection or press Esc Selection area Handles Selection border A dashed border surrounds the selection area Handles appear on the corners and in the middle of each side of the selection border The image inside the selection border remains ...

Page 61: ... area From the Edit menu select Select All or press Ctrl A A selection border is drawn around the entire preview area Selecting the entire zoomed area After a Zoom scan use the Select All command to create a selection area containing the entire zoomed area From the Edit menu select Select All or press Ctrl A A selection border is drawn around the entire zoomed area A selection border around the en...

Page 62: ...ges to a bidirectional arrow see page 28 2 Click on the handle and drag the side of the border to a new location 3 Release the mouse button Use the Dimensions tool You can use the fields in the Selection Area Dimensions area of the Dimensions tool to define the exact size of the selection area See page 34 for more about the Dimensions tool 1 From the Tools menu select Dimensions The Dimensions too...

Page 63: ... range Use the Zoom command to see the image better when you adjust it Performing a Zoom scan 1 Create a selection area page 58 2 To enlarge the view of the selection area Click the Zoom button in the toolbar or from the Scan menu choose Zoom The scanner scans the selection area and the selection area fills the preview area Zoomed selection ...

Page 64: ...each one individually Using Undo Zoom Use the Undo Zoom command when you want to create a different selection area in the preview image 1 Click the Undo Zoom button in the toolbar or from the View menu choose Undo Zoom The preview image appears with all settings preserved 2 Select a different area of the preview image 3 Click the Zoom button in the toolbar or from the Scan menu choose Zoom The sca...

Page 65: ...ed the image to be in another program resize it now Resizing an image in the destination program can cause the image to become fuzzy or jagged The usual procedure for setting output dimensions follows this order 1 Choose the units of measurement you want to work with page 66 2 Create a selection area page 58 and adjust the size of the selection area page 62 3 Adjust the output dimensions page 67 O...

Page 66: ...sions and the Output Dimensions areas The units available are inches centimeters points pixels To set units 1 Create a selection area page 58 2 Click the list button in the Units field of the Dimensions tool and select a unit of measurement When you change units the output width value in both Width fields changes the output height value in both Height fields changes the output width value in the i...

Page 67: ...n area page 58 2 Click the list button in the Scale field and select a percentage or type a value in the Scale field then press Enter The new output width appears in the Width field in the Output Dimensions area and in the info bar The new output height appears in the Height field in the Output Dimensions area and in the info bar The new scale percentage appears in the Scale field and in the info ...

Page 68: ...t Dimensions area and in the info bar The new output height appears in the Height field of the Output Dimensions area and in the info bar The new scale percentage appears in the Scale field and in the info bar The new image size displays in the Image Size box in the status bar The selection area remains the same Locking values for output dimension You can lock the output dimensions you have define...

Page 69: ...f the scanning software window However the output type selected by the scanning software may not be the most appropriate for the way you will use the image For example when you want to print the image of a color photograph on a black and white printer you may want to set the output type to Grayscale Some output types are more suitable for images that will be displayed on a monitor others are more ...

Page 70: ...he new image size displays in the status bar a new sharpening level may appear in the Sharpen Level tool a new value may appear in the Output Resolution tool For best results with images that will be used on 256 color display monitors do not use the 256 Color Optimized Palette output type When an optimized palette is used in an image that palette is unique to that image and the unique palette colo...

Page 71: ...ter black and white raster image for printing or displaying on a monitor not appropriate for resizing in another program Scalable vector scalable black and white vector image for resizing in another program 256 Color 8 bit color 256 shades of color Web Palette best color for displaying images on a Web page one color tint image for displaying on a Web page System Palette best color for displaying w...

Page 72: ...ictures 4 73 Tools for making adjustments 75 Sharpen 77 Adjust exposure 87 Adjust color 90 Set output resolution 92 Set threshold for black and white bitmaps 94 Set color channel for black and white bitmaps 96 Invert options ...

Page 73: ...ts you can make The tools available for making adjustments to an image of a picture depend on the Output Type you have selected Adjustments for color output types An image with the True Color or a 256 Color output type can be adjusted for sharpening exposure color resolution Adjustment Tool sharpening Sharpen Level page 75 exposure Exposure Adjustment page 77 color Color Adjustment page 87 resolut...

Page 74: ...adjusted for sharpening exposure resolution Adjustments for Black White Bitmap raster output type An image with the Black White Bitmap raster output type can be adjusted for sharpening resolution black and white threshold Adjustments for Black White Scalable vector output type An image with the Black White Scalable vector output type cannot be adjusted with any of the tools ...

Page 75: ...f the original picture is not sharp or you want to create a special effect you can increase or decrease sharpening with the Sharpen Level tool The sharpen level you select will be applied to the final scan See page 33 for more about the Sharpen Level tool Grayscale output type Medium sharpen level Extreme sharpen level The scanning software automatically selects the optimal sharpen level for the o...

Page 76: ...ew area The AutoSharpen button in the Sharpen Level tool becomes active Applying the default sharpen level Click the AutoSharpen button in the Sharpen Level tool The optimal sharpen level determined by the scanning software is applied to the Sharpen Level tool The result of the change to the sharpen level can be seen in the preview area Black White Bitmap raster output type None sharpen level Extr...

Page 77: ...o view the distribution of pixels see page 81 read the RGB values of the pixels in the image see page 81 The Exposure Adjustment tool is active for the color and grayscale output types Using the Exposure Adjustment tool 1 From the Tools menu select Exposure Adjustment The Exposure Adjustment tool appears See page 36 2 Refer to the following sections for using the Exposure Adjustment tool Changing ...

Page 78: ... in the Highlights field is set in the Preference Controls tab see page 53 Bringing out details in light areas To bring out details in the light areas of the image decrease the number in the Highlights field Click on the left side of the slider or type a lower number in the Highlights field then press Tab or Enter or click the DOWN spin button next to the Highlights field slider field DOWN spin bu...

Page 79: ...he Shadows field is set in the Preference Controls tab see page 53 Bringing out details in dark areas To bring out details in the dark areas of the image decrease the number in the Shadows field Click on the left side of the slider or type a lower number in the Shadows field then press Tab or Enter or click the DOWN spin button next to the Shadows field The result of the change to Shadows can be s...

Page 80: ...brighten the image overall increase the number in the Midtones field Click on the right side of the slider or type a higher number in the Midtones field then press Tab or Enter or click the UP spin button next to the Midtones field The result of the change to Midtones can be seen in the preview area Midtones slider field DOWN spin button UP spin button control If you will be sharing the image with...

Page 81: ...ram represents the current setting for Highlights the lightest areas in the image The turquoise line appears in the histogram when either eyedropper pointer is positioned over the image It shows you where the pixels at that place in the image occur in the histogram Changing the settings for Highlights and Shadows does not change the graph in the histogram Changing the selection area changes the gr...

Page 82: ...n the Exposure Adjustment tool When you click the pointer changes to this When you click the pointer changes to this 2 Move the pointer over the image The RGB values and pixel color appear in the RGB Meter The turquoise line appears in the histogram 3 Click the same eyedropper button again The RGB Meter dims The pointer returns to normal RGB values Pixel color Do not click while the eyedropper poi...

Page 83: ...r with no ink or toner and therefore no detail The darkest areas will print with the blackest color of ink or toner saturating the area with the same color of black with no visible detail The Exposure Alert buttons in the Exposure Adjustment tool are for viewing white pixels that will be clipped in the final scan for viewing black pixels that will be clipped in the final scan Appearance when neith...

Page 84: ...els disappear from the image The result of the change to Highlights can be seen in the preview area 3 Click the white Exposure Alert button again The Exposure Alert button turns off Viewing and removing clipped dark areas 1 Click the black Exposure Alert button The dark areas in the image that will print as pure black appear white in the preview area 2 In the Shadows control click the DOWN spin bu...

Page 85: ... effects in images of pictures The ranges for the numbers in the White and Black fields are set in the Preference Controls tab see page 53 1 Click the Output Levels checkbox in the Exposure Adjustment tool to select it The White and Black output levels controls appear in the Exposure Adjustment tool 2 Click on the one side of a slider or type a different number in the White or Black field then pre...

Page 86: ...nt to create an image to use as a backdrop for light text on a dark background such as with color slides decrease the White output level value until the image is as faint as you like Click the Auto button in the Exposure Adjustment tool to change all the exposure settings to the optimal exposure settings determined by the scanning software T I P Appearance with White control 255 Black control 0 Ap...

Page 87: ...ette 256 Color Optimized Palette 1 From the Tools menu select Color Adjustment The Color Adjustment tool appears see page 37 2 Change the color balance or saturation as described below The color settings you select will be applied to the final scan Changing color balance Use the Color Wheel in the Color Adjustment tool to change color balance hue Moving the indicator circle When the image has too ...

Page 88: ... image diluted colors The range for the number in the Saturation field is 0 to 150 The result of the change to the saturation value can be seen in the preview area Increasing the amount of color Increase the number in the Saturation field to make colors in the image more vivid Click on the right side of the slider or type a higher number in the Saturation field then press Tab or Enter or click the...

Page 89: ...ield Applying the default color settings Click the Auto button in the Color Adjustment tool The optimal color settings determined by the scanning software are applied to the Color Adjustment tool The results of the changes to the color settings can be seen in the preview area Saturation set at 100 Saturation set at 150 Saturation set at 75 ...

Page 90: ... Output Resolution tool will be applied to the final scan Resolution settings for photographs Follow these guidelines to set output resolution for color or black and white photographs Use 75 as the output resolution setting when you plan to display the image on a monitor in a Web page the output type is 256 Color Web Palette 256 Color System Palette 256 Color Optimized Palette or Grayscale Use 100...

Page 91: ...Bitmap raster Use 300 as the output resolution setting when you plan to print the image on a 300 DPI printer the output type is 256 Color Optimized Palette Grayscale or Black White Bitmap raster Use 600 as the output resolution setting when you plan to print the image on the HP PhotoSmart printer or a 600 DPI printer the output type is 256 Color Optimized Palette Grayscale or Black White Bitmap ra...

Page 92: ... White Threshold tool for an image that has the Black White Bitmap raster output type See page 38 for more about the Black White Threshold tool Applying the default threshold Click the Auto button in the Black White Threshold tool The optimal black and white threshold setting determined by the scanning software is applied to the Black White Threshold tool The result of the change to the threshold ...

Page 93: ...ite Threshold field click on the left side of the slider or drag the slider to the left or type a lower number in the Black White Threshold field then press Tab or Enter or click the DOWN spin button next to the Black White Threshold field The result of the change to the black and white threshold setting can be seen in the preview area The range for the number in the threshold field is set in the ...

Page 94: ...reshold see page 93 5 Select a color channel from the Scan using channel list box in the Black White Threshold tool To eliminate all the red in colored line art or from a drawing printed on red or pink paper choose the Red channel The red components of each pixel in the image will be mapped to white and green and blue components of each pixel will be mapped to black To eliminate all the green in c...

Page 95: ...hite Threshold tool Original with True Color output type Black White Bitmap raster output type applied with NTSC Gray color channel and automatic threshold 110 Red color channel and automatic threshold 110 Green color channel and automatic threshold 110 Blue color channel and automatic threshold 110 Blue color channel and higher threshold 173 The NTSC Gray channel in the Scan using channel list bo...

Page 96: ...age A color image will look like the negative of a color photo You can invert an image if you save to a raster output types such as TIFF GIF or JPEG Scans saved as B W Vector Text and Text with Images can not be inverted This tool is probably most useful for B W bitmaps and grayscale images When you turn on the Invert option the inverted image is displayed in the preview area T I P Black White Bit...

Page 97: ...5 Scanning text 5 98 Scan and convert a block of text 101 Scan a whole page ...

Page 98: ...rea click the Zoom button in the toolbar or from the Scan menu choose Zoom The scanner scans the selection area and the selection area fills the preview area 5 Adjust the selection area to include all the characters you want in the final scan see page 62 6 To begin the final scan and the character conversion scan to a destination see page 99 or drag and drop to another program see page 99 or Copy ...

Page 99: ...ton and drag the image to its position in the open document The pointer changes to 5 Release the mouse button A final scan of the image is performed The text is converted to editable text and placed in the open document Always Zoom scan a selection area you want to convert to text then adjust the position and size of the selection area to be sure it contains all the characters you want to convert ...

Page 100: ... receive the text Position the pointer where you want to place the text then click From the program s Edit menu choose Paste or press Ctrl V The text appears where you pasted it Save to a file 1 Click the Save As button in the toolbar or from the Scan menu select Save As or press Ctrl S The Save As dialog box appears The only file format choice in the Save as type list box is Text File txt 2 In th...

Page 101: ...Image 4 From the Scan menu select Save As The Save As dialog box appears The only file format choices in the Save as type list box are PDF pdf Rich Text Format rtf and HTML 5 In the Save in box choose the directory where you want to save the file 6 In the File name box type a name for the file 7 Click Save A final scan of the entire area of the scanner glass is performed The text is converted to e...

Page 102: ...g scanned images 6 103 How you can use the image 104 Print the image 105 Scan to a destination 106 Drag and drop to another program 107 Drag and drop to the Desktop 108 Copy to the Clipboard 109 Save to a file ...

Page 103: ... by placing it directly from the scanning software into another program When you save the document you placed the image in the image is saved with the document You can place the image directly into another program using scan to a destination see page 105 drag and drop see page 106 copy and paste see page 108 TWAIN see page 11 Make the image permanent by saving it to a file An image file can be cre...

Page 104: ...opy of the image in the selection area you will be able to see the size and quality of the printed image Use the Print command to send a copy of the image to a printer The Print command is unavailable for vector line art text and text image Output Types N O T E If no selection area has been drawn the entire area of the scanner glass is printed Be sure to keep the original in the same place on the ...

Page 105: ...an to a destination Select this option to scan to A blank page in an application i e Microsoft Word An opened document in an application this option is not available with all applications A document management application A web page creation application A print or fax modem application ...

Page 106: ...s position in the open document The pointer changes to If the pointer changes to the destination program does not accept drag and drop 5 Release the mouse button A final scan of the image is performed The image appears in the destination program The image in the selection area can be dragged and dropped into another program that supports drag and drop After the image is dropped into the destinatio...

Page 107: ...bitmap file named Scan bmp is created on the Desktop or in the folder in the Windows Explorer You can create a bitmap file of the image in the selection area by dragging the selection area to the Desktop or to a folder in the Windows Explorer The file name for each new bitmap file after the first one created this way includes a number in parentheses Be sure to keep the original in the same place o...

Page 108: ...stination program 2 Open the document and view the page that will receive the image 3 Position the pointer where you want to place the image then click 4 From the program s Edit menu choose Paste or press Ctrl V The image appears where you pasted it The image in the selection area can be copied to the Clipboard then pasted into the destination program After the image is pasted into the destination...

Page 109: ...d easier GIF Image gif GIF is a compressed file format suitable for an image that will be used on the Web or on multiple platforms You can save your GIF file as an interlaced GIF HTML htm HTML is useful for text and graphics that will be viewed on the World Wide Web When this format is selected for an image and text the text is converted to editable text and is saved as HTML and the graphics are s...

Page 110: ... is used with the Save As Whole Page command to create an RTF file of a page that contains text or text and pictures The formatting of text in an RTF file can usually be interpreted by other programs Text File txt The Text File file format is used for saving to a txt file when the selection area contains only text the Text output type is applied you want the text converted to editable unformatted ...

Page 111: ... as type list box choose a file type 5 Click Save A final scan of the image is performed The image is saved to the file The file name extension for the selected file type is automatically added to the file name Reducing file size You can reduce the size of an image file in the scanning software by reducing resolution avoiding the True Color output type reducing the scale of the image saving with a...

Page 112: ...7 Scanning transparencies 7 113 The 35mm slide adapter 114 Scan the slide 115 Active Transparency Adapter ...

Page 113: ...t stays up 2 Place the adapter next to the top edge of the scanner glass so that the arrowhead on the adapter points to the arrowhead on the scanner bed 3 Tip the adapter toward the scanner lid 4 Turn the slide so the emulsion side is next to the scanner glass 5 Orient the slide with the top of the picture directed to the top edge of the scanner glass 6 Place the slide under the notched section of...

Page 114: ...3 Zoom scan page 63 4 Set the output dimensions page 65 5 If necessary make adjustments to the image see Chapter 4 Adjusting images of pictures page 72 6 Save copy drag and drop or print see Chapter 6 Saving scanned images page 102 A Preview scan of the slide Be sure to keep the slide in the same place on the scanner glass until the final scan of the image is completed T I P A Zoom scan of the sel...

Page 115: ...y Adapter XPA to scan instead of scanning from the scanner bed 1 Plug the Active Transparency Adapter XPA connector into back of scanner 2 Place the large template on the scanner bed 3 Position the transparency For scanning general transparencies up to 5 inches by 5 inches 12 7 centimeters by 12 7 centimeters place the transparency in the large cut out in the middle of the template ...

Page 116: ...ll template 4 Place the Active XPA over the transparency Align it to fit in the corner cut outs on the large template 5 Close the lid on the scanner you may leave it up 6 Check the Use Transparency Adapter option in the HP scanning software In HP PrecisionScan Pro it s under the Tools menu In HP PrecisionScan it s under the Settings menu 7 Scan as you usually do See Use Transparency Adapter Tool o...

Page 117: ...ning 49 bitmap file format 109 Black White Bitmap raster output type 21 Black White Scalable vector output type 21 Black White Threshold tool 38 39 92 93 94 95 control range preferences 53 black and white adjustments 74 bitmap raster 74 color channel 94 95 output types 74 scalable vector 74 black and white threshold 92 93 95 Blue color channel 95 bmp 109 brightness 78 79 80 button Scan configuring...

Page 118: ... the Desktop 107 drawings output types for 91 resolution 91 resolution for 32 E Edit menu 20 8 bit readout 0 255 53 eliminating details 83 red green or blue 94 95 e mail scanning 14 exposure adjusting 36 77 automatic application 51 defaults 77 Exposure Adjustment tool 36 77 control range preferences 53 78 histogram 81 RGB Meter 82 eyedropper pointers 29 F fax scanning 15 file formats 109 saving im...

Page 119: ...pg 110 L Load Settings command 19 loading settings 46 M Maximum Pixel Depth 49 menus Edit 20 Help 23 Output Type 21 Scan 19 Tools 22 View 20 midtones 36 77 80 monitors 256 color 70 N NTSC Gray color channel 95 O online Help using 41 online manuals 43 optimized palette 70 output dimensions 34 65 output levels for pixels 85 output resolution 31 90 Output Resolution tool 31 90 adding or deleting valu...

Page 120: ...le 100 101 109 111 scaling 34 67 preferences 49 Scan button on scanner configuring 12 using 10 57 Scan menu 19 scan to a document management application 16 scan to a fax 15 Scan To command 24 scan to e mail 14 scan using channel 94 95 ScanJet Button Manager 57 scanner HP support 3 placing original 9 scanner buttons 13 scanner Document Management button 16 scanner E mail button 14 scanner Fax butto...

Page 121: ...evel 33 75 Use Transparency Adapter 115 Tools menu 22 ToolTips 41 transparencies scanning 112 115 116 True Color output type 21 turning off automatic color 51 automatic exposure 51 automatic output type 51 automatic selection area 51 Best Quality Scaling 49 Best Quality Sharpening 49 Maximum Pixel Depth 49 TWAIN 11 12 bit readout 0 4095 53 256 Color Optimized Palette output type 21 System Palette ...

Reviews: