3-15
Installation and Configuration
1. Press the
Access Pens
button. The pen carriage moves out from the pen service sta-
tion at the left of the plotter and stops in front of the slot in the bail.
2. When the pen carriage stops and the display reads ªOpen window to access pens,º
open the window.
Note
If you don’t open the window within 30 seconds after the message is dis-
played, the pen carriage returns to the pen service station.
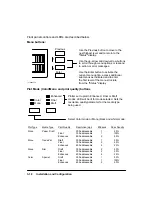
3. Refer to the plotter display. The display indicates, via flashing icon(s), which pen
position(s) is/are detected to be in need of servicing. The four icons represent the
following pen positions: outer left = Y (yellow), inner left = M (magenta), inner
right = C (cyan), outer right = K (black).
Note
In monochrome mode, only the black pen icon will appear solid, while the
remaining icons are outlined. In color mode, all pen icons will appear solid.
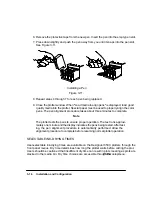
4. Place your hand on top of the pen you are replacing and press down slightly as you
pull the pen toward you. See Figure 3-10.
5. Lift the pen out of its slot.
Summary of Contents for 650c - DesignJet Color Inkjet Printer
Page 1: ...PrinterFAQ COM HP DesignJet650C User Guide ...
Page 126: ...7 10 Adjustments Calibrations Notes ...
Page 156: ...9 4 Product History Notes ...
Page 165: ...10 9 Parts and Diagrams Illustrated Parts Breakdown C2859A Electronics Enclosure C C2858 3 1 ...
Page 167: ...10 11 Parts and Diagrams Illustrated Parts Breakdown C2858A Electronics Enclosure C C2858 4 1 ...
Page 183: ...10 27 Parts and Diagrams Illustrated Parts Breakdown Paper Drive Assemblies C C2858 12 1 ...
Page 199: ......


