background image

Deschutes Disassembly                                                                     


4

 / 

14


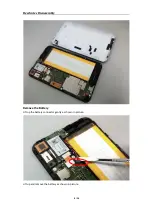
Remove the Battery 

Lift up the battery connector gently as shown in picture. 


Lift up and remove the battery as shown in picture. 

Summary of Contents for 7 Plus G2

Page 1: ...ed Circuit Boards PCB or Printed Circuit Assemblies PCA With a surface greater than 10 sq cm 1 Batteries All types including standard alkaline and lithium coin or button style batteries 1 Mercury containing components For example mercury in lamps display backlights scanner lamps switches batteries 1 Liquid Crystal Displays LCD with a surface greater than 100 sq cm Includes background illuminated d...

Page 2: ...er Description 2 Description 3 Description 4 Description 5 3 0 Product Disassembly Process 3 1 List the basic steps that should typically be followed to remove components and materials requiring selective treatment 1 Follow steps described in Disassembly instruction file attached 2 If parts can be removed without using a tool remove it first 3 Use correct screwdriver and torque value before unlock...

Page 3: ...Deschutes Disassembly 1 14 Deschutes Disassembly Introduction ...

Page 4: ...reassemble the PAD for maintenance and troubleshooting IMPORTANT 1 The use of metal tools during disassembly may damage the casing Use plastic tools where possible 2 Cover the work area with a clean dry lint free cloth before placing the PAD face down 3 Please turn off your device before disassembly ...

Page 5: ...ARDOWN THE TABLET Remove SD card and SIM card Open the SD SIM card cap as shown in picture and remove the SD SIM card from its slot Remove the battery cover Insert the pry bar as shown in picture slide up and down to release battery cover Below is the general view after the battery cover is removed ...

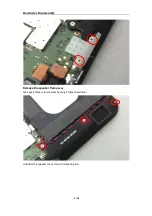
Page 6: ...Deschutes Disassembly 4 14 Remove the Battery Lift up the battery connector gently as shown in picture Lift up and remove the battery as shown in picture ...

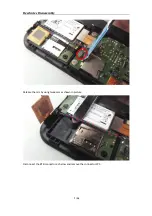
Page 7: ...Deschutes Disassembly 5 14 Remove the side key Remove the side key with tweezers as shown in picture Remove the diversity antenna Disconnect the RF connector ...

Page 8: ...Deschutes Disassembly 6 14 Unscrew below 2 screws as shown in picture Lift up the frame and peel off it from front cover gently Remove the Sub mainboard Disconnect the TP connector as shown in picture ...

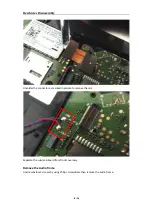
Page 9: ...Deschutes Disassembly 7 14 Release the mic by using tweezers as shown in picture Disconnect the BTB connector as below and remove the connector FPC ...

Page 10: ...ly 8 14 Unsolder the connector as marked in picture to remove the mic Separate the sub mainboard from front cover assy Remove the Audio frame Unscrew below 2 screws by using Philips screwdriver then remove the audio frame ...

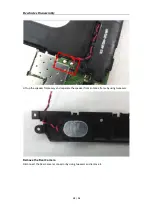
Page 11: ...Deschutes Disassembly 9 14 Remove the speaker frame assy Take apart three screws below by using Philips screwdriver Unsolder the speaker connector with soldering iron ...

Page 12: ...utes Disassembly 10 14 Lift up the speaker frame assy and separate the speaker from antenna frame by using tweezers Remove the Rear Camera Disconnect the Rear Camera connector by using tweezers and remove it ...

Page 13: ...Deschutes Disassembly 11 14 Separate the rear camera rubber from camera Remove the Mainboard Unsnap the LCD FPC connector by using tweezers and disconnect FPC ...

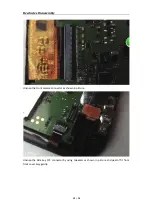
Page 14: ...Deschutes Disassembly 12 14 Unsnap the Front camera connector as shown in picture Unsnap the Side key FPC connector by using tweezers as shown in picture and peel off it from front cover assy gently ...

Page 15: ...Deschutes Disassembly 13 14 Remove below four screws by using Philips screwdriver Lift up and remove the Mainboard gently Remove Front Camera Remove the front camera from Mainboard gently ...

Page 16: ...Deschutes Disassembly 14 14 Separate the camera and camera rubber below The end ...

Reviews: