


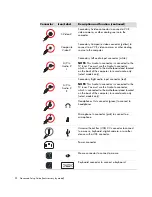
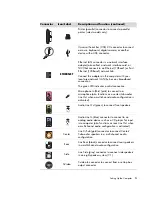
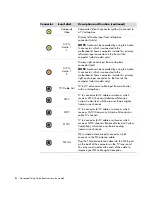
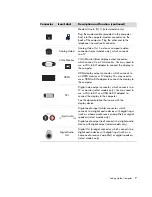


Setting Up the Computer
1
Setting Up the Computer
Putting the Computer Together
Follow the steps on the setup poster to set up the computer. Read the topics in this section
to learn more about the location of components and connectors on the computer, and to
learn about some setup alternatives.
Look in the computer box for printed details or updates regarding the computer.
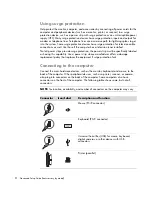
Placing the computer in the proper location
When setting up your new computer, place it where ventilation openings are unobstructed.
Make sure that all connections are secure and that all cabling is out of the way. Do not
place cabling in walkways or where it can be stepped on or damaged from placing
furniture on it.
WARNING: The power supply is preset for the country/region in which you
purchased your computer. If you move, please check the voltage requirements
for your new location before plugging the computer into an AC power outlet.
WARNING: Please read “Safety Information” in the
Limited Warranty
and Support Guide
before installing and connecting the computer to
the electrical power system.
Summary of Contents for A6400f - Pavilion - 3 GB RAM
Page 1: ...Advanced Setup Guide ...
Page 6: ...vi Advanced Setup Guide features vary by model ...
Page 68: ...Part number 5992 3542 ...


