


26
Trou
bleshooting and Maintenance
Guide
5
In the Re
cover
y Manage
r Welcome
window
, click
the
Advanced options
button.
6
Choo
se the s
yste
m r
ecove
ry opti
on that re
covers
your computer to its original factor
y condition,
and then
click
Next
.
7
Click
Next
at the next screen that prompts
yo
u
todo
so.
You
r comp
uter re
starts.
8
In th
e Welc
ome wi
ndow
, cl
ick
Next
.
9
When prompted to per
for
m a system restore, click
No
, and then cl
ick
Next
.
10
Click
Yes
to perfor
m a system
recovery, and then
click
Next
.
11
If you are p
rompted
to back up your files, and
you
have not done so, click
Yes
. Othe
rw
ise, click
No
,
and then
click
Next
.
System
re
cover
y be
gins
. Af
ter
syst
em r
ecov
ery
is
complete, the compu
ter restar
ts.
12
Comple
te the registration process, and
wait until
you
see the
deskto
p.
13
Tur
n off
the computer, reconnect
all peripheral
device
s, and tur
n the
computer ba
ck on.
14
Perfor
m the procedure “Per
forming the
po
st-re
cov
ery
procedure” o
n pag
e2
7.
System recovery
at system
startup
If Windows V
ista is not respond
ing, but the computer i
s
wo
rking
, u
se thes
e step
s to pe
rform a
sys
tem re
cover
y:
1
Tur
n off the computer
. If
necessary,
press andh
old
the On button unt
il the computer
turns
off.
2
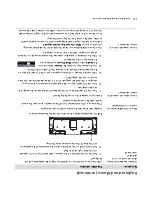
Disco
nne
ct a
ll pe
riph
eral devices from the
computer
,e
xcept the monitor, keyboa
rd, and
mouse.
3
Press the On
button
to tur
n on the computer
.
4
As soon as you see
the initial company
logo
screen appear
, repeatedly
press the F11
key on
your keyboard until the Recover
y Mana
ger
window
opens.
5
Click
Advan
ced
opti
on
s
.
6
In
the Advanced options window, cl
ick
System
recove
ry
, and then click
Next
.
7
If you are p
rompted
to back
up fil
es, and you
have
already done so, click
No
, and the
n click
Nex
t
.
System
recove
ry be
gins
. After system recover
y is
comple
te, the comp
uter restarts.
8
Complete the registration
process, and wait until
you se
e the
desk
top.
9
Tur
n off
the computer
, reconnect all peripheral
devices,
and turn
the computer b
ack
on.
10
Per
for
m the procedure i
n “P
erfor
ming the
post-recovery procedure” on page
27.
Starting system
recovery
from
recover
y discs
This sectio
n contains the
procedure for
perfor
ming a
syste
m re
cover
y fro
m the r
ecove
ry di
scs you cre
ated as
described in
“Creating Recover
y Discs” on page
24.
To
perfor
m a system recovery program
using
recovery
discs:
1
If the c
ompu
ter
is
wo
rkin
g, crea
te a backu
p CD or
DVD containing all the data file
s you want to
save.
When you are done, remove
the backup d
isc from
the drive tray
.
2
Inser
t recover
y disc #1
into the appropriate drive
tray (CD or DVD), and
close the tray
.
NOTE:
If your
system does not detect a recover
y
partit
ion, it will pr
ompt you to insert a
recovery
disc.
NOTE:
System recovery deletes all data and p
rograms
you created or installed af
ter purc
hase. T
herefo
re,
ensure yo
u back up, to
a removable disc, any da
ta
you want to keep.
NOTE:
System recovery deletes all data and
programs
you created or insta
lled after p
urchase. Therefore,
ensu
re yo
u back u
p, onto
remova
ble discs, any data
you wa
nt to keep.
CAUT
ION
: A
ll da
ta o
n the hard
disk drive
will be
deleted. Y
ou wi
ll lose data
if it is
not
back
ed u
p.
Summary of Contents for A6600f - Pavilion - 3 GB RAM
Page 1: ...疑難排解與維護手冊 ...
Page 4: ...iv 疑難排解與維護手冊 ...
Page 32: ...www hp com ...
Page 33: ......
Page 61: ...iv Troubleshooting and Maintenance Guide ...
Page 64: ...Troubleshooting and Maintenance Guide Printed in ...


