background image

iii

B321/B421

Important Safety Instructions

1.  Read these instructions.
2.  Keep these instructions.
3.  Heed all warnings.
4.  Follow all instructions.
5.  Do not use this apparatus near water.
6.  Clean only with dry cloth.
7.  Do not block any ventilation openings. Install in accordance 

with the manufacturer’s instructions.

8.  Do not install near any heat sources such as radiators, heat 

registers, stoves, or other apparatus (including amplifiers) 

that produce heat.

9.  Do not defeat the safety purpose of the polarized or 

grounding-type plug. A polarized plug has two blades with 

one wider than the other. If the provided plug does not fit 

into your outlet, consult an electrician for replacement of the 

obsolete outlet.

10. Protect the power cord from being walked on or pinched 

particularly at plugs, convenience receptacles, and the point 

where they exit from the apparatus.

11. 

Only use attachments/accessories specified by the 

manufacturer.

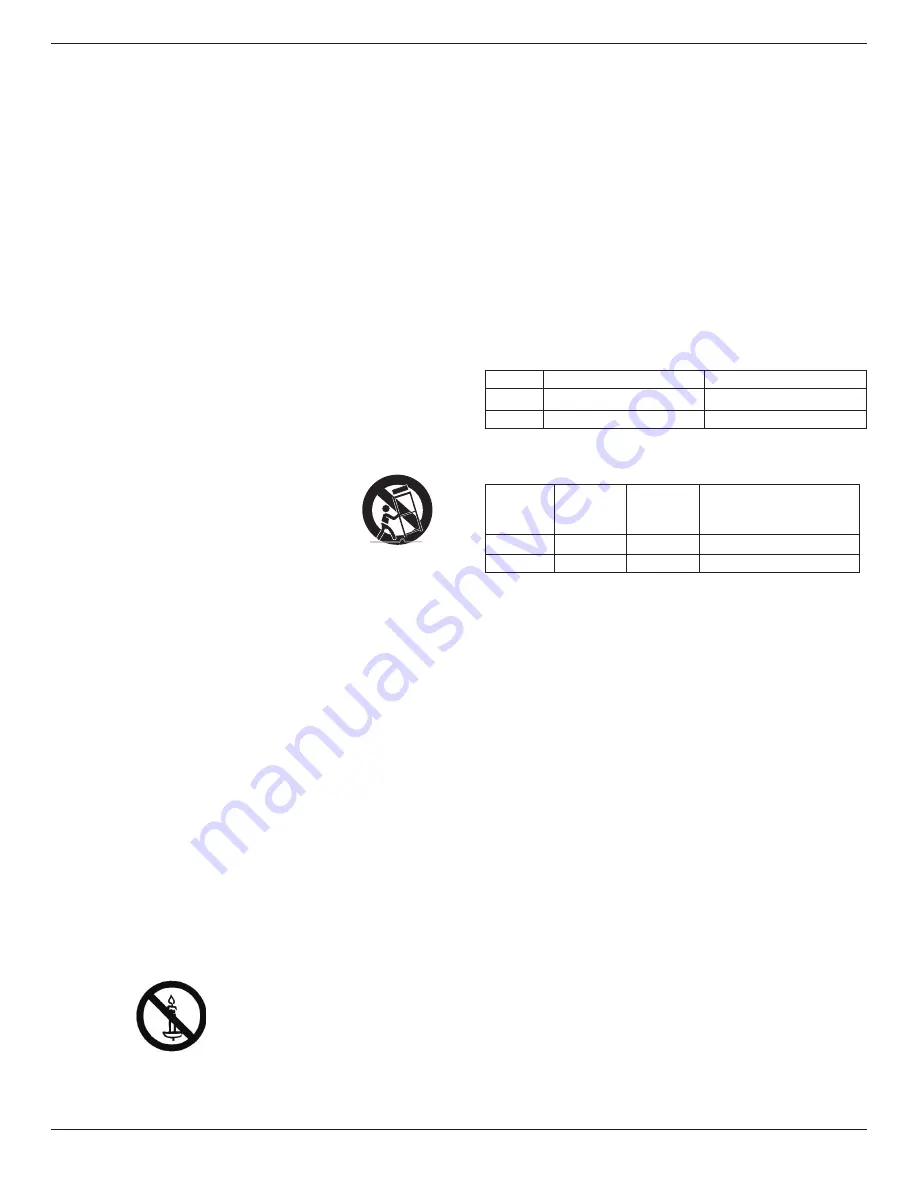
12. Use only with the cart, stand, tripod, bracket, 

or table specified by the manufacturer, or 

sold with the apparatus. When a cart is used, 

use caution when moving the cart/apparatus 

combination to avoid injury from tip-over.

13. Unplug this apparatus during lightning storms or when 

unused for long periods of time.

14. 

Refer all servicing to qualified service personnel. Servicing 

is required when the apparatus has been damaged in any 

way, such as power-supply cord or plug is damaged, liquid 

has been spilled or objects have fallen into the apparatus, 

the apparatus has been exposed to rain or moisture, does 

not operate normally, or has been dropped.

WARNING

:   TO REDUCE THE RISK OF FIRE OR ELECTRIC 

SHOCK, DO NOT EXPOSE THIS APPARATUS 

TO RAIN OR MOISTURE.

WARNING

:   Apparatus shall not be exposed to dripping or 

splashing and no objects filled with liquids, such 

as vases, shall be placed on the apparatus.

WARNING

:   The batteries (batteries installed) shall not be 

exposed to excessive heat such as sunshine, fire 

or the like.

WARNING

:   The mains plug or appliance coupler is used as 

the disconnect device,the disconnect device shall 

remain readily operable.

WARNING

:   To prevent the spread of fire, keep candles or 

other open flames away from this product at all 

times. 

WARNING

:   To prevent injury, this apparatus must be securely 

attached to the floor/wall in accordance with the 

installation instructions.

CAUTION

:   These servicing instructions are for use by 

qualified service personnel only. To reduce the 

risk of electric shock,do not perform any servicing 

other than that contained in the operating 

instructions unless you are qualitified to do so.

CAUTION

:   Excessive sound pressure from earphones and 

headphones can cause hearing loss. Adjustment 

of the equalizer to maximum increases the 

earphone and headphone output voltage and the 

sound pressure level. Therefore, to protect your 

hearing, adjust the equalizer to an appropriate 

level.

For UL/CUL application

: For use only with UL Listed Wall 

Mount Bracket with minimum weight/load: 

Model

Viewable Image Size

Minimum weight/load (kg)

B321

80.0cm(31.5 in.)diagonal

19.8


B421

106.7cm(42 in.)diagonal

35.7

For CB application

: The equipment and its associated 

mounting means still remain secure during the test. 

Model

Unit Weight 

(kg)

VESA Size 

(mm)

Mounting Screws*

(X=Thickness of wall-

mount plate)

B321

6.6

200 × 100

M6 × (16 + X)

B421

11.9

400 × 400

M6 × (20 + X)

Summary of Contents for B321

Page 1: ...B321 B421 HP LED Digital Signage Display User Guide ...

Page 2: ... However never use alcohol solvents or ammonia based liquids Consult a service technician if the display does not operate normally when you have followed the instructions in this manual The casing cover should be opened only by qualified service personnel Keep the display out of direct sunlight and away from stoves or any other heat sources Remove any object that could fall into the vents or preve...

Page 3: ...ly or has been dropped WARNING TO REDUCE THE RISK OF FIRE OR ELECTRIC SHOCK DO NOT EXPOSE THIS APPARATUS TO RAIN OR MOISTURE WARNING Apparatus shall not be exposed to dripping or splashing and no objects filled with liquids such as vases shall be placed on the apparatus WARNING The batteries batteries installed shall not be exposed to excessive heat such as sunshine fire or the like WARNING The ma...

Page 4: ...moisture THIS CLASS B DIGITAL APPARATUS MEETS ALL REQUIREMENTS OF THE CANADIAN INTERFERENCE CAUSING EQUIPMENT REGULATIONS This device complies with Part 15 of the FCC Rules Operation is subject to the following two conditions 1 this device may not cause harmful interference and 2 this device must accept any interference received including interference that may cause undesired operation Electric Ma...

Page 5: ...should not be greater than 5A NOTE The severed plug must be destroyed to avoid a possible shock hazard should it be inserted into a 13A socket elsewhere How to connect a plug The wires in the mains lead are coloured in accordance with the following code BLUE NEUTRAL N BROWN LIVE L GREEN YELLOW EARTH E 1 The GREEN YELLOW wire must be connected to the terminal in the plug which is marked with the le...

Page 6: ...对人体 财产带来严重损害的期限 在环境保护期限中 请按照使用说明书使用本产品 本环境保护使用不覆盖易损件 电池 废弃电子产品回收处理管理条例 提示性说明 为了更好地关爱及保护地球 当用户不再需要此产品或产品寿命 终止时 请遵守国家废弃电器电子产品回收处理相关法律规定 将其交给当地具有国家认可的回收处理资质的厂商进行回收处 理 仅适用于非热带气候条件下安全使用 汉 文 仅适用于非热带气候条件下安全使用 蒙古文 藏 文 维 文 壮 文 Dan hab yungh youq gij dienheiq diuzgen mbouj dwg diegndat haenx ancienz sawjyungh 2000m 仅适用于海拔2000m以下地区安全使用 汉 文 仅适用于海拔 2000m 以下地区安全使用 蒙古文 藏 文 维 文 壮 文 Hai dou gaxgonq wngdang sien du...

Page 7: ...ouseholds This marking on the product or on its packaging illustrates that under European Directive 2002 96 EC governing used electrical and electronic appliances this product may not be disposed of with normal household waste You are responsible for disposal of this equipment through a designated waste electrical and electronic equipment collection To determine the locations for dropping off such...

Page 8: ...s in the remote control 6 2 3 3 Handling the remote control 6 2 3 4 Operating range of the remote control 6 3 Connection 7 3 1 Connecting External Equipments 7 3 2 Connecting Multiple Displays 8 3 2 1 RS232C control connection optional 8 3 2 2 IR connection optional 8 3 3 IR Pass through Connection optional 8 3 4 Wire connecting to Network optional 9 4 Operation 10 4 1 Watch the Connected Video So...

Page 9: ... packing material for shipping the display 1 3 Installation Notes Due to the high power consumption always use the plug exclusively designed for this product If an extended line is required please consult your service agent The distance between the back of the product and the wall should be maintained for proper ventilation Avoid installing the product in the kitchen bathroom or any other places w...

Page 10: ...revent the display from falling To lessen the probability of injury and damage resulting from fall of the display in case of earthquake or other natural disaster be sure to consult the bracket manufacturer for installation location Ventilation Requirements for enclosure locating To allow heat to disperse leave space between surrounding objects as shown in the diagram below 100 mm 100 mm 100 mm 100...

Page 11: ...hlight bar down to adjust the selected item while OSD menu is on 6 button Press to increase the adjustment while OSD menu is on or to increase the audio output level while OSD menu is off 7 button Press to decrease the adjustment while OSD menu is on or to decrease the audio output level while OSD menu is off 8 Remote control sensor and power status indicator Receives command signals from the remo...

Page 12: ... video source input 8 AUDIO IN RCA Audio input from external AV device 9 AUDIO OUT RCA Audio signal output to connect your external AV device 10 AUDIO IN 3 5mm Audio input from your PC 11 SPDIF OUT Digital audio signal output to connect your external AV device 12 IR OUT 13 IR IN 3 5 mm IR signal output input for the loop through function NOTES This display s remote control sensor will stop working...

Page 13: ...ION buttons Navigate through menus and select items 7 button Confirm an entry or selection 8 ADJUST button Access currently available options picture and sound menus 9 BACK button Return to the previous menu page or exit from the previous function 10 VOLUME button Adjust volume 11 MUTE button Press to turn the mute function on off 12 COLOR buttons Select tasks or options 13 NUMERIC buttons Enter t...

Page 14: ...h exposed battery acid as it can damage your skin NOTE If you do not intend to use the remote control for a long period remove the batteries 2 3 3 Handling the remote control Do not subject to strong shock Do not allow water or other liquid to splash the remote control If the remote control gets wet wipe it dry immediately Avoid exposure to heat and steam Other than to install the batteries do not...

Page 15: ...poses only 3 1 Connecting External Equipments DVD VCR VCD PC STEREO AMPLIFIER AUDIO OUT USB RS232C IN OUT IR IN OUT AUDIO IN AUDIO IN COMPONENT OUT YPbPr SPDIF HDMI IN DVI IN RJ 45 VGA IN COMPONENT IN AUDIO OUT DVI OUT VGA OUT USB AUDIO OUT AUDIO IN HDMI OUT AC IN Y Pb Pr R L R L USB ...

Page 16: ...RS 232C RS232C OUT RS232C IN RS232C OUT 3 2 2 IR connection optional DISPLAY 1 DISPLAY 2 IR IN IR OUT IR IN External IR Receiver IR OUT NOTE This display s remote control sensor will stop working if the IR IN is connected 3 3 IR Pass through Connection optional DISPLAY DVD VCR VCD DVD VCR VCD Remote Control IR OUT IR IN ...

Page 17: ...RNET To setup the network 1 Switch on the router and switch on its DHCP setting 2 Connect the router to this display with an Ethernet cable 3 Press button to display the OSD menu 4 Press or button to select the menu item Network settings Press button to enter its submenu 5 Press or number button to adjust its value Press button to confirm NOTE Connecting with a shielded CAT 5 Ethernet cable to com...

Page 18: ...twork A media server running on your computer Appropriate settings on your computer firewall to allow you to run the media server Set up the network 1 Connect your display and the computer to the same network See page 9 for connecting your display to a network 2 Switch on your computer and the router NOTE If the apparatus does not return to DLNA mode due to external electrical disturbances e g ele...

Page 19: ...rnal power supply 4 4 Play options 4 4 1 Playing music files 1 Select in the top bar 2 Select one music track then press button USB device Sort Play All Options Info 05 05 1 Music Album To play all the tracks in a folder select one music file then select Play All To skip to the next or previous track press or button To pause the track press button Press button again to resume playback To skip back...

Page 20: ...ou play content from a media server you can select another media server Shuffle On Shuffle Off Enable or disable random play of video files NOTE To view information about a video for example played position duration title or date select the video then press button To hide the information press button again 4 4 3 Playing photo files 1 Select in the top bar 2 Select a photo thumbnail then press butt...

Page 21: ...tore style Restore the last selected predefined picture setting Backlight Adjust the brightness of this display s backlight Contrast Adjust video contrast Brightness Adjust screen brightness Colour Adjust the colour saturation of the picture Sharpness Adjust the sharpness of the picture Advanced Access advanced settings such as gamma tint settings and video contrast settings Noise reduction Select...

Page 22: ...tched on 5 1 3 General settings menu Menu language Monitor id Eco mode Auto search Clock USB scheduling Sleep timer Auto switch off Control settings Factory settings Picture Sound General settings Network settings Menu language Select language used for OSD menus Monitor id Set the ID number for controlling this display via the RS232C connection Each display must have a unique ID number when multip...

Page 23: ...twork configuration Static IP configuration Digital Media Render Network name Picture Sound General settings Network settings View network settings View connected network status Network settings Select how this display should assign addresses to the network resources Static IP Configuration Assign IP address Netmask Gateway DNS1 and DNS2 for this display Digital Media Renderer DMR Receive multimed...

Page 24: ...tion Active Resolution Refresh Rate Pixel Rate Aspect Ratio Stand for Mode H Pixels V Lines 720p 1280 720 50 Hz 74 25 MHz 16 9 Normally DVB Mode 60 Hz 1080i 1920 1080 25 Hz 74 25 MHz 16 9 Normally ATSC Mode 30 Hz 1080p 1920 1080 50 Hz 148 5 MHz 16 9 Normally ATSC Mode 60 Hz The PC text quality is optimum in HD 1080 mode 1920 1080 60 Hz Your PC display screen might appear different depending on the...

Page 25: ...lint free cloth If the surface becomes dirty soak a soft lint free cloth in a mild detergent solution Wring the cloth to remove excess liquid Wipe the surface of the display to remove dirt Then use a dry cloth of the same type to dry Do not scratch or hit the surface of the panel with fingers or hard objects of any kind Do not use volatile substances such as insert sprays solvents and thinners Cab...

Page 26: ...een The zoom mode is not correctly set Use the Zoom mode or Custom zoom function in the Screen menu to fine tune display geometry and time frequency parameter Can hear sound but no picture Improperly connected source signal cable Make sure that both video inputs and sound inputs are correctly connected Can see picture but no sound is heard 1 Improperly connected source signal cable 2 Volume is tur...

Page 27: ...nel L R Supports LPCM only DVI D Input DVI D jack Digital RGB TMDS Video VGA Input D Sub Jack 1 15 pin Analog RGB 0 7V p p 75Ω H CS V TTL 2 2kΩ SOG 1V p p 75Ω MAX 720p 1080p 1920 1080 60 Hz WUXGA Component Input RCA Jack 3 Y 1V p p 75Ω Pb 0 7V p p 75Ω Pr 0 7V p p 75Ω MAX 480i 576i 480p 576p 720p 1080i 1080p SPDIF Output SPDIF Port Serial digital audio output when input is HDMI IR Input Output 3 5 ...

Page 28: ... LPCM only DVI D Input DVI D jack Digital RGB TMDS Video VGA Input D Sub Jack 1 15 pin Analog RGB 0 7V p p 75Ω H CS V TTL 2 2kΩ SOG 1V p p 75Ω MAX 720p 1080p 1920 1080 60 Hz WUXGA Component Input RCA Jack 3 Y 1V p p 75Ω Pb 0 7V p p 75Ω Pr 0 7V p p 75Ω MAX 480i 576i 480p 576p 720p 1080i 1080p SPDIF Output SPDIF Port Serial digital audio output when input is HDMI IR Input Output 3 5 mm 2 IR pass thr...

Page 29: ...itional warranty HP shall not be liable for technical or editorial errors or omissions contained herein This document contains proprietary information that is protected by copyright No part of this document may be photocopied repro duced or translated to another language without the prior written consent of Hewlett Packard Company Document Part Number 749839 001 First Edition January 2014 Specific...

Reviews: