


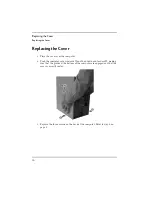


15
Replacing the System Board
Replacing the System Board
Replacing the System Board
You will need:
•
to make sure that the replacement board has all jumpers set to the same as
the system board that is being replaced.
•
to make sure that the any components removed from the system board being
replaced are inserted in the new board. Refer to the appropriate chapters for
instructions on inserting the individual components.
The Procedure
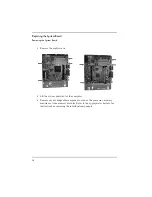
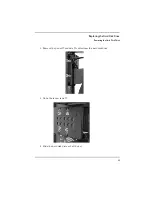
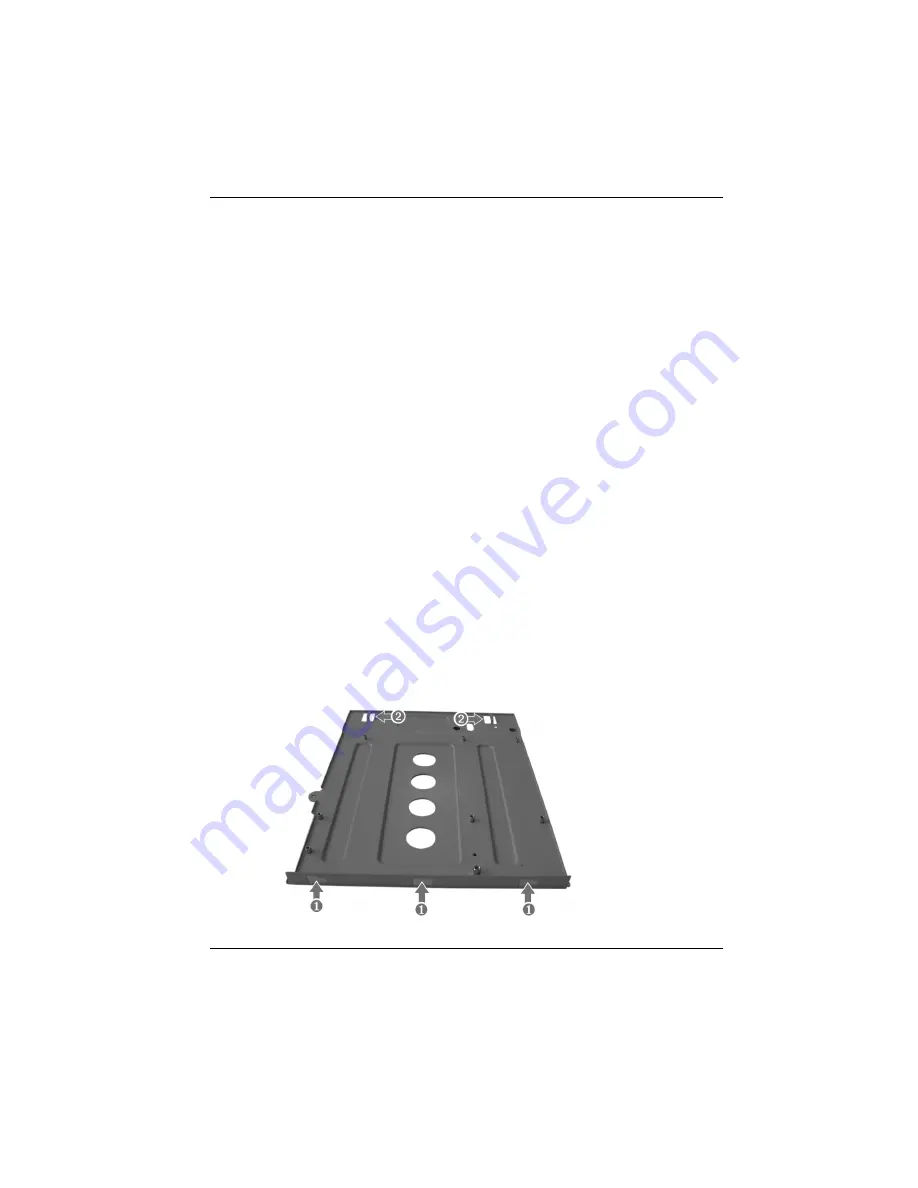
1
Place the system board onto its base.
2
Replace the eight screws. Refer to step 4 on page 14 for the location of the
screws.
3
Replace the cables into their appropriate sockets. The connectors are keyed
and can only fit into the sockets in one direction.
4
Replace the system board into the computer, making sure that the bottom
mounts
➊
are correctly inserted into the bottom of the case and that the top
mounts
➋
are correctly engaged.
Summary of Contents for Brio BA
Page 1: ...http www hp com go briosupport Upgrade Guide HP Brio PCs BA BAx ...
Page 5: ...5 Inside the Computer 1 ...
Page 7: ...7 Replacing the Cover 2 ...
Page 11: ...11 Replacing the System Board 3 ...
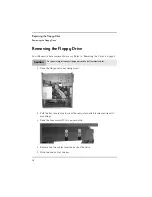
Page 17: ...17 Replacing the Floppy Drive 4 ...
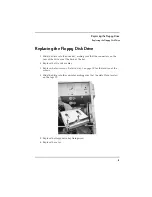
Page 20: ...20 Replacing the Floppy Drive Replacing the Floppy Disk Drive ...
Page 32: ...32 Replacing a 5 25 Bay Disk Drive Removing an Expansion Bay Drive ...
Page 33: ...33 Replacing a Memory Module 7 ...
Page 40: ...40 Replacing the Video RAM Replacing the VRAM Module ...
Page 41: ...41 Replacing Expansion Cards 9 ...
Page 44: ...44 Replacing Expansion Cards Removing an Expansion Card ...
Page 45: ...45 Replacing the Power Supply Unit 10 ...
Page 48: ...48 Replacing the Power Supply Unit ...
Page 50: ...50 Replacing the Processor ...
Page 51: ......
Page 52: ... Paper not bleached with chlorine Part Number 5967 9523V2 Printed in ...


