26481a
20
21
22
23
0
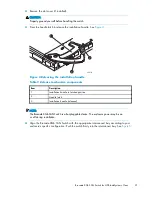
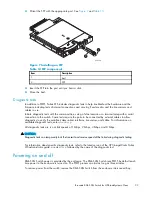
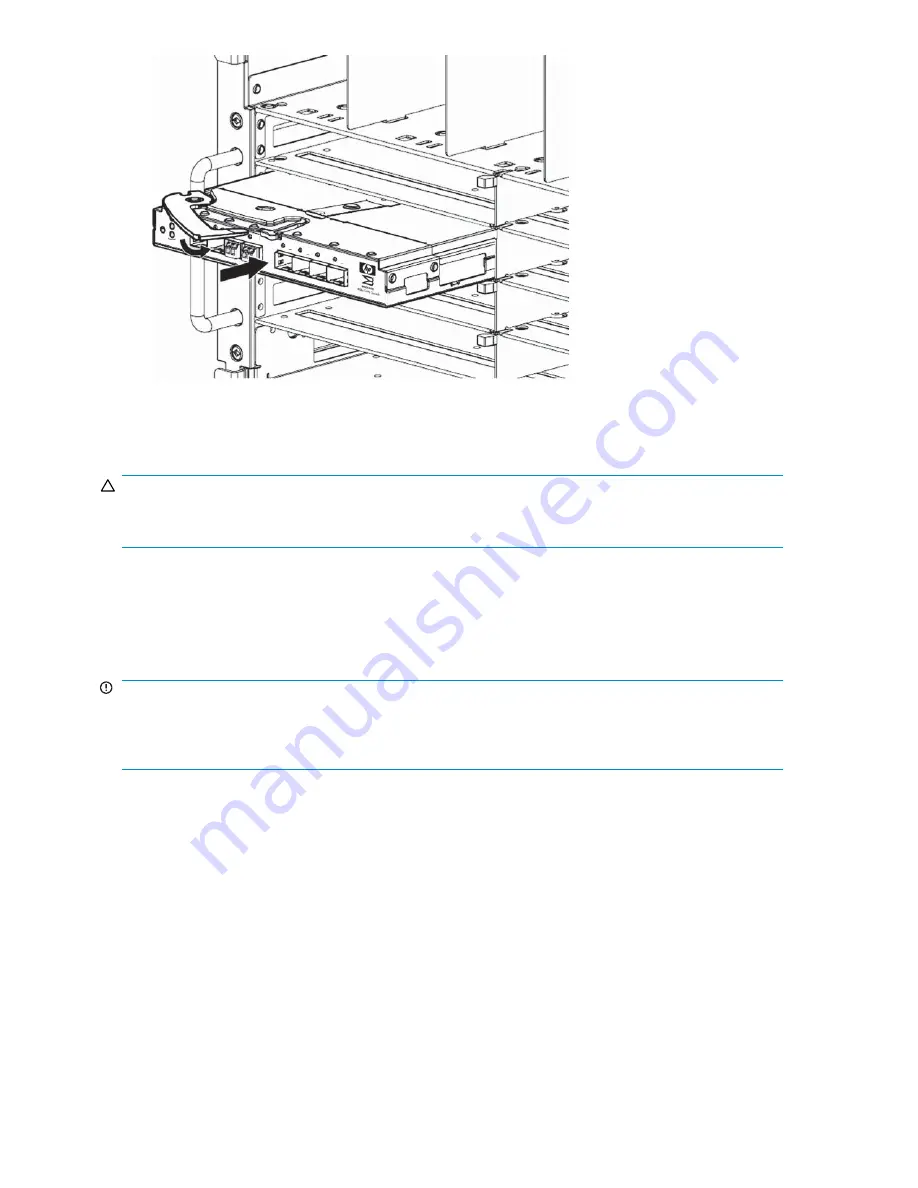
Figure 5 Installing the Brocade 8Gb SAN Switch into an interconnect bay
5.
Press the installation handle into the latch to lock the Brocade 8Gb SAN Switch in place.
CAUTION:
All panels and doors should be in place and securely fastened while the unit is in operation, for proper
cooling and for EMI emissions control.
OA power veri
fi
cation
As de
fi
ned earlier, the HP BladeSystem Onboard Administrator (OA) is the enclosure management
processor that manages the devices contained within the enclosure. The OA provides a single point from
which to perform basic management tasks on switches or server blades installed in the enclosure.
IMPORTANT:
HP recommends reading the appropriate
HP BladeSystem Enclosure User Guide
and the
HP BladeSystem
Onboard Administrator User Guide
. Reading these guides in sequence will promote an overall understanding
of your speci
fi
c enclosure model.
Once the switch is installed in the interconnect bay, the OA veri
fi
es that the switch type matches the
mezzanine cards present on the servers. If there is no mismatch, the OA powers up the switch.
If the switch does not power up, check the enclosure and switch status with the OA web interface. Refer to
the
HP BladeSystem Onboard Administrator User Guide
.
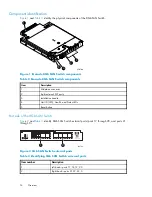
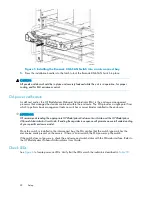
Check LEDs
See
Figure 6
to locate power-on LEDs. Verify that the LEDs match the indicators described in
Table 10
.
22
Setup
Summary of Contents for Brocade 8Gb SAN
Page 5: ...Index 61 Brocade 8Gb SAN Switch for HP BladeSystem c Class 5 ...
Page 8: ...8 ...
Page 12: ...12 About this guide ...
Page 18: ...18 Overview ...
Page 40: ...40 Managing the 8Gb SAN Switch ...
Page 46: ...46 Regulatory compliance and safety ...
Page 48: ...48 Electrostatic discharge ...
Page 52: ...52 SAN Switch technical specifications ...
Page 60: ...60 Glossary ...


