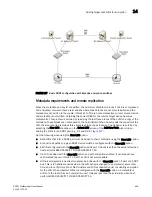
background image

DCFM Professional User Manual

401

53-1001773-01

Configuring hosts for encryption targets

14

Configuring hosts for encryption targets

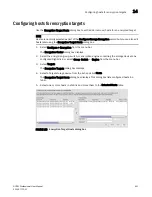
Use the Encryption Target Hosts dialog box to edit (add or remove) hosts for an encrypted target.

NOTE

Hosts are normally selected as part of the Configure Storage Encryption wizard but you can also edit 
hosts later using the Encryption Target Hosts dialog box. 

1. Select Configure > Encryption from the menu bar.

The Encryption Center dialog box displays.

2. Select the encryption group, switch, or encryption engine containing the storage device to be 

configured.Right-click, or select Group, Switch, or Engine from the menu bar.

3. Select Targets.

The Encryption Targets dialog box displays. 

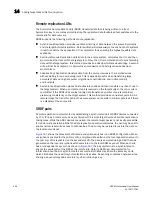
4. Select a Target storage device from the list, and click Hosts.

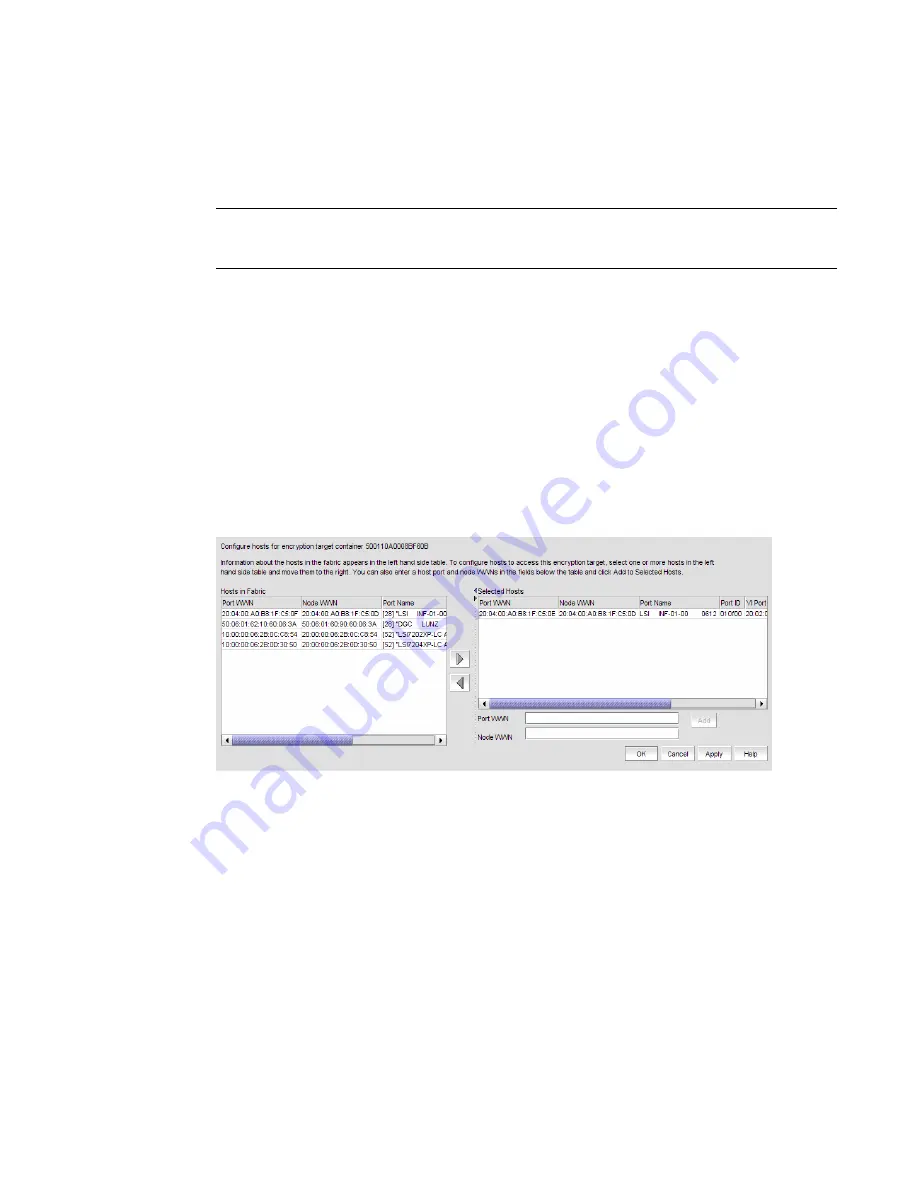
The Encryption Target Hosts dialog box displays. This dialog box lists configured hosts in a 
fabric.

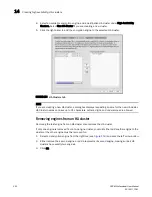
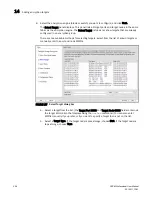
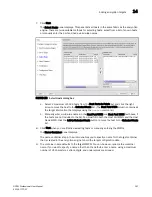
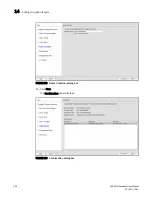
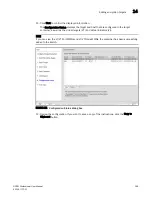
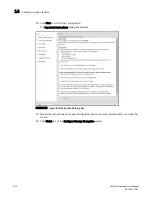
5. Select one or more hosts in a fabric and move them to the Selected Hosts table.

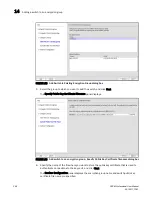
FIGURE 163

Encryption Target Hosts dialog box

Summary of Contents for Brocade BladeSystem 4/12

Page 1: ...53 1001773 01 14 April 2010 DCFM Professional User Manual Supporting DCFM 10 4 X ...

Page 2: ...eneral Public License or other open source license agreements To find out which open source software is included in Brocade products view the licensing terms applicable to the open source software and obtain a copy of the programming source code please visit http www brocade com support oscd Brocade Communications Systems Incorporated Document History The following table lists all versions of the ...

Page 3: ...DCFM Professional User Manual iii 53 1001773 01 ...

Page 4: ...iv DCFM Professional User Manual 53 1001773 01 ...

Page 5: ...terms xxix Notice to the reader xxx Additional information xxx Brocade resources xxx Other industry resources xxxi Getting technical help xxxi Document feedback xxxii Chapter 1 Getting Started In this chapter 1 User interface components 1 Menu bar 3 Toolbar 3 SAN tab 4 View All list 4 Port Display buttons 5 Product List 5 Connectivity Map 6 Toolbox 7 Master Log 7 Minimap 9 Status bar 10 Icon legen...

Page 6: ...yboard shortcuts 31 Look and Feel 32 Chapter 2 Discovery In this chapter 35 Fabric discovery overview 35 FCS policy and seed switches 37 Discovering fabrics 37 Configuring SNMP credentials 41 Reverting to a default SNMP community string 42 Deleting a fabric 43 Host discovery 43 Discovering Hosts by IP address or hostname 43 Importing Hosts from a CSV file 44 Importing Hosts from a Fabric 45 Config...

Page 7: ...a to a new server 66 Display 66 Resetting your display 66 End node display 67 Displaying end nodes 67 Ethernet events 68 Enabling Ethernet events 68 Disabling Ethernet events 69 Event storage 69 Configuring event storage 69 Flyovers 70 Configuring flyovers 70 Turning flyovers on or off 73 Viewing flyovers 73 Names 74 Setting names to be unique 74 Setting names to be non unique 75 Fixing duplicate ...

Page 8: ...opology layout 101 Customizing the layout of devices on the topology 102 Customizing the layout of connections on the topology 103 Changing a group s background color 103 Reverting to the default background color 104 Changing the product label 105 Changing the port label 105 Changing the port display 105 Grouping on the topology 106 Collapsing groups 106 Expanding groups 106 Viewing connections 10...

Page 9: ...s 122 Services 122 Monitoring and managing Management application services 122 Refreshing the server status 123 Stopping all services 123 Stopping the CIMOM services 123 Starting all services 124 Restarting all services 124 Changing server port numbers 124 Restoring the database 125 Capturing technical support information 126 Upgrading HCM on the Management server 127 Chapter 7 Device Configuratio...

Page 10: ...vices 159 Determining port status 159 Viewing port optics 160 Port Auto Disable 162 Viewing the port auto disable status 162 Enabling port auto disable on individual ports 163 Enabling port auto disable on all ports on a device 163 Disabling port auto disable on individual ports 164 Disabling port auto disable on all ports on a device 164 Unblocking ports 164 Device Technical Support 165 Schedulin...

Page 11: ... 183 Policy types 183 Policy triggers 184 Policy actions 185 Adding an event policy 185 Adding an Port offline policy 186 Adding a PM threshold crossed policy 187 Adding a security violation policy 188 Defining the broadcast message action 189 Defining the launch script action 190 Defining the send e mail action 191 Configuring support data capture action 192 Activating a policy 192 Deactivating a...

Page 12: ...r 211 Removing a host server 211 Adding a destination 211 Editing a destination 212 Removing a destination 212 Enabling Syslog forwarding 212 Disabling Syslog forwarding 213 Chapter 9 Performance Data In this chapter 215 Performance overview 215 Performance measures 216 Performance management requirements 217 Real time performance data 221 Generating a real time performance graph 222 Filtering rea...

Page 13: ... Channel over IP In this chapter 243 FCIP services licensing 244 FCIP Concepts 244 IP network considerations 244 FCIP platforms and supported features 245 FCIP trunking 246 Design for redundancy and fault tolerance 247 FCIP tunnel restrictions for FCP and FICON emulation features247 FCIP Trunk configuration considerations 247 FCIP circuit failover capabilities 248 Bandwidth calculation during fail...

Page 14: ...erties 268 Viewing General FCIP properties 269 Viewing FCIP FC port properties 270 Viewing FCIP Ethernet port properties 271 Editing FCIP tunnels 272 Editing FCIP circuits 273 Disabling FCIP tunnels 274 Enabling FCIP tunnels 274 Deleting FCIP tunnels 276 Disabling FCIP circuits 276 Enabling FCIP circuits 276 Deleting FCIP Circuits 276 Displaying FCIP performance graphs 277 Displaying performance g...

Page 15: ...CoE traffic 289 Switch policies 294 CEE map and Traffic Class map 294 LLDP profiles 294 Access control lists 294 Spanning Tree Protocol policy 295 802 1x policy 295 Link aggregation groups 296 Adding a LAG 296 Editing a CEE switch 299 Editing a CEE port 300 Editing a LAG 301 Enabling a CEE port or LAG 303 Deleting a LAG 304 CEE Performance 305 Real Time Performance Graph 305 Historical Performance...

Page 16: ... Setting 802 1x parameters for a switch 333 CEE switch management using Web Tools 335 CEE switch management using Telnet 336 Virtual FCoE port configuration 336 Viewing virtual FCoE ports 337 Clearing a stale entry 338 Chapter 14 Encryption configuration In this chapter 339 Encryption Center features 340 Encryption user privileges 341 Smart card usage 342 Registering authentication cards from a ca...

Page 17: ...p user name and password 362 Setting up the local Certificate Authority CA on SKM 363 Downloading the local CA certificate from SKM 364 Creating and installing the SKM server certificate 364 Enabling SSL on the Key Management System KMS Server 365 Creating an SKM High Availability cluster 366 Copying the local CA certificate for a clustered SKM appliance 366 Adding SKM appliances to the cluster 36...

Page 18: ...r key from a key vault 417 Restoring a master key from a smart card set 418 Creating a new master key 419 Zeroizing an encryption engine 420 Encryption Targets dialog box 421 Redirection zones 423 Disk device decommissioning 424 Decommissioning LUNs 424 Displaying and deleting decommissioned key IDs 425 Viewing and editing switch encryption properties 425 Exporting the public key certificate signi...

Page 19: ...Creating a zone alias 451 Editing a zone alias 452 Removing an object from a zone alias 452 Exporting zone aliases 453 Renaming a zone alias 453 Creating a zone configuration 453 Viewing zone configuration properties 454 Adding zones to a zone configuration 454 Activating a zone configuration 455 Deactivating a zone configuration 457 Refreshing a zone database 458 Merging two zone databases 458 Sa...

Page 20: ...ones list 474 Listing zone members 475 Removing a member from a zone 475 Removing a zone from a zone configuration 476 Renaming a zone 476 Renaming a zone configuration 477 Replacing zone members 477 Chapter 16 Troubleshooting In this chapter 479 FC troubleshooting 479 Tracing FC routes 480 Troubleshooting device connectivity 481 IP troubleshooting 482 Configuring IP ping 482 Tracing IP routes 485...

Page 21: ... menus 495 Shortcut menus 503 Appendix B Call Home Event Tables In this appendix 515 Call Home Event Table 515 CONSRV Events Table 517 Thermal Event Reason Codes Table 517 Brocade Events Table 518 Appendix C User Privileges In this appendix 519 About User Privileges 519 About Roles and Access Levels 531 ...

Page 22: ... end devices 543 Device 544 EE Monitor 551 Event FM 553 Fabric 559 FC Port Stats 562 FCIP 565 FCIP Tunnel Stats 568 GigE Port Stats 570 ISL 572 License 575 Meta SAN 576 Network 578 Others 579 Port Fencing 580 Quartz 581 Reports 584 Role Based Access Control 584 SNMP 587 Stats 590 Switch 592 Switch details 597 Switch port 602 Switch SNMP info 607 Threshold 609 User Interface 610 Zoning 1 611 Zoning...

Page 23: ...ructions Chapter 4 View management provides view and topology configuration instructions Chapter 5 Third party tools provides instructions for adding and launching third party tools Chapter 6 Server Management Console provides information on using the Server Management Console to stop and start the Management application services back up the Management application database and capture technical su...

Page 24: ...S requirements refer to the Table 1 footnotes NOTE Discovery of a Secure Fabric OS fabric in strict mode is not supported The hardware platforms in the following table are supported by this release of DCFM 10 4 X TABLE 1 Supported Hardware Device Name Terminology used in documentation Brocade 200E switch 16 port 4 Gbps FC Switch Brocade 300 switch6 24 port 8 Gbps FC Switch Brocade 4012 switch Embe...

Page 25: ...Gbps 6 port ISL blades Brocade DCX7 13 384 port Backbone Chassis Brocade DCX7 13 with FC8 16 FC8 32 and FC8 48 Blades 384 port Backbone Chassis with 8 Gbps 16 FC port 8 Gbps 32 FC port and 8 Gbps 48 FC port blades Brocade DCX7 13 with FR4 18i Blades 384 port Backbone Chassis with 4 Gbps Router Extension blade Brocade DCX9 13 with FC10 6 Blades 384 port Backbone Chassis with FC 10 6 ISL Blade Broca...

Page 26: ... port 10 GbE ports 2 10 GbE ports Extension Blade M4700F Fabric Switch13 32 Port 4 Gbps Switch M6140 Director13 140 Port Director Mi10K Director13 256 Port Director 1 Platform requires Fabric OS v5 1 0 or later 2 Platform requires Fabric OS v5 2 0 or later 3 Platform requires Fabric OS v5 2 1 or later 4 Platform requires Fabric OS v5 3 0 or later 5 Platform requires Fabric OS v5 3 1 or later 6 Pla...

Page 27: ... to Appendix Changed AG icons Moved Management server and client section to Chapter 1 Getting Started Changed procedure Discovering a fabric Changed topic Fabric Monitoring Changed topic seed switch failover Moved Call Home to new chapter Moved View Management and Topology to new chapter Moved Third party tools to new chapter Changed topic Fabric tracking Changed SAN menu to Server menu Changed pr...

Page 28: ...ascaded FICON fabric Changed procedure Configuring a cascaded FICON fabric Changed procedure Cascaded FICON fabric merge Changed topic POrt Groups Changed procedure Adding a detached device Changed Supportsave troubleshooting Changed topic Privileges and Application Behavior table Information that was deleted Removed EMC E mail and HP Modem call home centers For further information about new featu...

Page 29: ...narrative portions of this guide are presented in mixed lettercase for example switchShow In actual examples command lettercase is often all lowercase Otherwise this manual specifically notes those cases in which a command is case sensitive Notes cautions and warnings The following notices and statements are used in this manual They are listed below in order of increasing severity of potential haz...

Page 30: ...mplementation and maintenance you can obtain Building SANs with Brocade Fabric Switches through http www amazon com White papers online demos and data sheets are available through the Brocade Web site at http www brocade com products solutions products index page For additional Brocade documentation visit the Brocade Web site http www brocade com Release notes are available on the Brocade Connect ...

Page 31: ... displays 2 General Information Switch model Switch operating system version Error numbers and messages received supportSave command output Detailed description of the problem including the switch or fabric behavior immediately following the problem and specific questions Description of any troubleshooting steps already performed and the results Serial console and Telnet session logs syslog messag...

Page 32: ...ade DCX access the numbers on the WWN cards by removing the Brocade logo plate at the top of the nonport side of the chassis Document feedback Quality is our first concern at Brocade and we have made every effort to ensure the accuracy and completeness of this document However if you find an error or an omission or you think that a topic needs further development we want to hear from you Forward y...

Page 33: ...nagement application provides easy centralized management of the SAN as well as quick access to all product configuration applications Using this application you can configure manage and monitor your networks with ease The Management application s main window contains a number of areas The following graphic illustrates the various areas and descriptions of them are listed below NOTE Some panels ma...

Page 34: ...dit a view select to how to view the Product list All Levels Products and Ports Products Only or Ports Only and to select which view you want to display in the main window Does not display until you discover a fabric 5 Port Display buttons Provides buttons that enable quick access to configuring how ports display Does not display until you discover a fabric For more information refer to Port Displ...

Page 35: ... window and provides icons to perform various functions Figure 2 FIGURE 2 The Toolbar The icons on your toolbar will vary based on the licensed features on your system 1 Users Displays the Server Users dialog box Use to configure users user groups and permissions 2 Properties Displays the Properties dialog box of the selected device or fabric Use to view or edit device or fabric properties 3 Launc...

Page 36: ...t arrow on the divider View All list The View All list is located at the top left side of the window and enables you to create copy or edit a view select to how to view the Product list All Levels Products and Ports Products Only or Ports Only and to select which view you want to display in the main window Does not display until you discover a fabric To discover a fabric refer to Discovering fabri...

Page 37: ... is a quick way to look up product and port information including serial numbers and IP addresses To display the Product List select View Show Panels Product List or press F9 You can edit information in the Product List by double clicking in a field marked with a green triangle You can sort the Product List by clicking a column heading The following columns presented here in alphabetical order are...

Page 38: ... Configured Gbps Displays the actual speed of the port in Gigabits per second State Displays the state for the product and the port Status Displays the status for the product and the port Symbolic Name Displays the symbolic name for the port TAG Displays the tag number of the product Vendor Displays the name of the product s vendor WWN Displays the world wide name of the product or port Connectivi...

Page 39: ...s sorted by the Last Event Server Time column To filter information in the Master Log refer to Filtering events in the Master Log on page 179 The following fields and columns are included in the Master Log Level The severity of the event When the same event Warning or Error occurs repeatedly the Management application automatically eliminates the additional occurrences For more information about e...

Page 40: ... occurred Module Name The name of the module on which the event occurred Message ID The message ID of the event Contributor The name of the contributor on which the event occurred Node WWN The world wide name of the node on which the event occurred Fabric Name The name of the fabric on which the event occurred ...

Page 41: ...chor or float the Minimap to customize your main window To float the Minimap and view it in a separate window click the Detach icon in the upper right corner of the Minimap To anchor the Minimap and return the Minimap to its original location on the main window do one of the following steps Click the Attach icon in the upper right corner of the Minimap Click the Close icon in the upper right corne...

Page 42: ...ed on ISL status The possible states are operational unknown degraded or failed Select a product or fabric from the Connectivity Map or Product List and click this icon to open the related Fabric Log only available for persisted fabrics 5 Call Home Status Enterprise edition only Displays a call home status icon when one or more fabrics are discovered which allows you to determine the current call ...

Page 43: ... displays with gray icons Some of the icons shown display when certain features are licensed Icon Description Icon Description Fabric Fabric OS Switch and Blade Switch Fabric OS Director Fabric OS CEE Switch Fabric OS Router Storage Fabric OS FC Switch in Access Gateway mode single fabric connected Fabric OS FC Switch in Access Gateway mode multiple fabric connected Fabric OS CEE Switch in Access ...

Page 44: ...ists the product status icons that display on the topology Icon Description Icon Description Switch Group Host Group Storage Group Unknown Fabric Group Unmanaged Fabric Group Chassis Group Icon Description Occupied FC Port Unoccupied FC Port Attached FC Port Trunk port group IP and 10 GE Port Attached IP and 10 GE Port Attached to Cloud 10 GE Port Virtual Port Virtual FCoE Port Attached FCoE Port ...

Page 45: ...ing table lists the event icons that display on the topology and Master Log For more information about events refer to Fault Management on page 173 Device Removed Missing Down Failed Routed In Routed Out Unknown Link Down Event Icon Description Informational Warning Error Icon Status ...

Page 46: ...r Switch Server No Yes 211 2 FTP Port Data TCP FTP Data port for internal FTP server Client Server Switch Server No Yes 221 SSH or Secure Telnet TCP Sectelnet port from server to switch client to switch Server Switch Client Switch Yes 231 Telnet TCP Telnet port from server client to switch Server Switch Client Switch Yes 25 SMTP Server port TCP SMTP Server port for E mail communication Server SMTP...

Page 47: ...ric OS version is earlier than 6 1 1 5 Port 80 is the default web server port number If you set the web server port number to a port other than the default you must open that port in the firewall 6 The Syslog listening port is configurable in the Management server The switch always sends syslog messages to port 514 If you have any other syslog daemon on the Management server machine already listen...

Page 48: ...e application to remember your password the next time you log in 4 Click Login 5 Click OK on the Login Banner dialog box The Management application displays Launching a remote client To launch a remote client complete the following steps 1 Open a web browser and enter the IP address of the Management application server in the Address bar If the web server port number does not use the default 443 i...

Page 49: ...g box displays 2 Click View on the General tab The Java Cache Viewer dialog box displays 3 Right click the application and select Delete 4 Click Close on the Java Cache Viewer dialog box 5 Click OK on the Java Control Panel dialog box To create a remote client link in the Start menu refer to Launching a remote client on page 16 Launching the Configuration Wizard You can re launch the Configuration...

Page 50: ... machine as the Management application the Firmware Repository feature will not be available FIGURE 9 FTP Server screen 5 Complete the following steps on the Server IP Configuration screen FIGURE 10 Server IP Configuration screen a Select an address from the Server IP Configuration list b Select an address from the Switch Server IP Configuration Preferred Address list If DNS is not configured for ...

Page 51: ...e you will not receive any syslog messages from the device b Enable SSL by selecting the SSL Enabled check box c Enter a port number in the Web Server Port Number field default is 443 if SSL Enabled is selected otherwise the default is 80 d Enter a port number in the SNMP Port Number field default is 162 e Enter a port number in the Starting Port Number field default is 24600 NOTE The server requi...

Page 52: ...uration information on the Server Configuration Summary screen and click Next 9 Complete the following steps on the Start Server screen a Select the Start SMI Agent check box if necessary b Select the Start SLP check box if necessary c Select the Start Client check box if necessary d Click Finish After all of the services Server SLP SMI Agent and Client are started the Log In dialog box displays 1...

Page 53: ...OK 5 Click Login 6 Click OK on the Login Banner dialog box The Management application displays Changing the database user password To change the database password complete the following steps in the Install_Home bin directory 1 Open a command window 2 Type dbpassword User_Name Password New_Password Confirm_Password and press Enter Where User_Name is your user name Password is your current password...

Page 54: ...g box displays Figure 15 FIGURE 14 Active Sessions dialog box 2 Review the active session information The following information displays ID Displays the name of the user for example Administrator Description Displays the description of the user for example Operator Network Address Displays the network address of the user Client Type Displays the type of Management application client Connected Disp...

Page 55: ...ct Server Server Properties The Server Properties dialog box displays Figure 15 FIGURE 15 Server Properties dialog box 2 Click Close Viewing port status You can view the port status for the following ports SNMP Syslog FTP Web Server To view the port status complete the following steps 1 Click the port status icon The Port Status dialog box displays Figure 15 FIGURE 16 Port Status dialog box ...

Page 56: ...d client 1 The status options are as follows Success The port is listening or bound to the server Failed The port fails to listen or bind to the server Disabled FTP port only only displays when the FTP server is external This is considered a normal status 2 Click Close ...

Page 57: ...ep instructions refer to Installing the Application in the DCFM Installation Guide 1 Select Help License The License dialog box displays 2 Choose from one of the following options Enter the license key in the License Key field The License Key field is not case sensitive Browse to the license file 3 Click Update to extract the new license information Review the new information in the License dialog...

Page 58: ...ange 6 Select or clear the Save password check box to choose whether you want the application to remember your password the next time you log in 7 Click Login 8 Click OK on the Login Banner Installing a patch The patch installer enables you to update the Management application between releases Each patch installer includes the previous patches within a specific release For example patch F 10 4 0f ...

Page 59: ...lect Help About in the main window 6 Start all services by completing the following steps a Launch the Server Console b Click the Services tab c Click Start to start all services Uninstalling a patch Note that only one set of back up files are retained which enables you revert back to the previous version You can only revert back one version For example If you upgrade from patch A to patch B you c...

Page 60: ...tch version patch version value to the reverted patch for example if you are reverting from patch F to patch C then patch version c If the previous version is the initial version no patches change the patch version value to none for example patch version None 11 Go to the Install_Home patch backup conf directory 12 Copy the patch conf file in this directory to the Install_Home conf directory If th...

Page 61: ...p Management license Not available Fault Management Requires Fabric OS 4 4 or later for SNMP traps Requires M EOS and M EOSn 9 6 X or later Fabric Binding Professional Plus and Enterprise Edition Only Requires Fabric OS 5 2 or later in a pure Fabric OS fabric Requires Fabric OS 6 0 or later in a mixed Fabric OS and M EOS fabric Requires M EOS and M EOSn 9 6 X or later FCIP Management Requires Fabr...

Page 62: ...EOS and M EOSn 9 6 X or later Security Management Requires Fabric OS 5 2 and later for SCC Policy Requires Fabric OS 5 2 and later for DCC Policy Requires Fabric OS 5 3 and later for IP Filter Policy Requires Fabric OS 6 0 and later for AD LDAP Server Configuration Requires Fabric OS 5 0 and later for RADIUS Server Configuration Not available Technical Support Data Collection Requires Fabric OS 5 ...

Page 63: ...he keystrokes shown in the table below to perform common functions NOTE To open a menu using keystrokes press ALT plus the underlined letter To open a submenu open the menu then press the key for the underlined letter SHIFT plus letter for capitals of the submenu option Menu Item or Function Keyboard Shortcut All Panels F12 Collapse CTRL L Command Tool SHIFT F4 Connectivity Map F7 Copy CTRL C Cut ...

Page 64: ...list 3 Choose from one of the following options Select Default to configure the look and feel back to the Management application defaults Select System to configure the Management application to have the look and feel of your system This changes the look and feel for the components that use Java Metal Look and Feel For example if you have your system display color scheme set to High Contrast 1 the...

Page 65: ...uld be 8 and large font size would be 10 1 Select Server Options The Options dialog box displays 2 Select Look and Feel in the Category list 3 Select one of the following options from the Font Size list Select Default to return to the default font size Select Small to change the font to a smaller font size Select Large to change the font to a larger font size NOTE Changing the font size to Large m...

Page 66: ...34 DCFM Professional User Manual 53 1001773 01 Accessibility features for the Management application 1 ...

Page 67: ...c OS fabric the seed switch must be the primary Fabric Configuration Server FCS If you use a non primary FCS to discover the fabric the Management application displays an error and will not allow the discovery to proceed If the Management application has already discovered the fabric but afterward you create the FCS policy and the seed switch is not a primary FCS an event is generated during the n...

Page 68: ...iscovery overview 2 NOTE Professional edition can discover but not manage M EOS devices or the Backbone chassis Use the device s Element Manager which can be launched from the Connectivity Map to manage the device This device cannot be used as a Seed switch ...

Page 69: ...imary FCS switch but Management application does not check at the time of download that the switch is the primary FCS Switch NOTE Switches running in Access Gateway mode cannot be used as the seed switch NOTE The Backbone Chassis cannot be used as a seed switch Discovering fabrics NOTE Fabric OS devices must be running Fabric OS 5 0 or later M EOS devices must be running M EOS 9 6 or later NOTE On...

Page 70: ...FIGURE 18 Address Properties dialog box IP Address tab 3 Enter a name for the fabric in the Fabric Name field 4 Enter an IP address for a device in the IP Address field For seed switch requirements refer to Seed switch requirements on page 53 NOTE The Backbone Chassis cannot be used as a seed switch NOTE Professional and Professional Plus editions cannot manage the Backbone Chassis Professional ed...

Page 71: ...l User Manual 39 53 1001773 01 Fabric discovery overview 2 NOTE Professional edition can discover only 1 fabric 5 Fabric OS devices only Enter the user ID and password for the switch in the User ID and Password fields ...

Page 72: ...o step 14 10 Specify the Read option by selecting Default public or Custom 11 If you selected Custom enter the community string in the Custom and Confirm Custom fields 12 Specify the Write option by selecting Default private or Custom 13 If you selected Custom enter the community string in the Custom and Confirm Custom fields Go to step 21 14 If you are configuring a 256 port director select the C...

Page 73: ... the Discover Setup dialog box Configuring SNMP credentials 1 Select Discover Setup The Discover Setup dialog box displays 2 Select an IP address from the Available Addresses table 3 Click Edit The Address Properties dialog box displays 4 Click the SNMP tab 5 Select the SNMP version from the SNMP Version list If you selected v1 continue with step 6 If you select v3 the SNMP tab displays the v3 req...

Page 74: ... the Priv Password field 17 Click OK on the Address Properties dialog box If the seed switch is not partitioned continue with step 18 If the seed switch is partitioned the Undiscovered Seed Switches dialog box displays a Select the Select check box for each undiscovered seed switch to discover their fabrics b Click OK on the Undiscovered Seed Switches dialog box 18 Click OK on the Discover Setup d...

Page 75: ...e fabric for which you want to delete from the Discovered Addresses table 3 Click Delete You are prompted to confirm that you want to delete the fabric Host discovery The Management application enables you to discover individual hosts import a group of Host from a comma separated values CSV file or import all hosts from discovered fabrics NOTE Host discovery requires HCM Agent 2 0 or later NOTE SM...

Page 76: ...at step 5 through step 7 for each Host you want to discover 9 Click OK on the Add Host Discovery dialog box If an error occurs a message displays Click OK to close the error message and fix the problem A Host Group displays in Discovered Addresses table with pending status To update the status from pending you must close and reopen the Discover Setup dialog box 10 Click Close on the Discover Setup...

Page 77: ...7 Configure Host credentials if necessary To configure host credentials refer to Configuring Brocade HBA credentials on page 46 or Configuring virtual machine credentials on page 47 8 Click OK on the Add Host Discovery dialog box If an error occurs a message displays Click OK to close the error message and fix the problem A Host Group displays in Discovered Addresses table with pending status To u...

Page 78: ...the Add Host Discovery dialog box If an error occurs a message displays Click OK to close the error message and fix the problem A Host Group displays in Discovered Addresses table with pending status To update the status from pending you must close and reopen the Discover Setup dialog box 9 Click Close on the Discover Setup dialog box Configuring Brocade HBA credentials To configure credentials fo...

Page 79: ...edentials To configure credentials for a virtual machine complete the following steps 1 Select Discover Setup The Discover Setup dialog box displays 2 Click Add Host The Add Host Discovery dialog box displays 3 Discover a host To discover a host refer to Discovering Hosts by IP address or hostname on page 43 Importing Hosts from a CSV file on page 44 or Importing Hosts from a Fabric on page 45 4 C...

Page 80: ...it The Edit Host Discovery dialog box displays FIGURE 27 Edit Host Discovery dialog box 3 To edit Brocade HBA credentials select the Discover Brocade HBAs in the hosts check box if necessary and complete the following steps a Enter the HCM Agent port number in the Brocade HBAs Port field if necessary b Enter your username and password in the appropriate fields 4 To edit virtual machine credentials...

Page 81: ...ck a fabric and select Expand All to show all devices in the fabric The Name field displays the discovery status icons in front of the device name The following table illustrates and describes the icons that indicate the current status of the discovered devices The Discovery Status field details the actual status message text which varies depending on the situation The following are samples of act...

Page 82: ... Agent collection failed Troubleshooting discovery If you encounter discovery problems complete the following checklist to ensure that discovery was set up correctly 1 Verify IP connectivity by issuing a ping command to the switch a Open the command prompt b From the Server type ping Switch_IP_Address 2 Enter the IP address of the device in a browser to verify the SNMP settings For example http 10...

Page 83: ...hrough the Discover Setup dialog box The following table illustrates and describes the icons that indicate the current status of the discovered fabrics To change the monitoring interval refer to Configuring asset polling on page 95 Monitoring discovered fabrics NOTE Monitoring is not supported on Hosts To monitor a fabric and all associated devices complete the following steps 1 Select Discovery S...

Page 84: ... the seed switch is not running a supported version you are prompted to change the seed switch When one or more switches join the fabric or if the switch firmware is changed on any of the switches in the fabric the Management application checks to make sure that the seed switch is still running a supported version If it is not then you are prompted to either upgrade the firmware on the seed switch...

Page 85: ...abric you are monitoring and if you have provided login credentials for only that seed switch in the fabric then you lose connection to the seed switch Seed switch requirements Depending on your environment you must meet the following hardware and firmware version requirements for seed switches Fabric OS devices For Fabric OS only fabrics the seed switch must be running Fabric OS 5 0 or later For ...

Page 86: ...y If there are Virtual Fabric capable switches the Management application only uses these switches as recommended seed switches If there are no Virtual Fabric capable switches the Management application uses the list from the second check To change the seed switch complete the following steps 1 Select Discovery Setup The Discover Setup dialog box displays 2 Select the fabric for which you want to ...

Page 87: ... the latest Fabric OS version in the fabric are displayed The current seed switch is not displayed in this list 5 Click OK If you are not already logged in to the seed switch the Fabric Login dialog box displays If you are successfully authenticated the fabric is deleted from the Management application without purging historical data and the same fabric is rediscovered with the new seed switch 6 C...

Page 88: ...56 DCFM Professional User Manual 53 1001773 01 Seed switch 2 ...

Page 89: ...interval will be missing from the backup The Management application allows you to view the backup status at a glance initiate immediate backup enable or disable automatic backup reconfigure the backup directory interval and start time and retrieve backup events What is backed up The data is backed up to the following directories Backup databases contains database and log files Backup data contains...

Page 90: ...ty of a CD is approximately 700 MB and needs to be replaced when full Also CD media has a limited number of re writes before the medium is exhausted and write errors occur It is recommended that you configure the backup system to target a hard drive or a network drive as described in the procedures below Back up directory structure overview The Management server backs up data to two alternate fold...

Page 91: ...ry displays in the Backup Output Directory field 3 Select the Enable Backup check box if necessary 4 Choose one or more of the following options Select the Include FTP Root Directory check box If you select the FTP Root directory the FTP Root sub directories Technical Support and Trace Dump are selected automatically and you cannot clear the sub directory selections If you do not select the FTP Ro...

Page 92: ... hard drive The drive should not be the same physical drive on which your Operating System or the Management application is installed To configure the backup function to a hard drive complete the following steps 1 Select Server Options The Options dialog box displays 2 Select Backup in the Category list The currently defined directory displays in the Backup Output Directory field 3 Select the Enab...

Page 93: ...om kb 180362 en us NOTE Configuring backup to a network drive is not supported on UNIX systems NOTE It is recommended that this configuration be completed on the Local client the client application running on the Server so that the backup path and location can be confirmed To configure the backup function to a network drive complete the following steps 1 Select Server Options The Options dialog bo...

Page 94: ... that the device is accessible and that the server can write to it If the device does not exist or you are not authorized to write to the network drive an error message displays that states you have entered an invalid device path or invalid network credentials Click OK to go back to the Options dialog box and fix the error Backup occurs if needed at the interval you specified Enabling backup Backu...

Page 95: ...Do NOT modify the backup properties file To change the backup interval complete the following steps 1 Select Server Options The Options dialog box displays 2 Select Backup in the Category list 3 Select an interval from the Backup Interval drop down list to set how often backup occurs 4 Click Apply or OK The minimum value is 6 hours and the maximum value is 24 hours Icon Description Backup in Progr...

Page 96: ...ely There is no confirmation message 4 Click Apply or OK Reviewing backup events The Master Log which displays in the lower left area of the main window lists the events that occur on the Fabric If you do not see the Master Log select View All Panels The following backup events appear in the Master Log Backup started Backup error Backup Enabled Backup Disabled Backup Now Backup destination change ...

Page 97: ...s Backup cimom contains the SMIA configuration files In a disaster recovery situation it is possible that configuration changes made less than 45 minutes before Server loss depending on the backup interval you set could be missing from the backup Restoring data 1 Windows Open the Server Management Console from the Start menu on the Management application server OR UNIX Open Install_Home bin from t...

Page 98: ...nd view settings complete the following steps 1 Select Server Options The Options dialog box displays 2 Select Display in the Category list 3 Click Reset Display 4 Click Yes on the reset confirmation message The display and view settings are immediately reset to the default display settings as detailed in the Default display Settings table Table 5 5 Click Apply or OK to save your work TABLE 5 Defa...

Page 99: ...hasize switch members only Displaying end nodes To display end nodes when discovering a new fabric complete the following steps 1 Select Server Options The Options dialog box displays Figure 29 FIGURE 29 Options dialog box End Node Display option 2 Select End Node Display in the Category list 3 Select the Show connected end nodes when new fabric is discovered check box to display end nodes on your...

Page 100: ...ptions dialog box enables you to configure the Management application to generate an Ethernet event after a device is offline for a specific period of time To enable Ethernet events complete the following steps 1 Select Server Options The Options dialog box displays Figure 30 FIGURE 30 Options dialog box Ethernet Event option 2 Select Ethernet Event in the Category list 3 Select the Enable Etherne...

Page 101: ...lear the Enable Ethernet Event check box 4 Click Apply or OK to save your work Event storage You can configure the number of historical events in the repository as well as how long the events will be retained Configuring event storage To configure event storage complete the following steps 1 Select Server Options The Options dialog box displays Figure 31 FIGURE 31 Options dialog box Event Storage ...

Page 102: ...er days field The events are purged at midnight on the last day of the retention period regardless of the number of maximum events 6 Click OK NOTE Purged events from the event and syslog event tables are stored in the Install_Home data archive directory These files are retained for a maximum of 7 days Flyovers You can configure your system to display information for products and connections in a p...

Page 103: ...product properties include the following options b Click the right arrow to move the selected properties to the Selected Properties table c Use the Move Up and Move Down buttons to reorder the properties in the Selected Properties table if necessary The properties displayed in the Selected Properties table appear in the flyover display Name Device Type WWN IP Address Domain ID Class Tag Serial Ven...

Page 104: ... available for all protocols b Select each property you want to display in the connection flyover from the Available Properties table Depending on which protocol you select some of the following properties may not be available for all protocols Fibre Channel default Name port Address Node WWN Port WWN Port Attached Port OS Device Name Symbolic Name IP Address Max Frame Size bytes Active FC4 Types ...

Page 105: ...le appear in the flyover display 7 Click Apply or OK to save your work Turning flyovers on or off Flyovers display when you place the cursor on a product They provide a quick way to view a product s properties To turn flyovers on or off select Enable Flyover Display from the View menu Viewing flyovers On the Connectivity Map rest the pointer over a product icon port or connection The pop up window...

Page 106: ...N Setting names to be unique You can edit duplicate names so that each device has a unique name Note that the Duplicated Names dialog box only displays when you set names to be unique and there are duplicate names in the system To edit duplicate names complete the following steps 1 Select Server Options The Options dialog box displays Figure 34 FIGURE 34 Options dialog box Names option 2 Select Na...

Page 107: ...4 Click OK on the Options dialog box Fixing duplicate names To fix duplicated names complete the following steps 1 Select Configure Names The Configure Names dialog box displays Figure 35 FIGURE 35 Configure Names dialog box 2 Click Fix Duplicates The Duplicated Names dialog box displays 3 Select one of the following options If you select Append Incremental numbers for all repetitive names the nam...

Page 108: ...o display devices from the Display list You can display devices by All Names All WWNs Only Fabrics Only Products Only Ports or Switch and N Ports All discovered devices display 3 Select the device to which you want to assign a name in the Display table 4 Double click in the Name column for the selected device and enter a name for the device If you set names to be unique on the Options dialog box a...

Page 109: ...e to a detached wwn complete the following steps 1 Select Configure Names The Configure Names dialog box displays 2 Click Apply Names If there are any detached WWNs in a discovered state the Apply Names dialog box displays 3 Select or clear the check box for the associated switch or switch port Select a check box to apply the detached name as the switch or switch port name and remove the duplicate...

Page 110: ... Click the name you want to edit in the Name column 4 Edit the name and press Enter 5 Click OK to close the Configure Names dialog box 6 Click OK on the confirmation message Exporting names To export the names associated with devices complete the following steps 1 Select Configure Names The Configure Names dialog box displays 2 Click Export The Export Files dialog displays 3 Browse to the location...

Page 111: ... Click OK on the confirmation message Searching for a device by name You can search for objects switch fabric product ports or N Ports by name To search for a name in the Connectivity Map refer to Searching for a device in the connectivity map on page 113 To search by name complete the following steps 1 Select Configure Names The Configure Names dialog box displays 2 Select All Names from the Disp...

Page 112: ...fer to Searching for a device in the connectivity map on page 113 To search by WWN complete the following steps 1 Select Configure Names The Configure Names dialog box displays 2 Select All Names from the Display list 3 Select WWN from the Scope list 4 Enter the WWN you want to search for in the Search field You can search on partial WWNs NOTE To search for a device the device must be discovered a...

Page 113: ...the login banner to proceed otherwise they are logged out Configuring the server name To set the CHAP secret complete the following steps 1 Select Server Options The Options dialog box displays Figure 36 FIGURE 36 Options dialog box Security Misc option 2 Select Security Misc in the Category list 3 Enter the server name in the Server Name field The Server Name field cannot be empty 4 Enter a passw...

Page 114: ...II value preceded by a dollar sign for example abcdefghijklmnop 4 Re enter the password in the Retype Secret field If the secret does not meet the application requirements or the CHAP Secret and Retype Secret entries do not match an error message displays Click OK to re enter the CHAP Secret and Retype Secret values You are about to modify the ID Secret of this server Check all products that this ...

Page 115: ... time a user logs into this server in the Banner Message field This field contains a maximum of 1024 characters 5 Click Apply or OK to save your work Disabling the login banner To disable the login banner display complete the following steps 1 Select Server Options The Options dialog box displays 2 Select Security Misc in the Category list 3 Clear the Display login banner upon client login check b...

Page 116: ...t ports with the IP address Memory allocation Memory allocation for the client and server Server port Server port settings Support mode Support settings to allow enhanced diagnostics Client export port You can configure a port for communication between the client and server Configuring the client export port To configure client export port settings complete the following steps 1 Select Server Opti...

Page 117: ...o this option take effect after a client restart 5 Click OK on the changes take effect after client restart message Discovery You can configure connections between the switch and the Management application server Configuring Discovery To configure discovery complete the following steps 1 Select Server Options The Options dialog box displays Figure 38 FIGURE 38 Options dialog box Discovery option 2...

Page 118: ...ervers For Windows systems the built in FTP server is the default configuration and installation starts the FTP service if port 21 is not used by any other FTP server For UNIX systems built in FTP is the default for UNIX systems during installation the external FTP server is the default only if port 21 is busy Note that when uninstalling the application the built in FTP server is removed with all ...

Page 119: ... 3 Select the Use built in FTP Server option to use the default built in FTP server All active fields are mandatory 4 Change your password by entering a new password in the Password and Confirm Password fields 5 Click Test to test the FTP server An FTP Server running successfully or an error message displays If you receive an error message make sure your credentials are correct the server is runni...

Page 120: ...to test the FTP server An FTP Server running successfully or an error message displays If you receive an error message make sure your credentials are correct the server is running the remote directory path exists and you have the correct access permission then try again 10 Click OK on the message 11 Click Apply or OK to save your work Configuring a FTP or SCP server To configure the SCP server set...

Page 121: ...y list 3 Choose one or more of the following options If you are using the internal FTP server select the Use built in FTP Server option For step by step instructions about configuring the built in server refer to Configuring an internal FTP server on page 87 If you are using the external FTP server select the Use External FTP Server option For step by step instructions about configuring the built ...

Page 122: ...dresses To configure the IP address used by the server for client server communications complete the following steps 1 Select Server Options The Options dialog box displays Figure 40 FIGURE 40 Options dialog box IP Configuration option 2 Select IP Configuration in the Category list to set the IP address 3 Select the preferred IP address in the Switch Server IP Configuration Preferred Address list ...

Page 123: ... the confirmation message 4 Click Next on the FTP Server screen 5 Complete the following steps on the Server IP Configuration screen Figure 41 FIGURE 41 Server IP Configuration screen a Select an address from the Server IP Configuration list b Select an address from the Switch Server IP Configuration Preferred Address list If DNS is not configured for your network do not select the hostname option...

Page 124: ...FM Professional User Manual 53 1001773 01 Software Configuration 3 11 Enter your user name and password The defaults are Administrator and password respectively 12 Click Login 13 Click OK on the Login Banner ...

Page 125: ...oll at intervals when no state change occurs NOTE SAN size is a consideration in selection of polling periods Configuring memory allocation settings To configure memory allocation settings complete the following steps 1 Select Server Options The Options dialog box displays Figure 42 2 Select Memory Allocation in the Category list to set the memory allocation for the server and client FIGURE 42 Opt...

Page 126: ... change the default server memory value to 1024 MB If your server is running less than 2 Gb RAM do not change the default 512 MB Do not exceed the following server memory values For Windows systems the maximum server memory allocation is 1 4 GB For UNIX systems the maximum server memory allocation is 2 GB If you enter an invalid value an error message displays with the minimum value 768 MB allowed...

Page 127: ...ons The Options dialog box displays 2 Select Memory Allocation in the Category list to set the memory allocation for the server and client 3 Enter how often default is 60 seconds you want to check for state changes in the Check for state change every field You cannot enter a value lower than the default minimum value 4 Enter how often default is 120 seconds you want to check for state changes in t...

Page 128: ...t Server Options The Options dialog box displays Figure 43 FIGURE 43 Options dialog box Server Port option 2 Select Server Port in the Category list 3 Select the Enable SSL check box to enable this function for the server port 4 Enter a port number in the Web Server Port field NOTE Do not use port 2638 for any of these port numbers Port 2638 is used internally by the server 5 Enter a port number i...

Page 129: ... message Support mode You can configure support settings to allow enhanced diagnostics Configuring support mode settings To configure support mode settings complete the following steps 1 Select Server Options The Options dialog box displays Figure 44 FIGURE 44 Options dialog box Support Mode option 2 Select Support Mode in the Category list to enable or disable support modes NOTE Only use this opt...

Page 130: ...and there are less than 10 files for the server or 5 files for the client a new file is created For web clients log files client log 1 through client log 5 are created in the Install_Home Server_Name directory For clients log files client log 1 through client log 5 are created in the User_Home directory For servers log files server log 1 through server log 10 are created in the User_home jboss ser...

Page 131: ...N domain ID IP address and port number of the connected switches 2 Click Yes to accept changes Disabling fabric tracking 1 Disable fabric tracking by choosing one of the following options Select the fabric on which you want to disable fabric tracking on the Product List or Connectivity Map and select Monitor Track Fabric Changes Right click the fabric on which you want to disable fabric tracking o...

Page 132: ... and connection type as well as the WWN domain ID IP address and port number of the connected switches 2 Click Yes to accept changes Accepting changes for a device 1 Accept the changes to a device by choosing one of the following options Select the device on the Product List or Connectivity Map and select Monitor Accept Changes Right click the device on the Product List or Connectivity Map and sel...

Page 133: ...nd monitor devices in your SAN The following menu options are available on the View menu Use these options to customize the topology layout Map Display Select to specify a new layout for the desktop icons background color for groups as well as line type for connections between icons Domain ID Port Select to set the display domain IDs and port numbers in decimal or hex format Decimal Select to disp...

Page 134: ...h to switch connections Switch to switch connections only display when the Attached Ports option is also selected Customizing the layout of devices on the topology You can customize the layout of devices by group type or for the entire Connectivity Map Customizing the layout makes it easier to view the SAN and manage its devices Group types include Fabric Host Storage and Switch groups The Map Dis...

Page 135: ... topology You can change the way inter device connections display on the topology 1 Right click a group or the Connectivity Map and select Map Display then select one of the following options Straight Displays connections using straight lines Orthogonal Displays connections in orthogonal grid lines Disabled if Free Form is selected in Map Display Layout area None Hides the connections between devi...

Page 136: ...Specify the hue 0 to 359 degrees saturation 0 to 100 and brightness 0 to 100 To specify a color based on values of red green and blue click the RGB tab Specify the values for red green and blue 0 to 255 4 Click OK to change the background color or click Reset to return all settings to the color currently being displayed on the topology 5 Click OK on the Map Display Properties dialog box Reverting ...

Page 137: ...rt number as the port label Slot Port Displays the slot and port as the port label All port labels within the fabric to which the selected item belongs change to the selected port label type Changing the port display You have the option of viewing connected or occupied product ports unoccupied product ports or attached ports NOTE Occupied connected ports are those that originate from a device such...

Page 138: ...y by one level click the Expand button on the toolbox Viewing connections You can view the connections in a fabric using one of the following methods Select a fabric and then select View Connected End Devices and select Include Virtual Devices Hide All Show All or Custom Right click on the fabric and select Connected End Devices Include Virtual Devices Hide All Show All or Custom Configuring custo...

Page 139: ...nes to the Selected Zones list 4 Click Save The Save Application dialog box displays 5 Enter a new name in the Application Name field 6 Click OK on the Save Application dialog box 7 Click OK on the Connected End Devices Custom display for Fabric dialog box The saved custom connection configuration displays in the Connected End Devices menu Deleting a custom connection configuration NOTE Active zon...

Page 140: ... Map use one of the following methods Click the zoom in icon on the toolbox Press CTRL NumPad on the keyboard Use the Zoom dialog box a Select View Zoom The Zoom dialog box displays Figure 47 FIGURE 47 Zoom dialog box b Select a zoom percentage c Click OK to save your changes and close the Zoom dialog box Zooming out To zoom out of the Connectivity Map use one of the following methods Click the zo...

Page 141: ...s groups and fabrics Select View Show All Products View Ports To view all ports Select View Show All Ports Exporting the topology You can save the topology to a image PNG format 1 Click Export in the tool box The Export Topology To PNG File dialog box 2 Browse to the directory where you want to export the image 3 Edit the name in the File Name field if necessary 4 Click Save If the file name is a ...

Page 142: ...Resize the columns to fit the contents Sort the table by a specific column or multiple columns Copy information from the table to another application Export information from the table Search for information Expand the table to view all information Collapse the table Displaying columns To only display specific columns complete the following steps 1 Right click anywhere in the table and select Custo...

Page 143: ... anywhere in the table and select Customize or Table Customize The Customize Columns dialog box displays 2 Highlight the name of the column you want to move and use Move Up and Move Down to move it to a new location 3 Click OK Resizing the columns You can resize a single column or all columns in the table To resize a single column right click the column header and select Size Column to Fit or Tabl...

Page 144: ...cific row to a text file 1 Choose from one of the following options Right click anywhere in the table and select Table Export Table Select the table row that you want to export and select Table Export Row The Save table to a tab delimited file dialog box displays 2 Browse to the location where you want to save the file 3 Enter file name in the File Name field 4 Click Save Searching for information...

Page 145: ...ll or Table Collapse All Searching for a device in the connectivity map You can search for a device in the connectivity map by name WWN or device type When searching in the connectivity map make sure you search the right view View Manage View Display View View_Name with the appropriate options of port display View Port Display Display_Option and connected end devices View Port Display Show All ena...

Page 146: ...114 DCFM Professional User Manual 53 1001773 01 Customizing the main window 4 ...

Page 147: ...g an Element Manager 116 Launching Web Tools 117 Launching FCR configuration 118 Launching HCM Agent 119 About third party tools NOTE Installing tools is only available with the Professional Plus and Enterprise Editions You can open other software products such as Firefox Windows Exploerer Web Tools Element Managers FCR Configuration HCM Agent and so on you frequently use from the Tools menu or sh...

Page 148: ...ds to a switch NOTE The switch must have a valid IP address If the device does not have a valid IP address the Telnet selection will not be available on the Tools menu or the shortcut menu You must right click the device icon select Properties and enter the device s IP address before you can open a Telnet session To launch a telnet session complete the following steps On the Connectivity Map right...

Page 149: ...s You can open Web Tools directly from the application For more information about Web Tools refer to the Brocade Web Tools Administrator s Guide For more information about Brocade Access Gateway Switches and Directors refer to the documentation for the specific device To launch a device s Element Manager complete the following steps NOTE You must have Device Administration privileges for the selec...

Page 150: ...ion switch Fabric OS Directors configured with an extension blade Fabric OS 1U 40 port 8 Gbps FC Switch with Integrated Routing license Fabric OS 2U 80 port 8 Gbps FC Switch with Integrated Routing license Fabric OS directors configured with a FC 8 GB 16 port Blade with Integrated Routing license Fabric OS directors configured with a FC 8 GB 32 port Blade with Integrated Routing license Fabric OS ...

Page 151: ...ou must have Device Administration privileges for the selected device to launch HCM Agent If you do not have Device Administration privileges you will need to enter those credentials to launch HCM Agent On the Connectivity Map double click the Brocade HBA or CNA device you want to manage HCM Agent displays OR On the Connectivity Map right click the Brocade HBA or CNA device you want to manage and ...

Page 152: ...120 DCFM Professional User Manual 53 1001773 01 Launching HCM Agent 5 ...

Page 153: ...stop refresh and restart services on the server From the Ports tab you can change the Management application server or web server port number From the Authentication tab Enterprise Edition only you can configure an authentication server LDAP or Radius server and establish authentication policies From the Restore tab you can restore server application data From the Technical Support Information tab...

Page 154: ...es You must be logged in at the administrator Windows systems or root UNIX systems level to stop start and restart the Management application services Stopping and restarting the Management application services causes clients connected to the server to lose connection and they must re log in to the server Monitoring and managing Management application services To monitor the status of the Manageme...

Page 155: ...g steps 1 Launch the Server Management Console 2 Click the Services tab 3 Click Refresh to update the table with the latest status of the services in case the services were stopped or restarted outside of the Server Management Console 4 Click Close to close the Server Management Console Stopping all services To stop all services complete the following steps 1 Launch the Server Management Console 2...

Page 156: ...ollowing steps 1 Launch the Server Management Console 2 Click the Services tab 3 Click Restart to stop then restart all services NOTE If the server is configured to use an external FTP server the Server Management Console does not attempt to start the built in FTP service 4 Click Close to close the Server Management Console Changing server port numbers Use the Ports tab of the Server Management Co...

Page 157: ...o Data backup on page 57 To restore the application data files complete the following steps 1 Click the Services tab 2 Stop all services 3 Click the Restore tab Figure 51 FIGURE 51 Restore tab 4 Click Browse to select the path defined in the Output Directory field on the Options dialog box Backup pane to the database backup location 5 Click Restore Upon completion a message displays the status of ...

Page 158: ...echnical support information complete the following steps 1 Select the Technical Support Information tab Figure 52 FIGURE 52 Technical Support Information tab 2 Click Browse to select the path where the supportShow data will be saved If you do not specify an output path the Management application automatically saves the data to the Install_Home support directory NOTE For Linux systems you cannot h...

Page 159: ...ollowing steps 1 Select the HCM Upgrade tab Figure 53 FIGURE 53 HCM Upgrade tab 2 Click Browse to select the HCM installation folder location for example C Program Files BROCADE Adapter on Windows systems and opt brocade adapter on Solaris and Linux systems 3 Click Upgrade 4 Click Close NOTE All Management application services must be running before you can log into the Management application serv...

Page 160: ... box to choose whether you want the application to remember your password the next time you log in 6 Click Login Figure 55 FIGURE 55 SMIA Configuration Tool dialog box NOTE All Management application services must be running before you can log into the Management application services click Start on the FIGURE 56 Authentication tab ...

Page 161: ...DCFM Professional User Manual 129 53 1001773 01 Upgrading HCM on the Management server 6 FIGURE 57 CIMOM tab FIGURE 58 Certificate Management tab ...

Page 162: ...130 DCFM Professional User Manual 53 1001773 01 Upgrading HCM on the Management server 6 FIGURE 59 Summary tab ...

Page 163: ...Professional Edition only allows you to back up the configuration repository and save switch configuration For complete feature support you must upgrade Enterprise Edition For more information about the database fields refer to Sybase and Derby Database Fields on page 533 Saving switch configurations NOTE Save switch configuration is only supported on Fabric OS switches NOTE To save switch configu...

Page 164: ...tion You can use this file to restore the saved configuration through the device s Element Manager Device properties You can customize the device Properties dialog boxes to display only the data you need by adding editing and deleting property labels You can also edit property fields to change information Viewing properties To view the properties for a device or fabric complete the following step ...

Page 165: ...t Contact The primary contact at the customer site Contributors The device contributors Device Type Whether the device is an initiator or target Description A description of the customer site Destination IP Address The IP address of the of the FCIP tunnel destination device Discovery Status The discovery status of the switch Examples include Discovered Seed Switch and Discovered Not Reachable Doma...

Page 166: ...decimal number Managed By The management program used to manage the fabric Master Port The master port of the trunk Member Ports The member ports of the trunk Model The model number of the device Name The user defined name of the switch Node Name The name of the node Node WWN The world wide name of the node Physical Logical Whether the device is a physical device or a logical device Port Count The...

Page 167: ...ce s state for example online or offline Status The operational status Switch Name The switch name Switch IP The switch IP address Switch WWN The switch world wide name Tape Pipelining Whether tape pipelining is On or Off for the FCIP tunnel Tunnel ID The tunnel identifier Type The device type Unit Type The unit type of the node Vendor The product vendor Virtual FCoE port count The number of virtu...

Page 168: ... any field you create complete the following steps 1 Right click any product icon and select Properties The Properties dialog box displays 2 Select the tab on which you want to edit a property 3 Right click the label for the property you want to edit 4 Select Edit The Edit Property dialog box displays 5 Change the label and description for the property as needed 6 Change the property type from the...

Page 169: ... field complete the following steps 1 Right click any product icon and select Properties The Properties dialog box displays 2 Select the tab on which you want to edit a field Fields containing a green triangle in the lower right corner are editable 3 Click in an editable field and change the information 4 Click OK Enhanced group management Use Enhanced Group Management EGM a separate licensed feat...

Page 170: ...e switch or director model NOTE Non disruptive firmware download HCL is not supported when downgrading from Fabric OS version 6 2 to 6 1 You must remove all non default logical switches and disable Virtual Fabrics before downgrading NOTE Firmware download is not supported in pure IPv6 mode NOTE You cannot use Fabric OS firmware download with command line options in the Management application Displ...

Page 171: ...d Import Date are displayed You may also view the Release Notes if the release notes were imported Importing a firmware file and release notes Firmware files and release notes can be imported into the Firmware Repository 1 Select Configure Firmware Management The Firmware Management dialog box displays 2 Select the Repository tab Figure 61 3 Click Import The Import Firmware from File dialog box di...

Page 172: ...splays 2 Select the Repository tab Figure 61 3 Select one or more firmware files from the Firmware Repository for deletion 4 Click Delete A confirmation dialog displays Click Yes to confirm The firmware file is deleted from the repository Download firmware NOTE Non disruptive firmware download HCL is not supported when downgrading from Fabric OS version 6 2 to 6 1 You must remove all non default l...

Page 173: ...r choose from one of the following options Select External FTP Server to download from the external FTP server If you select external FTP server configure the following on the FTP server Create user and password Select the Shared folders link and set firmware location as the home directory and select all check boxes under the Files and Directories attributes Select SCP Server to download from the ...

Page 174: ...pen the Host Port Mapping dialog box the Management application automatically groups all HBAs under the discovered Host If you create a new Host and associate HBAs to it then you try to discover a Host with the same HBAs using Host discovery the HBA s discovered using Host discovery must match the HBAs associated to the Host exactly otherwise Host discovery will fail Creating a new Host To create ...

Page 175: ...BA icon and select Host Port Mapping The Host Port Mapping dialog box displays 2 Select the Host you want to delete in the Hosts table 3 Click Delete The selected Host is deleted Any HBAs associated with the Host are automatically moved from the Host table to the HBAs table 4 Click OK to save your changes and close the Host Port Mapping dialog box Viewing Host properties To view Host properties co...

Page 176: ...20 00 00 00 C9 69 D5 27 s1 20 00 00 05 1E 0A 35 0E s2 When the import is complete a result summary displays with the information listed in Table 7 TABLE 7 Import Results Value Definition Total Valid Input Records Number of lines identified in the CSV file without any errors excluding the Header Unique HBA WWNs Recognized Number of unique HBAs identified in the CSV file Hosts Created or Identified ...

Page 177: ...splays with the current mapping information Click Yes to overwrite the current mapping Click Yes to All to overwrite all mapping conflicts Click No to leave the current mapping Click No to All to leave all current mappings when conflict occurs Click Cancel to cancel the import 5 Click OK to close the Import Results dialog box 6 Click OK to close the Host Port Mapping dialog box Removing an HBA fro...

Page 178: ...lick any HBA port in the Device Tree and select Host Port Mapping The Host Port Mapping dialog box displays 2 Select the Host port you want to export from the HBA Ports list To configure Host port mapping refer to Creating a new Host on page 142 and Associating an HBA with a Host on page 143 3 Click Export The Export dialog box displays 4 Browse to the location where you want to save the export fi...

Page 179: ...y The Port Connectivity View dialog box displays Figure 65 FIGURE 65 Port Connectivity View dialog box Loop devices are displayed in multiple rows one row for each related device port If no switch or device is connected to the port then the related fields are empty The following table details the information located in alphabetical order on the Port Connectivity View dialog box TABLE 8 Port connec...

Page 180: ...e four possible operation status values Up Operation is normal Down The port is down or the route to the remote destination is disabled Disabled The connection has been manually disabled Backup Active The backup TCP port is active due to a failover Connected Port State The connected port s state for example online or offline Connected Port WWN The world wide name of the connected port Connected Us...

Page 181: ...d wide name of the port Prohibited Whether the allow prohibit matrix is activated Serial The port s serial number Speed The current port speed in gigabits per second State The port s state for example online or offline Switch Dynamic Load Sharing Whether switch dynamic load sharing is enabled Switch FCS Role Whether the Fabric Configuration Server FCS which is the primary point of control that man...

Page 182: ... Disable Switch Routing Policy Whether a routing policy for example port based routing policy is enabled Switch Secure Mode Whether switch secure mode is enabled Switch Status The operational status There are four possible operation status values Up Operation is normal Down The port is down or the route to the remote destination is disabled Disabled The connection has been manually disabled Backup...

Page 183: ... to select the property from which to filter the results 3 Click a blank cell in the Relation column to select an action operation The following actions are available contains matches 4 Define a filter by entering a value that corresponds to the selected property in the Value column 5 Repeat steps 2 through 4 as needed to define more filters 6 Click OK The Port Connectivity View dialog box display...

Page 184: ...lter check box Disabling the filter To disable the filter clear the Filter check box Viewing port details To view port details complete the following steps 1 Right click the port for which you want to view more detailed information on the Port Connectivity View dialog box and select Show Details The Port Details dialog box displays Figure 65 FIGURE 67 Port Details dialog box 2 Review the port info...

Page 185: ...s On bridges and CNT products only utilized Fibre Channel ports display IP ports do not display To view a port s properties right click on a port and select Properties or double click on the port The port Properties dialog box displays Figure 65 FIGURE 68 Port Properties dialog box The following port types are available depending on the selected device FC Ports GigE Ports IP Ports iSCSI Ports NOTE...

Page 186: ... service Connected Devices The number of connected devices Click the icon in the right side of the field to open the Virtual FCoE Port Number Connected Devices dialog box Connected Switch The name of the connected switch Delete button Click to delete Device Type Whether the device is an initiator or target Distance Actual km The actual distance in km for end to end port connectivity Distance Estim...

Page 187: ... ports Port Speed Gb s The port speed in Gbits per second Port State The port state online or offline Port Status The port s operational status online or offline Port WWN The port s world wide name Prohibited Whether the port is prohibited Protocol The network protocol for example Fibre Channel Serial The hardware serial number Slot The location slot of the port Speed Gb s The port speed in Gbits ...

Page 188: ... want to determine and select Show Ports The product s ports display 2 Right click a port and select Connected Port The focus jumps to the connected port and the connection is highlighted Vendor The product vendor Virtual FCoE Port Count The number of FC ports on the device TABLE 10 Port types Port Type Description E An expansion port connecting two Fibre Channel switches EX On a Fibre Channel Rou...

Page 189: ...BLE 11 Port connection properties Field Description Product Properties table The product information for the two connected switches Domain ID The domain ID of the selected switch and product in xxs yy format where xx is the normalized value and yy is the actual value Fabric Name The world wide name of the fabric IP Address The IP address of the switch Switch Name The name of the switch WWN The wor...

Page 190: ...value in milliseconds of the connected switch This variable is used to flag a potential error condition when an unexpected response is not received FC Address The Fibre Channel FC address of the switch FC Port The FC port number of the switch Flag FICON related Whether a FICON related flag is on or off GE Port The GE port number of the switch Locked Port Type The port type of the locked product Lo...

Page 191: ...r the Product List On the Connectivity Map right click on the product whose ports you want to view and select Show Ports To determine a port s status through the Product List scroll down the Product List to the product whose ports you want to see and click the added icon Protocol The network protocol for example Fibre Channel RA TOV The resource allocation time out value in milliseconds of the con...

Page 192: ...Channel address of the port TX Power The power transmitted to the SFP in dBm and uWatts NOTE The uWatts display requires devices with Fabric OS 6 1 0 and later Devices running Fabric OS 6 0 0 and earlier only display dBm RX Power The power received from the port in dBm and uWatts NOTE The uWatts display requires devices with Fabric OS 6 1 0 and later Devices running Fabric OS 6 0 0 and earlier onl...

Page 193: ... Connector The type of port connector Wave Length The wave length Encoding Displays how the fiber optic cable is encoded Voltage mVolts The voltage across the port in mVolts 3 Sort the results by clicking on the column header 4 Rearrange the columns by dragging and dropping the column header 5 Click Cancel to close the Port Optics SFP dialog box Refreshing port optics To refresh port optics click ...

Page 194: ...wing the port auto disable status NOTE The device must be running Fabric OS 6 3 or later 1 Select Configure Port Auto Disable The Port Auto Disable dialog box displays FIGURE 70 Port Auto Disable dialog box 2 Review the port status and other information Products Ports tree Displays devices and associated ports Also displays a Warning icon for blocked FC ports displayed with the port icon Port Auto...

Page 195: ...e dialog box displays 2 Select the fabric on which you want to enable port auto disable PAD from the Fabric list 3 Choose one of the following options from the Show list to filter the port list All Ports default Displays all ports in the fabric Disabled PAD Displays only ports where PAD is enabled 4 Select the ports on which you want to enable PAD 5 Click Enable PAD 6 Click OK on the Port Auto Dis...

Page 196: ...g port auto disable on all ports on a device NOTE The device must be running Fabric OS 6 3 or later 1 Select Configure Port Auto Disable The Port Auto Disable dialog box displays 2 Select the fabric on which you want to disable port auto disable PAD from the Fabric list 3 Select All Ports from the Show list 4 Select the device on which you want to disable PAD on all ports 5 Click Disable PAD 6 Cli...

Page 197: ...ten you want the scheduled collection to occur from the Frequency list 5 Select the start date for the scheduled collection from the Start Date list This list is only available when you select Weekly or Monthly from the Frequency list 6 Select the time you want the scheduled collection to begin from the Start Time Hour and Minute lists 7 Right click in the Available Switches table and select Expan...

Page 198: ...t to collect data for in the Available Switches table and click the right arrow to move them to the Selected Switches and Hosts table 4 Click the Hosts tab if necessary and complete the following steps a Right click in the Available Hosts table and select Expand All b Select the switches you want to collect data for in the Available Switches table and click the right arrow to move them to the Sele...

Page 199: ...l support information To e mail technical support information complete the following steps 1 Select Monitor Technical Support View Repository The Repository dialog box displays 2 Choose from one of the following options Select the Switches tab to e mail technical support information on switches Select the Hosts tab to e mail technical support information on Hosts 3 Select the file you want to e ma...

Page 200: ...nter the network address or domain name of the external FTP server in the Network Address field 6 Enter your user name and password 7 Enter the root directory where you want to copy the data on the external FTP server in the Root Directory field 8 Click OK The data is copied and the Repository dialog box closes automatically Deleting technical support files from the repository To delete a technica...

Page 201: ...rt Upload Failure Data Capture The Upload Failure Data Capture dialog box displays FIGURE 71 Upload Failure Data Capture dialog box 2 Select a one or more devices on which you want to enable automatic trace dump from the Available Switches with Upload Failure Data Capture Disabled table 3 Click the right arrow button The selected devices move from the Available Switches with Upload Failure Data Ca...

Page 202: ...with Upload Failure Data Capture Enabled table to the Available Switches with Upload Failure Data Capture Disabled table 4 Click OK on the Upload Failure Data Capture dialog box 5 Click OK on the confirmation message if necessary Purging upload failure data capture files NOTE Upload Failure Data Capture is only supported on Fabric OS devices 1 Select Monitor Technical Support Upload Failure Data C...

Page 203: ...ialog box displays FIGURE 72 Change FTP Server dialog box 4 Choose one of the following options Select the Use Management_Application option to use the Management application FTP server Select the Custom option and complete the following steps to configure a FTP server for the selected device a Enter the server s IP address in the Host IP field c Enter a user name for the server in the User Name f...

Page 204: ... Upload Failure Data Capture is only supported on Fabric OS devices 1 Select Monitor Technical Support View Repository The Repository dialog box displays 2 Select the trace dump file you want to view from the Available Support and Upload Failure Data Capture Files table 3 Click View The Upload Failure Data Capture repository displays ...

Page 205: ...tor your SAN using the following methods Monitor logs for specified conditions and notify you or run a script when the specified condition is met Create event based policies which contain an event trigger and action Configure E mail event notification Listen forward and process SNMP traps from Fabric OS switches which eliminates the need to poll switches for events Receive and forward Syslog messa...

Page 206: ...Log Displays events which indicate a change in Switch Status for all discovered switches and Brocade HBAs Security Log Displays all security events for the discovered switches Syslog Log Displays syslog messages from switches and HBAs The Management application also has an event notification feature By configuring event notification you can specify when the application should alert you of an event...

Page 207: ... click one of the selected rows and select Copy Rows 4 Open the application to which you want to paste the data 5 Click where you want to paste the data 6 Press CTRL V or select Edit Paste from the other application All data and column headings are pasted 7 Click Close to close the dialog box Copying an entire log entry You can copy data from logs to other applications Use this to analyze or store...

Page 208: ...he Master Log To configure e mail notification refer to Configuring e mail notification on page 201 To e mail event details from the Master Log complete the following steps 1 Right click an entry in the Master Log 2 Select E mail All The E mail dialog box displays 3 Enter the e mail address of the person to receive the e mail in the To field 4 Enter your e mail address in the From field 5 Click OK...

Page 209: ...the e mail in the To field 5 Enter your e mail address in the From field 6 Click OK Displaying event details from the Master Log You can view detailed information for an event To display event details from the Master Log complete the following steps 1 Right click an entry in the Master Log 2 Select Display Details The Event Details dialog box displays 3 Review the information TABLE 12 Event detail...

Page 210: ...o which you want to paste the data 4 Click where you want to paste the data 5 Press CTRL V or select Edit Paste from the other application All data and column headings are pasted Copying the entire Master Log You can copy data from logs to other applications Use this to analyze or store the data using another tool To copy the Master Log complete the following steps 1 Right click an entry in the Ma...

Page 211: ...ick Close to close the dialog box Filtering events in the Master Log You can filter the events that display in the Master Log on the main window By default all event types display in the Selected Events table For more information about the Master Log refer to Master Log on page 7 NOTE The e mail filter in the Management application is overridden by the firmware e mail filter When the firmware dete...

Page 212: ...pecified in the Define Filter dialog box for products in the current view NOTE Selecting these options only filters application and product specific events Clear both the Filter and Only events in current view check boxes to turn off the filter and view all events Setting up advanced event filtering for the Master Log To set up advanced event filtering on the selected events for the Master Log com...

Page 213: ... and time based filter fields do not display unless there is at least one advanced filter in the Additional Filters Include these Events table To set a duration for the filters select Last and choose how long to filter the events from the list Options include All 1 hour 2 hours 12 hours and 24 hours To set a specific date and time for the filters select Between and enter a start and end time in th...

Page 214: ...sional User Manual 53 1001773 01 Event logs 8 c Click the right arrow button to move the event type to the Additional Filters Filter out these Events table NOTE You can configure a maximum of 10 filters to be excluded ...

Page 215: ...Click OK to close the Advanced Event Filtering dialog box The Define Filter dialog box displays 8 Click OK to close Define Filter dialog box Event policies You can create policies for events you want to monitor A policy is the mechanism defined by you that identifies the response to specific event types You can customize the event management policy using triggers and actions which are explained in...

Page 216: ...a target product is audited Product Event notifies you when the product status changes Product Open Trunking Event occurs when a device open trunking event has been triggered Product State Event occurs when a device or connection changes to Up or Down Product Threshold Alert Event notifies you when a threshold alert has been reached Security Event notifies you when a product s security level chang...

Page 217: ...ollowing steps 1 Select Monitor Event Policies The Event Policies dialog box displays 2 Click Add The Add Event Policy dialog box displays 3 Enter a name 1024 characters maximum for the policy in the Name field Policy names must be unique however they are case insensitive 4 Enter a description 1024 characters maximum for the policy in the Description field 5 Select Event from the Policy Type list ...

Page 218: ...tion is 30 minutes 14 Select the check box in the Actions list for each action you want to occur when this policy is triggered For a list of the available actions refer to Policy actions on page 185 To define an action refer to Defining the broadcast message action on page 189 Defining the launch script action on page 190 Defining the send e mail action on page 191 or Configuring support data capt...

Page 219: ...1 or Configuring support data capture action on page 192 11 Click OK on the Add Event Policy dialog box 12 Select the Active check box for the policy you want to activate 13 Click OK on the Event Policies dialog box Adding a PM threshold crossed policy To add a PM threshold crossed policy complete the following steps 1 Select Monitor Event Policies The Event Policies dialog box displays 2 Click Ad...

Page 220: ...be unique however they are case insensitive 4 Enter a description 255 characters maximum for the policy in the Description field 5 Select Security Violation from the Policy Type list 6 Define the trigger in the IP Address Node WWN and Name list The trigger is limited to 1024 characters Multiple values must be separated by a semi colon When multiple values are entered as long as at least one value ...

Page 221: ... an event policy on page 193 Duplicating an Port offline policy on page 194 Duplicating a PM threshold crossed policy on page 195 or Duplicating a security violation policy on page 196 For step by step instructions on editing an event policy refer to Editing an event policy on page 197 Editing an Port offline policy on page 198 Editing a PM threshold crossed policy on page 199 or Editing a securit...

Page 222: ...plicating an Port offline policy on page 194 Duplicating a PM threshold crossed policy on page 195 or Duplicating a security violation policy on page 196 For step by step instructions on editing an event policy refer to Editing an event policy on page 197 Editing an Port offline policy on page 198 Editing a PM threshold crossed policy on page 199 or Editing a security violation policy on page 200 ...

Page 223: ...ting an event policy refer to Editing an event policy on page 197 Editing an Port offline policy on page 198 Editing a PM threshold crossed policy on page 199 or Editing a security violation policy on page 200 You must configure the Management application e mail server before you can define the e mail action For more information refer to Configuring e mail notification on page 201 To define the e ...

Page 224: ...olicy on page 199 or Editing a security violation policy on page 200 To configure the Management application to start supportSave on Fabric OS devices complete the following steps NOTE If you select User Action Event or Tech Support Event from the Event Type list Capture Support Data Fabric OS cannot be configured to start supportSave capture 1 Select Capture Support Data Fabric OS from the Action...

Page 225: ...acters maximum for the policy in the Name field Policy names must be unique however they are case insensitive 5 Edit the description 255 characters maximum for the policy in the Description field 6 Change the event type by selecting an event type from the Event Type list For a list of event types refer to Event types on page 183 7 Change the event level by selecting an event level from the Event L...

Page 226: ...ing the send e mail action on page 191 or Configuring support data capture action on page 192 15 Click OK on the Edit Event Policy dialog box 16 Select the Active check box to activate the duplicated policy 17 Click OK on the Event Policies dialog box Duplicating an Port offline policy To duplicate an Port offline policy complete the following steps 1 Select Monitor Event Policies The Event Polici...

Page 227: ... a name 255 characters maximum for the policy in the Name field Policy names must be unique however they are case insensitive 5 Edit the trigger in the IP Address Node WWN and Name list The trigger is limited to 1024 characters Multiple values must be separated by a semi colon When multiple values are entered as long as at least one value matches the IP address Node WWN or Name in the event and al...

Page 228: ...t least one value matches the IP address Node WWN or Name in the event and all other conditions are met an action is triggered IP addresses can either be in IPv4 or IPv6 format and must be complete A Node WWN is accepted with or without the colon 6 Enter a value between 2 and 999 in the Count field 7 Enter a value between 1 and 999 in the Duration field 8 Select the duration type Seconds or Minute...

Page 229: ... policy is triggered 9 Edit the trigger in the IP Address Node WWN and Name list The trigger is limited to 1024 characters Multiple values must be separated by a semi colon When multiple values are entered as long as at least one value matches the IP address Node WWN or Name in the event and all other conditions are met an action is triggered IP addresses can either be in IPv4 or IPv6 format and m...

Page 230: ...ither be in IPv4 or IPv6 format and must be complete A Node WWN is accepted with or without the colon 5 Change the count value between 2 and 999 in the Count field 6 Change the duration value between 1 and 999 in the Duration field 7 Select the duration type Seconds or Minutes from the Duration list The maximum duration is 30 minutes 8 Select the check box in the Actions list for each action you w...

Page 231: ...es can either be in IPv4 or IPv6 format and must be complete A Node WWN is accepted with or without the colon 5 Change the count value between 2 and 999 in the Count field 6 Change the duration value between 1 and 999 in the Duration field 7 Select the duration type Seconds or Minutes from the Duration list The maximum duration is 30 minutes 8 Select the check box in the Actions list for each acti...

Page 232: ...n the Duration field 7 Select the duration type Seconds or Minutes from the Duration list The maximum duration is 30 minutes 8 Select the check box in the Actions list for each action you want to occur when this policy is triggered For a list of the available actions refer to Policy actions on page 185 To define an action refer to Defining the broadcast message action on page 189 Defining the laun...

Page 233: ...Setup dialog box displays Figure 76 FIGURE 76 E mail Notification Setup dialog box 2 Select the Enable E mail Event Notification check box 3 Enter the IP address or the name of the SMTP mail server that the Server can use to send the e mail in the E mail Server field 4 Select the SMTP over SSL check box to enable secure communication 5 Enter the authentication ID of the SMTP mail server in the SMT...

Page 234: ... Test E mail to test the e mail server A message displays whether the server was found If the server was not found verify that the server address was entered correctly and that the server is running If you are using an SMTP mail server also verify that the SMTP ID and password information was entered correctly 11 Click OK to save your work and close the E mail Event Notification Setup dialog box S...

Page 235: ...e Events table To add additional filters repeat steps a through d 6 To remove a filter from the Additional Filters Include these Events table refer to Configure a date and time based filter by choosing one of the following options NOTE The date and time based filter fields do not display unless there is at least one advanced filter in the Additional Filters Include these Events table To set a dura...

Page 236: ...l order b Enter all or part of the event type description text in the Description Contains text box up to 40 characters This text should be the same text that displayed in the Description field for the events that displayed on the Master Log c Click the right arrow button to move the event type to the Additional Filters Filter out these Events table 8 Click OK The Define Filter dialog box displays...

Page 237: ...d Fabric OS devices To register the management server complete the following steps 1 Select Monitor SNMP Setup The SNMP Setup dialog box displays 2 Click the Management Server tab 3 Select the Auto register server as SNMP trap or informs recipient check box if necessary This check box is selected by default 4 Enter the SNMP listening port number of the Server in the SNMP Listening Port Server fiel...

Page 238: ...er Recipients tab 3 Select Remove from the Action list 4 Click OK on the SNMP Setup dialog box Enabling trap forwarding You can enable trap forwarding on all defined destinations To enable trap forwarding complete the following steps 1 Select Monitor SNMP Setup The SNMP Setup dialog box displays 2 Click the Trap Forwarding tab 3 Select the Enable trap forwarding check box 4 Click OK on the SNMP Se...

Page 239: ...dialog box displays 2 Click the Trap Forwarding tab 3 Select V3 from the Trap forwarding type list 4 Enter a user name in the User Name field 5 Optional Enter a context name in the Context Name field 6 Select the authorization protocol in the Auth Protocol field 7 Enter the authorization password in the Auth Password field and the Retype Password field 8 Select the privacy protocol in the Priv Pro...

Page 240: ...trap recipient s UDP port number in the port field d Click OK on the Add Edit Trap Recipient dialog box 4 Click OK on the SNMP Setup dialog box Removing a destination To remove a destination complete the following steps 1 Select Monitor SNMP Setup The SNMP Setup dialog box displays 2 Click the Trap Forwarding tab 3 Select the destination you want to remove in the Destinations table and click Remov...

Page 241: ...ecific switches in a Fabric you must configure Informs using the Element Manager on each switch or through the command line interface All Informs capable switches display in the SNMP Informs Capable Switch in the Fabric table 5 Click OK on the SNMP Setup dialog box SNMP Informs will be enabled on all switches in the SNMP Informs Capable Switch in the Fabric table Disabling SNMP informs To disable ...

Page 242: ...ogical switches the associated default switch must also be managed and monitored by the Management application Syslog messages are persisted in the database You can view the Syslog messages from the Management application by selecting Monitor Log Syslog You can also view audit syslog messages in the Master Log or by selecting Monitor Log Audit Log Registering the management server You can automati...

Page 243: ...following steps 1 Select Monitor Syslog Configuration The Syslog Registration and Forwarding dialog box displays 2 Click the Other Destination tab 3 Select Remove from the Action list 4 Click OK on the Syslog Registration and Forwarding dialog box Adding a destination You can forward Syslog events sent to this server to another destination on a different host To add a destination complete the foll...

Page 244: ...e Add Edit Syslog Recipient dialog box 4 Click OK on the Syslog Registration and Forwarding dialog box Removing a destination To remove a destination complete the following steps 1 Select Monitor Syslog Configuration The Syslog Registration and Forwarding dialog box displays 2 Click the Syslog Forwarding tab 3 Select the destination you want to remove in the Destinations table and click Remove Pre...

Page 245: ...g on all defined destinations To disable Syslog forwarding complete the following steps 1 Select Monitor Syslog Configuration The Syslog Registration and Forwarding dialog box displays 2 Click the Syslog Forwarding tab 3 Clear the Enable Syslog forwarding check box 4 Click OK on the Syslog Registration and Forwarding dialog box ...

Page 246: ...214 DCFM Professional User Manual 53 1001773 01 Syslog forwarding 8 ...

Page 247: ...es details about the quantity of traffic and errors a specific port or device generates on the fabric over a specific time frame You can also use performance to indicate the devices that create the most traffic and to identify the ports that are most congested Performance allows you to monitor your SAN by gathering and displaying real time performance data FC and GE ports as well as FCIP tunnels ...

Page 248: ...Failures available for Managed HBA ports Managed CNA ports and FC ports Sequence Errors available for FC ports Invalid Transmissions available for FC ports Rx Link Resets available for FC ports Tx Link Resets available for FC ports Dropped Packets available for FCIP tunnels only Compression Ratio available for FCIP tunnels only Latency available for FCIP tunnels only Link Retransmits available for...

Page 249: ...No access host configured yet Entry 2 No access host configured yet Entry 3 No access host configured yet Entry 4 No access host configured yet Entry 5 No access host configured yet Example of Management application Server IP included in access control list FCRRouter admin snmpconfig show accesscontrol SNMP access list configuration Entry 0 Access host subnet area 172 26 1 86 rw Entry 1 No access ...

Page 250: ...nt configuration Community rw test Trap Recipient s IP address 172 26 1 183 Trap recipient Severity level 0 5 4 Trap recipient Port 0 65535 162 Community rw OrigEquipMfr Trap Recipient s IP address 172 26 24 26 Trap recipient Severity level 0 5 4 Trap recipient Port 0 65535 162 Community rw custom Trap Recipient s IP address 172 26 1 158 Trap recipient Severity level 0 5 4 Trap recipient Port 0 65...

Page 251: ...Protocol MD5 1 SHA 2 noAuth 3 1 3 3 Priv Protocol DES 1 noPriv 2 3DES 3 AES128 4 AES192 5 AES256 6 2 2 2 User rw snmpadmin3 Auth Protocol MD5 1 SHA 2 noAuth 3 1 3 3 Priv Protocol DES 1 noPriv 2 3DES 3 AES128 4 AES192 5 AES256 6 2 2 2 User ro snmpuser1 Auth Protocol MD5 1 SHA 2 noAuth 3 1 3 3 Priv Protocol DES 1 noPriv 2 3DES 3 AES128 4 AES192 5 AES256 6 2 2 2 User ro snmpuser2 Auth Protocol MD5 1 ...

Page 252: ...ate level for the switch To check the SNMP security level use the snmpconfig show secLevel command Example of checking SNMP security level snmpconfig show secLevel GET security level 0 SET level 0 SNMP GET Security Level No security SNMP SET Security Level No security To set the SNMP security level use the snmpconfig set secLevel command Example of checking SNMP security level snmpconfig set secLe...

Page 253: ... is running on the switch to obtain real statistics To view switch statistics use the portperfshow slot port slot port tx rx tx rx t interval FC Ports or portshow fciptunnel Ge port number tunnel no perf FCIP tunnels command Example for FC ports Sprint 65 root portperfshow 5 Example for FCIP tunnels Sprint 65 root portshow fciptunnel ge0 1 perf Real time performance data Real time performance enab...

Page 254: ...the device or fabric and select Performance Real Time Graph If you selected a port the Real Time Performance Graphs dialog box for the selected port displays To filter real time performance data from the Real Time Performance Graphs dialog box refer to Filtering real time performance data on page 223 If you selected a fabric or device the Realtime Port Selector dialog box displays Continue with st...

Page 255: ...hich you want to graph performance from the Show list 4 Right click anywhere in the Available table and select Expand All 5 Select the ports you want to include in the performance graph in the Available table Press Ctrl or Shift and then click to select more than one port 6 Click the right arrow to move the selected ports to the Selected table 7 Click OK The Real Time Performance Graphs dialog box...

Page 256: ...selected graph automatically displays in the Real Time Performance Graphs dialog box 16 Click the close button X to close the Real Time Performance Graphs dialog box Exporting real time performance data To export real time performance data complete the following steps 1 Generate a performance graph To generate a performance graph refer to Generating a real time performance graph on page 222 2 Righ...

Page 257: ...ators support consultants and others interested in the SAN s architecture or archive them for future reference The following standard report types are available from the Generate Reports dialog box Fabric Ports Lists discovered ports including used and unused ports Port data for each fabric is divided into three parts Fabric wide port details Switch wide port details and individual port details Fa...

Page 258: ... SAN To view reports complete the following steps 1 Select Reports View or click the View Report icon The View Reports dialog box displays 2 Select the report you want to view in the All Reports list If you do not see the report you want to view generate it first by following the instructions in Generating reports on page 226 You can select reports by Time Report Type or User 3 Use the buttons in ...

Page 259: ...ge 226 You can select reports by Time Report Type or User 3 Select the format PDF HTML or XML you want to export to from the list to the left of the Export button 4 Click Export The Save dialog box displays 5 Browse to the file location where you want to save the report and click Save 6 Click Close to close the View Reports dialog box 7 Click Yes on the are you sure you want to close message ...

Page 260: ...og box displays 5 Select the printer to which you want to print and click Print 6 Close the Web browser 7 Click Close in the View Reports dialog box 8 Click Yes on the are you sure you want to close message Deleting reports To delete reports complete the following steps 1 Select Reports View or click the View Report icon The View Reports dialog box displays 2 Select the report you want to delete i...

Page 261: ...gure Zoning or right click the device and select Zoning The Zoning dialog box displays 2 Click Report 3 Click OK on the message The selected report automatically displays in the View Reports dialog box NOTE Hyperlinks in reports are active only as long as the source data is available To print the selected report refer to Printing reports on page 228 To export the selected report refer to Exporting...

Page 262: ...230 DCFM Professional User Manual 53 1001773 01 Generating zoning reports 10 ...

Page 263: ...ates with another manageability application called the Host Connectivity Manager HCM to provide complete management of the host bus adapters HBAs and converged network adapters CNAs The Management application focuses on operations such as fault management performance management and configuration management for multiple adapters and adapter ports and security configuration using Fibre Channel Secur...

Page 264: ...A ports including logical ports base ports remote ports and virtual ports Brocade 10 Gbps single port and 10 Gbps dual port converged network adapters CNAs CEE ports FCoE ports CNA only Ethernet ports CNA only Diagnostics which enables you to test the adapters and the devices to which they are connected Link status of each adapter and its attached devices Loopback test which is external to the ada...

Page 265: ...ne and therefore no optical modules SFPs are involved With the exception of no SFPs the Brocade 804 mezzanine FC HBA card and Brocade 1007 CNA expansion card functions the same as the other Brocade adapters TABLE 13 Brocade Fibre Channel HBA models Model Number Description Number of Ports Brocade 804 Dual port mezzanine HBA with a per port maximum of 8 Gbps This HBA installs in server blades that ...

Page 266: ...et CEE networks FCoE and 10 Gbps CEE operations are simultaneous TABLE 14 Brocade Fibre Channel CNA Models Model Number Port Speed Number of Ports Adapter Type Brocade 10071 10 Gbps maximum 2 Expansion Brocade 1020 10 Gbps maximum 2 Stand up Brocade 1010 10 Gbps maximum 1 Stand up 1 The Brocade 1007 is a two port CNA mezzanine or expansion card adapter that mounts on a blade server that installs i...

Page 267: ...Hosts from a CSV file Importing Hosts from a Fabric Configuring Brocade HBA credentials Configuring virtual machine credentials Editing Host credentials Removing a Host from Discovery Viewing the discovery state Troubleshooting discovery Connectivity map The Connectivity Map which displays in the upper right area of the main widow is a grouped map that shows physical and logical connectivity of SA...

Page 268: ...osts directly using Host discovery for step by step instructions refer to Host discovery on page 43 If you discover a host directly when you open the Host Port Mapping dialog box the Management application automatically groups all HBAs under the host If you create a new Host and associate HBAs to it and then you try to discover a host with the same HBAs using Host discovery the HBA s discovered us...

Page 269: ... ports and for the HBA and CNA ports TABLE 15 Counters FC port measures HBA port measures CNA port measures Tx utilization Tx utilization Tx utilization Rx utilization Rx utilization Rx utilization Tx MBps Tx MBps Tx MBps Rx MBps Rx MBps Rx MBps CRC errors CRC errors Signal losses Signal losses Sync losses Sync losses Link failures Link failures Sequence errors Primitive sequence protocol errors I...

Page 270: ...get product is audited Product Status Event occurs when a device or connection changes to Up or Down Product Threshold Alert Event notifies you when a threshold alert has been reached You can configure event policies for events you want to monitor A policy is the mechanism defined by you that identifies the response to specific event types You can customize the event management policy using trigge...

Page 271: ...abric OS devices and Brocade HBAs managed using the HCM Agent Syslog forwarding is the process by which you can configure the Management application to send Syslog messages to other computers Switches only send the Syslog information through port 514 therefore if port 514 is being used by another application you must configure the Management application to listen on a different port Then you must ...

Page 272: ...for Brocade HBAs that are managed using the HCM agent FC SP is not available for virtual ports or unmanaged HBA ports The user must have the Security privilege to use this feature Configuring security authentication using the Management application Access the Fibre Channel Security Protocol Configuration FCSP dialog box by selecting an adapter port from the device tree 1 Select the appropriate dev...

Page 273: ...igest version 5 MD5 produces a 128 bit digest and is the required authentication mechanism for LDAP v3 servers SHA1 A secure hashing algorithm that computes a 160 bit message digest for a data file that is provided as input MD5SHA1 Similar to the MD5 hashing algorithm but used for DH CHAP authentication SHA1MD5 Similar to the SHA1 hashing algorithm but used for DH CHAP authentication b Select DHNU...

Page 274: ...ime You can use Technical Support to collect supportSave data such as RASLOG TRACE and so on and switch events from Fabric OS devices The switch must be running Fabric OS 5 2 X or later to collect technical support data In addition you must have the supportSave privilege to collect supportSave information NOTE You cannot schedule Host supportSave information Instructions for scheduling and capturi...

Page 275: ...nced settings 263 Viewing FCIP connection properties 268 Viewing General FCIP properties 269 Viewing FCIP FC port properties 270 Viewing FCIP Ethernet port properties 271 Editing FCIP tunnels 272 Editing FCIP circuits 273 Disabling FCIP tunnels 274 Enabling FCIP tunnels 274 Deleting FCIP tunnels 276 Displaying FCIP performance graphs 277 Displaying FCIP performance graphs for Ethernet ports 277 Di...

Page 276: ...P network Because an FCIP tunnel uses an existing IP network configuring and managing an FCIP tunnel requires knowledge of general IP networking concepts and specific knowledge about the IP network that will be used for the tunnel Because the IP network may be used to transport data over very long distances and because the IP network is not designed exclusively for large data transfers latency is ...

Page 277: ...Gbps 16 FC ports 6 Gbps ports extension switch and 8 Gbps 12 FC port 10 GbE ports 2 10 GbE ports blade in Fabric OS version 6 3 0 but are planned for a later version Table 16 summarizes FCIP capabilities per platform Support is planned for a later release TABLE 16 FCIP capabilities Capabilities 8 Gbps 16 FC ports 6 Gbps ports extension switch 8 Gbps 12 FC port 10 GbE ports 2 10 GbE ports blade 4 G...

Page 278: ... of WAN bandwidth and providing redundant paths over the WAN to protect against transmission loss This feature is available only on the 8 Gbps extension switches and 8 Gbps extension blades Trunking is enabled by creating logical circuits within an FCIP tunnel A tunnel may have multiple circuits Each circuit is a connection between a pair of IP addresses that are associated with source and destina...

Page 279: ...DID pairs emulation Fast Write Tape Pipelining XRC or FICON Tape Pipelining will fail when a command is routed via tunnel 1 and the responses are returned via tunnel 2 Therefore multiple equal cost tunnels are not supported between the switch pairs when emulation is enabled on any one or more tunnels without controlling the routing of SID DID pairs to individual tunnels using TI Zones or LS LF con...

Page 280: ... lowest metric circuit In Figure 83 circuit 1 and circuit 2 are both lowest metric circuits Circuit 1 has failed and transmission fails over to circuit 2 which has the same metric Traffic that was pending at the time of failure is retransmitted over circuit 2 In order delivery is ensured by the receiving 7800 switch FIGURE 83 Link loss and retransmission over peer lowest metric circuit In Figure 8...

Page 281: ...ng ARL is performed on FCIP tunnel connections to change the rate in which the FCIP tunnel transmits data through the TCP connections This feature is available only on the 8 Gbps extension switches and 8 Gbps extension blades ARL uses information from the TCP connections to determine and adjust the rate limit for the FCIP tunnel dynamically This allows FCIP connections to utilize the maximum avail...

Page 282: ... of lower priorities if necessary QoS high The QoS high priority gets at least 50 of the available bandwidth QoS medium The QoS medium priority gets at least 30 of the available bandwidth QoS low The QoS low priority gets at least 20 of the available bandwidth These priorities are enforced only when there is congestion on the network If there is no congestion all traffic is handled at the same pri...

Page 283: ...Block Chaining mode of operation suitable for securing messages of varying lengths such as IP datagrams AH Authentication Header like ESP AH provides data integrity data source authentication and protection against replay attacks but does not provide confidentiality DES Data Encryption Standard is the older encryption algorithm that uses a 56 bit key to encrypt blocks of 64 bit plain text Because ...

Page 284: ...er switches and blades for mutual authentication IKEv2 uses UDP port 500 to communicate between the peer switches or blades All IKE traffic is protected using AES GCM ESP encryption Authentication requires the generation and configuration of 32 byte pre shared secrets for each peer switch or blade An SHA 512 hash message authentication code HMAC is used to check data integrity and detect third par...

Page 285: ...o determine the appropriate DSCP values VLANs and layer two quality of service Devices in physical LANs are constrained by LAN boundaries They are usually in close proximity to each other and share the same broadcast and multicast domains Physical LANs often contain devices and applications that have no logical relationship Also when logically related devices and applications reside in separate LA...

Page 286: ... 011011 0 000 Class 3 Multicast 31 011111 0 000 Broadcast Multicast 35 100011 0 000 Low Qos 39 100111 0 000 Low Qos 43 101011 4 100 High QoS 47 101111 4 100 High QoS 51 110011 4 100 High QoS 55 110111 4 100 High QoS 59 111011 4 100 High QoS 63 111111 0 000 TABLE 18 Default Mapping of DSCP priorities to L2Cos Priorities Continued DSCP priority bits L2CoS priority bits Assigned to ...

Page 287: ...figuring tunnels to use OSTP TABLE 19 FCIP Fastwrite Tape Acceleration Each GbE port supports up to 2048 simultaneous accelerated exchanges which means a total of 2048 simultaneous exchanges combined for Fastwrite and Tape Acceleration Each GbE port supports up to 2048 simultaneous accelerated exchanges which means a total of 2048 simultaneous exchanges combined for Fastwrite and Tape Acceleration...

Page 288: ...throttling the I O XRC emulation provides local responses to remote hosts eliminating distance related delays A FICON XRC Emulation License is required to enable XRC Emulation Tape write pipelining FICON tape write pipelining improves performance for a variety of applications when writing to tape over extended distances FICON tape write pipelining locally acknowledges write data records enabling t...

Page 289: ...ction should be active and working Identify all the devices in the data path between the extension switches including Ethernet switches Ethernet routers firewalls and common carrier equipment A network diagram is very helpful Support engineers may ask you to provide a network diagram when troubleshooting problems Routers and firewalls must be configured to pass ARP ICMP and IP layer 3 protocols Pe...

Page 290: ...tension connection you create FCIP tunnels and FCIP circuits between two extension switches 1 Select Configure FCIP Tunnels The FCIP Tunnels dialog box is displayed Figure 86 All discovered fabrics with extension switches are listed under devices FIGURE 86 FCIP Tunnels dialog box 2 Select the switch you want to configure under Devices ...

Page 291: ...E 87 Add FCIP Tunnel dialog box 4 Click Select Switch Two under Switch Two Settings to display discovered extension switches and select the switch that you want to connect to switch one The switch name and fabric are displayed in the Switch and Fabric fields 5 Enter a description of the tunnel in the Description field NOTE You cannot assign a Tunnel ID until after at least one circuit is configure...

Page 292: ...ion switch or blade model 2 Select the IP Address Type The implementation is a dual IP layer operation implementation as described in RFC 4213 IPv6 addresses can exist with IPv4 addresses on the same interface but the FCIP circuits must be configured as IPv6 to IPv6 and IPv4 to IPv4 connections IPv6 to IPv4 connections are not supported Likewise encapsulation of IPv4 in IPv6 and IPv6 in IPv4 is no...

Page 293: ...ic option is used to identify a failover circuit By assigning a non zero metric 1 you identify the circuit as a failover circuit By default a circuit is assigned a metric of 0 If a circuit fails FCIP trunking tries first to retransmit any pending send traffic over another circuit with a metric of 0 If no circuits with a metric of 0 are available then the pending send traffic is retransmitted over ...

Page 294: ...dgement should not be disabled Do not disable selective acknowledgement unless you have a specific need to do so in your operating environment Use the Keep Alive Time Out ms option to override the default value of 10000 ms As shown the range is from 500 to 7200000 Use the Max Retransmission Time ms option to override the default value of 100 ms Use the Max Retransmits option to override the defaul...

Page 295: ...ng and disabling compression Data compression can improve performance on long distance connections The procedure for enabling compression for the 4 Gbps Router Extension Switch and Blade is different than the procedure for enabling compression for the 8 Gbps 16 FC ports 6 Gbit ports Extension Switch and 8 Gbps 12 FC port 10 GbE ports 2 10 GbE ports Extension blade For 4 Gbps Router Extension Switc...

Page 296: ... the check mark and click OK Enabling Open Systems Tape Pipelining OSTP Latency introduced by a long distance IP connection can negatively impact tape I O performance OSTP may be used to improve performance on SCSI write I Os to sequential devices such as tape drives When OSTP is used the extension blades or switches emulate write commands and responses locally to reduce delays caused by latency B...

Page 297: ...E and IPsec policies These policies are enabled by selecting the Enable IPSec check box Matching policies are applied to the remote switch Note that the Enable IPSec check box is grayed while editing the tunnels because the IPsec settings cannot be edited for the secured tunnels 3 In the PreShared Key field specify the key for IKE authentication For the 4 Gbps router Extension switch and blade the...

Page 298: ... tunnel advanced settings 12 FIGURE 92 Advanced Settings Security Tab for the 8 Gbps extension switch and blade NOTE IPSec settings cannot be edited If you want to change settings you will need to delete the tunnel and then create a new tunnel with the new settings ...

Page 299: ... support for the three primary features If you select any of the primary features you must also select TIN TUR emulation and device level ACK emulation 2 Select the operational parameters for FICON emulation FICON Tape Write Max Pipe defines a maximum number of channel commands that may be outstanding at a given time during write pipelining Too small of a value will result in poor performance The ...

Page 300: ...path The range is 100 1500 FICON Tape Max Write Chain defines the maximum amount of data that can be contained in a single CCW chain If this value is exceeded emulation is suspended The range is FICON Oxid Base defines the base value of an entry pool of 256 OXIDs supplied to emulation generated exchanges It should fall outside the range used by FICON channels and devices to avoid conflicts The ran...

Page 301: ...P properties Take the following steps to view general FCIP properties 1 Select an extension blade or switch from the Fabric Tree structure or right click an extension blade or switch on the Connectivity Map and select Properties 2 Select the Properties tab Figure 95 FIGURE 95 General FCIP properties tab ...

Page 302: ...P FC port properties Take the following steps to view FCIP FC port properties 1 Select an extension blade or switch from the Fabric Tree structure or right click an extension blade or switch on the Connectivity Map and select Properties 2 Select the FC Ports tab Figure 96 FIGURE 96 FC ports tab ...

Page 303: ...Ethernet port properties Take the following steps to view Ethernet port properties 1 Select an extension blade or switch from the Fabric Tree structure or right click an extension blade or switch on the Connectivity Map and select Properties 2 Select the GigE Ports tab Figure 97 FIGURE 97 GigE ports tab ...

Page 304: ...able the tunnel before making changes 1 From the FCIP Tunnels dialog box select the tunnel you want to edit 2 Select Edit Tunnel The Edit FCIP Tunnel dialog box displays Figure 98 FIGURE 98 Edit FCIP Tunnel dialog box 3 Fields and parameters are as described in Configuring an FCIP tunnel You can edit all editable fields and parameters ...

Page 305: ... Gbit ports Extension Switch and 8 Gbps 12 FC port 10 GbE ports 2 10 GbE ports Extension blade may have multiple circuits per tunnel and circuits may be selected individually For the 4 Gbps Router Extension Switch and Blade 1 From the FCIP Tunnels dialog box select the tunnel you want to edit 2 Select Edit Tunnel The Edit FCIP Tunnel dialog box displays 3 Select Edit FCIP Circuit The Edit FCIP Cir...

Page 306: ...fields and parameters Disabling FCIP tunnels 1 From the FCIP Tunnels dialog box select the tunnel you want to disable 2 Select Disable Tunnel A confirmation dialog box displays warning you that when you delete a tunnel you delete all associated FCIP circuits 3 Click OK to disable the tunnel Enabling FCIP tunnels 1 From the FCIP Tunnels dialog box select the tunnel you want to enable 2 Select Enabl...

Page 307: ...DCFM Professional User Manual 275 53 1001773 01 Enabling FCIP tunnels 12 A confirmation dialog box displays 3 Click OK to enable the tunnel ...

Page 308: ...able 4 Select Disable Circuit A confirmation dialog box displays 5 Click OK to disable the circuit Enabling FCIP circuits 1 From the FCIP Tunnels dialog box right click the tunnel that contains the circuit 2 Select the Circuit tab 3 Select the circuit from the circuit properties table 4 Select Enable Circuit A confirmation dialog box displays 5 Click OK to enable the circuit Deleting FCIP Circuits...

Page 309: ...performance graphs for FC ports 1 Select an extension blade or switch from the Fabric Tree structure or right click an extension blade or switch on the Connectivity Map and select Properties 2 Select the FC Ports tab 3 Click Performance Real Time Graph Displaying FCIP performance graphs for Ethernet ports 1 Select an extension blade or switch from the Fabric Tree structure or right click an extens...

Page 310: ... 12 Displaying tunnel properties from the FCIP tunnels dialog box Tunnel properties can be displayed from the FCIP Tunnels dialog box 1 Select a tunnel from the FCIP tunnels dialog box 2 Select the Tunnel tab Tunnel properties are displayed Figure 100 FIGURE 100 Tunnel properties on the FCIP Tunnels dialog box ...

Page 311: ...IP circuit properties from the FCIP tunnels dialog box Tunnel properties can be displayed from the FCIP Tunnels dialog box using the following procedure 1 Select a tunnel from the FCIP tunnels dialog box 2 Select the Circuit tab Circuit properties are displayed Figure 101 FIGURE 101 Circuit properties on the FCIP Tunnels dialog box ...

Page 312: ...properties from the FCIP Tunnels dialog box 12 Displaying switch properties from the FCIP Tunnels dialog box Switch properties are displayed on the FCIP Tunnels dialog box when you select a switch Figure 102 FIGURE 102 Switch properties on the FCIP Tunnels dialog box ...

Page 313: ...properties from the FCIP Tunnels dialog box 12 Displaying fabric properties from the FCIP Tunnels dialog box Fabric properties are displayed on the FCIP Tunnels dialog box when you select a fabric Figure 103 FIGURE 103 Fabric properties on the FCIP Tunnels dialog box ...

Page 314: ... switch on the Connectivity Map and select Properties 2 Select the GigE Ports tab 3 Select the Ethernet port 4 Click Troubleshooting The following options are presented IP Ping Tests connections between a local Ethernet port ge0 or ge1 and a destination IP address IP Traceroute Traces routes from a local Ethernet port ge0 or ge1 to a destination IP address IP Performance Measures end to end IP pat...

Page 315: ...n the limited bandwidth that Ethernet has historically provided However with 10 Gbps Ethernet the available bandwidth now offers the potential to consolidate all the traffic types over the same link Unlike Fibre Channel Ethernet is not a peer to peer protocol The mechanism used to discover new ports MAC address assignments and FC logins and logouts is called the FCoE Initialization Protocol FIP DC...

Page 316: ...iority groups are fully subscribed If one of the priority groups does not consume its allocated bandwidth then any unused portion is available for use by other priority groups Priority based flow control Priority based flow control allows the network to selectively pause different classes of traffic and create lossless lanes for Fibre Channel while retaining packet drop congestion management for I...

Page 317: ... 802 3ae 10 Gb Ethernet 802 1p priority encoding IEEE 1149 1 JTAG for manufacturing debug and diagnostics IPv4 specification RFC 793 768 IPv6 specification RFC 2460 TCP UDP specification RFC 793 768 ARP specification RFC 826 RSS with support for IPV4TCP IPV4 IPV6TCP IPV6 hash types HDS Header data split FCoE protocols The following protocols support Fibre Channel over Ethernet FIP FC BB5 compliant...

Page 318: ...virtual FCoE port displays in the device tree but you cannot enable disable or view virtual FCoE port information Save running to startup The Save running to startup dialog box lists discovered CEE switches with Fabric OS version 6 3x firmware or higher You can select available switches and move them to the Selected Switches table Upon startup the CEE switch configuration is copied to the selected...

Page 319: ...has 8 8 Gbps FC ports and 24 10 Gbps Ethernet CEE ports You must configure CEE interfaces and ports differently than you configure FC ports in order to effectively use the converged network features For example Priority based flow control PFC and Enhanced transmission selection ETS are the two QoS policy enhancements you must configure to create a lossless Ethernet You then use DCBX protocol on CE...

Page 320: ...map and select Configure CEE The CEE Configuration dialog box displays showing the status of all CEE related hardware and functions NOTE The Protocol Down Reason column displays only if the 10 Gbps CEE FC switch module is selected FIGURE 105 CEE configuration dialog box 2 Select the CEE switch link aggregation group or CEE port to perform one of the following converged enhanced Ethernet tasks whic...

Page 321: ...disable a LAG or CEE port Display performance statistics for CEE ports Instructions for performing the CEE configuration tasks shown in Figure 105 are detailed in the following sections Link aggregation groups on page 296 QoS configuration on page 307 LLDP DCBX configuration on page 316 Access Control List configuration on page 322 Spanning Tree Protocol configuration on page 327 802 1x authentica...

Page 322: ... CEE Configuration dialog box displays 2 Select the switch to edit in the CEE Ports and LAGs table and click Edit The CEE Edit Switch dialog box displays 3 Click the QOS tab The CEE Edit Switch QoS tab dialog box displays FIGURE 106 CEE Edit Switch dialog box QOS tab 4 Use Creating a CEE map on page 308 to create a new CEE Map to carry the traffic types as shown in the dialog box above 5 Click Clo...

Page 323: ...DCBX tab 4 The CEE Edit Switch LLDP DCBX tab dialog box displays FIGURE 107 CEE Edit Switch dialog box LLDP DCBX tab 5 Select the Global Configuration LLDP profile in the LLDP Profiles table 6 Click the left arrow button to edit 7 Select the FCoE Application and FCoE Logical Link check boxes in the Advertise table to advertise them on the network 8 Click OK The CEE Confirmation and Status dialog b...

Page 324: ...CBX on Te Port Number check box 10 Select Assign the Global Configuration 11 Click OK The CEE Confirmation and Status dialog box displays 12 Click Start on the CEE Confirmation and Status dialog box to save the changes to the switch 13 Click Close on the CEE Configuration dialog box Create the FCoE VLAN to carry FCoE traffic NOTE This procedure is completed using Web Tools For more information see...

Page 325: ... the following steps 1 Log into the switch and enter global configuration mode Example switch userid cmsh switch configure terminal 2 Create and apply VLAN Classifiers to the CEE interface to classify Ethernet frames on an untagged interface to VLAN Example switch config vlan classifier rule 1 proto fip encap ethv2 switch config vlan classifier rule 2 proto fcoe encap ethv2 switch config vlan clas...

Page 326: ... CEE map you specify the precedence priority and then you map the priority groups with the Class of Service CoS and apply bandwidth percentages Refer to QoS configuration on page 307 for instructions on how to create CEE and Traffic Class maps LLDP profiles Data Center Bridging Capability Exchange Protocol DCBX enables Enhanced Ethernet devices to discover whether a peer device supports particular...

Page 327: ...tive link fails without the danger of bridge loops or the need to manually enable or disable these backup links NOTE STP is not supported on internal ports Refer to Spanning Tree Protocol configuration on page 327 for more information 802 1x policy 802 1x is a standard authentication protocol that defines a client server based access control and authentication protocol 802 1x restricts unknown or ...

Page 328: ...lected The Edit button is enabled when a single LAG port or switch is selected NOTE When LLDP DCBX Access Control List ACL or Spanning Tree Protocol STP is disabled on the switch a yellow banner displays on the dialog box indicating that LLDP DCBX ACL or STP is not only disabled on the switch it is also disabled for all ports and LAGs on the switch Adding a LAG You manage port selection using the ...

Page 329: ...s Trunk mode allows more than one VLAN association and allows tagged frames A converged mode interface can be native Access untagged frames in one VLAN and non native Trunk tagged frames in another VLAN IP Netmask The netmask is used to divide an IP address into subnets It specifies which portion of the IP address represents the network and which portion represents the host and can only be configu...

Page 330: ... is limited to four ports The default is Standard NOTE The 8 Gbps 16 FC port 10 GbE 8 Ethernet Port have three anvil chips and each anvil chip supports eight 10 Gbps Ethernet ports You cannot create Brocade type LAGs from different anvil chips If you do an error message displays and only the first port is considered as part of the LAG 7 When you have finished configuring the policies click OK The ...

Page 331: ...es for the Edit Switch tabs which are described in the following sections QoS configuration on page 307 LLDP DCBX configuration on page 316 Access Control List configuration on page 322 Spanning Tree Protocol configuration on page 327 802 1x authentication on page 332 5 When you have finished configuring the policies apply the settings to the switch NOTE Clicking Cancel when there are pending chan...

Page 332: ...e the IP Netmask field is enabled and you can then assign the primary and secondary IP addresses L2 Mode This is enabled if you select L2 as the Interface Mode If a CEE port is enabled on the 10 Gbps CEE FC switch module the L2 mode is disabled L3 Mode appears only for the 10 Gbps CEE FC switch module port NOTE You cannot change the Interface Mode to None if it is set to L2 and the port is assigne...

Page 333: ...he changes carefully before you accept them 8 Click Start to apply the changes or click Close to abort the operation Editing a LAG Use the following procedure to change members and policies in a link aggregation group LAG 1 Select Configure Switch CEE from the menu bar The CEE Configuration dialog box displays showing the status of all CEE related hardware and functions 2 Select the link aggregati...

Page 334: ...face mode must be L3 to enable these fields Secondary Enter the secondary IP address optional Multiple secondary IP addresses help when the interface and port are part of multiple subnets 6 Select at least one available CEE port from the Available Members table and click the right arrow button to move them to the LAG Members table The CEE ports are now part of the link aggregation group 7 Continue...

Page 335: ...e status of all CEE related hardware and functions 2 Select one or more CEE ports or LAGs which can span multiple switches that you want to enable NOTE All selected LAGs must be in the same state enabled or disabled otherwise both the Enable and Disable buttons are disabled 3 Click Enable The selected CEE port or LAG is enabled for CEE configuration 4 Click OK The CEE Confirmation and Status dialo...

Page 336: ...r The CEE Configuration dialog box displays showing the status of all CEE related hardware and functions 2 Select one or more LAGs that can span multiple swiches that you want to delete from the Products Ports table 3 Click Delete 4 Click OK The CEE Confirmation and Status dialog box displays 5 Review the changes carefully before you accept them 6 Click Start to apply the changes or click Close to...

Page 337: ... graphs can be sorted by the column headers You can create multiple real time performance graph instances Generating a real time performance graph To generate a real time performance graph for a device complete the following steps 1 Select a CEE port from the CEE Configuration dialog box and select Real Time Graph from the Performance list A message displays prompting you to close the CEE Configur...

Page 338: ...cal performance graph 1 Select a CEE port from the CEE Configuration dialog box and select Historical Graph from the Performance list A message displays prompting you to close the CEE Configuration dialog 2 Click OK to close the CEE Configuration dialog and open the Performance dialog box The Historical Performance Graph dialog box displays For complete information about Real Time Performance Grap...

Page 339: ...election Enhanced Transmission Selection ETS allows lower priority traffic classes to use available bandwidth not being used by higher priority traffic classes and maximizes the use of available bandwidth Priority based flow control Priority based flow control PFC is an enhancement to the existing pause mechanism in Ethernet PFC creates eight separate virtual links on the physical link and allows ...

Page 340: ...e entries are Strict Priority entries with a Priority Group ID of 15 0 to 15 7 and eight are user definable entries with a Priority Group ID of 0 7 See Table 20 for an example of priority group configuration NOTE The 10 Gbps CEE FC switch module can have only one CEE map 1 Select Configure Switch CEE from the menu bar The CEE Configuration dialog box displays showing the status of all CEE related ...

Page 341: ... must map each CoS to at least one of the PG IDs Use a comma or a space to separate multiple CoS values as shown in Figure 113 Note the following points You cannot define a bandwidth percentage for Strict Priorities PG ID 15 0 15 7 The total Bandwidth for PG ID 15 0 15 7 must equal 0 If you set a CoS value to one or more of the PG IDs 0 7 you must also enter a non 0 bandwidth percentage The total ...

Page 342: ...ange the name Precedence Enter a value between 1 100 This number determines the map s priority Bandwidth Enter a bandwidth value for priority group IDs 0 7 The total of all priority groups must equal 100 Priority Flow Control check box Check to enable priority flow control on individual priority groups CoS Enter a Class of Service value to correspond to the Priority Group ID rows Each CoS must be ...

Page 343: ... dialog box The QoS dialog box displays 4 Select a CEE Map that you want to delete from the CEE Maps table 5 Click Delete The Delete confirmation dialog displays 6 Click Yes to confirm The CEE Map row is removed from the table 7 Click OK The CEE Confirmation and Status dialog box displays 8 Review the changes carefully before you accept them 9 Click Start to apply the changes or click Close to abo...

Page 344: ... QoS tab on the Edit Port dialog box The QoS dialog box displays FIGURE 114 QoS Assign a CEE Map to a port dialog box 4 Click the Assign a map to port name check box If you do not enable this check box all QoS edit features are disabled 5 Select CEE Map in the Map Type list 6 Select a CEE Map in the Available CEE Maps list If no CEE maps were created on the switch the Available CEE Maps list is em...

Page 345: ...e the Traffic Class map 6 Click the Traffic Class cell in a CoS row and directly enter a value from 0 7 You can leave the cell empty to indicate zero 0 7 Click the right arrow button to add the map to the Traffic Class Maps table If the name of the Traffic Class map already exists an overwrite warning message displays Click Yes to overwrite the existing Traffic Class map 8 Click OK if the Traffic ...

Page 346: ...t arrow button to re add the map to the Traffic Class Maps table 7 Click OK The CEE Confirmation and Status dialog box displays 8 Review the changes carefully before you accept them 9 Click Start to apply the changes or click Close to abort the operation Deleting a traffic class map 1 Select Configure Switch CEE from the menu bar The CEE Configuration dialog box displays showing the status of all ...

Page 347: ...menu bar The CEE Configuration dialog box displays showing the status of all CEE related hardware and functions 2 Select a port or LAG and click Edit 3 Click the QoS tab on the Edit Switch dialog box The QoS dialog box displays FIGURE 115 QoS assign a traffic class map to a port dialog box 4 Click the Assign a map to port name check box 5 Select Traffic Class in the Map Type list 6 Select a Traffi...

Page 348: ...ed Ethernet CEE environment LLDP is enhanced with DCBX protocol to further share or change the configured CEE enhancements You must enable the DCBX protocol and configure certain parameters in order to effectively utilize the benefits of a converged network Using the LLDP DCBX dialog box you can create and manage LLDP profiles and assign a LLDP profile to a port or link aggregation group LAG Confi...

Page 349: ...DP DCBX tab on the Edit Switch dialog box The LLDP DCBX dialog box displays 4 Click the Enable LLDP DCBX checkbox 5 Configure the LLDP Profile parameters Name Type a name for the LLDP profile If the name of the LLDP profile already exists on the switch an overwrite warning displays You can change the Global Configuration name when you click the right arrow button a new LLDP is created Description ...

Page 350: ...wing the status of all CEE related hardware and functions 2 Select a switch and click Edit 3 Click the LLDP DCBX tab on the Edit Switch dialog box The LLDP Profile dialog box displays 4 Select an LLDP Profile in the LLDP Profile table NOTE You can edit or rename the Global Configuration profile You cannot however delete or duplicate global configurations 5 Click the left arrow to load the LLDP Pro...

Page 351: ...lays 4 Select an existing LLDP Profile from the LLDP Profiles table in the upper right pane NOTE You cannot delete Global Configurations You can however edit global configurations For more information see Editing an LLDP profile on page 318 5 Click Delete A confirmation dialog displays 6 Click Yes to confirm you want to delete the LLDP profile The LLDP Profile table row is removed 7 Click OK The C...

Page 352: ...and LAGs on the switch 1 Select Configure Switch CEE from the menu bar The CEE Configuration dialog box displays showing the status of all CEE related hardware and functions 2 Select a port or link aggregation group LAG and click Edit 3 Click the LLDP DCBX tab on the Edit Port Edit LAG dialog box The Assign an LLDP profile to port name dialog box displays FIGURE 117 Assign an LLDP profile dialog b...

Page 353: ...tion and Status dialog box displays 7 Review the changes carefully before you accept them The port you selected on the CEE Configuration dialog box should now be assigned to the profile you selected from the Available Profiles list 8 Click Start to apply the changes or click Close to abort the operation ...

Page 354: ...ecurity ACLs save network resources by reducing traffic ACLs block unwanted traffic and users ACLs reduce the chance of attacks You create an ACL on a switch and then you can apply the configuration to ports and link aggregation groups LAGs on that switch Adding an ACL to a switch 1 Select Configure Switch CEE from the menu bar The CEE Configuration dialog box displays showing the status of all CE...

Page 355: ...it creates the new ACL entity Action Select Permit or Deny from the list For a Standard ACL the Action must be Deny and the Source must be Any For an Extended ACL the Action must be Deny and the Source and Destination must be Any Source Enter the media access control MAC address where the packets originate Mask is the subnet mask of the source MAC address If you select Any from the Source list the...

Page 356: ...xist the CEE Confirmation and Status dialog box displays 8 Review the changes carefully before you accept them 9 Click the Start button to apply the changes or click Close to abort the operation You can now assign the ACL to ports or link aggregation groups LAGs on the switch Editing the parameters of an ACL You cannot change the name of the ACL Standard or Extended after you have created the ACL ...

Page 357: ...7 Review the changes carefully before you accept them 8 Click Start to apply the changes or click Close to abort the operation Assigning an ACL to a port or link aggregation group An access control list ACL cannot be assigned to a port when the port is a member of a link aggregation group LAG An ACL can be assigned to a LAG however NOTE The ports and the ports in a link aggregation group LAG for t...

Page 358: ... standard or extended in parentheses for example Human Resources Extended The details of the selected ACL are displayed in the Assigned ACL Details table shown in Figure 120 6 Click OK to commit the assign the ACL to the port or LAG The CEE Confirmation and Status dialog box displays 7 Review the changes carefully before you accept them 8 Click Start to apply the changes or click Close to abort th...

Page 359: ...ocol configures a separate spanning tree for each VLAN group and blocks the links that are redundant within each spanning tree NOTE STP is not supported for internal ports See Spanning Tree Protocol policy on page 295 for general information about Spanning Tree Protocol Enabling Spanning Tree Protocol 1 Select Configure Switch CEE from the menu bar The CEE Configuration dialog box displays showing...

Page 360: ...ting Spanning Tree Protocol is disabled and the STP parameters are disabled as well 1 Select Configure Switch CEE from the menu bar The CEE Configuration dialog box displays showing the status of all CEE related hardware and functions 2 Select a switch and click Edit 3 Click the Spanning Tree Protocol tab on the Edit Port dialog box The Enable Spanning Tree Protocol dialog box displays 4 Click the...

Page 361: ...ard Delay 1 If you specify a Maximum Age value that exceeds this range an error message displays Re enable Port Interval The interval after which the port will be enabled The value range is 10 1000000 and the default is 300 Re enable Port State Enables or disables the timeout mechanism for the port to be enabled back Path Cost Sets the path cost behavior Options include Standard and Custom You can...

Page 362: ...rotocol configuration 13 FIGURE 122 Spanning Tree Protocol dialog box MSTP 6 Click OK The CEE Confirmation and Status dialog box displays 7 Review the changes carefully before you accept them 8 Click Start to apply the changes or click Close to abort the operation ...

Page 363: ... STP is not supported for internal ports on the 10 Gbps CEE FC switch module If an internal port is selected the Edit Port dialog box and Spanning Tree Protocol tab do not display and the L3 interface mode is unavailable FIGURE 123 Spanning Tree Protocol dialog box STP You can configure the following Spanning Tree Protocol parameters Mode The spanning tree protocol mode Path Cost The port s path c...

Page 364: ...ication is enabled or disabled globally on the switch using the Edit Switch dialog box 1 Select Configure Switch CEE from the menu bar The CEE Configuration dialog box displays showing the status of all CEE related hardware and functions 2 Select a switch and click Edit 3 Click the 802 1x tab on the Edit Switch dialog box The Enable 802 1x dialog box displays 4 Click the Enable 802 1x check box to...

Page 365: ...us dialog box displays 6 Review the changes carefully before you accept them 7 Click Start to apply the changes or click Close to abort the operation Setting 802 1x parameters for a switch The 802 1x parameters can be configured whether the feature is enabled on the switch The default parameters are initially populated when 802 1x is enabled but you can change the default values as required 1 Sele...

Page 366: ...ins in the quiet state after a failed authentication exchange with the client The value range is 1 to 65535 seconds The default value is 60 Re authentication State Enable or disable the periodic re authentication of the client The default is Disable Re authentication Interval The number of seconds between re authentication attempts The value range is 1 to 4294967295 The default value is 3600 secon...

Page 367: ... menu bar Right click the CEE switch from the device tree and select Configure CEE Right click the CEE switch from the topology map and select Configure CEE The CEE Configuration dialog box displays showing the status of all CEE related hardware and functions 2 Select the CEE switch NOTE For Fabric OS versions 6 3 and earlier selecting a CEE switch launches the Edit Switch dialog box rather than t...

Page 368: ...nfigure CEE The CEE Configuration dialog box displays showing the status of all CEE related hardware and functions 2 Select the CEE switch 3 Click Telnet The Telnet session window displays NOTE On Linux systems you must use CTRL BACKSPACE to delete text in the Telnet session window Virtual FCoE port configuration The virtual FCoE port has the following configuration features Eight 10 Gbps CEE port...

Page 369: ...lect the Virtual FCoE Ports tab The Virtual FCoE Ports tab displays FIGURE 126 Virtual FCoE Ports dialog box 3 Select one or more virtual ports from the Products Ports list 4 Perform one of the following tasks Click Enable to enable a selected virtual FCoE port for CEE configuration Click Disable to disable a selected virtual FCoE port from CEE configuration Click Connected Devices to view a list ...

Page 370: ...splays 2 Select one or more rows from the Connected Devices table and click Disconnect The CEE Confirmation and Status dialog displays 3 Click OK The selected connected device should be cleared from the switch cache and from the table Note however that the connected devices might still be active and this operation could potentially stop traffic between the connected devices and the switch 4 Review...

Page 371: ...n RKM appliance 352 Steps for connecting to an LKM appliance 355 Steps for connecting to an SKM appliance 360 Steps for connecting to a TEMS appliance 369 Gathering information 373 Creating a new encryption group 374 Adding a switch to an encryption group 387 Creating high availability HA clusters 391 Adding encryption targets 394 Configuring hosts for encryption targets 401 Adding target disk LUN...

Page 372: ...ns Encryption user privileges on page 341 describes the Role based Access Control privileges that are specific to encryption Smart card usage on page 342 and the topics that follow describe the options available for the use of Smart Cards for user authentication system access control and storing backup copies of data encryption master keys Network connections on page 349 describes the network conn...

Page 373: ... LUN centric view Rebalance encryption engines Decommission LUNs Edit smart card Create a new encryption group or add a switch to an existing encryption group Edit group engine properties except for the Security tab Add targets Select encryption targets and LUNs to be encrypted or edit LUN encryption settings Edit encryption target hosts configuration StorageEncryption Key Operations Enables the f...

Page 374: ...tion engines Securely store backup copies of master keys Smart card readers provide a plug and play interface to read and write to a smart card The following smart card readers are supported GemPlus GemPC USB http www gemalto com readers index html SCM MicrosystemsSCR331 http www scmmicro com security view_product_en php PID 2 See the following procedures for instructions about how to manage smart...

Page 375: ...number of cards necessary to enable the card holders to perform the security sensitive operations listed above The maximum quorum size is five cards The actual number of authentication cards registered is always more than the quorum size so if you set the quorum size to five for example you will need to register at least six cards in the subsequent steps NOTE Ignore the System Cards setting Refer ...

Page 376: ...entication Card table 2 Click Deregister 3 A confirmation dialog box is displayed Click OK to confirm de registration The Encryption Group dialog box displays 4 Click OK on the Encryption Group dialog box The card is de registered from the group Using authentication cards When a quorum of authentication cards are registered for use an Authenticate dialog box is displayed to grant access to the fol...

Page 377: ...the dialog box The currently registered cards and the assigned owners are listed in the table near the bottom of the dialog box 2 Insert a card and wait for the ID to appear in the Card ID field 3 Enter the assigned password 4 Click Authenticate 5 Wait for the confirmation dialog box and click OK 6 Repeat steps two through five for each card until the quorum is reached 7 Click OK ...

Page 378: ...emoves a switch or blade with the intent of accessing the encryption engine it will function as an ordinary FC switch or blade when it is powered up but use of the encryption engine is denied To register a system card from a card reader a smart card must physically available System cards can be registered during encryption group creation or member configuration when running the configuration wizar...

Page 379: ... Figure 128 FIGURE 128 Smart Card asset tracking dialog box Clicking the Delete button removes a selected smart card from the Management application database Deleting smart cards from the Management application database keeps the Smart Cards table at a manageable size but does not invalidate the smart card The smart card can still be used You must de register a smart card to invalidate its use NOT...

Page 380: ...rom the Encryption Center select Smart Card Edit Smart Card The Edit Smart Card dialog box displays Figure 129 FIGURE 129 Edit Smart Card dialog box 2 Insert the smart card into the card reader 3 After the card s ID is displayed in the Card ID field enter the Card Password and click Login 4 Edit the card assignment user information as needed 5 Click OK ...

Page 381: ... switch or blade has two GbE ports labeled Ge0 and Ge1 The Ge0 and Ge1 ports are Ethernet ports that connect encryption switches and blades to other encryption switches and blades Both ports of each encryption switch or blade must be connected to the same IP network and the same subnet Static IP addresses should be assigned VLANs should not be used and DHCP should not be used These two ports are b...

Page 382: ...cation operations the FIPS crypto officer FIPS user and node CP certificates are transparent to users The KAC certificates are required for operations with key managers In most cases KAC certificate signing requests must be sent to a Certificate Authority CA for signing to provide authentication before the certificate can be used In all cases signed KACs must be present on each switch Encryption n...

Page 383: ...y manager appliances requires an exchange of certificates that are used for mutual authentication Each supported key manager appliance has unique requirements for setting up a secure connection and exchanging certificates The following key manager appliance are supported The RSA Key Manager RKM The NetApp Lifetime Key Manager LKM The HP StorageWorks Secure Key Manager SKM The Thales Encryption Man...

Page 384: ...ing the KAC CSR to a Certificate Authority CA for signing 1 Synchronize the time on the switch and the key manager appliance They should be within one minute of each other Differences in time can invalidate certificates and cause key vault operations to fail 2 From the Encryption Center right click on the switch and select Properties 3 If a CSR is present click Export If a CSR is not present right...

Page 385: ...eed the URL and have the proper authority level a user name and a password 2 Select the Operations tab 3 Select Certificate Upload 4 In the SSLCAcertificateFile field enter the full local path of the CA certificate Do not use the UNC naming convention format 5 Select Upload Configure SSL and Restart Webserver 6 After the web server restarts enter the root password 7 Open another web browser window...

Page 386: ...c Enter a label for the node in the Name field This is a user defined identifier d Select the Hardware Retail Group in the Identity Groups field e Select the Operational User role in the Authorization field f Click Browse and select the imported certificate as the Identity certificate g Click Save RKM key vault high availability deployment When dual RKM appliances are used for high availability th...

Page 387: ...tall and launch the NetApp DataFort Management Console Establish the trusted link Obtain and import the LKM certificate Export and register encryption node certificates on LKM If required create an LKM cluster for high availability These steps are described in more detail in the following sections The NetApp DataFort Management Console The NetApp DataFort Management Console DMC must be installed o...

Page 388: ... listed as openkey_trustee_ ip address where the IP address is the switch IP address 4 Select the switch and click Approve and Create TAP The Approve TEP dialog box displays The TEP must be approved before a TAP can be created 5 Provide a label in the dialog box and click Approve to approve the TEP A list of recovery cards and recovery officers is displayed TEP approval is done by a quorum of reco...

Page 389: ...ing system tamper status No physical intrusion detected 2 Add the group leader to the LKM key sharing group Enter lkmserver add type third party key sharing group followed by the group leader IP address lkm 1 lkmserver add type third party key sharing group 10 32 244 71 NOTICE LKM Server third party 10 32 244 71 added Cleartext connections not allowed 3 On the NetApp LKM appliance terminal enter s...

Page 390: ... with the encryption switch or blade the dual LKMs must be clustered There is no enforcement done at the encryption switch or blade to verify whether or not the dual LKMs are clustered but key creation operations will fail if you register non clustered dual LKMs with the encryption switch or blade Regardless of whether you deploy a single LKM or clustered dual LKMs register only the primary key va...

Page 391: ...ation LKM Key Vault Deregistration Deregistration of either Primary or Secondary LKM KV from an encryption switch or blade is allowed independently Deregistration of Primary LKM You can deregister the Primary LKM from an encryption switch or blade without deregistering the backup or secondary LKM for maintenance or replacement purposes However when the primary LKM is deregistered key creation oper...

Page 392: ... specified when installing the SKM appliance use that port number The following configuration steps are performed from the SKM management web console and from the Management application Configure a Brocade group on SKM Register the Brocade group user name and password on the encryption node Set up a local Certificate Signing Authority CA on SKM Download the CA certificate Create and install an SKM...

Page 393: ... password 6 Select the User Administration Permission and Change Password Permission check boxes 7 Select Save to save this user data 8 Select Add under Local Groups 9 Add a Brocade group under Group 10 Select Save 11 Select the new Brocade group name and then select Properties Local Group Properties and a User List are displayed 12 In the User List section select or type the Brocade user name und...

Page 394: ...nodes in an encryption group This is not enforced or validated by the encryption group members so care must be taken when configuring the user name and password to ensure they are the same on each node Different user names and passwords can never be used within the same encryption group but each encryption group may have its own user name and password If you change the user name and password the k...

Page 395: ...lue Enter your organizational information Enter the Email Address to receive messages for the Security Officer Enter the Key Size HP recommends using 2048 for maximum security Select Self signed Root CA Enter the CA Certification Duration and Maximum User Certificate Duration These values determine when the certificate must be renewed and should be set inaccordance with your company s security pol...

Page 396: ... Security tab 2 Under Certificates and CAs select Certificates 3 Enter the required information under Create Certificate Request Enter a Certificate Name and Common Name The same name may be used for both Enter your organizational information Enter the E mail Address where you want messages to the Security Officer to go Enter the Key Size HP recommends using the default value 1024 4 Click Create C...

Page 397: ...Properties The Certificate Request Information window displays 18 Click Install Certificate The Certificate Installation window displays 19 Paste the signed certificate data you copied under Certificate Response and click Save The status of the server certificate should change from Request Pending to Active Enabling SSL on the Key Management System KMS Server The KMS Server provides the interface ...

Page 398: ... Cluster The Create Cluster section displays 3 Select and note the Local IP address You will need this address when you add an appliance to the cluster 4 For Local Port use the default value of 9001 unless you are explicitly directed to use a different value for your site 5 Type the cluster password in the Create Cluster section of the main window to create the new cluster 6 Click the Create butto...

Page 399: ...ation required in the Install CA Certificate section near the bottom of the page Type the Certificate Name of the certificate being transferred from the first cluster member Paste the copied certificate data into the Certificate box 4 Click Install 5 In the Certificates CA menu click Trusted CA Lists 6 Click on the Default Profile Name 7 Click Edit 8 Select the name of the CA from the list of Avai...

Page 400: ...ab 5 Select Local CAs under Certificates CAs The Certificate and CA Configuration page displays 6 Under Local Certificate Authority List select the Brocade CA name 7 Select Sign Request The Sign Certificate Request page is displayed 8 Select Sign with Certificate Authority using the Brocade CA name with the maximum of 3649 days option 9 Select Client as Certificate Purpose 10 Allow Certificate Dur...

Page 401: ...and from the Management application Set up network connections to TEMS Create a TEMS client Establish TEMS key vault credentials Sign encryption node certificate signing requests Import the signed requests onto the encryption nodes These steps are described in more detail in the following sections Setting up TEMS network connections Communicating to TEMS is enabled over an SSL connection Two IP ad...

Page 402: ...rt 9000 Enable KM Server Creating a client on TEMS This step assumes that the group brocade has been created by an administrator If the group brocade does not exist you must log in to TEMS as officer create the group and assign the group to a manager 1 From the Encryption Center select a switch that needs to have a TEMS Client 2 Select Properties 3 Select the Key Vault User Name button The Key Vau...

Page 403: ...EMS Clients tab 7 Click the Add Client tab 8 Paste or type in the user name from step 4 in the Name field 9 Enter a password in the Password and Verify Password fields 10 Select the group brocade from the group pull down menu 11 Click on Add Client A TEMS client user is created and is listed in the table ...

Page 404: ...tly the user name and password used when creating the TEMS client You may create different credentials but if you do you also need to change the TEMS client credentials to match the new credentials 3 Click OK Importing a signed KAC certificate into a switch After a KAC CSR has been submitted and signed by a CA the signed certificate must be imported into the switch 1 From the Encryption Center sel...

Page 405: ...provide failover support All switches in the planned encryption group are interconnected on an I O synch LAN The management ports on all encryption switches and 384 port Backbone Chassis CPs that have encryption blades installed have a LAN connection to the SAN management program and are available for discovery A supported key management appliance is connected on the same LAN as the encryption swi...

Page 406: ... tape pools in the switch are removed 1 Select Configure Encryption from the menu bar The Encryption Center dialog box displays FIGURE 135 Encryption Center No Group Defined dialog box 2 Select a switch from the NO GROUP DEFINED encryption group The switch must not be in an encryption group already 3 Select a switch and select Encryption Create Add to Group from the menu bar or right click the swi...

Page 407: ...length of the group name is 15 characters letters digits and underscores are allowed and select the Automatic failback mode NOTE If the name you enter for the encryption group already exists a pop up warning message displays Although unique group names avoid confusion while managing multiple groups you are not prevented from using duplicate group names Click Yes to use the same name for the new en...

Page 408: ...pe The choices are the following RSA Key Manager RKM NetApp Link Key Manager LKM HP Secure Key Manager SKM Thales Encryption Manager for Storage TEMS Tivoli Key Lifetime Manager TKLM Different options are available depending on which key vault type you choose NOTE TKLM is not supported in the current Fabric OS version It will be added in a version ...

Page 409: ... direct traffic to the appliances Use the IP address of the load balancer b Enter the name of the file that holds the primary key vault s public key certificate or browse to the location by clicking the Browse button c If you are implementing encryption on data replication LUNs used by the EMC Symmetrix Remote Data Facility SRDF you must select Enabled for REPL Support FIGURE 138 RKM Key Vault Opt...

Page 410: ... the file that holds the primary key vault s public key certificate or browse to the location by clicking the Browse button c If you are using a backup key vault also enter the IP address or host name and the name of the file holding the backup key vault s public key certificate in the fields provided FIGURE 139 LKM Key Vault Options d Click Next The Specify Public Key Certificate File Name dialog...

Page 411: ...y clicking the Browse button c Enter the user name and password you established for the Brocade user group d If you are using a backup key vault also enter the IP address or host name and the name of the file holding the backup key vault s public key certificate in the fields provided The same user name and password used for the primary key vault are automatically applied to the backup key vault F...

Page 412: ...e or browse to the location by clicking the Browse button c Enter the user name and password you created for the Brocade group TEMS client d If you are using a backup key vault also enter the IP address or host name the name of the file holding the backup key vault s public key certificate in the fields provided and the user name and password for the backup key vault FIGURE 141 TEMS Key Vault Opti...

Page 413: ... the file that holds the primary key vault s public key certificate or browse to the location by clicking the Browse button c If you are using a backup key vault also enter the IP address or host name and the name of the file holding the backup key vault s public key certificate in the fields provided FIGURE 142 TKLM Key Vault Options d Click Next The Specify Public Key Certificate File Name dialo...

Page 414: ...te connections to the key vault and click Next The certificate stored in this file is the switch s public key certificate You will need to know this path and file name to install the switch s public key certificate on the key management appliance 9 Click Next If you chose LKM as the Key Vault Type the Confirm Configuration panel displays skip to step 14 For all other supported key vault types the ...

Page 415: ...4 Specify Master Key File Name dialog box 10 Enter a file name or browse to the desired location 11 Enter the passphrase which is required for restoring the master key The passphrase can be between eight and 40 characters and any character is allowed 12 Re type the passphrase for verification ...

Page 416: ...splays as shown in Figure 146 The configuration status steps vary slightly depending on the key vault type A progress indicator shows that a configuration step is in progress A green check mark indicates successful completion of all steps for that Configuration Item A red stop sign indicates a failed step All Configuration Items have green check marks if the configuration is successful A message d...

Page 417: ... the initiated state the Management application performs the cryptocfg initnode command Create encryption group on the switch The Management application creates a new group using the cryptocfg create encgroup command and sets the key vault type using the cryptocfg set keyvault command Register key vault s The Management application registers the key vault using the cryptocfg reg keyvault command E...

Page 418: ...nt application saves the master key into the specified file Note that a master key is not generated if the key vault type is LKM LKM manages DEK exchanges through a trusted link and the LKM appliance uses its own master key to encrypt DEKs 15 Click Next The Read Instructions dialog box displays instructions for installing public key certificates for the encryption switch These instructions are spe...

Page 419: ... The Encryption Center dialog box displays 2 Select the switch to be to be added to the group The switch must not already be in an encryption group 3 Select Switch Create Add to Group or right click the switch and select Create Add to Group The Configure Switch Encryption welcome panel displays 4 Click Next The Designate Switch Membership panel displays FIGURE 147 Add switch to an encryption group...

Page 420: ...pecify Public Key Certificate Filename panel displays FIGURE 149 Add switch to an encryption group Specify Public Key Certificate filename dialog box 6 Specify the name of the file where you want to store the public key certificate that is used to authenticate connections to the key vault and click Next The Confirm Configuration panel displays the encryption group name and switch public key certif...

Page 421: ...ration step is in progress A green check mark indicates successful completion of all steps for that Configuration Item A red stop sign indicates a failed step All Configuration Items have green check marks if the configuration is successful A message displays below the table indicating that the encryption switch was added to the group you named and the public key certificate is stored in the locat...

Page 422: ...ption engine in an encryption group To replace an encryption engine in an encryption group with another encryption engine within the same DEK Cluster complete the following steps 1 From the Encryption Center select the encryption engine and select Engine Replace or right click on the encryption engine and select Replace The Engine Operations tab of the Encryption Group Properties dialog box displa...

Page 423: ... the cluster and then add the second engine You can make multiple changes to the HA Clusters list the changes are not applied to the switch until you click OK Both engines in an HA cluster must be in the same fabric as well as the same encryption group NOTE An IP address is required for the management port for any cluster related operations 1 Select Configure Encryption from the menu bar The Encry...

Page 424: ...ays requesting a name for the new HA cluster HA Cluster names can have up to 31 characters Letters digits and underscores are allowed Removing engines from an HA cluster Removing the last engine from an HA cluster also removes the HA cluster If only one engine is removed from a two engine cluster you must either add another engine to the cluster or the other engine must be removed too 1 Select an ...

Page 425: ... determines how the encryption engine resumes encrypting and decrypting traffic to its encryption targets In auto mode when the first encryption engine restarts it automatically resumes encrypting and decrypting traffic to its encryption targets In manual mode the second encryption engine continues handling the traffic until you manually invoke failback using the CLI or Management application or u...

Page 426: ...ton to commit the changes If you attempt to close the Encryption Targets dialog box without committing the changes you are reminded of uncommitted changes in the Management application 1 Select Configure Encryption from the menu bar The Encryption Center dialog box displays 2 Select the encryption group switch or encryption engine to which you want to add the target Right click or select Group Swi...

Page 427: ...viewed If the Targets dialog box is showing all targets in an encryption group the list includes all engines in the group If the Targets dialog box is showing all targets for a switch the list includes all encryption engines for the switch If the Targets dialog box is showing targets for a single encryption engine the list contains only that engine FIGURE 156 Select Encryption Engine dialog box ...

Page 428: ... an encryption group There are two available methods for selecting targets select from the list of known targets or manually enter the port and node WWNs FIGURE 157 Select Target dialog box a Select a target from the list The Target Port WWN and Target Node WWN fields contain all the target information that displays using the nsshow command You can also enter WWNs manually if you prefer or if you ...

Page 429: ...mand b Manually enter world wide names in the Host Port WWN and Host Port WWN text boxes if the hosts are not included in the list You must fill in both the Host Port WWN and the Host Node WWN Click the Add to Selected Hosts button to move the host to the Selected Hosts list 8 Click Next when you are finished selecting hosts or manually entering the WWNs The Name Container panel displays The name ...

Page 430: ...398 DCFM Professional User Manual 53 1001773 01 Adding encryption targets 14 FIGURE 159 Name Container dialog box 10 Click Next The Confirmation panel displays FIGURE 160 Confirmation dialog box ...

Page 431: ...host that are configured in the target container as well as the virtual targets VT and virtual initiators VI NOTE If you can view the VI VT Port WWNs and VI VT Node WWNs the container has been successfully added to the switch FIGURE 161 Configuration Status dialog box 12 Review the configuration If you want to save a copy of the instructions click the Copy to Clipboard button ...

Page 432: ...xt to confirm the configuration The Important Instructions dialog box displays FIGURE 162 Important Instructions dialog box 14 Review the instructions about post configuration tasks you must complete after you close the wizard 15 Click Finish to exit the Configure Storage Encryption wizard ...

Page 433: ...t Configure Encryption from the menu bar The Encryption Center dialog box displays 2 Select the encryption group switch or encryption engine containing the storage device to be configured Right click or select Group Switch or Engine from the menu bar 3 Select Targets The Encryption Targets dialog box displays 4 Select a Target storage device from the list and click Hosts The Encryption Target Host...

Page 434: ...zard 1 Select Configure Encryption The Encryption Center dialog box displays 2 Right click a group switch or encryption engine or select a group switch or encryption engine from the Encryption Devices table and select Disk LUNs The Encryption Disk LUN view displays Figure 164 FIGURE 164 Encryption Disk LUN view 3 Select Add The Add New Path wizard Select Target Port dialog box displays Figure 165 ...

Page 435: ... default If this LUN is to be paired with another LUN for SRDF data replication the New LUN option must be enabled by selecting this checkbox Refer to Metadata requirements and remote replication for information about how this option works If REPL support was not enabled this checkbox is not displayed 10 Click Finish The new LUN path is added to the Encryption Disk LUN view 11 In environments wher...

Page 436: ...rget system the copy cycle is committed If the SRDF links are lost during data transfer any partial chunk is discarded preserving consistency on the target system This method provides a consistent point in time remote image that is not far behind the source system and results in minimal data loss if there is a disaster at the source site SRDF pairs Remote replication is implemented by establishing...

Page 437: ...een of the Add New Path wizard when adding the LUNs for an SRDF pair e g R1 and R2 in Figure 167 Not the following when using the New LUN option Both LUNs that form a SRDF pair must be added to their containers using the New LUN option At any site all paths to a given SRDF device must be configured with the New LUN option All LUNs configured with the New LUN option will report 3 blocks less than t...

Page 438: ...ryption group If the local LUN contains host data configuring it with the New LUN option would cause the data on the last 3 blocks of the LUN to be lost Before using the New LUN option you must migrate the contents of the LUN to another LUN that is larger by at least 3 blocks The new larger LUN can then used when creating the SRDF pair The remote LUN of the SRDF pair must be of the same size The o...

Page 439: ...rgets dialog box displays 4 Select a Target storage device from the list and click LUNs The Encryption Target LUNs dialog box displays 5 Click Add The Add Encryption Target Tape LUNs dialog box displays This dialog box includes a table of all LUNs in the storage device that are visible to hosts LUNs are identified by the Host world wide name LUN number and Volume Label Prefix number 6 Select a hos...

Page 440: ... is from host port B to target port B using encryption engine B for encryption Encryption engines A and B are in switches that are already part of encryption group X The following is the procedure for configuring this scenario using the Management application 1 Zone host port A and target port A using the Configure Zoning dialog box 2 Zone host port B and target port B using the Configure Zoning d...

Page 441: ...tape target containers can be hosted on the same switch or blade Hosting both disk and tape target containers on the same switch or blade may result in a drop in throughput but it can reduce cost by reducing the number of switches or blades needed to support encrypted I O in environments that use both disk and tape The throughput drop can be mitigated by re balancing the tape and disk target conta...

Page 442: ...gathered and read together from a card reader attached to a PC running the Management application to restore the master key NOTE It is very important to back up the master key because if the master key is lost none of the data encryption keys can be restored and none of the encrypted data can be decrypted Active master key The active master key is used to encrypt newly created data encryption keys...

Page 443: ...ey actions are disabled if unavailable There are several ways a master key can be disabled The user does not have Storage Encryption Security permissions See Encryption user privileges on page 341 for more information The group leader is not discovered or managed by the Management application Saving the master key to a file Use the following procedure to save the master key to a file 1 Select Conf...

Page 444: ...tion to file dialog box 5 Select File as the Backup Destination 6 Enter a file name or browse to the desired location 7 Enter the passphrase which is required for restoring the master key The passphrase can be between eight and 40 characters and any character is allowed 8 Re type the passphrase for verification 9 Click OK ATTENTION Save the passphrase This passphrase is required if you ever need t...

Page 445: ... for Encryption Group dialog box displays FIGURE 169 Backup Destination to key vault dialog box 5 Select Key Vault as the Backup Destination 6 Enter the passphrase which is required for restoring the master key The passphrase can be between eight and 40 characters and any character is allowed 7 Re type the passphrase for verification 8 Click OK A dialog box displays that shows the Key ID 9 Store b...

Page 446: ...the cards in the card set When the master key is backed up to a set of three cards a minimum of two cards can be used together to restore the master key When the master key is backed up to a set of five cards a minimum of three cards can be used together to restore the master key Backing up the master key to multiple recovery cards is the recommended and most secure option NOTE When you write the ...

Page 447: ...s in the Card Serial field Be sure to wait for the ID to appear 9 Enter the mandatory last name and first name of the person to whom the card is assigned 10 Type a Card Password 11 Re type the password for verification 12 Record and store the password in a secure location 13 Click Write Card The dialog box prompts you to insert the next card up to the number of cards specified in step 6 14 Repeat ...

Page 448: ...ster Key Action The Restore Master Key for Encryption Group dialog box displays FIGURE 171 Select a Master Key to Restore from file dialog box 5 Choose the active or alternate master key for restoration as appropriate Refer to Active master key on page 410 and Alternate master key on page 410 if you need more information on active and alternate master keys 6 Select File as the Restore From locatio...

Page 449: ...ction The Restore Master Key for Encryption Group dialog box displays FIGURE 172 Select a Master Key to Restore from key vault dialog box 5 Choose the active or alternate master key for restoration as appropriate Refer to Active master key on page 410 and Alternate master key on page 410 if you need more information on active and alternate master keys 6 Select Key Vault as the Restore From locatio...

Page 450: ... dialog box displays FIGURE 173 Select a Master Key to Restore from a recovery set of smart cards dialog box 5 Choose the active or alternate master key for restoration as appropriate Refer to Active master key on page 410 and Alternate master key on page 410 if you need more information on active and alternate master keys 6 Select A Recovery Set of Smart Cards as the Restore From location 7 Inser...

Page 451: ...he alternate master key The new master key cannot be used no new data encryption keys can be created so no new encrypted LUNs can be configured until you back up the new master key After you have backed up the new master key it is strongly recommended that all encrypted disk LUNs be re keyed Re keying causes a new data encryption key to be created and encrypted using the new active master key ther...

Page 452: ...offline The host will not have unencrypted access to the target There will be no data flow at all because the encryption virtual targets will be offline NOTE Zeroizing an engine affects the I Os but all target and LUN configuration is intact Encryption target configuration data is not deleted You can zeroize an encryption engine only if it is enabled running or disabled but ready to be enabled If ...

Page 453: ...owing steps 1 Select Configure Encryption from the menu bar The Encryption Center dialog box displays showing the status of all encryption related hardware and functions 2 Select the Group Targets Switch Targets or Engine Targets from the tool bar menu or right click on the group switch or encryption engine in the Encryption Devices table and select Targets The Encryption Targets dialog box Figure...

Page 454: ...is allowed tape pool changes and any configuration changes for storage targets hosts and LUNs If a group is in the Unknown state the group leader is in an unmanaged fabric Remove button Removes a selected target Proceed only if the data on the LUN is to be disabled or if the LUN is to be configured for encryption again on some other encryption engine If the LUN data is to be enabled and later acce...

Page 455: ... target LUNs button Launches the Encryption Target LUNs dialog box where you can display existing LUNs and add new LUNs The button is enabled only if there are hosts associated with the targets Commit button Commits LUN changes including adding removing or modifying disk or tape LUNs If there are multiple paths to the same physical LUNs then the LUNs are added to multiple target containers one tar...

Page 456: ... encryption group leader node this error message will not be seen for any device decommission operation issued serially on an encryption group member node If more than one device decommission operation is tried in an encryption group from member nodes simultaneously then this error message is transient and will go away after device decommission operation is complete If the device decommissioning o...

Page 457: ...commissioned keys from the switch As a precaution you may want to copy the keys to a secure location before deleting them from the switch To export the keys right click and select Export which will export all the key IDs Viewing and editing switch encryption properties To view switch encryption properties complete the following steps 1 Select Configure Encryption from the menu bar The Encryption C...

Page 458: ...sible values are Group Member Leader Member Comm Error Discovering and Not a member Encryption Group the name of the encryption group to which the switch belongs Encryption Group Status Possible values are OK Converged the group leader can communicate with all members Degraded the group leader cannot communicate with one or more members Unknown the group leader is in an unmanaged fabric NOTE When ...

Page 459: ...as sent to LKM and is waiting for the LKM administrator s approval Waiting for local approval a response was received from LKM Created not validated the interim state until first used OK a shared link key exists and has been successfully used Backup Key Vault Connection Status whether the backup key vault link is connected Possible values are Unknown Key Vault Not Configured No Response Failed aut...

Page 460: ... under Public Key Certificate Request complete the following steps 1 Click Export A Save dialog box displays 2 Browse to the location where you want to save the certificate 3 Click Save Alternatively you may also copy the CSR and paste it to a file 4 Submit the CSR to a certificate authority CA for signing CA signing requirements and procedures differ per key manager appliance Refer to Supported e...

Page 461: ... To entry under Encryption Engine Properties 2 Click the field and select Enabled 3 Click OK Disabling the encryption engine state from Properties To disable the encryption engine complete the following steps 1 Find the Set State To entry under Encryption Engine Properties 2 Click the field and select Disabled 3 Click OK ...

Page 462: ... the Encryption Devices table 3 Select a group from the Encryption Devices table and select Group Properties from the menu bar or right click the group and select Properties The Encryption Group Properties dialog box shown in Figure 176 has six tabs which are defined in this section General tab on page 431 Members tab on page 431 Security tab on page 434 HA Clusters tab on page 435 Engine Operatio...

Page 463: ...kup key vault Backup Key Vault Connection Status the status of the connection to the backup key vault if a backup is configured Primary key vault certificate the details of the primary vault certificate for example version and signature information Backup key vault certificate the details of the backup vault certificate for example version and signature information Members tab The Group Members ta...

Page 464: ...nsequences of removing an encryption switch Table 23 explains the impact of removing switches Figure 178 shows the warning message that displays if you click Remove to remove a switch TABLE 23 Switch configuration Impact of removal The switch is the only switch in the encryption group The encryption group is also removed The switch has configured encryption targets on encryption engines The switch...

Page 465: ...1773 01 Viewing and editing group properties 14 FIGURE 178 Removal of switch warning Figure 179 shows the warning message that displays if you click Remove to remove an encryption group FIGURE 179 Removal of switch in encryption group warning ...

Page 466: ...lows Create a new master key which is enabled when no master key exists or the previous master key has been backed up Back up a master key which is enabled any time a master key exists Restore a master key which is enabled when either no master key exists or the previous master key has been backed up See Master keys on page 410 for complete information about managing master keys NOTE Encryption is...

Page 467: ...d remove encryption engines from HA clusters and failback an engine FIGURE 181 Encryption Group Properties HA Clusters tab Engine Operations tab The Engine Operations tab enables you to replace an encryption engine in an encryption switch with another encryption engine in another switch within a DEK Cluster environment A DEK Cluster is a set of encryption engines that encrypt the same target stora...

Page 468: ...n a group share the same link keys The Link Keys tab displays a table that shows link key status for each switch in an encryption group You must create link keys under the following circumstances When a new encryption group is created When a new switch is added to an encryption group When a new key vault is added to an encryption group After all encryption engines in a switch have been zeroized Wh...

Page 469: ...lan The tape pool name or number used must be the same name or number used by the host backup application If the same tape pool name or number is configured for an encryption group tapes in that tape pool are encrypted according to the tape pool settings instead of the tape LUN settings Encryption switches and encryption blades support tape encryption at the tape pool level for most backup applica...

Page 470: ...the Encryption Devices table 3 Select an encryption group from the tree and select Group Tape Pools from the menu bar or right click the encryption group and select Tapepools The Add Tape Pool dialog box displays The Name tape pool label type is the default however you can change the tape pool label type to its number by selecting Number shown in Figure 184 FIGURE 183 Add Tape Pool by name dialog ...

Page 471: ...f the license is not present a warning message displays 7 Enter the number of days that you want to use a key before obtaining a new key if you want to enforce a key lifespan The default is Infinite a blank field or a value of 0 NOTE The key lifespan interval represents the key expiry timeout period for tapes or tape pools You can only enter the Key Lifespan field if the tape pool is encrypted If ...

Page 472: ...440 DCFM Professional User Manual 53 1001773 01 Encryption related acronyms in log messages 14 ...

Page 473: ... software zoning controlled at the Node World Wide Name nWWN level assisted by the name server of a switch Depending on the vendor and interoperability mode it also supports Domain Port zoning Domain Port zoning is not supported when the fabric is in McDATA Open Mode InteropMode 3 Types of zones Fabric OS has the following types of zones Regular zones Enable you to partition your fabric into logic...

Page 474: ... the Management application using any of the following methods Select Configure Zoning Fabric Click the Zoning icon on the toolbar Right click a port switch switch group or fabric in the device list and select Zoning Right click a port switch switch group or fabric in the Connectivity Map and select Zoning Zoning naming conventions The naming rules for zone names zone aliases and zone configuratio...

Page 475: ... any zoning related procedure changes to a zone database are not saved until you click OK or Apply on the Zoning dialog box If you click Cancel or the close button X no changes are saved 1 Select Configure Zoning Fabric The Zoning dialog box displays 2 Click the Zone DB tab if that tab is not automatically displayed 3 Select an FC fabric from the Zoning Scope list This identifies the target entity...

Page 476: ... and selecting QoS Priority_Level High Medium or Low NOTE QoS priority support is available for zones with WWN or Domain Index D I members QoS zones using D I notation cannot be created if any of the switches in the fabric are running Fabric OS versions earlier than 6 3 0 The zone name is automatically renamed to QoSX_Zone_Name where X is the priority level H High M Medium or L Low and Zone_Name i...

Page 477: ... number of zone members in the selected alias Configure Status TI Zone and Fabric OS only Whether or not the TI zone is enabled Configure Failover TI Zone and Fabric OS only Whether or not the TI zone failover is enabled Status not applicable for TI zones The status of the selected zone 6 Click OK to close the Zone Properties dialog box Adding members to a zone Use this procedure to add a member t...

Page 478: ...e zone configuration into the switch from the offline zone database a Select Save to Switch from the Zone DB Operation list b Click Yes on the confirmation message The selected zone database is saved to the fabric without enabling a specific zone configuration 9 Click OK or Apply to save your changes A message displays informing you that any zones or zone configurations you have changed will be sa...

Page 479: ...ick Apply to save your changes and keep the Add Zone Member dialog box open so you can add more new members Repeat steps 5 6 and 7 as many times as needed and proceed to step 8 when appropriate 9 For offline zone databases only complete the following steps to save the zone configuration into the switch from the offline zone database a Select Save to Switch from the Zone DB Operation list b Click Y...

Page 480: ...mber dialog box OR Click Apply to save your changes and keep the Add Zone Member dialog box open so you can add more new members Repeat steps 5 6 and 7 as many times as needed and proceed to step 8 when appropriate 9 For offline zone databases only complete the following steps to save the zone configuration into the switch from the offline zone database a Select Save to Switch from the Zone DB Ope...

Page 481: ...scovered device a message displays informing you of this and instructing you to enter a port WWN Click OK to close the message box and enter an appropriate WWN Select the Domain Port Index decimal option and enter domain or port values in the fields Select the Domain Port Index hex option and enter domain or port values in the fields 8 Click OK to save your changes and close the Add Zone Member di...

Page 482: ...bric is named on the Zoning Policies dialog box 7 Perform one of the following actions based on the task you want to complete To enable the default zone click Enable and then click OK To disable the default zone click Disable and then click OK The Zoning Policies dialog box closes and the Zone DB tab displays 8 Click OK or Apply to save your changes A message displays informing you that any zones ...

Page 483: ...x number pair for example 2 20 Identifying members by device node and device port WWNs Zone aliases are supported only in Brocade Native mode InteropMode 0 and in a mixed Fabric OS and M EOS McDATA Fabric Mode InteropMode 2 1 Select Configure Zoning Fabric The Zoning dialog box displays 2 Click the Zone DB tab if that tab is not automatically displayed 3 Select an FC fabric from the Zoning Scope l...

Page 484: ... to the alias 7 Remove members from the alias by completing the following steps a Select one or more members that you want to remove from the alias in the Selected Member s list Press SHIFT or CTRL and click each member to select more than one member b Click the left arrow between the Potential Members list and Selected Member s list to remove the selected members to the alias 8 Click OK on the Ed...

Page 485: ...g Fabric The Zoning dialog box displays 2 Click the Zone DB tab if that tab is not automatically displayed 3 Select Alias from the Type list 4 Right click the zone alias you want to rename and select Rename 5 Edit the name and press Enter 6 Click OK or Apply on the Zoning dialog box to save your changes Creating a zone configuration 1 Select Configure Zoning Fabric The Zoning dialog box displays 2...

Page 486: ...Select an FC fabric from the Potential Members list This identifies the target entity for all subsequent zoning actions and displays the zoning library for the selected entity 4 Right click the zone configuration you want to review in the Zone Configs list and select Properties The Zone Config Properties dialog box displays 5 Review the zone configuration properties The following information is in...

Page 487: ...following problems Zone and zone configuration name violations Zoning configuration violations Zone configuration change limit violations For pure EOS fabrics during zone configuration activation the total number of zone members in each zone and in the zone configuration are checked against the limits imposed by the firmware and hardware product If the limits are exceeded a message is displayed in...

Page 488: ...o cancel the activation and consider your naming options For pure EOS fabrics when the total number of zones and zone members defined exceeds the limit recommended for the system firmware a warning message displays informing you of this fact and asking whether you want to proceed Consider carefully whether you want to continue with the zone configuration activation The limits are set to ensure sta...

Page 489: ...age displays informing you that any zones or zone configurations you have changed will be saved in the zone database and warning you to make sure no other user is making changes to the same areas Deactivating a zone configuration Use this procedure to deactivate the active zone configuration There are several conditions that could cause the Deactivate button to be unavailable They include the foll...

Page 490: ...the Zone DB Operation list A message displays informing you that refresh will overwrite the selected database Click Yes to continue 5 Click OK A message displays informing you that any zones or zone configurations you have changed will be saved in the zone database and warning you to make sure no other user is making changes to the same areas Merging two zone databases If a zone or zone configurat...

Page 491: ...r the database areas by selecting one of the following from the Comparison View list Storage to Host Connectivity Displays only storage and host devices Host to Storage Connectivity Displays only host and storage devices Full Zone Configs Zones Aliases Displays all zone configurations zones and aliases 6 Set the level of detail for the database areas by selecting one of the following options from ...

Page 492: ...liases zones and zone configurations to the editable database by completing the followings steps a Select one or more of the same elements in the Reference Zone DB area b Select the element type in the Editable Zone DB area c Click Add 14 Remove elements from the editable zone database by selecting an available element added from the Editable Zone DB are and clicking Remove Note that if a zone is ...

Page 493: ...annot be used ATTENTION If failover is disabled use care when planning your TI zones so that non TI zone devices are not isolated If disabled failover is not used correctly it can cause major fabric disruptions that are difficult to resolve Enhanced TI zones In Fabric OS 6 4 0 or higher ports can be in multiple TI zones Zones with overlapping port members are called enhanced TI zones ETIZ Enhanced...

Page 494: ...ly displayed 3 Select an FC fabric from the Zoning Scope list This identifies the target entity for all subsequent zoning actions and displays the zoning database for the selected entity 4 Select Domain Port Index from the Type list 5 If you want to show all discovered fabrics in the Potential Members list right click in the Potential Members list and select Display All 6 Create the traffic isolat...

Page 495: ...be saved in the zone database and warning you to make sure no other user is making changes to the same areas Adding members to a traffic isolation zone NOTE Traffic isolation zones are configurable only on a Fabric OS device Use this procedure to add a member to a zone when the member is listed in the Potential Members list of the Zone DB tab Only ports can be added as members to a traffic isolati...

Page 496: ...l be saved in the zone database and warning you to make sure no other user is making changes to the same areas Enabling a traffic isolation zone NOTE Traffic isolation zones are configurable only on a Fabric OS device Use this procedure to enable a traffic isolation zone When a zone configuration in the same zone database is activated the enabled TI zones are also activated at that time Traffic is...

Page 497: ...sage displays informing you that any zones or zone configurations you have changed will be saved in the zone database and warning you to make sure no other user is making changes to the same areas The traffic isolation zone is not disabled until you activate a zone configuration in the same zone database Enabling failover on a traffic isolation zone NOTE Traffic isolation zones are configurable on...

Page 498: ...check box is selected 1 Select Configure Zoning Fabric The Zoning dialog box displays 2 Click the Zone DB tab if that tab is not automatically displayed 3 Select an FC fabric from the Zoning Scope list This identifies the target entity for all subsequent zoning actions and displays the zoning database for the selected entity 4 Right click the traffic isolation zone you want to disable failover on ...

Page 499: ... Select a database from the Editable Zone DB field The Reference Zone DB and Editable Zone DB areas display all available element types zone configurations zones and aliases for the two selected zone databases In the Editable zone DB area each element type and element display with an icon indicator Table 25 to show the differences between the two databases TABLE 25 Compare icon indicators Icon Des...

Page 500: ...ging zone configuration comparison alerts You can turn off the automatic zone configuration comparison function if you no longer want to see two of the alert messages that the comparison can produce When a zone configuration is successfully activated the comparison function can display an alert icon if either of two conditions exist The messages in question are The active zone configuration does n...

Page 501: ... want to set limits 5 To set a limit for new undiscovered fabrics enter a value in the Default Change Count for New Fabrics field The default value is 0 Unlimited 6 Select the Enforce change limits during zone activation check box to enforce the change limits If you want to set the limits now but turn on enforcement of the limits at a later time make sure the check box is clear 7 Click OK to save ...

Page 502: ... box to save your changes Deleting a zone configuration 1 Select Configure Zoning Fabric The Zoning dialog box displays 2 Click the Zone DB tab if that tab is not automatically displayed 3 Select an FC fabric from the Zoning Scope list This identifies the target entity for all subsequent zoning actions and displays the zoning database for the selected entity 4 Select one or more zone configuration...

Page 503: ...peration list 5 Click Yes on the confirmation message The message box closes and when successful the Fabric Zone DB is cleared of all zoning configurations 6 Click OK to close the Zoning dialog box Duplicating a zone When you duplicate a zone you make a copy of it in the same zone database The first time a zone is duplicated the duplicate is automatically given the name zonelabel _copy On subseque...

Page 504: ...enaming a zone alias on page 453 6 Click OK or Apply on the Zoning dialog box to save your changes Duplicating a zone configuration When you duplicate a zone configuration you make a copy of it in the same zone database The first time a zone configuration is duplicated the duplicate is automatically given the name zonesetlabel _copy On subsequent times a sequential number is assigned to the zone n...

Page 505: ...ct an FC fabric from the Zoning Scope list This identifies the target entity for all subsequent zoning actions and displays the zoning database for the selected entity 4 If you want to show all fabrics discovered in the Potential Members list right click in the Potential Members list and select Display All 5 Select the device or port you want to find in the Potential Members list Press SHIFT or CT...

Page 506: ...ns and displays the zoning database for the selected entity 4 Select the zone you want to find in the Zones list Press SHIFT or CTRL and click each zone to select more than one zone 5 Click Find between the Zones list and the Zone Configs list If the zone is found all instances of the zone are highlighted in the Zone Configs list If the zone is not found a message displays informing you of this Cl...

Page 507: ...eted it is only removed from the zone 1 Select Configure Zoning Fabric The Zoning dialog box displays 2 Click the Zone DB tab if that tab is not automatically displayed 3 Select an FC fabric from the Zoning Scope list This identifies the target entity for all subsequent zoning actions and displays the zoning database for the selected entity 4 Click the plus sign by the appropriate zone in the Zone...

Page 508: ...hen successful the zone is removed from the Zone Configs list 6 Click OK or Apply to save your changes A message displays informing you that any zones or zone configurations you have changed will be saved in the zone database and warning you to make sure no other user is making changes to the same areas Renaming a zone 1 Select Configure Zoning Fabric The Zoning dialog box displays 2 Click the Zon...

Page 509: ...rming you the name contains characters that are not accepted by some switch vendors and asking whether you want to proceed Click Yes to continue or No to cancel the renaming and consider your options 7 Click OK or Apply to save your changes A message displays informing you that any zones or zone configurations you have changed will be saved in the zone database and warning you to make sure no othe...

Page 510: ...as previously assigned to the potential member a message displays informing you of this and asking whether you want to overwrite the existing name Click Yes to continue and assign a new name or No to decline and dismiss the message box 7 Click OK If you have entered more than one port name or zoning method a message displays informing you of the error Click OK to close the message correct your ent...

Page 511: ...roubleshooting 494 FC troubleshooting NOTE FC troubleshooting is only available for Fabric OS devices You can perform the following operations using FC troubleshooting Trace Route Path Information and FC Ping Use to obtain the detailed routing information for any two selected device ports The devices can exist in the same fabric or in two different fabrics shared through FC Routers Device Connecti...

Page 512: ...me fabric however they cannot be connected to the same switch To enter the ports select the Enter port FC Address option a Enter the source port FC address in the Source field b Enter the destination port FC address in the Destination field To select the ports select the Select two device ports option a Right click a fabric in the Available Device Ports table and select Expand All b Select the por...

Page 513: ...Configure FC Troubleshooting Device Connectivity The Device Connectivity Troubleshooting dialog box displays 2 Select the source and destination ports on which you want to troubleshoot device connectivity using one of the following options Enter the source and destination ports directly by selecting the Enter port FC Address option and completing the following steps a Enter the source port in the ...

Page 514: ...ng Results dialog box Adding a detached device To add a detached device to the Selected Device Ports table complete the following steps 1 Select Configure FC Troubleshooting Device Connectivity The Device Connectivity Troubleshooting dialog box displays 2 Click Add Detached 3 Enter the port WWN of the detached device port in the Port WWN field 4 Click OK IP troubleshooting NOTE IP troubleshooting ...

Page 515: ...Received The number of received responses Packets Lost Equal to the number of packets sent minus the number of packets received Packet Lost percentage The number of packets lost expressed as a percentage of the packets sent This will be 0 25 50 75 or 100 for 0 1 2 3 or all 4 packets lost Minimum Round Trip Time The shortest time in milliseconds of any response If no response the round trip times i...

Page 516: ... rough indication of network congestion or latency It is normal for the first packet to experience a higher round trip time than later packets if the intermediate routers need to do ARP requests to locate the next hop Time To Live hops The number of hops remaining in the received response The time to live is decremented by each router that forwards the packet The packet is dropped if the time to l...

Page 517: ...e then repeats the operation with a TTL of two hops to get the IP address of the second hop This process repeats for up to ten hops or until a successful PING response is received The IP Trace Details table displays the results of each attempt TABLE 28 IP Trace Details Field or Component Description Hop Number The TTL inserted in the transmitted probe packet IP Address 1 The IP address of the syst...

Page 518: ...etwork link to see how much bandwidth is available It will display the media link bandwidth only if no other traffic is flowing The remote IP address must belong to a managed switch so that IP Performance can set up the receiving end on the remote switch For more information about IP Performance refer to Chapter 20 in the Fabric OS Administrator s Guide During the IP Performance test data is sent ...

Page 519: ...hen 1500 then 1260 The value displayed in the table is the largest value that worked Field Component Description Problem Resolution Downloading Client from a Internet Explorer Browser over HTTPS If the JNLP file does not launch automatically use one of the following options Complete the following steps 1 Save the JNLP file to the local host 2 Launch the JNLP file manually In Internet Explorer 7 co...

Page 520: ...ternal FTP server and the Management application server is running IPv6 firmware download is not supported Choose from one of the following options If the Management application is running IPv6 only configure an external FTP server If the Management application is running IPv4 and IPv6 configure IPv4 to be the preferred address ...

Page 521: ...application and select Delete d Click Close on the Java Cache Viewer dialog box e Click OK on the Java Control Panel dialog box 2 Log into the remote client from the browser a Open a web browser and enter the IP address of the Management application server in the Address bar If the web server port number does not use the default 443 if is SSL Enabled otherwise the default is 80 you must enter the ...

Page 522: ...remove the old link and launch the correct remote client version complete the following steps 1 Clear the previous version from the Java cache a Select Start Settings Control Panel Java The Java Control Panel dialog box displays b Click View on the General tab The Java Cache Viewer dialog box displays c Right click the application and select Delete d Click Close on the Java Cache Viewer dialog box...

Page 523: ...que names and you try to use a name that already exists in the fabric You can enter a different name for the device or search for the duplicate name using one of the following procedures Searching for a device by name on page 79 in the Configure Names dialog box Searching for a device by WWN on page 80 in the Configure Names dialog box Searching for a device in the connectivity map on page 113 TAB...

Page 524: ...lete close the window 6 Close the System Configuration Utility 7 Restart the computer to apply changes NOTE You can re enable UAC using the above procedure and selecting the Enable UAC tool name in step 4 Disable using regedit by completing the following steps NOTE Before making changes to the registry make sure you have a valid backup In cases where you re supposed to delete or modify keys or val...

Page 525: ...in Approval Mode policy and select Properties 10 Select the Disabled option and click OK 11 Close the Group Policy editor 12 Restart the computer to apply changes To disable using the Active Directory based GPO editor complete the following steps 1 On a Vista computer that is a member of a domain select Start Run 2 Type gpedit msc on the Run dialog box and click OK 3 Browse to the required GPO tha...

Page 526: ... dialog box to change the default password on the new switch before you can use the Management application to perform zoning When configuring a large zone configuration a switch displays offline during discovery If a large zone configuration is configured in a fabric switches may temporarily display as being offline during discovery Wait for the next discovery cycle and click the Refresh button on...

Page 527: ...r Properties Select to display the Server properties Options Select to configure the Management application options Exit Select to close the Management Client Edit Menu Copy Select to copy information and move it to another location Show Connections Select to show connections in a group Select All Select to select all objects in the Connectivity Map and Product List Properties Select to display th...

Page 528: ...ow Ports Select to show utilized ports on the selected device Connected End Devices Select to show or hide all connected end devices Include Virtual Devices check box Select to include virtual devices Hide All Select to hide all connected end devices Show All Select to show all connected end devices Custom Select to set a custom display for all connected end devices MyCustomList Lists all custom v...

Page 529: ...ty Map that are connected to other devices UnOccupied Product Ports Select to display the ports of the devices shown in the Connectivity Map that are not connected to any other device Attached Ports Select to display the attached ports of the target devices Switch to Switch Connections Select to display the switch to switch connections Discover Menu Setup Select to set up Discovery Server Port Map...

Page 530: ...the switch Configuration or Security Swap Blades Professional Plus and Enterprise Edition Only Select to swap blades Firmware Management Select to download firmware to devices Routing Select to manage a selected router Configuration Professional Plus and Enterprise Edition Only Select to view the R_Ports on a router Domain IDs Professional Plus and Enterprise Edition Only Select to configure the r...

Page 531: ... blocked ports FICON Enterprise Edition Only Select to configure FICON Configure Fabric Select to configure cascaded FICON from the selected fabric Merge Fabrics Select to merge the selected fabrics Allow Prohibit Matrix Enterprise Edition Only Select to allow FICON users to configure an Allow Prohibit Matrix table You can select any matrix tables and compare them either vertically or horizontally...

Page 532: ...erformance through a real time list of top conversations for a switch or port along with related information Real Time Graph Select to monitor performance through a graph which displays transmit and receive data The graphs show real time data Historical Graph Professional Plus and Enterprise Edition Only Select to monitor a performance through a graph which displays transmit and receive data The g...

Page 533: ...ic Product Status Select to display operational status changes of managed products Security Select to display security information Syslog Select to display Syslog events related to the selected device or fabric Track Fabric Changes Professional Plus and Enterprise Edition Only Select to track fabric changes on the selected fabric Accept Change s Professional Plus and Enterprise Edition Only Select...

Page 534: ... a software application You can configure the Tools menu to display different software applications Recommended tools to include in this menu include an internet browser the command prompt application and Notepad Help Menu Contents Select to open the Online Help Find Select to search the Online Help About Management_Application_Name Select to view the application information such as the company in...

Page 535: ...ly Real Time Graph Historical Graph Professional Plus and Enterprise Edition Only Historical Report Professional Plus and Enterprise Edition Only Events Configure FCIP Tunnels Only launches the wizard when FCIP capable switches are in the selected fabric High Integrity Fabric Professional Plus and Enterprise Edition Only Fabric Binding Professional Plus and Enterprise Edition Only Router Configura...

Page 536: ...ll Collapse All Customize Only available from Product List Properties Device Group Host Port Mapping Only available for servers or host group Zoning Only available for switch group Storage Port Mapping Professional Plus and Enterprise Edition Only Only available for storage group Map Display Port Display Occupied Product Ports UnOccupied Product Ports Attached Ports Switch to Switch Connections On...

Page 537: ...irmware Management Zoning Does not display when switch is in a Core Switch group Chassis group or Isolated device group or when it is in Access Gateway mode Allow Prohibit Matrix Enterprise Edition Only Only available for Fabric OS devices Only enabled when the Fabric OS device is FICON capable and has the Enhanced Group Management license Technical Support Switch Host SupportSave Upload Failure D...

Page 538: ...more than one item Setup Tools Professional Plus and Enterprise Edition Only Product Only enabled when the fabric is tracked and the product is removed and joins another fabric Other Ports Fabric Name 1 Fabric Name 2 Does not display when an Access Gateway mode device is attached to multiple fabrics Accept Change Professional Plus and Enterprise Edition Only Only enabled in tracked FC Fabrics Only...

Page 539: ...es Fabric OS only Only available from Product List Configuration Fabric OS only Save Restore Schedule Backup Professional Plus and Enterprise Edition Only Configuration Repository Replicate Configuration Professional Plus and Enterprise Edition Only Security Professional Plus and Enterprise Edition Only Swap Blades Firmware Management Fabric OS only Events Technical Support Fabric OS only Switch H...

Page 540: ...routed fabric Mapping Product Only available for Brocade HBAs LightPulse Utility NT Only available for Emulex devices Launches with Origin in context for routed device Emulex Configuration Tool Only available for Emulex devices Launches with Origin in context for routed device SANSurfer Only available for Qlogic HBAs User defined menu item Configured in Setup Tools May be more than one item Host O...

Page 541: ...for devices routed in Not available for enclosures Destination Only available for devices routed out Not available for enclosures Port Display Occupied Product Ports UnOccupied Product Ports Attached Ports Switch to Switch Connections Only available from Product List Table Copy Device_Name Group Copy Row Copy Table Export Row Export Table Search Select All Size All Columns To Fit Expand All Collap...

Page 542: ...Columns To Fit Expand All Collapse All Customize Only available from Product List Properties Switch Port FC Performance Real Time Graph Historical Graph Professional Plus and Enterprise Edition Only Historical Report Professional Plus and Enterprise Edition Only Zoning List Zone Members Enable Disable Enable Disable Connected Port Port Display Occupied Product Ports UnOccupied Product Ports Attach...

Page 543: ...hen you have the Security Privilege Zoning List Zone Members Professional Plus and Enterprise Edition Only Connected Port Port Display Occupied Product Ports UnOccupied Product Ports Attached Ports Switch to Switch Connections Only available from Product List Table Copy Device_Name Group Copy Row Copy Table Export Row Export Table Search Select All Size All Columns To Fit Expand All Collapse All C...

Page 544: ...Storage Node Show Ports Does not display for routed devices and discovered Hosts Show Connections Storage FC and iSCSI Storage port Storage Port Mapping Professional Plus and Enterprise Edition Only Zoning List Zone Members Professional Plus and Enterprise Edition Only Connected Port Port Display Occupied Product Ports UnOccupied Product Ports Attached Ports Switch to Switch Connections Only avail...

Page 545: ... Table Export Row Export Table Search Select All Size All Columns To Fit Expand All Collapse All Customize Only available from Product List Properties Connection Properties FCIP Tunnel Properties Trunk Port Display Occupied Product Ports UnOccupied Product Ports Attached Ports Switch to Switch Connections Only available from Product List Table Copy Device_Name Group Copy Row Copy Table Export Row ...

Page 546: ...s Attached Ports Switch to Switch Connections Table Copy Component Copy Row Copy Table Export Row Export Table Search Select All Size All Columns To Fit Expand All Collapse All Customize Product List Table Copy Component Copy Table Export Table Search Select All Size All Columns To Fit Expand All Collapse All Customize Some form of this shortcut menu is available for all tables in the Management i...

Page 547: ...ing from Fabric 3 10 None SW Login Server unable to synchronize databases 2 11 None SW Login Server database found to be invalid 2 20 None SW Name Server unable to synchronize databases 2 21 None SW Name Server database found to be invalid 2 40 None SW Operator panel has failed 2 50 None SW Management Server unable to synchronize databases 2 51 None SW Management Server database found to be invali...

Page 548: ...RU type has failed 3 307 FAN HW A cooling fan propeller in FAN2 FRU type has failed 3 322 FAN HW Front top fan FRU failed 3 323 FAN HW Front bottom fan FRU failed 3 324 FAN HW Rear top fan FRU failed 3 325 FAN HW Rear bottom fan FRU failed 3 400 CTP HW Power up diagnostic failure 3 411 CTP SW Firmware fault occurred 3 413 CTP HW Backup CTP power on self test failure 3 414 CTP HW Backup CTP failure...

Page 549: ...3 607 SBAR SWM HW M EOS Switch contains no operational SBAR cards 4 610 SWM INFO SWM BMAC Link Down 0 622 SBAR INFO SWM powered off 0 625 SBAR INFO SWM NV RAM failure 0 Event Reason Code FRU Code Event Type Description Severity 800 DVP LIM HW High temperature warning 3 801 DVP LIM HW Critically hot temperature warning 3 802 DVP LIM HW M EOS Port card shutdown due to thermal violations 3 805 SWM SB...

Page 550: ...426 FW 1426 Faulty or Missing Power supply 3 1427 FW 1427 Faulty Power supply 3 1428 FW 1428 Missing Power supply 3 1429 FW 1429 Problem in power supply arrangement 3 1430 FW 1430 Faulty Temperature sensors 3 1431 FW 1431 Faulty fans 3 1432 FW 1432 Faulty WWN Cards 3 1433 FW 1433 Faulty CPs 3 1434 FW 1434 Faulty Blades 3 1435 FW 1435 Flash usage is out of range Fabric OS version 6 1 or later 3 143...

Page 551: ...ee available configurations no privilege read only and read write User privilege is the Management application s method of providing role based access control RBAC to the software s user administrator In the Management application resource groups are assigned privileges roles and fabrics Privileges are not directly assigned to users users get privileges because they belong to a role in a resource ...

Page 552: ...ontrols for Backup on the Options dialog box Enables you to launch Options dialog box from the SMIA Configuration Tool Home tab however disables all functions Disables the Configure command on the Backup icon right click menu on the application status bar Disables all controls for Backup on the Options dialog box Enables you to launch Options dialog box from the SMIA Configuration Tool Home tab ho...

Page 553: ...ation Setup button in the Users dialog box Disables the E mail option in the Master Log shortcut menu Currently asks Are you sure you want to assign Event Management privileges to this group that does not otherwise have read write for E mail Event Notification Setup Enables the Event Notification E mail command on the Monitor menu and the E mail Event Notification Setup button in the Users dialog ...

Page 554: ...ncel function for the dialog boxes Enables the Logs Log_Type from the Monitor menu Enables you to launch Options dialog box from the SMIA Configuration Tool Home tab however disables all functions Enables the SNMP Trap and Syslog configuration commands from the Monitor menu Enables the following functions from the dialog boxes configure Management server registration configure TRAP or Syslog forwa...

Page 555: ...ose Cancel and Help Enables the Switch FCoE command from the Configure menu Enables all commands and functions on the dialog box Firmware Management Allows you to download firmware to selected switches and manage the firmware repository Disables the Firmware Management command from the Configure menu and right click menu Enables the Firmware Management command from the Configure menu and right cli...

Page 556: ...ows you to open the Performance Graphs dialog box and enables all controls Enables all functions on the individual port dialog box double click a graph Enables the Port Optics command on the right click menu Product Administration NOTE This privilege affects M EOS and M EOSn switch product Element Managers An Element Manager privilege that enables most functionally Disables the functions described...

Page 557: ... editable property fields Enables the Names command on the Configure menu however disables all edit functions in the dialog box Enables Properties command on Edit menu and right click menus Enables editable properties marked by a green triangle in the Product List and the Properties Sheets Enables the Names command on the Configure menu and enables all functions in the dialog box Report Allows you...

Page 558: ... functions in the Servers dialog box SMIA Operations Allows you to access the CIMOM Common Information Model Object Manager server and the SMIA Configuration Tool Enables the Configure SMI Agent button from the Server Console Disables the CIMOM and Certificate Management tabs on the SMIA Configuration Tool dialog box Denies access to the CIMOM server with the following WBEM exception CIM_ERR_ACCES...

Page 559: ... menu and right click menu Enables the SupportSave Upload Failure Data Capture and View Repository commands from the Monitor Technical Support menu and right click menu Enables all functions on the dialog boxes View Management Allows you to create edit and delete views Selecting from views should always be allowed unless restricted by the assignment of Views in the Group definition in the Users di...

Page 560: ... in the Zoning dialog box Disables the Activate Deactivate and Zoning Policies buttons in the Zoning dialog box Enables the Zoning Policies button however you cannot perform any operations within the Zoning dialog box Disables the Activate and Deactivate buttons in the Zoning dialog box Enables the Activate Deactivate and Zoning Policies buttons in the Zoning dialog box TABLE 30 Privileges and App...

Page 561: ... the Save To function on the Active Zone Config tab In Zoning dialog box the Zone DB list includes offline zones If you select an offline zone the contents are loaded into the Zoning dialog box Disables all offline zone DB editing activating and persisting functions In Zoning dialog box enables the Cancel and Help buttons and the Compare and Export functions in the Zone DB Operation list On the Zo...

Page 562: ...In Zoning dialog box enables the Cancel and Help buttons and the Compare and Export functions in the Zone DB Operation list On the Zone DB tab enables the find buttons On the Active Zone Config tab enables the Zone Member Display list and Report button In the Compare Merge dialog box enables the Cancel and Help buttons In the Potential Members table enables all functions in the right click menu In...

Page 563: ...figuration Management System Administrator Operator Diagnose and Troubleshooting System Administrator Operator Discovery Setup System Administrator Host Administrator Operator E mail Event Notification Setup System Administrator Operator Event Management System Administrator Operator Fabric Tracking System Administrator Operator Fault Management System Administrator Operator FCIP Management System...

Page 564: ...rator Security Administrator Zone Administrator Network Administrator Security Officer Operator Host Administrator Zoning Activation System Administrator Zone Administrator Operator Zoning Offline System Administrator Zone Administrator Operator Zoning Online System Administrator Zone Administrator Operator Zoning Set Edit Limits System Administrator Zone Administrator Operator TABLE 31 Features a...

Page 565: ...devices 543 Device 544 EE Monitor 551 Event FM 553 Fabric 559 FC Port Stats 562 FCIP 565 FCIP Tunnel Stats 568 GigE Port Stats 570 ISL 572 License 575 Meta SAN 576 Network 578 Others 579 Port Fencing 580 Quartz 581 Reports 584 Role Based Access Control 584 SNMP 587 Stats 590 Switch 592 Switch details 597 Switch port 602 Threshold 609 User Interface 610 Zoning 1 611 Zoning 2 613 ...

Page 566: ...ility varchar 512 TABLE 33 CARD_CAPABILITY Field Definition Format Size CARD_ID DB ID of the card int CAPABILITY_ Name of the capability detected on the card varchar 256 ENABLED 1 the capability is enabled on the card int TABLE 34 VIRTUAL_SWITCH_CAPABILITY Field Definition Format Size VIRTUAL SWITCH_ID DB ID of virtual switch int CAPABILITY_ Name of capability detected on virtual switch varchar 25...

Page 567: ...RTED 1 trunking is supported on this blade smallint FICON_DISABLED 1 FICON is disabled on this blade smallint IP_ADDRESS IP address of first Ethernet management port for a given slot with intelligent blade char 64 SUBNET_MASK Mask of first Ethernet man agement port for a given slot with intelligent blade varchar 64 DEFAULT_GATEWAY Gateway IP address Ethernet management for a given slot with intell...

Page 568: ...Management application user name varchar 128 NAME Client view name varchar 255 DESCRIPTION Client View description varchar 255 TABLE 40 CLIENT_VIEW_COLUMN Field Definition Format Size ID int NAME Column name varchar 255 ENTITY_CATEGORY Either fabric or product switch or device or port or combination of these 3 basic categories varchar 128 COLUMN_INDEX 0 Predefined column 1 First user defined colum...

Page 569: ...it is a secured fabric smallint AD_ENVIRONMENT 1 there are user defined ADs in this fabric smallint MANAGED 1 it is an actively monitored fabric otherwise it is an unmonitored fabric smallint MANAGEMENT_STATE Bit map to indicate various management indications for the fabric smallint TRACK_CHANGES 1 changes member switches ISL and devices in the fabric are tracked smallint STATS_COLLECTION 1 statis...

Page 570: ...N Timestamp of the seed switch when the particular HTML page was changed last Note that this is not when the last time collection was done timestamp TABLE 45 COLLECTOR Field Definition Format Size NAME Name of the collector registered with the collection framework varchar 256 CLASS_NAME Java class name which serves as the collector varchar 256 DESCRIPTION Collector description usually not used var...

Page 571: ...ffective active in that fabric varchar 256 USER_DEFINED_VALUE_1 User defined custom value varchar 256 USER_DEFINED_VALUE_2 User defined custom value varchar 256 USER_DEFINED_VALUE_3 User defined custom value varchar 256 TABLE 47 COLLECTOR_END_TIMESTAMP Field Definition Format Size COLLECTOR_SOURCE Internal key for switches and fabrics for which collection is undertaken varchar 256 COLLECTOR_NAME C...

Page 572: ...varchar 32 CHECKSUM Checksum value varchar 16 TABLE 50 CORE_SWITCH_CHECKSUM Field Definition Format Size CORE_SWITCH_ID DB ID int CHECKSUM_KEY Checksum type varchar 32 CHECKSUM Checksum value varchar 16 TABLE 51 CORE_SWITCH_COLLECTION Field Definition Format Size CORE_SWITCH_ID Core switch ID int COLLECTION_NAME Collector name varchar 256 LAST_CORE_SW_ MODIFICATION Last core switch modification ti...

Page 573: ...int DIFFIE_HELLMAN_GROUP Diffie Hellman Group used in PFS negotiation smallint SECURITY_ASSOC_LIFE Association lifetime in seconds double SECURITY_ASSOC_LIFE_ IN_MB Security association lifetime in megabytes double TABLE 53 FIRMWARE_SWITCH_DETAIL Field Definition Format Size FIRMWARE_ID ID for the firmware file int SWITCH_TYPE Switch type that supports this firmware file smallint REBOOT_REQUIRED R...

Page 574: ...itch type smallint DESCRIPTION Description of the switch type varchar 256 SPEED Switch maximum speed smallint MULTI_CP_CAPABLE Switch is multi CP capable or not smallint TABLE 56 FTP_SERVER Field Definition Format Size ID int TYPE Type indicates the FTP is internal or external 0 internal 1 external smallint IP FTP server IP address varchar 64 USER_NAME FTP server user name varchar 64 PASSWORD FTP ...

Page 575: ...ATED_BY The column value helps to figure out who triggered the configuration upload operation varchar 64 TABLE 59 CED_APPLICATION Field Definition Format Size ID int NAME Name of the application Application represents a collection of active zones in a fabric varchar 24 FABRIC_ID ID of the fabric for which the application is created int TABLE 60 CED_APPLICATION_MEMBER Field Definition Format Size A...

Page 576: ...tly smallint CREATION_TIME When the device port was discovered i e created in the DB timestamp MISSING 1 if that device port is missing from the fabric smallint MISSING_TIME Time when it misses timestamp NPV_PHYSICAL Update NPV device type on this given device port The value npvPhysical on the device port will be 1 when the device port has reference to a device node of DEVICE_TYPE value 0 i e phys...

Page 577: ...ar 16 TRUSTED 1 the node is trusted for fabric tracking smallint CREATION_TIME Timestamp when the record is created by the Management application server timestamp MISSING 1 the device node is missing from the fabric smallint MISSING_TIME Time when the device node missed timestamp PROXY_DEVICE One of the device ports of this device node has translated domain That device port is set as the Proxy Dev...

Page 578: ...NDOR Vendor name varchar 256 MODEL Device enclosure Model varchar 256 SERIAL_NUMBER Serial Number given for the entity varchar 256 FIRMWARE Firmware running on the device which is not applicable for device enclosure logical entity varchar 256 USER_DEFINED_VALUE1 User defined custom value varchar 256 USER_DEFINED_VALUE2 User defined custom value varchar 256 USER_DEFINED_VALUE3 User defined custom v...

Page 579: ...E_TIME Time when the fabric was last updated timestamp ACTIVE_ZONESET_NAME Name of the zone configuration which is effective active in that fabric varchar 256 USER_DEFINED_VALUE_1 User defined custom value varchar 256 USER_DEFINED_VALUE_2 User defined custom value varchar 256 USER_DEFINED_VALUE_3 User defined custom value varchar 256 TABLE 68 DEVICE_PORT_INFO Name Source ID DEVICE_PORT ID NODE ID ...

Page 580: ...AIL CONTACT LOCATION USER_DEFINED_DEVICE_DETAIL LOCATION DESCRIPTION USER_DEFINED_DEVICE_DETAIL DESCRIPTION USER DEFINED VALUE1 USER_DEFINED_DEVICE_DETAIL USER_DEFINED_VALUE1 USER DEFINED VALUE2 USER_DEFINED_DEVICE_DETAIL USER_DEFINED_VALUE2 USER DEFINED VALUE3 USER_DEFINED_DEVICE_DETAIL USER_DEFINED_VALUE3 TABLE 69 DEVICE_INFO Name Source DEVICE NODE ID DEVICE_NODE ID DEVICE NODE WWN DEVICE_NODE ...

Page 581: ...ITCH_PORT TYPE SWITCH PORT FULL TYPE SWITCH_PORT FULL_TYPE SWITCH PORT STATUS SWITCH_PORT STATUS SWITCH PORT HEALTH SWITCH_PORT HEALTH SPEED SWITCH_PORT SPEED MAX_PORT_SPEED SWITCH_PORT MAX_PORT_SPEED NPIV SWITCH_PORT NPIV NPIV_CAPABLE SWITCH_PORT NPIV_CAPABLE CALCULATED_STATUS SWITCH_PORT CALCULATED_STATUS AREA_ID SWITCH_PORT AREA_ID PHYSICAL_PORT SWITCH_PORT PHYSICAL_PORT CATEGORY SWITCH_PORT CA...

Page 582: ...evice node or device port WWN char 23 NAME User assigned device name varchar 256 TYPE User set device type initiator or target varchar 32 IP_ADDRESS Device IP address varchar 256 CONTACT User assigned contact varchar 256 LOCATION User assigned device location varchar 256 DESCRIPTION User assigned description varchar 256 USER_DEFINED_VALUE1 User assigned arbitrary value varchar 256 USEER_DEFINED_VA...

Page 583: ...CATION USER_DEFINED_DEVICE_DETAIL LOCATION DESCRIPTION USER_DEFINED_DEVICE_DETAIL DESCRIPTION USER DEFINED VALUE1 USER_DEFINED_DEVICE_DETAIL USER_DEFINED_VALUE1 USER DEFINED VALUE2 USER_DEFINED_DEVICE_DETAIL USER_DEFINED_VALUE2 USER DEFINED VALUE3 USER_DEFINED_DEVICE_DETAIL USER_DEFINED_VALUE3 TABLE 72 EE_MONITOR_STATS Field Definition Format Size ID int EE_MONITOR_ID References to the ID in EE_MO...

Page 584: ...ize ID int MONITOR_ID The Number Index given by the switch when user creates End End monitor on the switch int SWITCH_PORT_ID References the ID in SWITCH_PORT table int SOURCE_PORT_ID References the ID in DEVICE_PORT table and this is an initiator for EE monitor int DEST_PORT_ID References the ID in DEVICE_PORT table and this is a target for EE monitor int NAME Name of the End_End Monitor varchar ...

Page 585: ...object to which the event applies such as Fabric Switch or Port char 64 DESCRIPTION Description of the object varchar 255 TABLE 79 EVENT_TYPE Field Definition Format Size ID int TYPE_CODE Event Type Code char 64 DESCRIPTION Description of the Event Rule varchar 255 TABLE 80 MESSAGE_RECIPIENT Field Definition Format Size ID int DESCRIPTION Description about recipient varchar 64 IP_ADDRESS IP Addres...

Page 586: ...like a password It is sent along with each SNMP Get Request and allows or denies access to a device The default value is public This is applicable if the agent is configured to operate in SNMPv1 varchar 64 WRITE_COMMUNITY_ STRING The SNMP Write Only Community String is like a password It is sent along with each SNMP Set Request and allows or denies access to device The default value is private Thi...

Page 587: ...he event originated varchar 32 SOURCE_ADDR IP Address from which the event originated varchar 32 EVENT_SOURCE Source from which the event is generated varchar 32 STATUS Status of the event varchar 32 PRIORITY Priority of the event Default priority is 7 int EVENT_NUMBER Sequence number of the event int EVENT_COUNT Number of occurrences of the event int AUDIT Audit file of the syslog message varchar...

Page 588: ... varchar 10 FIRST_OCCURENCE_ SWITCH_TIME First occurrence switch time timestamp LAST_OCCURENCE_ SWITCH_TIME Last occurrence switch time timestamp FIRST_OCCURENCE_HOST_ TIME First occurrence host time this is set to GMT time timestamp LAST_OCCURENCE_HOST_ TIME Last occurrence host time this is set to GMT time timestamp MODULE Module from which the event is generated varchar 20 MESSAGE_ID Unique mes...

Page 589: ...ailed FRU position in case of FRU failure 0 otherwise int CALL_HOME Call Home status of the Event 1 call home event 0 not a call home event smallint OID Object Identifier of the SNMP Trap Event For other events this column will be blank varchar 50 TABLE 85 RAS_LOG Field Definition Format Size MSG_ID Message ID of the event varchar 15 MODULE_ID Module ID of the event varchar 10 SEVERITY Severity of...

Page 590: ...OR1 AND operator used to append the rule varchar 12 EVENT_TYPE_ID The Selected Event type ID from the Event type combo box int OPERATOR2 AND operator used to append the rule varchar 12 MESSAGE_ID Message ID provided by the user varchar 20 OPERATOR3 AND operator used to append the rule varchar 12 IP_ADDRESS Source IP Address varchar 32 OPERATOR4 AND operator used to append the rule varchar 12 WWN S...

Page 591: ...age for Broadcast message varchar 30 FIELD1 Data for the selected action varchar 512 FIELD2 Data for the selected action varchar 512 FIELD3 Data for the selected action varchar 512 FIELD4 Data for the selected action varchar 512 STATE State of the Action 0 Action Disabled 1 Action Enabled smallint TABLE 89 SAN Field Definition Format Size ID int NAME Name of this SAN varchar 256 CONTACT Contact pe...

Page 592: ...s an unmonitored fabric smallint MANAGEMENT_STATE Bit map to indicate various management indications for the fabric smallint TRACK_CHANGES 1 changes member switches ISL and devices in the fabric are tracked smallint STATS_COLLECTION 1 statistics collection is enabled on the fabric smallint CREATION_TIME When the fabric record is inserted i e created timestamp LAST_FABRIC_CHANGED Time when fabric l...

Page 593: ...LUE_2 USER_DEFINED_VALUE_3 FABRIC USER_DEFINED_VALUE_3 ID VIRTUAL_SWITCH ID SEED SWITCH IP ADDRESS CORE_SWITCH IP_ADDRESS SWITCH COUNT FABRIC_MEMBER FABRIC_ID FABRIC ID TABLE 92 FABRIC_MEMBER Field Definition Format Size FABRIC_ID Fabric ID foreign key to FABRIC table INT VIRTUAL_SWITCH_ID ID of the virtual switch which is a member of this fabric foreign key to VIRTUAL_SWITCH table INT TRUSTED 1 t...

Page 594: ...State of collection 0 failed 1 success smallint LINKFAILURES Number of link failures double TXLINKRESETS Number of transmit link failures double RXLINKRESETS Number of receive link failures double SYNCLOSSES Number of sync losses double SIGNALLOSSES Number of signal losses double SEQUENCEERRORS Number of sequence errors double INVALIDTRANSMISSIONS Number of invalid transmission errors double CRCER...

Page 595: ..._UTILIZATION double RX_UTILIZATION double CREATION_TIME timestamp ACTIVE_STATE smallint LINKFAILURES double TXLINKRESETS double RXLINKRESETS double SYNCLOSSES double SIGNALLOSSES double SEQUENCEERRORS double INVALIDTRANSMISSIONS double CRCERRORS double DATA_GAPS_IN5MIN smallint DATA_GAPS_IN30MIN smallint TABLE 96 FC_PORT_STATS_1DAY Field Definition Format Size ID int SWITCH_ID int PORT_ID int TX d...

Page 596: ...VE_STATE smallint LINKFAILURES double TXLINKRESETS double RXLINKRESETS double SYNCLOSSES double SIGNALLOSSES double SEQUENCEERRORS double INVALIDTRANSMISSIONS double CRCERRORS double DATA_GAPS_IN5MIN smallint DATA_GAPS_IN30MIN smallint DATA_GAPS_IN2HOUR smallint TABLE 96 FC_PORT_STATS_1DAY Continued Field Definition Format Size ...

Page 597: ...int KEEP_ALIVE_TIMEOUT FCIP Tunnel Parameter int MAX_RETRNASMISSION FCIP Tunnel Parameter int PATH_MTU_DISCOVERY_ ENABLED FCIP Tunnel Parameter smallint WAN_TOV_ENABLED FCIP Tunnel Parameter smallint TUNNEL_STATUS Tunnel Status Active Inactive int TABLE 98 FCIP_TUNNEL_INFO Name Source ID FCIP_TUNNEL ID ETHERNET_PORT_ID FCIP_TUNNEL ETHERNET_PORT_ID TUNNEL_ID FCIP_TUNNEL TUNNEL_ID VLAN_TAG FCIP_TUNN...

Page 598: ...E_READ_MAX_PIPE FCIP_TUNNEL_DETAILS FICON_TAPE_READ_MAX_PIPE FICON_TAPE_WRITE_MAX_OPS FCIP_TUNNEL_DETAILS FICON_TAPE_WRITE_MAX_OPS FICON_TAPE_READ_MAX_OPS FCIP_TUNNEL_DETAILS FICON_TAPE_READ_MAX_OPS FICON_TAPE_WRITE_TIMER FCIP_TUNNEL_DETAILS FICON_TAPE_WRITE_TIMER FICON_TAPE_MAX_WRITE_CHAI N FCIP_TUNNEL_DETAILS FICON_TAPE_MAX_WRITE_CHAIN FICON_OXID_BASE FCIP_TUNNEL_DETAILS FICON_OXID_BASE FICON_XR...

Page 599: ...KE Policy on the tunnel int IPSEC_POLICY_NUM The IPSEC Policy on the tunnel int PRESHARED_KEY The Preshared Key on the tunnel char 32 FICON_TAPE_READ_BLOCK _ID_ENABLED Whether Ficon_Tape_Read_Block is enabled on that tunnel smallint FICON_TIN_TIR_ EMULATION_ENABLED Whether Ficon_Tin_Tir_Emulation is enabled on that tunnel smallint FICON_DEVICE_LEVEL_ ACK_EMULATION_ENABLED Whether Device_Level_Ack_...

Page 600: ...e precision RX Receive RX value in bytes double precision TX_UTILIZATION Transmit utilization value in percentage double precision RX_UTILIZATION Receive utilization value in percentage double precision DROPPED PACKETS The number of dropped packets double precision COMPRESSION The compression value double precision LATENCY The latency value double precision LINK_RETRANSMITS The number of link retr...

Page 601: ...TILIZATION double precision RX_UTILIZATION double precision DROPPED PACKETS double precision COMPRESSION double precision LATENCY double precision LINK_RETRANSMITS double precision ACTIVE_STATE smallint TABLE 104 FCIP_TUNNEL_STATS_1DAY Field Definition Format Size ID int TUNNEL_DBID int SWITCH ID int CREATION TIME timestamp TX double precision RX double precision TX_UTILIZATION double precision RX...

Page 602: ...TRANSMIT_TIME FCIP Tunnel Parameter int SELECTIVE_ACK_ENABLED FCIP Tunnel Parameter smallint KEEP_ALIVE_TIMEOUT FCIP Tunnel Parameter int MAX_RETRANSMISSION FCIP Tunnel Parameter int PATH_MTU_DISCOVERY_ ENABLED FCIP Tunnel Parameter smallint WAN_TOV_ENABLED FCIP Tunnel Parameter smallint TUNNEL_STATUS Tunnel Status Active Inactive int TABLE 106 GIGE_PORT_STATS Field Definition Format Size ID int S...

Page 603: ...recision RX double precision TX_UTILIZATION double precision RX_UTILIZATION double precision DROPPED PACKETS double precision COMPRESSION double precision LATENCY double precision BANDWIDTH double precision TABLE 108 GIGE_PORT_STATS_2HOUR Field Definition Format Size ID int SWITCH ID int PORT_ID int CREATION TIME timestamp TX double precision RX double precision TX_UTILIZATION double precision RX_...

Page 604: ...double precision TABLE 110 ISL_INFO Name Source ID ISL ID FABRIC_ID ISL FABRIC_ID COST ISL COST TYPE ISL TYPE SOURCE_DOAMIN_ID ISL SOURCE_DOMAIN_ID SOURCE PORT NUMBER ISL SOURCE_PORT_NUMBER SOURCE SWITCH ID SOURCE_VIRTUAL_SWITCH ID SOURCE SWITCH NAME SOURCE_VIRTUAL_SWITCH NAME SOURCE SWITCH PORT ID SOURCE_SWITCH_PORT ID SOURCE SWITCH PORT WWN SOURCE_SWITCH_PORT WWN DEST DOMAIN ID ISL DEST_DOMAIN_I...

Page 605: ...DDRESS DEST_CORE_SWITCH IP_ADDRESS DEST SWITCH WWN DEST_VIRTUAL_SWITCH WWN DEST SWITCH PORT WWN ISL_INFO SOURCE_SWITCH_PORT_WWN SOURCE SWITCH PORT WWN REMOTE MASTER PORT DEST SWITCH NAME ISL_INFO DEST_SWITCH_NAME DEST SWITCH PORT ID ISL_INFO DEST_SWITCH_PORT_ID TABLE 112 ISL Field Definition Format Size ID int FABRIC_ID Fabric DB ID int SOURCE_DOMAIN_ID Source domain ID int SOURCE_PORT_NUMBER Sour...

Page 606: ...fabric otherwise it is an unmonitored fabric smallint MANAGEMENT_STATE Bit map to indicate various management indications for the fabric smallint TRACK_CHANGES 1 changes member switches ISL and devices in the fabric are tracked smallint STATS_COLLECTION 1 statistics collection is enabled on the fabric smallint CREATION_TIME When the fabric record is inserted i e created timestamp LAST_FABRIC_CHANG...

Page 607: ...he primary key integer FEATURE_ID Foreign Key LICENSED_FEATURE ID and is part of the primary integer TABLE 117 LICENSED_FEATURE Field Definition Format Size ID int NAME License feature name a short text description varchar 64 DESCRIPTION Optional detailed description about the license feature varchar 256 TABLE 118 SWITCH_LICENSE Field Definition Format Size ID int CORE_SWITCH_ID Refers to the entr...

Page 608: ...rd reference int TABLE 122 FCR_ROUTE Field Definition Format Size ID INT BB_FABRIC_ID Backbone fabric DB ID INT FCR_FABRIC_ID FID assigned to edge fabric INT SWITCH_WWN WWN of the router switch VARCHAR 128 NR_PORT_ID Route parameter INT FCRP_COST Route parameter INT EX_PORT_WWN Ex_port WWN VARCHAR 128 TABLE 123 FABRIC Field Definition Format Size ID int SAN_ID Foreign key to SAN table usually 1 si...

Page 609: ...abric record is inserted i e created timestamp LAST_FABRIC_CHANGED Time when fabric last changed timestamp LAST_SCAN_TIME timestamp LAST_UPDATE_TIME Time when fabric was last updated timestamp ACTIVE_ZONESET_NAME Name of the zone set which is effective active in that fabric varchar 256 USER_DEFINED_VALUE_1 User defined custom value varchar 256 USER_DEFINED_VALUE_2 User defined custom value varchar...

Page 610: ..._PORT_NUMBER EDGE PORT TYPE SWITCH_PORT TYPE TABLE 126 IP_INTERFACE Field Definition Format Size ID int ETHERNET_PORT_ID GigE Port ID int IP_ADDRESS IP address on the Ip_interface varchar 64 NET_MASK Subnet mask for the interface varchar 64 MTU_SIZE MTU Size for that interface int CHECKSUM Check Sum varchar 64 TABLE 127 IP_ROUTE Field Definition Format Size ID int ETHERNET_PORT_ID GigE Port ID int...

Page 611: ...DOR Vendor name varchar 64 TABLE 130 OUI_GUESSED_DEVICE_MAP Field Definition Format Size OUI Vendor OUI char 6 TYPE Guessed device type for this vendor varchar 32 TABLE 131 FEATURE Field Definition Format Size FEATURE_ID ID used to uniquely identify the feature int 6 NAME Name of the feature varchar 256 DESCRIPTION Description for the feature varchar 256 TABLE 132 FEATURE_EDITION_MAP Field Definit...

Page 612: ...olicies are For ISL Default Protocol Error Policy For Link Violation type Default Link Level Policy For Security Default Security Policy smallint B_THRESHOLD_LIMIT Threshold Limits for Fabric OS Switch Not Supported int B_THRESHOLD_DURATION Duration in minutes for Fabric OS Switch Not Supported int TABLE 134 PORT_FENCING_POLICY_MAP Field Definition Format Size ID int POLICY_ID Foreign key to ID co...

Page 613: ...ge TABLE 136 QRTZ_TRIGGERS Field Definition Format Size TRIGGER_NAME Name of the trigger varchar 80 TRIGGER_GROUP Name of the trigger group varchar 80 JOB_NAME Name of the job varchar 80 JOB_GROUP Name of the job group varchar 80 IS_VOLATILE Whether the trigger should be persisted in the JobStore for re use after program restarts bit DESCRIPTION A description for the trigger instance may be useful...

Page 614: ... use after the program restarts bit INSTANCE_NAME Trigger instance name varchar 80 FIRED_TIME The trigger fired time numeric 13 0 STATE The fired trigger job state varchar 16 JOB_NAME Name of the job varchar 80 JOB_GROUP Name of the job group varchar 80 IS_STATEFUL Whether the job implements the interface StatefulJob bit REQUESTS_RECOVERY True or false bit TABLE 139 QRTZ_JOB_LISTENERS Field Defini...

Page 615: ... Scheduler info varchar 80 TABLE 143 QRTZ_SCHEDULER_STATE Field Definition Format Size INSTANCE_NAME Instance of the scheduler varchar 80 LAST_CHECKIN_TIME Last fired time in milliseconds numeric 13 0 CHECKIN_INTERVAL Repeat interval numeric 13 0 RECOVERER Misfire instruction varchar 80 TABLE 144 QRTZ_LOCKS Field Definition Format Size LOCK_NAME Resource identification name assigned by user varcha...

Page 616: ... The Management application user who has generated this report varchar 128 REPORT_OBJECT Report object BLOB image TIMESTAMP_ Timestamp when the report is generated timestamp TABLE 149 USER_ROLE_MAP Field Definition Format Size USER_NAME User name varchar 128 ROLE_ID Role ID which is mapped for the user int TABLE 150 ROLE Field Definition Format Size ID int NAME Role name varchar 128 DESCRIPTION Ro...

Page 617: ...128 TABLE 155 ROLE_PRIVILEGE_INFO name Source ID ROLE ID ROLE NAME ROLE NAME ROLE DESCRIPTION ROLE DESCRIPTION ID PRIVILEGE ID NAME PRIVILEGE NAME PERMISSION ROLE_PRIVILEGE_MAP PERMISSION TABLE 156 USER_ Field Definition Format Size NAME User name varchar 128 DESCRIPTION User description varchar 512 PASSWORD User password varchar 512 EMAIL User e mail ID varchar 1024 NOTIFICATION_ENABLED Flag for ...

Page 618: ...tion varchar 512 TABLE 159 RESOURCE_FABRIC_MAP Field Definition Format Size RESOURCE_GROUP_ID Resource group ID int FABRIC_ID Fabric ID which is in the resource group int TABLE 160 USER_ROLE_RESOURCE_INFO name Source RESOURCE GROUP ID RESOURCE_GROUP ID RESOURCE_GROUP_ID RESOURCE GROUP NAME RESOURCE_GROUP NAME RESOURCE_GROUP_NAME ROLE ID ROLE ID ROLE_ID ROLE NAME ROLE NAME ROLE_NAME NAME USER_ NAME...

Page 619: ... SNMPv1 varchar 64 WRITE_COMMUNITY_ STRING The SNMP Write Only Community String is like a password It is sent along with each SNMP Set Request and allows or denies access to a device The default value is private This is applicable if the agent is configured to operate in SNMPv1 varchar 64 USER_NAME A human readable string representing the name of the user This is applicable if the agent is configu...

Page 620: ... if get set request to the SNMP agent times out Default value is 3 smallint TIMEOUT Timeout value in seconds before for a get set request to the SNMP agent Default value is 5 smallint VERSION SNMP agent version running on the switch as in SNMPv1 and SNMPv3 varchar 6 READ_COMMUNITY_STRING The SNMP Read Only Community String is like a password It is sent along with each SNMP Get Request and allows o...

Page 621: ... not messages sent or received on behalf of this user can be encrypted and if so which privacy protocol to use The current values for this field are usmNoPrivProtocol and usmDESPrivProtocol This is applicable if the agent is configured to operate in SNMPv3 varchar 16 PRIV_PASSWORD The localized secret key used by the privacy protocol for encrypting and decrypting messages This is applicable if the...

Page 622: ...LAST_VALUE The number of minutes hours days It becomes null in two cases 1 When the value of FROM_TIME is not Custom 2 When FROM_TIME is Custom and user chooses the time interval CUSTOM_FROM and CUSTOM_TO int CUSTOM_TIME_UNIT The unit type Minutes Hours Days of the CUSTOM_LAST_VALUE varchar 40 CUSTOM_FROM The starting time timestamp CUSTOM_TO The ending time timestamp GRANULARITY The granularity v...

Page 623: ...igh boundary threshold value T2 int TABLE 168 DEFAULT_FAVORITES Field Definition Format Size ID Name of the favorite int NAME The topnumber of ports 5 10 15 20 varchar 64 TOP_N Types of ports FC FCIP GE and End to End Monitors varchar 40 SELECTION_FILTER The time interval in which the graph is shown varchar 40 FROM_TIME Always null The default favorite is not customized varchar 40 CUSTOM_LAST_VALU...

Page 624: ...mum size of zone configuration on the switch int CREATION_TIME Time at which this record was created timestamp LAST_UPDATE_TIME Time when this record was last updated timestamp USER_NAME User name of the switch varchar 128 PASSWORD Password varchar 128 MANAGEMENT_STATE Various states as per manageability software like the Management application int STATE State of the switch varchar 32 STATUS Statu...

Page 625: ...CHES Actual number of virtual switches carved out of this physical switch 0 means it is not operating in Virtual Fabric model smallint REACHABLE Whether reachable by HTTP smallint UNREACHABLE_TIME When the switch became unreachable from HTTP timestamp OPERATIONAL_STATUS Operational status as reported by the embedded software varchar 128 CREATION_TIME Time when this record was created by the Manage...

Page 626: ...rchar 128 TABLE 172 SWITCH_INFO name Source PHYSICAL SWITCH ID CORE_SWITCH ID PHYSICAL SWITCH NAME CORE_SWITCH NAME IP_ADDRESS CORE_SWITCH IP_ADDRESS PHYSICAL SWITCH WWN CORE_SWITCH WWN PHYSICAL OPERATIONAL STATUS CORE_SWITCH OPERATIONAL_STATUS TYPE CORE_SWITCH TYPE MAX_VIRTUAL_SWITCH CORE_SWITCH MAX_VIRTUAL_SWITCHES NUM VIRTUAL_SWITCHES CORE_SWITCH NUM_VIRTUAL_SWITCHES FIRMWARE_VERSION CORE_SWITC...

Page 627: ...N_TIME LAST_UPDATE_TIME VIRTUAL_SWITCH LAST_UPDATE_TIME USER_NAME VIRTUAL_SWITCH USER_NAME PASSWORD VIRTUAL_SWITCH PASSWORD MANAGEMENT_STATE VIRTUAL_SWITCH MANAGEMENT_STATE STATE VIRTUAL_SWITCH STATE STATUS VIRTUAL_SWITCH STATUS STATUS_REASON VIRTUAL_SWITCH STATUS_REASON FABRIC_IDID_MODE VIRTUAL_SWITCH FABRIC_IDID_MODE LOGICAL_ID VIRTUAL_SWITCH LOGICAL_ID USER_DEFINED_VALUE_1 VIRTUAL_SWITCH USER_D...

Page 628: ...BLE 174 PURGED_SWITCH Field Definition Format Size WWN WWN of the switch char 23 NAME Name of the switch varchar 64 VIRTUAL_FABRIC_ID Virtual fabric ID smallint USER_NAME Switch user name varchar 64 PASSWORD Switch password varchar 128 IP_ADDRESS IP address varchar 128 PORT_NUMBER SNMP port number smallint RETRY_COUNT Retry count smallint TIMEOUT SNMP time out value smallint VERSION SNMP version v...

Page 629: ...nt MAX_PORT Number of maximum ports physically allowed on the switch smallint CHASSIS_SERVICE_TAG varchar 32 BAY_ID varchar 32 TYPE_NUMBER varchar 32 MODEL_NUMBER Switch model number string varchar 32 MANUFACTURER The name of the organization responsible for producing the chassis This might be different from the vendor if the product is shipped by an OEM with a private label varchar 32 PLANT_OF_MA...

Page 630: ...btained through SNMP varchar 256 DESCRIPTION User assigned description obtained through SNMP varchar 256 TYPE SWBD type number as given by Fabric OS smallint MODEL Model type of the switch 0 Unknown 1 Not applicable 2 Fabric OS switch 3 M EOS switch smallint FIRMWARE_VERSION Embedded Fabric OS or M EOS software version varchar 128 VENDOR Switch vendor varchar 256 MAX_VIRTUAL_SWITCHES Maximum virtu...

Page 631: ...agement application host IP used by this switch int MANAGING_SERVER_IP_ ADDRESS IP address of the server which is currently managing this switch Used for M EOS switch only It does not apply for Fabric OS switches varchar 128 TABLE 177 SWITCH_DETAILS_INFO Name Source PHYSICAL SWITCH ID CORE_SWITCH ID PHYSICAL SWITCH NAME CORE_SWITCH NAME IP_ADDRESS CORE_SWITCH IP_ADDRESS PHYSICAL SWITCH WWN CORE_SW...

Page 632: ...ER_NAME PASSWORD VIRTUAL_SWITCH PASSWORD MANAGEMENT_STATE VIRTUAL_SWITCH MANAGEMENT_STATE STATE VIRTUAL_SWITCH STATE STATUS VIRTUAL_SWITCH STATUS STATUS_REASON VIRTUAL_SWITCH STATUS_REASON FABRIC_IDID_MODE VIRTUAL_SWITCH FABRIC_IDID_MODE LOGICAL_ID VIRTUAL_SWITCH LOGICAL_ID USER_DEFINED_VALUE_1 VIRTUAL_SWITCH USER_DEFINED_VALUE_1 USER_DEFINED_VALUE_2 VIRTUAL_SWITCH USER_DEFINED_VALUE_2 USER_DEFINE...

Page 633: ...E_NUMBER CORE_SWITCH_DETAILS SEQUENCE_NUMBER TAG CORE_SWITCH_DETAILS TAG DYNAMIC_LOAD_SHARING CORE_SWITCH_DETAILS DYNAMIC_LOAD_SHARING PORT_BASED_ROUTING CORE_SWITCH_DETAILS PORT_BASED_ROUTING IN_ORDER_DELIVERY CORE_SWITCH_DETAILS IN_ORDER_DELIVERY ACT_CP_PRI_FW_VERSION CORE_SWITCH_DETAILS ACT_CP_PRI_FW_VERSION ACT_CP_SEC_FW_VERSION CORE_SWITCH_DETAILS ACT_CP_SEC_FW_VERSION STBY_CP_PRI_FW_VERSION ...

Page 634: ...hether the GigE Port is persistently disabled smallint INTERFACE_TYPE smallint CHECKSUM varchar 16 FCIP_CAPABLE 1 FCIP capable otherwise 0 smallint ISCSI_CAPABLE 1 ISCSI capable otherwise 0 smallint INBAND_MANAGEMENT_ST ATUS 1 Inband Management status is enabled otherwise 0 smallint TABLE 179 SWITCH_PORT Field Definition Format Size ID int VIRTUAL_SWITCH_ID DB ID of virtual_switch to which this po...

Page 635: ...LLOCATED How many BB credits are allocated for the port int ESTIMATED_DISTANCE The estimated physical distance of the connection between ports int ACTUAL_DISTANCE The physical distance of the connection on the port in relation to the other port int LONG_DISTANCE_SETTING Whether long distance enabled int DEGRADED_PORT Whether a port is degraded or not varchar 16 REMOTE_NODE_WWN Node WWN of the atta...

Page 636: ...ATUS varchar 64 USER_DEFINED_VALUE1 varchar 256 USER_DEFINED_VALUE2 varchar 256 USER_DEFINED_VALUE3 varchar 256 KIND varchar 32 STATE varchar 64 TABLE 180 GIGE_PORT_INFO name Source ID GIGE_PORT ID SWITCH_PORT_ID GIGE_PORT SWITCH_PORT_ID PORT_NUMBER GIGE_PORT PORT_NUMBER SLOT_NUMBER GIGE_PORT SLOT_NUMBER ENABLED GIGE_PORT ENABLED SPEED GIGE_PORT SPEED MAX_SPEED GIGE_PORT MAX_SPEED MAC_ADDRESS GIGE...

Page 637: ...t can be mapped to multiple F_ports SMALLINT F_PORT Port number of port type F_Port which is being mapped SMALLINT TABLE 182 N2F_PORT_MAP_INFO Name Source VIRTUAL SWITCHID N2F_PORT_MAP VIRTUAL_SWITCH_ID N PORT N2F_PORT_MAP N_PORT F PORT N2F_PORT_MAP F_PORT EDGE SWITCH PORT WWN AG_N_PORT REMOTE_PORT_WWN AG F PORT WWN AG_F_PORT WWN REMOTE NODE WWN AG_F_PORT REMOTE_NODE_WWN DEVICE PORT WWN AG_F_PORT ...

Page 638: ...he switch varchar 32 FCS_ROLE FCS role of the switch varchar 16 AD_CAPABLE 1 switch is AD capable smallint FABRIC_IDID_MODE Fabric IDID mode smallint OPERATIONAL_STATUS Operation status of switch varchar 128 MAX_ZONE_CONFIG_SIZE Maximum size of zone configuration on the switch int CREATION_TIME Time at which this record was created timestamp LAST_UPDATE_TIME Time when this record was last updated ...

Page 639: ...SICAL SWITCH NAME PHYSICAL_SWITCH_NAME IP ADDRESS IP_ADDRESS PHYSICAL SWITCH WWN PHYSICAL_SWITCH_WWN PHYSICAL OPERATIONAL STATUS PHYSICAL_OPERATIONAL_STATUS TYPE TYPE MAX VIRTUAL SWITCHES MAX_VIRTUAL_SWITCHES FIRMWARE VERSION FIRMWARE_VERSION VENDOR VENDOR REACHABLE REACHABLE UNREACHABLE TIME UNREACHABLE_TIME CONTACT CONTACT LOCATION LOCATION DESCRIPTION DESCRIPTION MODEL MODEL ID SWITCH_INFO ID N...

Page 640: ...TRUSTED TRUSTED MISSING MISSING MISSING TIME MISSING_TIME SNMP PORT NUMBER SNMP_CREDENTIALS PORT_NUMBER SNMP RETRY COUNT SNMP_CREDENTIALS RETRY_COUNT SNMP TIMEOUT SNMP_CREDENTIALS TIMEOUT SNMP VERSION SNMP_CREDENTIALS VERSION SNMP READ COMUMUNITY STRING SNMP_CREDENTIALS READ_COMMUNITY_STRING SNMP WRITE COMMUNITY STRING SNMP_CREDENTIALS WRITE_COMMUNITY_STRING SNMP USER NAME SNMP_CREDENTIALS USER_NA...

Page 641: ...t NAME Name of the policy varchar 24 TYPE Type of the policy varchar 20 DESCRIPTION Description about the policy varchar 100 TABLE 189 FABRIC_THRESHOLD_SETTING Field Definition Format Size FABRIC_ID References the ID in FABRIC table int POLICY_ID References the ID in THRESHOLD_POLICY table int 24 TABLE 190 VIRTUAL_SWITCH Field Definition Format Size ID INT TABLE 191 PM_MEASURE Field Definition For...

Page 642: ... selected product connection property 0 not included in the default list smallint TABLE 194 SELECTED_FLYOVER_PROPERTY Field Definition Format Size PROPERTY_ID Refers to Flyover_Property ID from AVAILABLE_FLYOVER_PROPERTY table int USER_NAME The name of the user who selected the property to be shown on flyover varchar 128 TABLE 195 TOOL_APP Field Definition Format Size TOOL_MENU_TEXT Text to be dis...

Page 643: ...icular tool varchar 256 TOOL_ID The tool to be used for launching the application int PARAMETERS Link to that application varchar 256 IP_SELECTED Selected IP Address option smallint WWN_SELECTED Selected WWN option smallint TABLE 198 ZONE_DB Field Definition Format Size ID PK of the owning fabric int FABRIC_ID Zone DB name for offline Zone DBs int NAME Offline Zone DB 1 offline varchar 256 OFFLINE...

Page 644: ...rmat Size ID int BB_FABRIC_ID Backbone fabric DB ID int EDGE_FABRIC_ID FID assigned to edge fabric int NAME LSAN zone name varchar 128 TABLE 201 LSAN_ZONE_MEMBER Field Definition Format Size LSAN_ZONE_ID LSAN_ZONE record reference int MEMBER_PORT_WWN Zone member WWN char 23 TABLE 202 ZONE_DB_CONTENT Field Definition Format Size ID int ZONE_DB_ID PK of the owning offline zone DB int CONTENT Saved o...

Page 645: ...inition Format Size ID int TYPE Zone alias member type 2 WWN 4 D P smallint VALUE Member value D P or WWN varchar 256 ZONE_ALIAS_ID PK of the owning zone alias int TABLE 206 ZONE_IN ZONE_SET Field Definition Format Size ZONE_SET_ID PK of the owning zone set INT ZONE_ID PK of the owning zone INT TABLE 207 ZONE Field Definition Format Size ID int ZONE_DB_ID PK the owning ZONE_DB int NAME The zone na...

Page 646: ... Last saved to switch user name varchar 128 DEFAULT_ZONE_STATUS All access or no access when no active zone configuration smallint ZONE_TXN_SUPPORTED Zoning commands support transaction smallint MCDATA_DEFAULT_ZONE McData switch default zoning mode smallint MCDATA_SAFE_ZONE McData switch safe zoning mode smallint ZONE_CONFIG_SIZE Zone configuration string length int TABLE 209 ZONE_SET Field Defini...

Page 647: ...tor access defined 531 advanced filtering setting up 180 202 alerts zone configuration comparison 468 asset polling configuring 95 associating HBAs to servers 143 B backup changing interval 63 configuring to hard drive 60 configuring to network drive 61 configuring to writable CD 59 data 57 disabling 62 enabling 62 immediate 64 management server 58 reviewing events 64 roles and access levels 531 s...

Page 648: ... authentication using the GUI 240 server name 81 server port 96 smart cards 342 SNMP credentials 41 software 84 support mode settings 97 traffic isolation zoning 462 zoning for the SAN 443 configuring zoning 443 connected ports showing 156 connections status determining 10 connections between a switch and an LKM key vault 436 connections changing display of 103 content broadcast messages 189 copyi...

Page 649: ...fic isolation zone 465 traffic isolation zone failover 466 disabling backup 62 disabling SNMP informs 209 disabling trap forwarding 208 Discover menu 497 discovering a fabric 35 discovery 35 configuring 37 85 description of 232 in band enabling 37 out of band enabling 37 setting up 37 SNMP version 37 state 49 troubleshooting 50 discovery setup roles and access levels 531 display end nodes 67 displ...

Page 650: ...s of zeroizing 420 recovering from zeroizing 420 removing from HA clusters 435 support for tape pools 437 zeroizing 420 encryption group adding a switch using the management application 387 confirming configuration status 384 creating using the encryption setup wizard 374 selecting the key vault type 376 switch connection requirements 352 encryption group properties using the restore master key 42...

Page 651: ... 453 external FTP server configuring 88 F Fabric OS seed switch version 52 Fabric OS feature listing 29 fabric tracking roles and access levels 531 fabrics deleting 43 discovering 35 IPv6 discovery 35 monitoring 51 status determining 10 zone database clearing 471 Fastwrite 255 fault management roles and access levels 531 FC Address for inactive iSCSI devices 153 159 FC routing module 118 FCIP adva...

Page 652: ... zoning online 532 zoning set edit limits 532 feature to firmware requirements 29 Fibre Channel over IP 244 FICON configuring emulation 267 display resetting 66 setting 66 filtering events for users 239 master log events 179 port connectivity view results 151 real time performance data 223 firmware deleting files from repository 140 downloading 140 management overview 138 overwriting 141 firmware ...

Page 653: ...g 37 internal FTP server configuring 87 IP configuration 90 IP frames 244 IP interfaces configuring 258 IP routes configuring 258 IPsec FCIP 251 IPSec policies configuring 265 iSCSI devices identifying inactive 153 159 ISL offline policies adding 186 duplicating 194 editing 198 K key vaults connection from switch 436 entering the IP address or host name for 377 378 379 380 381 L launch remote clie...

Page 654: ...ey 411 saving to a file 411 master log 7 copying 178 copying parts 178 displaying 176 177 exporting 179 filtering events 179 McDATA fabric mode 450 memory allocation configuration 93 configuring asset polling 95 menu bar 3 Configure 497 Discover 497 Edit 495 Help 502 Monitor 500 Server 495 Tools 501 View 495 M EOS feature listing 29 merging zone databases 458 minimap 9 anchoring 9 attaching 9 deta...

Page 655: ...licy triggers 184 policy types 183 port connection properties viewing 157 port connectivity view disabling filter 152 enabling filter 152 filtering results 151 refreshing 150 resetting filter 152 viewing details 152 port connectivity viewing 147 port display changing 105 port label changing 105 port optics refreshing 161 viewing 160 port properties 153 port status determining 159 port status viewi...

Page 656: ... SNMP traps 208 host server 206 host server for syslog forwarding 211 members from zone 475 objects from zone alias 452 servers 143 zone from zone configuration 476 zones from zone configuration 476 renaming zone alias 453 zone configuration 477 zones 476 renaming servers 143 replacing zone members 477 report roles and access levels 531 report types 225 reports deleting 228 exporting 226 generatin...

Page 657: ... connected 156 procedure 153 smart cards configuring 342 removing using the management application 347 saving to a file 347 SNMP credentials configuring 41 SNMP informs disabling 209 SNMP informs enabling 209 SNMP traps adding V1 destination 206 adding V3 destination 207 editing a destination 208 registering a different host server 205 registering the management server 205 removing a destination 2...

Page 658: ...se fields 553 559 fabric database fields 559 561 FC port status database fields 562 564 FCIP database fields 565 568 FCIP tunnel stats database fields 568 570 GigE port stats database fields 570 572 ISL database fields 572 575 license database fields 575 Meta SAN database fields 576 578 network database fields 578 579 others database fields 579 port fencing database fields 580 quartz database fiel...

Page 659: ...topology See also physical map total user count 10 traffic isolation zone adding members 463 creating 462 disabling 465 disabling failover 466 enabling 464 enabling failover 465 traffic isolation zoning 461 configuring 462 trap forwarding disabling 208 enabling 206 triggers 184 troubleshooting discovery 50 FCIP Ethernet connections 282 tunnels configuring 258 U unassociating HBA to server 145 user...

Page 660: ... disabling 465 traffic isolation disabling failover 466 traffic isolation enabling 464 traffic isolation enabling failover 465 zone alias creating 451 deleting 470 editing 452 exporting 453 zone alias duplicating 472 zone alias removing objects 452 zone alias renaming 453 zone configuration activating 455 adding zones 454 creating 453 deactivating 457 deleting 470 duplicating 472 finding member in...

Page 661: ...42 overview 441 traffic isolation 461 traffic isolation configuring 462 zoning activation roles and access levels 532 zoning administration 466 zoning configuration overview 443 zoning offline roles and access levels 532 zoning online roles and access levels 532 zoning reports generating 229 zoning set edit limits roles and access levels 532 zooming in 108 zooming out 108 ...

Page 662: ...630 DCFM Professional User Manual 53 1001773 01 ...
Reviews: