Setting Preferences
You can customize the PaperPort software so that it is displayed
according to your preferences.
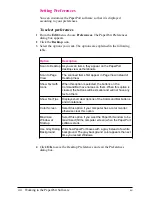
To select preferences
1
From the Edit menu, choose Preferences. The PaperPort Preferences
dialog box appears.
2
Click the Desktop icon.
3
Select the options you want. The options are explained in the following
table.
Option
Description
Scan to Desktop As you scan items, they appear on the PaperPort
desktop view as thumbnails.
Scan to Page
View
The scanned items first appear in Page View instead of
Desktop View.
Show Text with
Icons
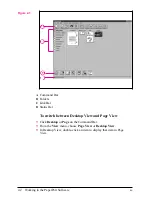
When this option is selected, the buttons on the
Command Bar have names on them. When this option is
cleared, the buttons will be smaller and will not have any
text on them.
Show Tool Tips
Displays short descriptions of the Command Bar buttons
and Annotations.
Color Screen
Select this option if your computer has a color monitor;
otherwise clear this option.
Maximize
Window at
Startup
Select this option if you want the PaperPort window to be
maximized (fill the computer screen) when the PaperPort
software starts.
Use Gray Dialog
Background
Will show PaperPort boxes with a gray instead of a white
background. The gray background color appears the next
time you restart Windows.
4
Click OK to save the Desktop Preferences and exit the Preferences
dialog box.
2-4
Working in the PaperPort Software
EN

