Installing an External Drive
Step 1: Check the Drive’s SCSI ID
2-7
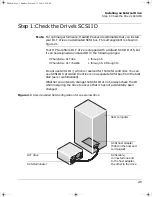
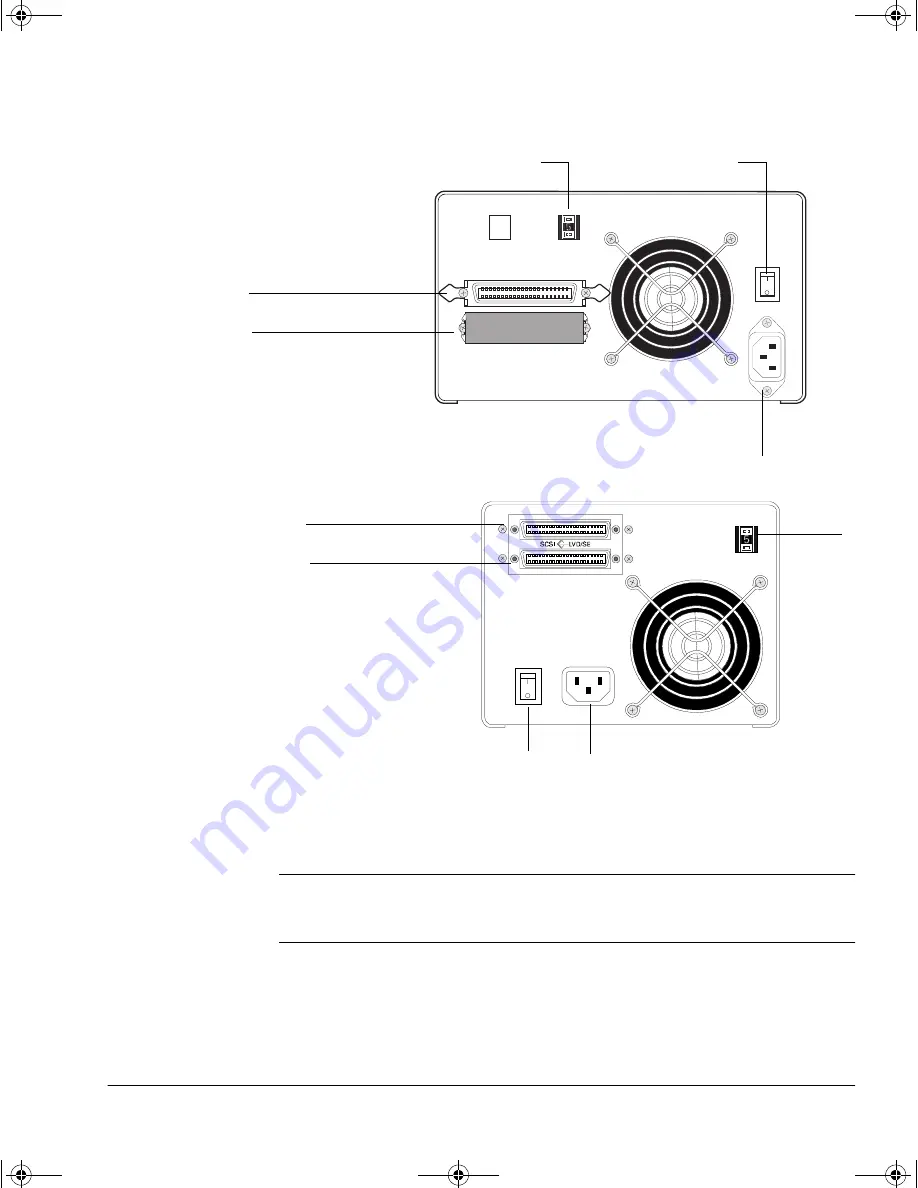
Figure 2.2
Rear panel of an HP SureStore DLT 40e and 70e drives
Figure 2.3
Rear panel of an HP SureStore DLT 80e drive
2
Change the SCSI ID. Use a ball-point pen or similar pointed object to press
the + and
−
buttons above and below the SCSI ID display on the rear of the
drive to increase or decrease the number. Do not use a pencil because
particles of pencil lead might get into the drive.
Caution
Both the computer and tape drive check the SCSI ID only at power-on.
Always power-cycle the drive and reboot the computer after you change
the SCSI ID.
SCSI ID
Power
connector
SCSI connector 1
Power switch
SCSI connector 2
with terminator
fitted
Note: HP SureStore DLT 70e drives have 68-pin thumb-screw
SCSI connectors, not the 50-pin connectors shown here.
SCSI ID
Power connector
SCSI connector 1
Power switch
SCSI connector 2
dlt.book Page 7 Monday, February 12, 2001 5:42 PM


