ENWW
Chapter 6 Removal and replacement 183
Controller PCA
1
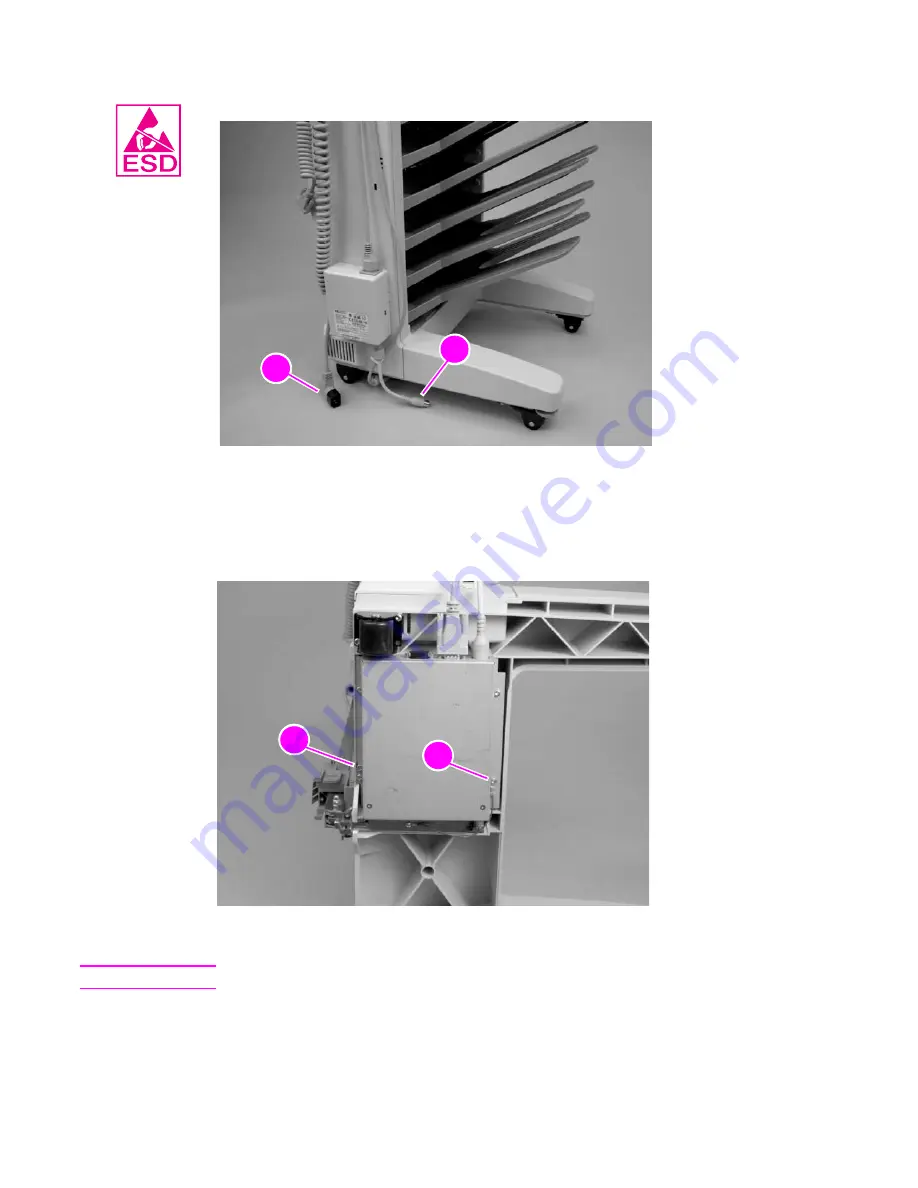
Disconnect the power supply cable (callout 1) and the Jet-Link cable (callout 2).
Figure 161.
Controller PCA (1 of 4)
2
Carefully lay the 8-bin mailbox on its front side (user LED side).
3
Remove one grounding screw (callout 3) and loosen one screw (callout 4).
Figure 162.
Controller PCA (2 of 4)
Note
Make sure that you do not lose the metal washer connected to the grounding screw.
2
1
3
4
Summary of Contents for C8088B
Page 1: ...service ...
Page 2: ......
Page 10: ...8 Contents ENWW ...
Page 44: ...42 Installation ENWW ...
Page 153: ...ENWW Chapter 6 Removal and replacement 151 Figure 118 Stacker controller PCA 2 2 2 2 1 3 2 3 ...
Page 299: ......
Page 300: ... 2004 Copyright Hewlett Packard Development Company L P Q5693 Q5693 90002 90002 Q5693 90002 ...


