ENWW
Chapter 6 Removal and replacement 97
3
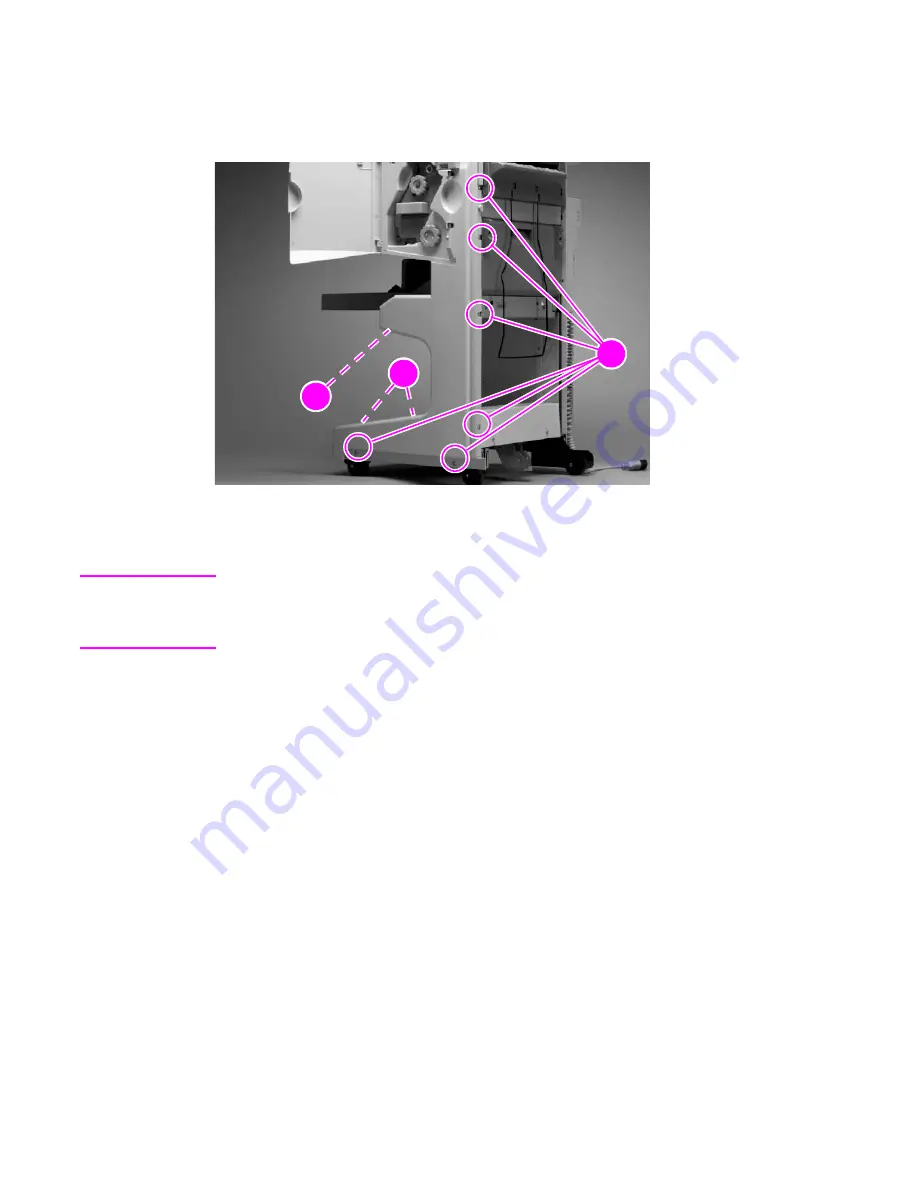
Remove six more screws (callout 2) from the front cover.
4
Pull one tab (callout 3) downward to release it.
5
Lift the lower section of the cover upward to release two internal tabs (callout 4), and remove
the cover.
Figure 53.
Front cover (2 of 2)
Reinstall note
CAUTION
Before you reinstall the product-release handle, move the internal latching mechanism toward the
left side of the multifunction finisher, and align the spring correctly (see figure 49 on page 93). If
the product-release handle is not reinstalled correctly, the multifunction finisher will no longer
detach from the printer.
2
2
2
2
3
4
Summary of Contents for C8088B
Page 1: ...service ...
Page 2: ......
Page 10: ...8 Contents ENWW ...
Page 44: ...42 Installation ENWW ...
Page 153: ...ENWW Chapter 6 Removal and replacement 151 Figure 118 Stacker controller PCA 2 2 2 2 1 3 2 3 ...
Page 299: ......
Page 300: ... 2004 Copyright Hewlett Packard Development Company L P Q5693 Q5693 90002 90002 Q5693 90002 ...


