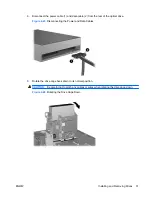
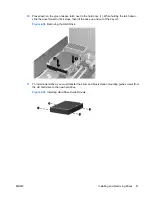
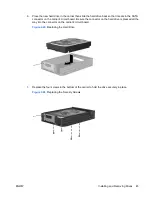
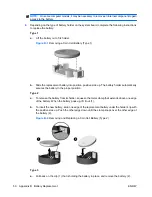


6.
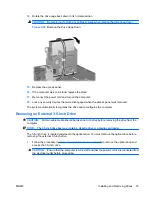
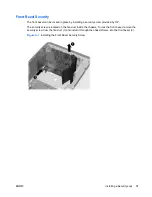
Place the new hard drive in the carrier then slide the hard drive back so that it seats in the SATA
connector on the carrier's circuit board. Be sure the connector on the hard drive is pressed all the
way into the connector on the carrier's circuit board.
Figure 2-45
Replacing the Hard Drive
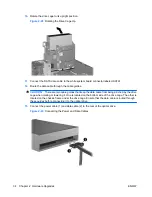
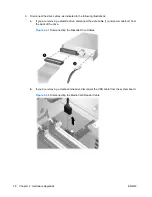
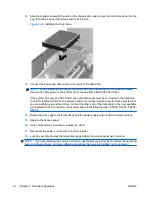
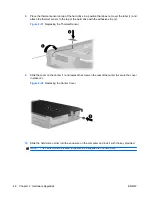
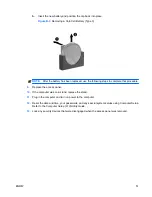
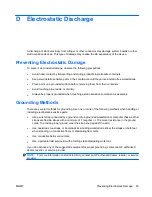
7.
Replace the four screws in the bottom of the carrier to hold the drive securely in place.
Figure 2-46
Replacing the Security Screws
ENWW
Installing and Removing Drives
45
Summary of Contents for Compaq dc5800
Page 1: ...Hardware Reference Guide dc5800 Small Form Factor Model HP Compaq Business PC ...
Page 4: ...iv About This Book ENWW ...
Page 14: ...8 Chapter 1 Product Features ENWW ...
Page 58: ...52 Appendix B Battery Replacement ENWW ...
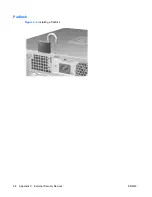
Page 60: ...Padlock Figure C 2 Installing a Padlock 54 Appendix C External Security Devices ENWW ...
Page 64: ...58 Appendix C External Security Devices ENWW ...


