
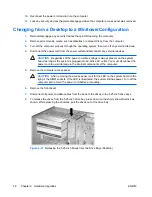
Removing a Drive from a Drive Bay
CAUTION
All removable media should be taken out of a drive before removing the drive from
the computer.
1.
Remove/disengage any security devices that prohibit opening the computer.
2.
Remove all removable media, such as diskettes or compact discs, from the computer.
3.
Turn off the computer properly through the operating system, then turn off any external devices.
4.
Disconnect the power cord from the power outlet and disconnect any external devices.
CAUTION
Regardless of the power-on state, voltage is always present on the system
board as long as the system is plugged into an active AC outlet. You must disconnect the
power cord to avoid damage to the internal components of the computer.
5.
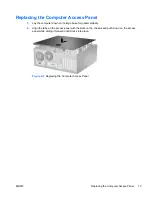
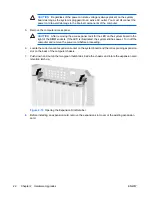
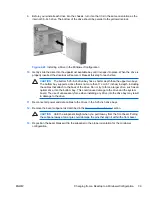
Remove the computer access panel.
CAUTION
After removing the access panel, look for the LED on the system board to the
right of the DIMM sockets. If the LED is illuminated, the system still has power. Turn off the
computer and remove the power cord before proceeding.
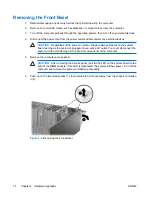
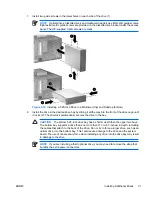
6.
Remove the front bezel.
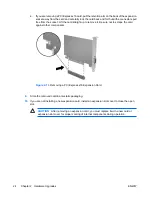
7.
Disconnect the power and data cables on the back of the drive.
CAUTION
When removing the cables, pull the tab or connector instead of the cable itself
to avoid damaging the cable.
8.
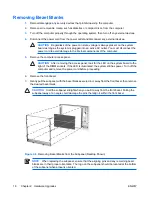
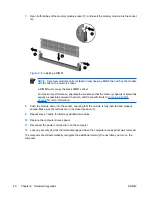
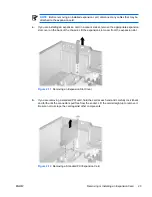
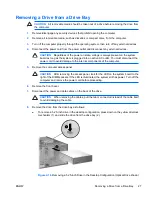
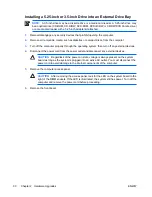
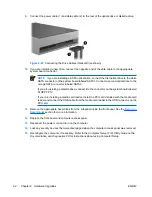
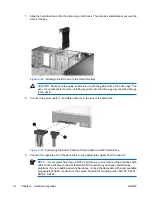
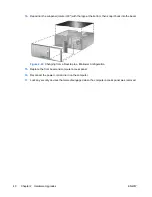
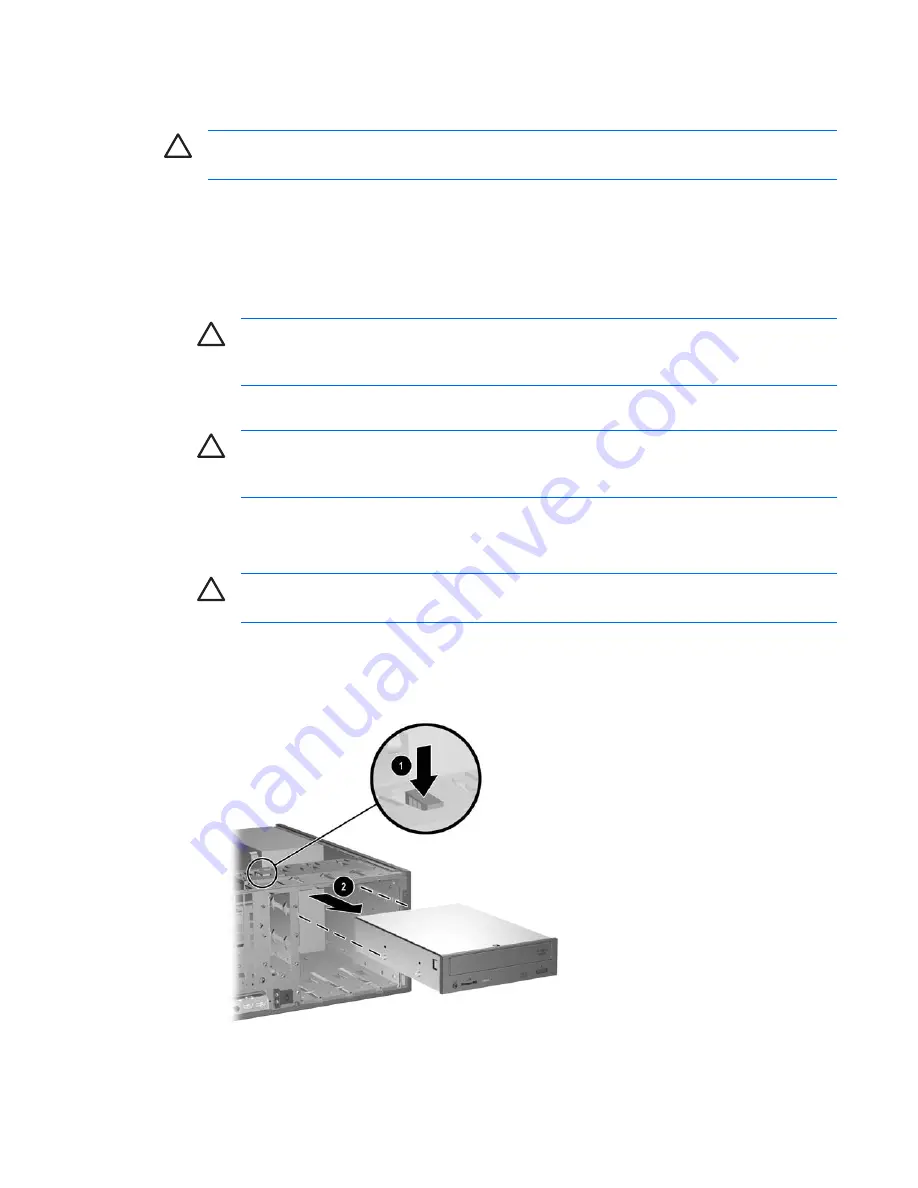
Remove the drive from the drive bay as follows:
●
To remove a 5.25-inch drive in the desktop configuration, press down on the yellow drivelock
mechanism (1) and slide the drive from the drive bay (2).
Figure 2-16
Removing a 5.25-inch Drive in the Desktop Configuration (Optical Drive shown)
ENWW
Removing a Drive from a Drive Bay
27
Summary of Contents for Compaq dc7700 MT
Page 1: ...Hardware Reference Guide dc7700 Series Convertible Minitower HP Compaq Business PC ...
Page 4: ...iv About This Book ENWW ...
Page 14: ...8 Chapter 1 Product Features ENWW ...
Page 52: ...46 Appendix B Battery Replacement ENWW ...
Page 54: ...Padlock Figure C 2 Installing a Padlock 48 Appendix C External Security Devices ENWW ...


