3.5” Drive
If you are installing a device for the first time in the external 3.5” drive bay you will need to use a flat
blade screwdriver to break out the metal shield.
The 3.5” external drive bay may be populated with a diskette drive or a media card reader. The removal
procedure is the same for both devices.
1
.
Prepare the computer for disassembly (
Preparation for Disassembly on page 37
2
.
Remove the access panel (
3
.
Remove the front bezel (
4
.
If the device is a media card reader, disconnect the internal USB cable from the system board. If the
device is a diskette drive, disconnect the power, and data cables from the back of the drive.
5
.
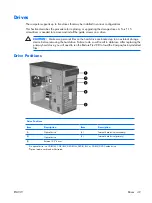
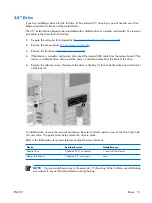
Remove the retainer screws that secure the drive in the bay (1) then slide the drive forward and out
of the bay (2).
To install a drive, reverse the removal procedure. Be sure to install a guide screw on the front right side
of a new drive. The guide screw helps secure the drive in place.
Refer to the table below for proper retainer and guide screw locations.
Device
Retainer Screws
Guide Screws
Diskette Drive
2 (labeled “FDD” on chassis)
1 (front left side of drive)
Media Card Reader
2 (labeled “CR” on chassis)
none
NOTE:
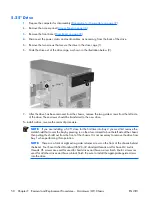
If you are installing a drive in the external 3.5” drive bay for the first time, use a flat blade
screwdriver to pry out the metal shield covering the bay.
ENWW
Drives 51
Summary of Contents for Compaq dx2308
Page 1: ...Service Reference Guide HP Compaq dx2300 and dx2308 Business PC ...
Page 4: ...iv About This Book ENWW ...
Page 20: ...12 Chapter 2 Computer Setup F10 Utility ENWW ...
Page 26: ...18 Chapter 3 HP Insight Diagnostics ENWW ...
Page 27: ...4 Desktop Management ENWW 19 ...
Page 44: ...36 Chapter 6 Identifying the Chassis Routine Care and Disassembly Preparation ENWW ...
Page 87: ...12 T M D S Data3 24 T M D S Clock ENWW DVI Connector 79 ...
Page 88: ...80 Appendix A Connector Pin Assignments ENWW ...
Page 101: ...W Web sites BIOS download 21 ROM Flash 21 software support 22 ENWW Index 93 ...
Page 102: ...94 Index ENWW ...


