background image

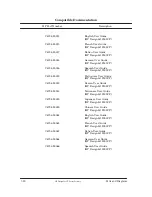
Parts and Diagrams

7-39

HP DesignJet CP Series Printers


Drive Roller Area

(HP DesignJets 3500CP and 3000CP Only)

Summary of Contents for DesignJet 2000CP

Page 1: ...Service Manual HP DesignJet 2500CP HP DesignJet 3500CP HP DesignJet 2000CP HP DesignJet 3000CP Printers ...

Page 2: ... the furnishing performance or use of this material WARNING The procedures described in this manual are to be performed by HP qualified service personnel only Electrical Shock Hazard Serious shock hazard leading to death or injury may result if you do not take the following precautions Ensure that the ac power outlet mains has a protective earth ground terminal Disconnect the Printer from the powe...

Page 3: ...Service Manual HP DesignJet 2500CP HP DesignJet 3500CP HP DesignJet 2000CP HP DesignJet 3000CP Printers ...

Page 4: ... HP DesignJet CP Series Printers 0 D D D D 1 0 1 0 0 0 ...

Page 5: ... 6 63 4 30 86 3 49 A 5 6 0 880 09 609 A 5 6 0 8 0 065 09 609 A 5 6 0 805 8 65 05 6 93 8 1 9 805 9 A 5 6 0 805 8 9 786 3 49 0 0 6 05 A 5 6 0 6 8 59689 8 5 68205 A 5 6 0 0 6 8 2 805 4 99 77 89 5 805 8 09 6 6 68 09 05 A 5 6 0 03 99 4 3 6 9 56 36 8 33 A 5 6 0 59 05 5 5 4 99 77 89 65 865 A 5 3 A 86 3 9 66 05 0 49 805 8 9 9 A 5 6 0 805 8 6 9 56 6 8 A 5 6 0 05 5968 9 86 3 49 05 0 A 09 52 9 4 A 6 6 86 3 9...

Page 6: ... HP DesignJet CP Series Printers ...

Page 7: ... 2 8 0 8 32 59 2 7 6 787 2378 7 28 6 2 8 6 787 2378 7 29 78 1 0 8632 7 2 2736 66 7 7 7 7 6 8 8 32 00 6328 2 0 27367 6 7 2 988 6 0 1 9 0 8 6 28 6 28 328 29 8 0 2 300 6 6 7 7 8 3928 67 6 7 6 7 32 20 5 Service Calibrations 6 0 6 8 327 28 6 2 8 6 0 6 8 327 29 78 1 66 00 2 2736 6 8 8 32 6 28 7 0 21 28 6 28 7 3036 0 20 0 0 2 7 2 8 46 28 6 6 96 28 2 2 328 4 8 20 0 0 2 7 2 8 46 28 6 ...

Page 8: ... 9 3 5 3 611035 4 54 9 5 07 3 3 5 07 3 3 3 5 3 3 4 54 9 3 5 3 3 4 54 9 530 4 0 6 5 3 8 4 44 9 7 503 44 9 44 9 33 44 9 0 07 3 3 37 5 5 0 44 9 3 8 4 0503 44 9 3 7 0 3 3 4 54 9 3 7 0 3 3 4 54 9 539 5 3 3 44 9 5 3 0 5 655 3 44 9 6550 4 54 9 0 1 5 0 6 5 5 0 30 5 7 3 94 4 54 9 30 5 7 3 94 4 54 9 5 3 4 6 039 7 39 945 4 8 Removal and Installation 530 6 5 0 59 3 65 0 4 53045 5 4 3 3 65 0 4 26 3 00 4 530 4 ...

Page 9: ...4 2 33 9 06 34 4 0 20 4 4 9 5440 06 34 4 0 26 4 4 0 33 9 26 4 4 0 06 0 4 26 4 4 0 33 9 06 0 4 26 4 4 0 34 4 0 0 4 26 4 4 0 33 9 34 4 0 0 4 26 4 4 0 2 2 33 9 9 11 40 3 43 06 34 4 0 0 2 42 1 06 34 4 0 2 06 34 4 0 8 3 4 06 34 4 0 22 33 9 06 34 4 0 8 3 0402 33 9 06 34 4 0 544 2 33 9 9 11 40 3 43 06 34 4 0 544 2 33 9 9 11 40 3 43 06 34 4 0 6 402 33 9 06 34 4 0 ...

Page 10: ... 3 6 01 1 6 3 3 00 5 3 5 1 0 10 6 3 1 3 5 6 01 1 1 3 6 01 1 1 3 3 00 5 6 3 3 00 5 3 5 1 0 10 6 3 1 3 5 6 01 1 1 3 6 01 1 1 3 3 00 5 6 1 5 1 6 3 6 01 1 6 3 00 0 6 3 6 01 1 6 00 0 1 0 6 3 1 0 0 6 3 1 00 0 1 0 1 6 01 1 1 0 0 6 01 1 1 00 0 1 0 1 6 1 1 0 6 3 1 1 1 6 3 1 0 3 01 1 1 1 6 01 1 1 0 3 01 1 1 1 6 01 1 1 1 1 6 211 5 1 0 10 6 3 6 01 1 6 012 1 1 6 ...

Page 11: ...32 9 4 3 9 5 1 3 1 2 9 1 5 3 5 3 3 9 13 4 1 9 9 9 7 2 3 132 9 2 3 9 23 1 03 9 2 3 9 9 1 3 1 4 3 22 2 9 9 7 2 22 8 9 11 9 9 7 2 3 9 7 2 3 3 2 1 9 9 7 2 3 1 22 8 9 1 31 0 9 1 9 15 3 3 22 8 9 1 1 22 8 9 22 8 9 5 3 1 22 8 9 9 7 2 22 8 9 31 2 4 9 3 00 1 3 12 9 2 12 9 2 1 9 5 1 2 12 9 3 1 2 12 9 ...

Page 12: ...s well as providing protection against electrical shock in case of a fault A terminal marked with this symbol must be connected to ground in the manner described in the installation operating manual and before operating the equipment Frame or chassis terminal A connection to the frame chassis of the equipment which normally includes all exposed metal Alternating current Direct current Alternating ...

Page 13: ...1 1 HP DesignJet CP Series Printers ...

Page 14: ...01 XX 1 only A 02 XX 1 A 03 XX 1 A 04 XX 1 How do I Check the Hard Disk Drive Version Only applicable to HP DesignJet 2500CP 3500CP For HP DesignJet 2500CP 1 1 For HP DesignJet 3500CP 1 1 Is the Printer Using the Latest Firmware Revision 0 0 1 0 0 HP DesignJet 2000CP 3000CP HP DesignJet 2500CP 3500CP ...

Page 15: ...2 1 1 1 6 2 0 28 If you do not wish to continue press the Down Arrow key and the message Cancelled Program Power off the board is displayed on the front panel Switch the Printer OFF from the power switch on the back of the printer 6 0 11 2 Up Arrow 6 2 11 7 0 1 1 1 1 6 THE DATA ON THE FLASH SIMM IS BEING ERASED AT THIS POINT DO NOT SWITCH OFF THE PRINTER BECAUSE IT WILL DAMAGE THE FLASH SIMM 7 2 2...

Page 16: ... SIMM YOU ONLY NEED TO UPGRADE THE POSTSCRIPT SIMM IF THE FIRMWARE CODE IS A 02 08 OR HIGHER 1 not 0 2 3 0 ON 2 0 3 0 If the Printer has problems starting up the 8MB flash SIMM with the firmware code has been incorrectly upgraded it can be dead or it is incorrectly installed 4 Down Arrow 0 2 0 0 3 5 Up Arrow 0 2 0 3 6 Up Arrow 0 2 1 0 3 0 0 7 Down Arrow 0 2 0 3 THE DATA ON THE FLASH SIMM IS BEING ...

Page 17: ...signJet CP Series Printers 2 0 0 3 0 2 0 2 0 0 3 0 2 0 2 0 0 0 2 0 0 3 THE DATA IS BEING DOWNLOADED ONTO THE FLASH SIMM AT THIS POINT DO NOT SWITCH OFF THE PRINTER BECAUSE IT WILL DAMAGE THE FLASH SIMM 0 2 0 3 1 2 0 0 3 0 0 3 3 ...

Page 18: ...0 5 0 0 3 6 3 6 Down Arrow 3 5 3 3 6 7 Down Arrow 3 5 3 6 THE DATA ON THE SECOND FLASH SIMM IS BEING ERASED AT THIS POINT DO NOT SWITCH OFF THE PRINTER BECAUSE IT WILL DAMAGE THE FLASH SIMM 8 2 5 3 3 2 3 6 2 2 1 3 THE DATA IS BEING DOWNLOADED ONTO THE SECOND FLASH SIMM AT THIS POINT DO NOT SWITCH OFF THE PRINTER BECAUSE IT WILL DAMAGE THE FLASH SIMM 9 3 5 2 2 3 6 10 2 2 2 11 1 1 0 12 1 3 3 2 2 2 4...

Page 19: ...ies Printers What Can I do when a System Error Code Appears on the FrontĆPanel Display D D D D D D D D Have you performed a Service Test on the Failed Component Assembly If the test on that component assembly passes you should NOT replace it ...

Page 20: ...sary Service Calibrations Calibrations To Be Done When Required C01 C02 C03 C05 C06 C07 C08 C09 C10 Yes Yes Yes Yes Yes Yes Yes Yes Yes Yes Yes Yes Yes Yes Yes Yes Yes Yes Yes 0 Yes Yes Yes Yes Yes Yes Yes Yes Yes Yes Yes Yes Yes Yes What can I do to Solve Image Quality Problems 0 ...

Page 21: ... What can I do if the Printer continuously rejects Printheads 1 3 3 32 3 1 3 3 11 42 3 1 13 4 1 2 5 3 1 3 2 1 3 11 318 23 423 3 1 3 1 3 3 1 3 2 23 1 3 3 1 0 3 1 3 6 3 6 3 6 1 3 2 3 1 3 3 8 3 3 1 1 3 2 1 1 3 1 3 3 1 1 3 1 3 3 4 38 23 0 9 4 1 1 3 31 2 23 0 9 5 0 3 1 0 9 6 0 3 11 22 8 0 9 What can I do if the Printer has problems with Media Loading 2 32 6 433 2 23 3 22 23 1 3 3 3 2 1 433 2 23 11 3 8 ...

Page 22: ...Path message appears when the Printer is about to cut or is cutting 1 3 2 0 5 3 0 3 5 What can I do if the Bail Assembly does not lower all the way 1 0 2 3 3 2 5 What can I do if the Lens Maintenance message appears on the FrontĆPanel 1 1 3 3 3 2 1 2 3 1 0 Troubleshooting Media Jams Printhead Crashes 0 4 4 0 0 3 0 0 0 0 0 3 0 1 0 2 D 0 2 0 0 5 D 0 5 3 0 3 0 3 0 1 3 0 1 1 0 0 2 1 ...

Page 23: ...9 22 9 4 285 4 7 7 658 9 54 6 7 957 8 9 8 4 97 3 2 9 9 658 9 54 4 952 7 4 57 6 7 9578 9 9 7 2 9 4 5 9 7 7 88 3 2 7 62 9 49 7 7 7 88 3 2 D 62 4 9 54 67 5 8 8 8 4 7 9 6 7 957 4 9 753 9 7 7 88 3 2 7 7 88 3 2 8 8 3 99 7 8 9 4 8 2 7 49 9 753 9 52 8 8 9 8 9 489 5 97 486 7 49 6 7 957 8 5 2 4 7 7 658 9 54 9 8 4 97 3 2 9 9 952 7 4 9 8 955 7 753 9 2 4 7 2 9 4 8 3 7 8 8 489 9 4 7 2 9 8 955 258 9 4 8 3 0 38 9...

Page 24: ...recommended to check the resistance of the motors in a noĆpowerĆup situation before installing a new Electronics Module 9 5 6 3 24 4 2 9 5 7 52 4 7 42 3 5 4 29 4 3 4 4 3 0 24 2 4 2 4 2 4 42 3 5 4 429 4 0 7 2 4 2 4 2 4 00 23 4 2 4 0 30 9 4 2 0 4 42 3 5 0 4 2 4 2 3 7 2 7 4 4 3 3 4 4 4 02 534 7 4 4 2 0 4 4 2 4 2 4 5 49 0 4 0 7 2 4 2 4 2 4 4 3 0 7 2 4 5 49 0 4 3 4 4 7 4 7 4 2 4 2 4 0 7 2 3 0 4 3 5 4 2...

Page 25: ...esignJet CP Series Printers What is the Ink System Ink Cartridge Printhead Printhead Cleaner How Do I Troubleshoot the Ink System 1 IInk system IncompltI D D If this doesn t solve the problem continue with the following process ...

Page 26: ... 53 0 5 54 7 5 13 5 4 05 15 3 5 3 353 03 5 4 0 03 D 5 3 4 35 45 5 13 5 4 05 15 5 130 8 5 5 13 5 3 1 5 33 44 06 7 3 4 35 5 063 13 5 4 5 13 5 3 4 15 5 0 5 6 3 45 5 34 07 3 45 5 353 7 7 4 0 0 0 5 30 5 1 5 5 5 426 3 4 3 13 4 5 5 3 45 353 3 45 D 5 353 4 05 15 3 5 3 353 03 5 4 0 03 D 5 3 3 4 35 5 45 5 353 4 05 15 5 130 8 5 5 13 5 3 463 5 5 5 44 4 05 4 033 5 0 5 50 5 5 3 0 5 5 4 033 5 0 5 4 05 5 3 1 5 44...

Page 27: ...Default type makes the correct selection for HP media types When using nonĆHP medias the following settings are probably best Glossy Ć B or C Coated Ć A or B Backlit Ć B or A 4 Additional printhead servicing and warming activities are done during refills which improves the quality over the 2xxxCP The user may notice some new servicing i e noises at midĆpage refills 5 Big print feature When a refil...

Page 28: ...1 16 Troubleshooting HP DesignJet CP Series Printers 21 0 1 3 1 1 1 1 1 1 1 1 0 0 1 1 1 1 1 22 3 0 0 0 1 0 1 ...

Page 29: ...17 HP DesignJet CP Series Printers Refill Avoidance Tips 1 1 2 2 Image Quality Printhead Service Refill now 1 1 2 1 1 1 2 0 0 1 1 2 3 4 0 2 How Do I Clean the Electrical Contacts The problem 1 1 1 0 1 1 The solution 1 3 ...

Page 30: ...rint some of the Internal Prints The Service Print If the EEROM is cleared you will loose all the information on the Service Print including the MIO Configuration Load media A4 minimum before printing the Service Print 1 Enter SERVICE TESTS Service print 2 Enter 3 ...

Page 31: ...Troubleshooting 1 19 HP DesignJet CP Series Printers If the EEROM is cleared the counters will be reset to zero Load media A4 minimum before printing the Usage Report INTERNAL PRINTS Usage Report ...

Page 32: ...1 20 Troubleshooting HP DesignJet CP Series Printers The PostScript Config Load media A4 minimum before printing the PostScript Config 1 Enter INTERNAL PRINTS PostScript Config 2 ...

Page 33: ...ÊÊ ÊÊÊÊ ÊÊÊÊ ÊÊÊÊÊÊ ÊÊÊÊÊÊ ÊÊÊÊÊÊ ÊÊÊÊÊÊ ÇÇÇÇÇÇÇ ÇÇÇÇÇÇÇ ÇÇÇÇÇÇÇ Move Media ÇÇÇ ÇÇÇ Applicable only to DesignJets 3XXXCP ÇÇÇÇÇ ÇÇÇÇÇ ÇÇÇÇÇ ÇÇÇÇÇ ÇÇÇÇÇ Max X Max Y Code rev PS rev Disk rev RAM present Ink Media ÊÊÊ ÊÊÊ ÊÊÊ Applicable only to DesignJets 2XXXCP ÇÇÇÇÇÇ ÇÇÇÇÇÇ On Off Continued on Next Page ...

Page 34: ... ÇÇÇÇÇ ÇÇÇÇÇ ÇÇÇÇÇ ÇÇÇÇÇ 1 0x1 4m 1 2x1 7m 44x62in 52x73in 54x76in ÇÇÇ ÇÇÇ Applicable only to DesignJets 3XXXCP ÇÇÇÇÇ ÇÇÇÇÇ Take up reel ÇÇÇÇÇÇ ÇÇÇÇÇÇ ÇÇÇÇÇÇ On Off ÇÇÇÇÇ ÇÇÇÇÇ ÇÇÇÇÇ Refill ÇÇÇÇÇÇ ÇÇÇÇÇÇ ÇÇÇÇÇÇ ÇÇÇÇÇÇ Default Type A Type B Type C Continued from Previous Page ...

Page 35: ...2 1 HP DesignJet CP Series Printers ...

Page 36: ...2 2 3 88 42 52 888 52 8888 52 8888 2 22 2 8888 2 22 2 8888 3 2 22 2 8888 2 7 2 52 8888 34 2 04 22 2 8888 2 3 52 9 5 6 22 2 7 3 4 5 4 4 3 26 5 2 9 5 6 22 2 7 9 5 4 2 3 6 4 2 0 24 4 22 2 4 4 30 3 4 2 2 4 2 34 500 24 2 0 24 4 22 2 6 4 7 2 4 2 9 2 5 2 4 02 4 2 2 7 2 2 6 3 4 02 4 2 3 53 0 4 22 2 5 2 26 2 4 522 4 52 4 3 4 3 47 2 00 4 4 534 2 3 53 6 23 4 3 4 02 2 02 5 9 9 5 4 43 54 4 53 4 3 44 4 ...

Page 37: ... 0 0 0 1 System Error Problem Description 0 Corrective Action 0 System Error Problem Description Corrective Action 0 D D D 1 Only replace one component at a time and check if the error has gone before replacing another component Using this procedure you will be able to determine exactly which component failed ...

Page 38: ...escription Corrective Action 1 0 NOTE The Printer will not function without any RAM SIMMs installed Make sure that you have a minimum of 4MB memory module installed D higher 1 0 S 1 1 1 1 1 1 0 1 S 1 0 1 1 0 1 1 0 0 D lower 2 System Error Problem Description Corrective Action 2 ...

Page 39: ...System Error Problem Description 0 Corrective Action 1 System Error Problem Description Corrective Action D D S 1 S 1 D 1 D 1 D 1 Only replace one component at a time and check if the error has gone before replacing another component Using this procedure you will be able to determine exactly which component failed ...

Page 40: ...ters System Error Problem Description Corrective Action D D D D D Only replace one component at a time and check if the error has gone before replacing another component Using this procedure you will be able to determine exactly which component failed ...

Page 41: ...or XX Problem Description XX 1 2 3 10 20 30 12 21 Corrective Action D D D S S S D Only replace one component at a time and check if the error has gone before replacing another component Using this procedure you will be able to determine exactly which component failed ...

Page 42: ...or 000X0000 Problem Description 00010000 4 2 00020000 4 2 00030000 Corrective Action 3 1 D 3 D 4 2 S 3 3 S 4 S 4 2 3 4 D 4 2 4 2 3 4 D 4 Only replace one component at a time and check if the error has gone before replacing another component Using this procedure you will be able to determine exactly which component failed ...

Page 43: ...2 1 00 different from 0 0 0 0 X 0 0 2 1 A 2 0 0 0 B 0 0 C 0 0 D 2 0 0 6 4 0 0 E 2 0 0 6 4 0 0 F 0 0 Corrective Action 5 0 3 D 0 0 0 0 0 X is not 0 0 0 0 1 6 D 1 0 0 0 0 0 0 2 0 0 0 0 0 5 0 0 0 0 1 D 1 0 0 0 0 0 0 0 5 D 0 0 0 0 0 0 2 0 0 0 0 0 0 0 S 0 0 0 6 S 0 0 0 6 D 0 0 0 0 0 2 0 0 0 0 0 0 2 0 0 0 0 6 D 0 0 0 0 2 0 0 0 0 0 2 0 5 6 ...

Page 44: ...component Using this procedure you will be able to determine exactly which component failed System Error 0 51 0000XX00 Problem Description 01 2 1 Corrective Action 6 1 4 D 4 1 1 1 1 1 0 1 1 1 1 0 2 4 1 1 1 0 1 4 0 1 7 1 0 0 7 1 1 0 2 8 D 1 0 1 7 1 1 6 1 4 S 02 1 1 1 0 1 1 6 S 1 8 S 1 00 6 8 S 1 1 0 2 8 Only replace one component at a time and check if the error has gone before replacing another co...

Page 45: ...2 2 4 0 1 0 0 4 0 2 5 5 4 0 4 0 2 1 0 X 5 ONCE YOU HAVE IDENTIFIED THE FAILING MOTOR YOU MUST REPLACE THE FAILING MOTOR ASSEMBLY AND THE ELECTRONICS MODULE TOGETHER AT THE SAME TIME TO SOLVE THE PROBLEM IF YOU INSTALL A NEW ELECTRONICS MODULE WITHOUT REPLACING THE FAILING MOTOR THE ELECTRONICS MODULE WILL BE BURNED AGAIN Stepper Motor Resistance ohms 1 5 3 1 5 3 1 ...

Page 46: ...or has gone before replacing another component Using this procedure you will be able to determine exactly which component failed System Error Problem Description Corrective Action D D D D Only replace one component at a time and check if the error has gone before replacing another component Using this procedure you will be able to determine exactly which component failed ...

Page 47: ...ng another component Using this procedure you will be able to determine exactly which component failed System Error Problem Description Corrective Action D D 0 D 0 D 0 Only replace one component at a time and check if the error has gone before replacing another component Using this procedure you will be able to determine exactly which component failed System Error Problem Description Corrective Ac...

Page 48: ...2 14 System Error Codes HP DesignJet CP Series Printers System Error X Problem Description X 0 1 2 3 4 5 Corrective Action D D S S D S S D D ...

Page 49: ...nd check if the error has gone before replacing another component Using this procedure you will be able to determine exactly which component failed System Error Problem Description 0 Corrective Action 1 0 D 1 D 1 2 D 2 Only replace one component at a time and check if the error has gone before replacing another component Using this procedure you will be able to determine exactly which component fa...

Page 50: ...rror Codes HP DesignJet CP Series Printers System Error Problem Description Corrective Action 1 System Error Problem Description Corrective Action 0 1 D D D D D System Error Problem Description 0 Corrective Action 1 ...

Page 51: ...rror Codes 2 17 HP DesignJet CP Series Printers System Error Problem Description 0 2 Corrective Action 1 0 D 3 D 0 S 3 S 3 S 3 S 3 S 3 S 1 3 D 1 0 D 3 System Error Problem Description 0 2 Corrective Action 3 3 ...

Page 52: ...ng the initialization then the problem can be solved by switching the printer OFF and ON again D Enter in Service Mode page 4Ć5 During the initialization sequence the Error Code 010110 appears Refer to that error code for further information System Error 010121 Problem Description One of the banks of the user area was corrupted while writing or reading in that area Corrective Action Try the follow...

Page 53: ...rs System Error Problem Description Corrective Action D D D D D D D D Only replace one component at a time and check if the error has gone before replacing another component Using this procedure you will be able to determine exactly which component failed ...

Page 54: ...rs System Error Problem Description Corrective Action D D D D D D D D Only replace one component at a time and check if the error has gone before replacing another component Using this procedure you will be able to determine exactly which component failed ...

Page 55: ...ers System Error Problem Description Corrective Action D D D D D D D Only replace one component at a time and check if the error has gone before replacing another component Using this procedure you will be able to determine exactly which component failed ...

Page 56: ...s System Error Problem Description Corrective Action D D D D D D D D D Only replace one component at a time and check if the error has gone before replacing another component Using this procedure you will be able to determine exactly which component failed ...

Page 57: ...rs System Error Problem Description Corrective Action D D D D D D D D Only replace one component at a time and check if the error has gone before replacing another component Using this procedure you will be able to determine exactly which component failed ...

Page 58: ...rs System Error Problem Description Corrective Action D D D D D D D D Only replace one component at a time and check if the error has gone before replacing another component Using this procedure you will be able to determine exactly which component failed ...

Page 59: ...or Problem Description 2 1 5 3 Corrective Action 4 2 D 2 do NOT try to troubleshoot any further D 4 4 5 D 0 D 5 3 4 5 D 4 2 5 D 5 3 5 D 4 5 Only replace one component at a time and check if the error has gone before replacing another component Using this procedure you will be able to determine exactly which component failed ...

Page 60: ...o troubleshoot any further D 3 3 5 D 0 D 5 2 3 5 D 3 1 5 D 5 2 5 D 3 5 Only replace one component at a time and check if the error has gone before replacing another component Using this procedure you will be able to determine exactly which component failed System Error 222 Problem Description Corrective Action 3 1 D 1 0 3 1 0 D 3 0 0 5 ...

Page 61: ...escription Corrective Action System Error Problem Description Corrective Action D D D D D D D Only replace one component at a time and check if the error has gone before replacing another component Using this procedure you will be able to determine exactly which component failed ...

Page 62: ... D 1 D 0 1 D 1 Only replace one component at a time and check if the error has gone before replacing another component Using this procedure you will be able to determine exactly which component failed System Error Problem Description 0 Corrective Action 0 D 1 D 1 D 1 System Error Problem Description Corrective Action ...

Page 63: ...tion 07 2 5 D 0 2 2 1 0 8 D 2 00 11 7 8 System Error Problem Description 1 0 2 0 2 Corrective Action 0 2 2 1 0 8 System Error 6666 Problem Description 0 5 0 00 0 Corrective action 130 7 3 4 2 2 12 4 01 2 1 0 5 0 12 0 3 0 2 0 5 0 0 4 1 2 1 8 2 00 0 0 1 2 0 12 2 2 12 1 2 0 02 2 00 0 2 2 1 1 2 0 0 2 0 12 3 02 12 2 2 5 0 2 D 0 3 0 2 0 2 0 D 2 2 00 0 3 0 6666 D 1 04 0 2 D 2 5 0 2 00 0 1 300 D 2 21 32 2...

Page 64: ...2 30 System Error Codes HP DesignJet CP Series Printers System Error Problem Description Corrective Action D D D D D System Error Problem Description Corrective Action ...

Page 65: ...tive Action 4 2 D 2 D 4 2 4 D 5 D 0 5 HP DesignJet 2500CP 3500CP only System Error Problem Description 2 0 1 Corrective Action 1 0 5 HP DesignJets 2500CP and 2000CP with firmware version A 02 14 or higher and HP DesignJets 3500CP and 3000CP only Error Message 4 5 1 4 4 4 0 0 5 D XX 2 D YYYY 2 4 Y D 5 DOES NOT 4 D 5 DOES 4 2 0 D 0 1 4 ...

Page 66: ...ies Printers X 0 0 0 0 0 2 05 0 1 0 0 0 3 0 1 0 5 0 5 0 5 1st Digit Cause of Error 5 0 4 5 0 2 0 0 0 5 0 0 0 0 0 0 0 0 1 0 0 5 1 0 3 7 7 0 X 0 0 YYYY 0 1 0 3 0 0 0 1st Digit Component Causing Error 2 0 0 10 3 0 0 6 0 0 1 05 2 5 5 0 0 3 0 0 0 5 0 ...

Page 67: ...3 1 HP DesignJet CP Series Printers ...

Page 68: ... operation has finished Accessing printheads The printer is moving the carriage that contains the printheads to a place where you can access them Wait for a few seconds until this operation has finished Action unavailable Entry being printed A print is being printed and you have requested to move delete or modify the number of copies through the queue management menu You cannot change the current ...

Page 69: ... are affected Press to ignore the error and continue printing In this case the image quality cannot be assured Check printheads JJ J Abort The printer has detected an error in the printheads indicated by the empty squares The printhead can be replaced but you should replace all components of the failing ink systems as soon as possible Reseat do not replace the indicated printheads or press the key...

Page 70: ...nk in the head cleaner may overflow and the print quality of your images may be affected To fix the problem select to check the ink system Or In the ink system replacement process one or more of the printhead cleaners have not been replaced at the same time as the corresponding printheads The squares that are flashing indicate the head cleaners that are full Press to continue You may still be able...

Page 71: ...stems are still faulty or have not been fully replaced as indicated by the flashing squares This message also appears if the printer believes that a component is incorrect you must then confirm that the ink system is indeed correct or rectify the error Press to continue to replace the ink systems Printing will be disabled You should replace the faulty ink systems immediately If you don t correct t...

Page 72: ...cted that one or more components of the ink system have reached the end of their intended lives You should now replace all three components of those ink systems affected the printheads the printhead cleaners and the ink cartridges Press to replace the erroneous ink systems INK SYSTEM ERROR xx xxxx The printer has detected an error in the ink system as shown in earlier messages Printing will be dis...

Page 73: ...ia Media was inserted with the media lever raised Lower the lever and reload the media Load media for calibration Load media to proceed with calibration Load media to align printheads Load media to proceed with printhead alignment Load media to check printheads The printer is telling you to load media so it can perform the printhead check Load media to proceed with printhead check Load sheet for c...

Page 74: ...tly Press the Enter key to clear the message from the front panel Check the handshake settings in the printer s front panel in the hardware configuration and in your application software configuration to make sure they are compatible with one another Mispositioned Reload roll The roll media is mispositioned Remove and reload the roll Mispositioned Reload sheet The sheet media is mispositioned Remo...

Page 75: ...the HP DesignJet CP Ink System UV Open left door to access ink cartrg You are doing an ink system replacement Open the left door to access the ink cartridges Open right door to access head cleaners You are doing an ink system replacement Open the right door to access the printhead cleaners Open window to access printheads You are doing an ink system replacement Open the window to access the printh...

Page 76: ...ing The squares that are flashing indicate the ink systems that have failed If the message contains no squares the procedure has failed because of a problem that is not related to specific printheads for example a problem with the media Press to continue The message Check ink system Ignore should be displayed If you press again to continue you may still be able to print again but image print quali...

Page 77: ...printer carriage are dirty and need cleaning Press the key to check the printheads Open the window when indicated and remove the printheads indicated Look at the electrical contacts on the printhead and carriage If they are dirty they should be cleaned Do not touch wipe or attempt to clean the printhead nozzles This can damage the printhead Handle the ink systems with care If you don t correct the...

Page 78: ...ing the media and the printer has ejected it The printer is waiting for you to reload the media Reload the media Reload sheet Sheet media was loaded skewed and the printer ejected it Reload the sheet Remove all ink cartridge s You have selected the option Utilities Transport mode of the front panel menu and opened the left door when instructed The printer is instructing you to remove all the ink c...

Page 79: ...are in the ink system replacement process and opened the right door when instructed The printer is waiting for you to replace the printhead cleaners indicated by s and then close the right door Replacement of ink system recommended You are about to finish the ink system replacement process and the printer recommends replacing one or more of the four ink systems for example because they have passed...

Page 80: ...ation check but media is not present Load media Sheet Roll Reload media Either Sheet mode was chosen while loading roll media Reload media Or a sheet more than 51 inches 130 cm long was loaded Trim the sheet and reload Switch power off You have selected the transport mode shut down sequence The printer is waiting for you to turn the power switch on the rear of the printer to OFF Switch OFF the pri...

Page 81: ...onfirm that you have changed the ink cartridges from Imaging to UV Pigmented Press to indicate that you have not changed the ink cartridges from Imaging to UV Pigmented You will then be given the opportunity of replacing the incorrect ink cartridges by the correct ones Verify ink system JJ J At power on the printer has detected an error in the ink systems shown by flashing squares Press to continu...

Page 82: ...g ink system The printer is verifying that the ink system was correctly installed or that all the components are present after any door or window on the printer has been opened Wait until the check is complete STATUS Checking media The printer is checking to see if media is correctly positioned with respect to the perforated line of the entry platen Wait until the check is complete STATUS Checking...

Page 83: ...cycle Refer to Chapter 9 to perform the Preventive Maintenance STATUS Measuring pattern The printer is measuring the accuracy calibration print that you just loaded Wait for the calibration to complete STATUS Out of media The printer has received a file is ready to print but has no media loaded Load appropriate media STATUS Pause pending You have pressed the Pause key but the printer was busy perf...

Page 84: ...tilities Service Tests Recover Printheads Wait for the printhead recovery procedure to complete STATUS Refilling X m XX s The printer is filling the printheads This message only applies to firmware revision levels A 02 08 or higher Wait for the process to complete STATUS Returning printheads The ink system replacement process has been cancelled and the printhead carriage is returning to its statio...

Page 85: ...4 1 HP DesignJet CP Series Printers ...

Page 86: ...tion Sequences 0 8 4 6 6 4 06 4 5 59 6 10 6 761 6 2 4 14 5 5 4 5 1 06 40 5 6 565 0 0 0 6 6 10 5 37 0 5 6 4 06 4 5 59 6 0 48 1 6 4106 2 0 52 9 5 19 1 0 6 61 6 55 0 6 0 5 1 5 4 4 61 6 2 46 9 6 24 06 4 5 6 56 0 6 6 6 1 06 0 1 6 5 2 465 5 56 4414 9 22 4 0 17 5 17 1057 6 6 56 4414 1 5 26 4 Code Parts Tested System Error if failed 05145 0 0 1 4 75 06 4 100 6 1 4 5 6 6 10 0 6 0 05 1614 4 8 4 16145 6 6 10...

Page 87: ... WARNING ALL THE COVER SENSORS ARE DISABLED WHEN IN THE DIAGNOSTICS MENU IF THE CARRIAGE IS MOVING IT WILL NOT STOP IF THE WINDOW IS OPENED SO BE VERY CAREFUL NOT TO PUT YOUR HANDS INSIDE 1 1 0 D D 0 D D 0 2 1 0 0 3 1 0 4 1 0 5 1 0 0 6 1 0 0 0 7 1 0 1 0 ...

Page 88: ...1 1 2 1 14 1 211 6 2 0 1 0 1 01 0 1 3 5 1 1 1 211 00 5 6 2 0 1 0 1 01 0 1 3 5 1 1 1 01 1 2 15 6 2 0 1 0 1 01 0 1 3 5 1 2 15 11 21 0 1 1 1 6 2 0 1 0 1 01 0 1 1 1 1 1 2 15 6 2 0 1 0 1 01 0 1 0 5 1 1 3 0 00 0 1 1 0 6 2 0 1 0 1 01 0 1 5 2 1 1 1 1 3 4 1 2 0 0 6 2 0 1 0 1 01 0 1 1 0 1 2 1 0 6 2 0 1 0 1 01 0 1 0 1 1 1 2 1 0 1 0 3 3 0 6 2 0 1 0 1 01 0 1 0 4 1 3 0 1 1 0 3 ...

Page 89: ...essage on the frontĆpanel 3 0 Enter 4 Arrow Enter 5 Arrow Enter 6 Arrow Enter 7 Arrow 8 Enter If the printer is not used for 5 minutes the printer exits out of the Service Mode and you must repeat the above steps to enter the service mode again In some cases a quick press of a button may not be recognized by the processor When pressing a button be sure to press it deliberately and all the way to t...

Page 90: ... ALWAYS PERFORM THIS TEST BEFORE REPLACING THE ELECTRONICS MODULE TRAILING CABLE HARD DISK OR THE CARRIAGE ASSEMBLY IF THIS TEST PASSES DO NOT REPLACE THE ELECTRONICS MODULE TRAILING CABLE LINE SENSOR OR THE CARRIAGE ASSEMBLY 1 Enter Diagnostics D01 Electronics 2 0 3 0 Down Arrow 4 0 5 0 IF THIS TEST PASSES DO NOT REPLACE THE ELECTRONICS MODULE TRAILING CABLE HARD DISK OR THE CARRIAGE 6 0 ...

Page 91: ...d 2 Replace the Hard Disk data cable page 8Ć12 3 If the Error Code continues to appear then replace the Hard Disk page 8Ć12 Line Sensor Failure D 0 In this case 1 Check if the Line Sensor is installed and connected correctly 2 Check and if necessary replace the Trailing Cable page 8Ć36 3 Replace the Carriage Assembly page 8Ć42 Only replace one component at a time and perform the test again before ...

Page 92: ...ead Continuity test page 4Ć27 to see if any of the Printheads are having a continuity problem If any of the Printheads are having a continuity problem replace the complete Ink Delivery System of that color Replace the complete Ink Delivery System of each color one by one performing this test each time Check and if necessary replace the Trailing Cable page 8Ć36 Replace the Carriage Assembly page 8Ć...

Page 93: ...LWAYS PERFORM THIS TEST BEFORE REPLACING THE LINE SENSOR IF THIS TEST PASSES DO NOT REPLACE THE LINE SENSOR 1 Enter Diagnostics D02 Line Sensor 2 3 Cancel Form Feed and Cut 4 Enter 5 6 Green OK V 8 0 Blue OK V 11 0 T 0 IF THIS TEST PASSES DO NOT REPLACE THE LINE SENSOR 7 Previous ...

Page 94: ... installed on the line sensor is dirty Replace the lens cover Users Guide Chapter 10 Lens Maintenance Make sure that the Mark Encoder on the Drive Roller is clean Perform the Electronics test page 4Ć6 Check if the Media used is suitable for the printer Check if the Line Sensor is installed and connected correctly If the problem continues replace the Carriage Assembly page 8Ć42 ...

Page 95: ...s 2 0 1 3 0 1 IF THIS TEST PASSES DO NOT REPLACE THE YĆAXIS MOTOR ASSEMBLY OR THE ENCODER STRIP 4 1 YĆaxis Failure 1 D 0 1 D 0 1 D 0 1 In these cases 1 Apply lubricant on the slider rods 2 Replace the Encoder Strip page 8Ć32 3 Replace the YĆaxis Motor Assembly page 8Ć45 Only replace one component at a time and perform the test again before replacing another component Using this procedure you will ...

Page 96: ...4 12 Service Tests HP DesignJet CP Series Printers Encoder Strip Failure D In this case ...

Page 97: ...RFORM THIS TEST BEFORE REPLACING THE XĆAXIS MOTOR IF THIS TEST PASSES DO NOT REPLACE THE XĆAXIS ASSEMBLY 1 1 Enter Diagnostics D04 Media Axis 2 1 0 2 3 1 0 2 IF THIS TEST PASSES DO NOT REPLACE THE XĆAXIS ASSEMBLY 4 0 2 XĆaxis Failure 2 D 1 2 0 D 1 2 D 1 2 In these cases Mark Encoder Failure D 1 2 ...

Page 98: ...n Page 5Ć16 4 Replace the lens cover which is installed on the line sensor 5 Replace the Trailing Cable Page 8Ć36 6 Replace the Carriage Assembly Page 8Ć42 7 Replace the Electronics Module page 8Ć6 Only replace one component at a time and check if the error has gone before replacing another component Using this procedure you will be able to determine exactly which component failed ...

Page 99: ...ION 1 Enter Diagnostics D05 Service Station 2 3 IF THIS TEST PASSES DO NOT REPLACE THE SERVICE STATION ASSEMBLY OR THE PRIMER ASSEMBLY 4 Primer Assembly Failure D In this case Replace the Primer Assembly page 8Ć29 Service Station Assembly Failure D In this case Check if the Service Station flag is installed correctly Check that the interconnect cable for the Service Station Assembly is connected c...

Page 100: ...EPLACE THE REFILL ASSEMBLY OR THE ELEVATOR ASSEMBLY 1 Enter Diagnostics D06 Refill 2 3 IF THIS TEST PASSES DO NOT REPLACE THE REFILL ASSEMBLY OR THE ELEVATOR ASSEMBLY 4 Refill Assembly Failure D In this case Check that the Refill interconnect cable is connected correctly Replace the Refill Assembly page 8Ć55 Elevator Assembly Failure D In this case Replace the Elevator Assembly page 8Ć52 ...

Page 101: ...S TEST PASSES DO NOT REPLACE THE FRONTĆPANEL ASSEMBLY 1 Enter Diagnostics D07 Front Panel 2 3 IF THIS TEST PASSES DO NOT REPLACE THE FRONTĆPANEL ASSEMBLY 4 If the test fails to resolve the problem try one of the following Check that the cable for the Front Panel Assembly is connected to the Electronics Module Replace the Front Panel Assembly page 8Ć24 ...

Page 102: ... D08 Sensors IF POSSIBLE ALWAYS PERFORM THIS TEST BEFORE REPLACING ANY OF THE SENSORS IF THIS TEST PASSES DO NOT REPLACE ANY OF THE SENSORS 1 Enter Diagnostics D08 Sensors 2 3 IF THIS TEST PASSES DO NOT REPLACE ANY OF THE SENSORS 4 Cover Sensor Failure ...

Page 103: ...ensor Failure D In this case Check that the Right Door Sensor is seated correctly Check that the cable for the Right Door Sensor is connected correctly Replace the Right Door Sensor page 8Ć21 Left Door Sensor Failure D In this case Check that the Left Door Sensor is seated correctly Check that the cable for the Left Door Sensor is connected correctly Replace the Left Door Sensor page 8Ć18 Refill V...

Page 104: ...tton Sensor Failure D In this case Check that the cable for the Standby Button Sensor is connected correctly Replace the Standby Button Assembly page 8Ć24 Media Sensor Failure D In this case Check that the cable for the Media Sensor is connected correctly Replace the Media Sensor Assembly page 8Ć78 Pincharm Sensor Failure D In this case Check that the cable for the Pincharm Sensor is connected cor...

Page 105: ...Service Tests 4 21 HP DesignJet CP Series Printers Diagnostics D09 MIO Presence ...

Page 106: ...he carriage picks up the Cutter Assembly and runs it along the length of the printer twice then the test has passed IF THIS TEST PASSES DO NOT REPLACE THE CUTTER ASSEMBLY If the carriage does not pick up the Cutter Assembly then the test has failed To resolve the problem try one of the following Check if the Cutter has been disabled through the frontĆpanel Perform the Carriage test page 4Ć11 Repla...

Page 107: ...the test has passed IF THIS TEST PASSES DO NOT REPLACE THE BAIL ASSEMBLY If the Printer does not raise the Bail Assembly then the test has failed If the bail fails the test try replacing one of the following components 1 Bail stepper motor page 8Ć62 2 Bail assembly page 8Ć58 Only replace one component at a time and perform the test again before replacing another component Using this procedure you ...

Page 108: ... are printed badly If a color is printing badly then replace the complete Ink Delivery System of the color that is bad 3 The Line Sensor is not calibrated correctly Perform the Line Sensor calibration page 5Ć9 4 The lens cover which is installed on the line sensor is dirty Replace the lens cover Users Guide Chapter 10 Lens Maintenance 5 Check if the Line Sensor is installed and connected correctly...

Page 109: ... If the test fails to resolve the problem try one of the following 1 Perform the Printhead Alignment Calibration page 5Ć12 2 The Line Sensor is not calibrated correctly Perform the Line Sensor calibration page 5Ć9 3 The lens cover which is installed on the line sensor is dirty Replace the lens cover Users Guide Chapter 10 Lens Maintenance 4 Perform the Electronics test page 4Ć6 5 Check if the Medi...

Page 110: ...esignJet CP Series Printers D13 Printhead ID 1 Enter Diagnostics D13 Printhead ID 2 HP DesignJet CP Ink System C 200000 M 200000 Y 200000 B 200000 3 HP DesignJet CP Ink System UV C 220000 M 220000 Y 220000 B 220000 4 Previous ...

Page 111: ...ult for each Printhead that is not inserted and the original values the value that was displayed before the Printhead was removed for the Printheads when they are inserted If you get a value that is different than 3ffff 3fff when the Printheads are removed then you must perform step 1 again If you get the same results after repeating step 1 then the carriage is damaged Replace the Carriage Assembl...

Page 112: ...4 28 Service Tests HP DesignJet CP Series Printers D15 Clean Roller 1 Enter Diagnostics D15 Clean Roller 2 3 Up Arrow Down Arrow 4 Previous ...

Page 113: ...ase EEROM Before erasing the EEROM it is recommended that a configuration plot is printed for setup reference because you will need to reĆconfigure the frontĆpanel settings 1 Enter Diagnostics D16 Erase EEROM 2 0 3 Previous 4 Enter 0 5 0 6 0 If the test fails ...

Page 114: ...ers D17 Reset Counters This test does not reset the Preventive Maintenance Counter To reset the preventive Maintenance Counter perform the Maintenance Calibration 5Ć18 1 Enter Diagnostics D17 Reset Counters 2 3 Previous 4 Enter 5 6 If the test fails ...

Page 115: ...P ONLY IF THE HARD DISK VERSION IS LOWER THAN A 02 08 THEN YOU MUST INFORM THE CUSTOMER TO ORDER THE UV UPGRADE KIT BY FAXING THE SHEET THAT THEY RECEIVED WITH THE PRINTER INFORMING THEM ABOUT THE UV UPGRADE KIT THEY CAN ALSO FAX THE SHEET ON THE FOLLOWING URL http www hp com go designjet YOU CAN ALSO ORDER THE FIRMWARE UPGRADE KIT WHICH INCLUDES A CDĆROM TO UPGRADE THE HARD DISK DRIVE CONTENTS RE...

Page 116: ...4 32 Service Tests HP DesignJet CP Series Printers ...

Page 117: ...5 1 HP DesignJet CP Series Printers ...

Page 118: ...signJet CP Series Printers Calibrations To Be Done When Required C01 C02 C03 C05 C06 C07 C08 C09 C10 Yes Yes Yes Yes Yes Yes Yes Yes Yes Yes Yes Yes Yes Yes Yes Yes Yes Yes Yes Yes Yes Yes Yes Yes Yes Yes Yes Yes Yes Yes Yes Yes Yes ...

Page 119: ... DesignJet CP Series Printers WARNING ALL THE COVER SENSORS ARE DISABLED WHEN IN THE CALIBRATIONS MENU IF THE CARRIAGE IS MOVING IT WILL NOT STOP IF THE WINDOW IS OPENED SO BE VERY CAREFUL NOT TO PUT YOUR HANDS INSIDE 1 2 3 4 5 6 ...

Page 120: ...5 4 Service Calibrations HP DesignJet CP Series Printers 7 Only available in the HP DesignJet 2500CP 3500CP printer 8 9 10 Only available in the HP DesignJet 2500CP 3500CP printer ...

Page 121: ...r 5 Arrow Enter 6 Arrow Enter 7 Arrow 8 Enter If the printer is not used for 5 minutes the printer exits out of the Service Mode and you must repeat the above steps to enter the service mode again In some cases a quick press of a button may not be recognized by the processor When pressing a button be sure to press it deliberately and all the way to the bottom of its travel If the Printer hangs up ...

Page 122: ...1 Carriage 0 0 2 2 THIS CALIBRATION MUST BE DONE WITH THE PRINTHEADS INSTALLED 2 1 0 2 1 0 0 4 Enter Calibrations C1 Carriage 2 4 1 2 3 5 1 Enter 2 3 0 1 1 3 2 4 2 3 5 4 3 4 3 5 5 Previous 4 3 5 6 2 2 3 5 4 5 3 4 5 4 5 3 1 4 5 2 4 5 3 2 1 4 5 2 1 4 5 3 2 1 4 5 ...

Page 123: ...Service Calibrations 5 7 HP DesignJet CP Series Printers D D D D D D D ...

Page 124: ...5 8 Service Calibrations HP DesignJet CP Series Printers ...

Page 125: ...Service Calibrations 5 9 HP DesignJet CP Series Printers Calibrations C3 Line Sensor Green I 8 0 O 984 Blue I 10 0 T 0 C 2 ...

Page 126: ...ter has too much light Make sure the Top Cover is closed If Value is above the Maximum then the printer has not enough light Make sure you are using white paper If you you are using white paper then there might be an Aerosol problem in which case replace the lens cover before performing this calibration 0 ...

Page 127: ...Service Calibrations 5 11 HP DesignJet CP Series Printers C04 Service Station THIS CALIBRATION IS NO LONGER REQUIRED AND SHOULD NEVER BE PERFORMED ...

Page 128: ...this test MAKE SURE THAT THE WINDOW IS CLOSED BEFORE YOU PERFORM THIS CALIBRATION 1 Enter Calibrations C5 Printheads Align 2 3 4 5 If the calibrations fails to resolve the problem try one of the following 1 If the calibration pattern is bad D D 2 Perform the Electronics Test page 4Ć6 3 Perform the Line Sensor Test page 4Ć9 ...

Page 129: ...Service Calibrations 5 13 HP DesignJet CP Series Printers C06 Printheads Check 11 0 11 1 2 Enter Calibrations C6 Printheads Check 2 2 0 3 3 2 0 3 4 0 2 0 3 5 0 3 2 3 0 2 3 2 3 0 2 3 2 3 0 ...

Page 130: ...2 0 D 1 2 D 1 2 0 D 1 2 D 1 2 0 D 1 2 D 1 2 0 If the calibrations fails to resolve the problem try one of the following If the calibration pattern is D 0 2 0 D 0 0 If the calibration pattern is D 0 page 8Ć42 Perform the Electronics Test page 4Ć6 Perform the Line Sensor Test page 4Ć9 ...

Page 131: ...dia before performing this test MAKE SURE THAT THE WINDOW IS CLOSED BEFORE YOU PERFORM THIS CALIBRATION 1 Enter Calibrations C7 Color Calib 2 3 4 5 If the calibrations fails to resolve the problem try one of the following 1 If the calibration pattern is bad D D 2 Perform the Electronics Test page 4Ć6 3 Perform the Line Sensor Test page 4Ć9 ...

Page 132: ...5 16 Service Calibrations HP DesignJet CP Series Printers C08 Service Accuracy 0 1 Enter Calibrations C8 Service Accuracy 2 3 Up Arrow 4 5 6 0 0 0 ...

Page 133: ... pattern Measure pattern Load arrow edge print side down Arrow edge If the calibrations fails to resolve the problem try one of the following If the calibration pattern is bad D D If the calibration pattern is D page 8Ć42 Perform the Electronics Test page 4Ć6 Perform the Line Sensor Test page 4Ć9 ...

Page 134: ... Enter Calibrations C9 Maintenance 2 If you are about to replace the Electronics Module you MUST note down the Swaths Counter 3 Down Arrow You should adjust the counter to the number that you noted before replacing the Electronics Module 4 0 Up Arrow 0 Down Arrow 0 Enter 0 5 0 ...

Page 135: ...IRMWARE INSTEAD OF REPLACING BOTH THE HARD DISK DRIVE AND THE ELECTRONICS MODULE NOTE FOR HP DESIGNJET 2500CP WITH FIRMWARE VERSION A 02 14 OR HIGHER AND HP DESIGNJET 3500CP 9 YOU MUST PERFORM THIS CALIBRATION WHEN YOU INSTALL A NEW ELECTRONICS MODULE IN ORDER TO SET THE CORRECT FONT TYPE 3 13 5 105 82 5 3 5 10 4 1 174 1 0 5 3 5 104 46 06 4 31 51 9 105 82 5 0 23 44 Enter Calibrations C10 Font Type...

Page 136: ...5 20 Service Calibrations HP DesignJet CP Series Printers 2 0 1 3 1 1 1 3 3 0 3 3 3 3 1 ...

Page 137: ...6 1 HP DesignJet CP Series Printers ...

Page 138: ... 2 2 8 2 Image Quality Color Calib 0 2 0 29 D 0 2 2 2 Image Quality Printhead Service Align Now 0 2 0 29 0 5 0 12 D 2 2 12 4 01 2 0 5 0 1 12 2 12 2 2 12 0 5 0 0 4 1 0 5 2 2 12 4 01 0 2 22 0 3 02 0 2 9 0 0 2 5 2 3 0 2 0 5 0 0 4 1 0 2 2 0 0 2 02 3 0 2 1 0 2 1 0 2 0 3 1 2 0 11 D 7 3 2 4 7 1 1 7 2 0 0 3 2 0 0 5 2 2 00 2 0 2 0 1 22 1 D 0 2 2 3 27 0 2 31 2 6 2 1 22 1 2 2 2 312 0 31 5 5 2 2 3 27 0 9 0 2 ...

Page 139: ...Print Quality 6 3 HP DesignJet CP Series Printers 1 D 1 D 1 D 1 D 0 ...

Page 140: ...6 4 Image Quality HP DesignJet CP Series Printers ...

Page 141: ...er 2 Use the same type of media that the customer was using when the image quality problem was discovered 3 Study each of the test patterns in the order listed to determine the type of image quality problem 4 If the customer was reporting problems of Image Quality using nonĆHP media and after the Image Quality Print test the same quality problems appear advise the customer to use genuine HP media ...

Page 142: ...6 6 Image Quality HP DesignJet CP Series Printers ...

Page 143: ...ing them in a perfect operating condition You can ignore this pattern and continue with Test Pattern 2 Test Pattern 2 This test pattern checks for overall image print quality If you do not see any problems with the image quality test similar to the example shown below then the printer is functioning correctly The problem may be with the RIP driver etc that the customer is using Refer to page 6Ć17 ...

Page 144: ...ters 2 Banding Problems 0 2 3 0 2 Test pattern 2 0 2 2 2 0 2 0 2 1 2 0 0 Secondary Color Primary Color Components 0 2 2 D D Banding Caused by Printhead Problems test pattern 2 3 2 2 0 2 0 2 2 0 2 33 33 33 33 Test Pattern 3 4 0 1 33 0 0 2 2 0 0 2 2 ...

Page 145: ...Print Quality 6 9 HP DesignJet CP Series Printers Example A Banding Problem 1 Problem Description Corrective Action Test Pattern 3 Banding Problem 2 Problem Description Corrective Action Test Pattern 3 ...

Page 146: ...em Description Corrective Action Test Pattern 3 Banding Caused by Media Advance Problems Test Pattern 2 Banding Problem Problem Description Corrective Action Test Pattern 4 It is also possible that the banding was caused because the customer was using nonĆHP media The performance of the printer can only be guaranteed if genuine HP media is used ...

Page 147: ...Print Quality 6 11 HP DesignJet CP Series Printers Example B Banding Caused by Misalignment Test Pattern 4 D D Banding Problem 5 Problem Description Corrective Action ...

Page 148: ...anding Problem 6 Problem Description Corrective Action Test Pattern 4 It is also possible that the banding was caused because the customer was using nonĆHP media The performance of the printer can only be guaranteed if genuine HP media is used Example C ...

Page 149: ...irm an error highlighted in Test Pattern 2 Some of the printhead nozzle problems that you will see in Test Pattern 3 do not mean you will not get perfect image quality results The printer has internal corrections that will hide many nozzle defects Nozzles not printing 1 2 Nozzles misdirected 3 4 ...

Page 150: ...Quality HP DesignJet CP Series Printers Nozzles Problem 1 33 2 Nozzles Problem 2 33 2 Corrective Action 2 0 1 2 4 2 3 2 2 4 2 2 2 5 2 2 6 2 0 D 5 D 5 D 2 5 Test Pattern 4 0 2 2 0 2 0 2 0 0 0 0 2 1 D 3 0 3 1 D 0 1 ...

Page 151: ... 2 2 1 2 0 1 7 0 4 2 2 2 0 1 0 4 2 207 0 12 2 712 21 207 step 1 3 2 3 27 0 2 12 1 0 1 2 0 2 1 0 4 2 0 2 3 1 0 0 2 04 30 7 0 2 2 1 9 0 2 2 3 27 0 2 2 1 2 0 1 7 0 4 2 5 2 00 0 2 3 1 207 2 5 D 0 0 2 20 1 12 9 D 2 0 9 D 2 00 11 7 9 D 2 9 6 1 11 7 9 Only replace one component at a time and check if the problem has gone before replacing another component Using this procedure you will be able to determin...

Page 152: ...6 16 Image Quality HP DesignJet CP Series Printers Test Pattern 5 Example E Correct Example F Incorrect Variation Problem only Corrective Action ...

Page 153: ...de Media Guide for the HP DesignJet CP Printers To have accurate colors the media settings must match the type of media loaded in the printer If the customer is using nonĆHP media with HP drivers the colors in the required print may not be accurate Advise the customer to use HP media if they want to improve the accuracy of the colors ...

Page 154: ...ies Printers 1 PQ Problem Printheads Affected Problem Description 1 0 1 1 1 1 Cause of Problem 0 Corrective Action 1 1 1 2 1 1 Only Applicable to HP DesignJet 3500CP PQ Problem 2 Printheads Affected Corrective Action 1 1 2 1 D 2 2 D 2 1 1 1 ...

Page 155: ...Print Quality 6 19 HP DesignJet CP Series Printers 1 D 3 1 1 1 1 3 1 1 1 1 0 1 1 1 1 I 22 22 1 1 D 3 1 1 1 1 1 2 D 3 2 3 1 1 1 2 1 1 2 1 2 1 1 2 1 1 1 1 1 1 ...

Page 156: ... Quality HP DesignJet CP Series Printers PQ Problem Printheads Affected Problem Description Cause of Problem Corrective Action PQ Problem Printheads Affected Problem Description Cause of Problem Corrective Action ...

Page 157: ...Print Quality 6 21 HP DesignJet CP Series Printers PQ Problem Printheads Affected Problem Description Corrective Action 1 0 0 2 0 3 0 ...

Page 158: ...5 0 0 3 3 0 1 1 3 0 0 0 3 0 0 Cause of Problem 5 4 0 4 0 1 03 1 0 Corrective Action 4 0 3 1 0 0 0 3 1 0 0 0 2 0 0 3 0 3 0 0 0 3 0 10 0 0 0 3 1 5 0 4 1 0 1 5 0 0 0 4 0 4 0 4 1 04 0 0 0 0 4 2 0 0 3 PQ Problem 0 0 Printheads Affected Cause of Problem 0 2 3 0 1 0 0 PQ Problem 0 3 0 1 4 1 Cause of Problem 0 0 1 0 2 1 0 ...

Page 159: ...AND 2 Six or more nozzles are missing in a Printhead Check OR 3 The temperature of the printhead rises to 15 degrees above its normal operating temperature If the ink level indicator is not showing low 2 or 3 will result in a Printhead Failure message Corrective Action The Printhead Check usually does a more reliable job of checking for Out of Ink conditions Setting the printhead check to more fre...

Page 160: ...6 24 Image Quality HP DesignJet CP Series Printers ...

Page 161: ...7 1 HP DesignJet CP Series Printers ...

Page 162: ...7 2 Parts and Diagrams HP DesignJet CP Series Printers HP DesignJets 2500CP and 2000CP Overview ...

Page 163: ...Parts and Diagrams 7 3 HP DesignJet CP Series Printers HP DesignJets 3500CP and 3000CP Overview ...

Page 164: ...4 Parts and Diagrams HP DesignJet CP Series Printers Printer Support HP DesignJets 2500CP and 2000CP Only 3 0 1 1 0 05 0 6 3 0 1 3 2 6 0 5 6 5 6 5 5 6 6 4 6 6 5 6 5 6 61 0 1 0 6 61 0 1 0 6 61 6 61 6 61 1 ...

Page 165: ...Parts and Diagrams 7 5 HP DesignJet CP Series Printers Printer Support HP DesignJets 2500CP and 2000CP Only ...

Page 166: ...7 6 Parts and Diagrams HP DesignJet CP Series Printers Printer Support HP DesignJets 3500CP and 3000CP Only 2 0 0 4 5 2 0 2 1 5 4 5 4 5 4 4 5 5 3 5 50 0 5 50 0 5 50 5 50 5 50 0 ...

Page 167: ...Parts and Diagrams 7 7 HP DesignJet CP Series Printers Printer Support HP DesignJets 3500CP and 3000CP Only ...

Page 168: ...7 8 Parts and Diagrams HP DesignJet CP Series Printers 2 1 3 3 1 3 3 3 1 3 3 3 2 3 3 0 2 3 3 0 3 3 1 3 3 3 3 2 3 3 3 2 ...

Page 169: ...Parts and Diagrams 7 9 HP DesignJet CP Series Printers ...

Page 170: ...7 10 Parts and Diagrams HP DesignJet CP Series Printers ...

Page 171: ...Parts and Diagrams 7 11 HP DesignJet CP Series Printers ...

Page 172: ...CP and 2000CP Only 1 1 6 13 4 1 4 3 37 2 1 03 8 5 1 3 8 5 1 3 8 1 6 8 8 0 5 1 8 1 6 8 8 1 6 1 23 1 03 0 1 3 4 2 3 HP DesignJet 2500CP 8 1 6 1 0 1 3 HP DesignJet 2000CP 8 17 2 0 8 8 6 31 2 4 8 0 1 8 1 8 8 5 1 HP DesignJet 2000CP 8 1 6 8 1 6 8 11 3 0 8 11 3 8 3 1 3 8 1 8 1 1 8 31 2 400 13 1 ...

Page 173: ...Parts and Diagrams 7 13 HP DesignJet CP Series Printers Printer Rear HP DesignJets 2500CP and 2000CP Only ...

Page 174: ... 2 1 03 8 5 1 3 8 5 1 3 8 1 6 8 8 0 5 1 8 1 6 8 8 1 6 1 23 1 03 0 1 3 HP DesignJet 3500CP 8 1 6 1 0 1 3 HP DesignJet 3000CP 8 17 2 0 8 8 6 31 2 4 8 0 1 8 1 8 8 5 1 HP DesignJet 3000CP 8 1 6 8 1 6 8 11 3 0 8 11 3 8 3 1 3 8 1 8 1 1 8 31 2 400 13 1 includes items 19 and 20 8 6 1 5 1 400 13 8 00 1 5 1 400 13 8 1 3 1 5 1 8 3 1 5 1 ...

Page 175: ...Parts and Diagrams 7 15 HP DesignJet CP Series Printers Printer Rear HP DesignJets 3500CP and 3000CP Only ...

Page 176: ...7 16 Parts and Diagrams HP DesignJet CP Series Printers Electronics Module Internal 0 0 0 0 0 0 0 0 0 includes item 6 ...

Page 177: ...Parts and Diagrams 7 17 HP DesignJet CP Series Printers ...

Page 178: ...7 18 Parts and Diagrams HP DesignJet CP Series Printers 1 2 2 2 2 2 1 2 0 2 2 1 1 2 2 2 0 2 2 2 2 2 2 0 1 ...

Page 179: ...Parts and Diagrams 7 19 HP DesignJet CP Series Printers ...

Page 180: ...7 20 Parts and Diagrams HP DesignJet CP Series Printers 0 1 1 0 04 0 2 0 0 5 5 2 5 5 5 10 5 5 5 5 1 5 5 5 5 0 4 5 5 5 3 0 4 5 5 5 3 0 5 5 0 ...

Page 181: ...Parts and Diagrams 7 21 HP DesignJet CP Series Printers ...

Page 182: ...7 22 Parts and Diagrams HP DesignJet CP Series Printers 0 02 3 0 3 2 26 1 0 2 0 4 1 2 1 2 7 7 0 4 7 7 7 0 4 7 7 7 1 0 7 7 7 7 7 5 1 0 2 3 1 2 7 7 0 3 0 7 7 7 5 1 2 0 11 6 7 7 0 3 4 2 2 ...

Page 183: ...Parts and Diagrams 7 23 HP DesignJet CP Series Printers ...

Page 184: ...7 24 Parts and Diagrams HP DesignJet CP Series Printers Elevator Assembly Applicable to HP DesignJets 2XXXCP and 3XXXCP ...

Page 185: ...Parts and Diagrams 7 25 HP DesignJet CP Series Printers Elevator Assembly Applicable to HP DesignJets 2XXXCP and 3XXXCP ...

Page 186: ...7 26 Parts and Diagrams HP DesignJet CP Series Printers 1 0 2 2 0 2 2 2 1 2 2 2 2 2 ...

Page 187: ...Parts and Diagrams 7 27 HP DesignJet CP Series Printers ...

Page 188: ...7 28 Parts and Diagrams HP DesignJet CP Series Printers Carriage Assembly 0 1 1 0 04 0 3 0 0 5 5 5 5 5 5 1 3 0 0 5 5 5 5 1 5 5 0 5 5 2 5 5 4 includes items 3 thru 7 5 5 5 2 0 2 0 0 ...

Page 189: ...Parts and Diagrams 7 29 HP DesignJet CP Series Printers ...

Page 190: ...7 30 Parts and Diagrams HP DesignJet CP Series Printers 0 1 1 0 1 1 1 1 1 1 1 1 1 1 1 1 1 1 0 1 1 0 1 1 ...

Page 191: ...Parts and Diagrams 7 31 HP DesignJet CP Series Printers ...

Page 192: ...7 32 Parts and Diagrams HP DesignJet CP Series Printers Service Station Assembly Area Applicable to HP DesignJets 2XXXCP and 3XXXCP ...

Page 193: ...Parts and Diagrams 7 33 HP DesignJet CP Series Printers Service Station Assembly Area Applicable to HP DesignJets 2XXXCP and 3XXXCP ...

Page 194: ...7 34 Parts and Diagrams HP DesignJet CP Series Printers XĆaxis Motor Assembly Applicable to HP DesignJets 2XXXCP and 3XXXCP ...

Page 195: ...Parts and Diagrams 7 35 HP DesignJet CP Series Printers XĆaxis Assembly Applicable to HP DesignJets 2XXXCP and 3XXXCP ...

Page 196: ...inters Drive Roller Area HP DesignJets 2500CP and 2000CP Only 2 0 0 3 4 2 4 4 0 4 0 2 4 0 4 4 0 0 4 4 2 4 4 1 1 3 0 4 1 1 3 0 4 1 4 1 4 4 4 0 4 0 Note A Applicable to Serial Number Format ESAXXXXXXX Note B Applicable to Serial Number Format ESBXXXXXXX ...

Page 197: ...Parts and Diagrams 7 37 HP DesignJet CP Series Printers Drive Roller Area HP DesignJets 2500CP and 2000CP Only ...

Page 198: ...7 38 Parts and Diagrams HP DesignJet CP Series Printers Drive Roller Area HP DesignJets 3500CP and 3000CP Only 1 2 3 1 3 3 3 1 3 3 3 3 3 1 3 1 3 0 0 2 3 0 3 3 3 3 0 0 1 ...

Page 199: ...Parts and Diagrams 7 39 HP DesignJet CP Series Printers Drive Roller Area HP DesignJets 3500CP and 3000CP Only ...

Page 200: ...7 40 Parts and Diagrams HP DesignJet CP Series Printers 1 0 2 2 1 2 2 1 2 2 1 2 2 0 2 2 2 2 2 1 2 2 2 2 0 2 2 2 1 ...

Page 201: ...Parts and Diagrams 7 41 HP DesignJet CP Series Printers ...

Page 202: ...7 42 Parts and Diagrams HP DesignJet CP Series Printers 2 1 3 3 1 3 3 3 3 3 1 3 3 3 3 3 3 3 3 3 1 3 3 3 3 3 0 3 3 2 3 3 ...

Page 203: ...Parts and Diagrams 7 43 HP DesignJet CP Series Printers ...

Page 204: ...r Assembly Note Part Number C4704Ć60019 is Applicable to HP DesignJets 2000CP and 2500CP with Serial Number Format ESAXXXXXX and ESBXXXXXX Note Part Number C4723Ć60244 is Applicable to HP DesignJets 3000CP and 3500CP and to HP DesignJets 2000CP and 2500CP with Serial Number Format ESCXXXXXX ...

Page 205: ...Parts and Diagrams 7 45 HP DesignJet CP Series Printers Refill Interconnect PCA and Cutter Assembly ...

Page 206: ...7 46 Parts and Diagrams HP DesignJet CP Series Printers Media Button HP DesignJets 3500CP and 3000CP Only ...

Page 207: ...Parts and Diagrams 7 47 HP DesignJet CP Series Printers Media Button HP DesignJets 3500CP and 3000CP Only ...

Page 208: ...7 48 Parts and Diagrams HP DesignJet CP Series Printers ...

Page 209: ...Parts and Diagrams 7 49 HP DesignJet CP Series Printers ...

Page 210: ...rinters 1 2 0 1 4 0 13 1 1 0 0 0 0 1 4 13 1 1 0 0 0 0 1 4 13 1 1 0 0 0 0 1 4 1 13 1 1 0 0 0 0 1 4 0 13 1 1 0 0 0 0 1 4 0 13 1 1 0 0 0 0 1 4 13 1 1 0 0 0 0 1 4 13 1 1 0 0 0 0 1 4 1 13 1 1 0 0 0 0 1 4 0 13 1 1 0 0 0 0 1 4 4 0 2 0 4 2 1 0 2 4 0 0 4 2 0 ...

Page 211: ...Parts and Diagrams 7 51 HP DesignJet CP Series Printers Front Panel Overlays HP DesignJets 2500CP and 2000CP Only Front Panel Overlays HP DesignJets 3500CP and 3000CP Only ...

Page 212: ...1 2 2 6 6 0 620 1 20 1 2 0 2 Note If you have purchased the optional HP JetDirect Printer Server Network Interface for the HP DesignJet 2000CP printer this cable is required PlugĆin memory DRAMM SIMM 02 3 0 1 0 2 6 6 6 6 Note For the location of the plugĆin memory see page 7Ć12 7 14 Ink Delivery Systems 1 02 3 0 1 02 3 0 1 0 2 5 2 4 ...

Page 213: ...8 1 HP DesignJet CP Series Printers ...

Page 214: ... Hand Trim Assembly 8Ć18 Right Hand Cover and Right Hand Trim Assembly 8Ć21 Front Panel and StandĆby Button 8Ć24 Service Station Assembly and Service Station Flag 8Ć26 Primer Assembly Only DesignJets 2500CP 2000CP 8Ć29 Encoder Strip 8Ć32 Trailing Cable 8Ć36 YĆAxis Belt 8Ć39 Carriage Assembly 8Ć42 YĆAxis Motor Assembly 8Ć45 Cutter Assembly Only DesignJets 2500CP and 2000CP 8Ć48 Cutter Assembly Only...

Page 215: ...d Drive Roller Only 3500CP 3000CP 8Ć72 Entry Platen 8Ć78 Roll Cover and Roll Feed Assemblies 8Ć81 Pincharm Assemblies Pincharm Shaft and Pincharm Sensor 8Ć84 Interconnect Cables 8Ć87 Media Button Only DesignJets 3500CP and 3000CP 8Ć90 Before using this chapter to remove and install a new component always make sure that you have performed the relevant service test from Chapter 4 If the test passes ...

Page 216: ...the following precautions Ensure that the ac power outlet mains has a protective earth ground terminal Switch the plotter off and disconnect it from the power source prior to performing any maintenance Prevent water or other liquids from running onto electrical components or circuits or through openings in the module 0 30 1 3 0 2 0 0 2 2 2 2 1 1 0 0 1 0 0 2 0 0 0 2 ...

Page 217: ...Removal and Installation 8 5 HP DesignJet CP Series Printers T8 T9 T10 T20 T15 T25 3 16 inch 5 5 mm and ...

Page 218: ...power cord 3 3 3 41 8 2 1 62 3 3 3 2 41 3 5 1 3 3 3 31 2 4 5 3 1 2 1 62 7 2 3 413 3 5 1 3 3 2 D 1 6 1 2 2 3 23 2 3 3 D 232 1 03 2 3 2 3 3 D 2 1 3 1 3 2 3 3 4 5 3 2 7 3 43 1 8 3 3 7 04 3 6 1 2 7 4 3 1 3 2 0 132 2 0 5 3 3 2 1 6 1 5 1 4 2 1 6 3 2 1 62 3 3 1 2 6 2 3 3 1 3 1 3 3 3 1 43 23 1 2 0 6 5 3 6 5 3 3 1 3 5 12 3 2 7 1 2 3 1 02 1 4 7 2 3 3 2 1 3 31 2 4 5 3 5 2 32 1 3 2 32 8 2 1 62 3 6 2 41 3 3 0 ...

Page 219: ... 0 2 01 1 3 0 10 1 0 10 6 0 40 1 1 1 1 1 3 0 2 1 1 0 2 2 1 1 1 0 1 1 0 1 4 02 2 0 1 1 0 1 0 01 0 ONLY 1 1 1 0 2 0 REPLACED 5 4 1 0 2 1 4 0 01 1 1 01 2 01 1 4 1 01 1 1 4 1 1 1 1 1 1 1 0 2 1 1 1 0 40 1 2 01 1 4 0 0 2 0 1 1 01 0 1 1 1 1 2 1 1 1 1 10 1 2 4 01 3 01 1 010 1 0 2 0 1 1 0 1 1 1 1 2 1 1 1 1 10 1 2 4 01 4 01 1 0 0 0 2 1 1 1 0 1 1 1 1 2 1 1 1 1 10 1 2 4 01 5 1 3 1 3 1 01 1 1 6 0 40 1 0 1 1 3 ...

Page 220: ... 8 XĆmotor cable in 9 Trailing cable in and 1 C01 Carriage page 5Ć6 2 C02 Refill page 5Ć8 3 C03 Line Sensor page 5Ć9 4 C10 Font Type Set page 5Ć19 5 C05 Printheads Alignment page 5Ć12 6 C06 Printheads Check page 5Ć13 7 C07 Color Calibration Only for HP DesignJet 2500CP 3500CP printer page 5Ć15 8 C08 Service Accuracy page 5Ć16 9 C09 Maintenance page 5Ć18 10 C10 Font Type Set page 5Ć19 4Ć6 ...

Page 221: ...Removal and Installation 8 9 HP DesignJet CP Series Printers ...

Page 222: ...8 10 Removal and Installation HP DesignJet CP Series Printers Additional Rear Cover Only applicable to HP DesignJets 3500CP and 3000CP Removal Installation ...

Page 223: ...Removal and Installation 8 11 HP DesignJet CP Series Printers Figure 1B Additional Rear Cover Only Applicable to HP DesignJets 3500CP 3000CP ...

Page 224: ...esignJet CP Series Printers Hard Disk Drive Power Switch Cable THE HARD DISK DRIVE IS ONLY APPLICABLE FOR THE HP DESIGNJET 2500CP 3500CP PRINTER Removal Switch off the printer and remove the power cord J22 Hard Disk Drive J15 HDD PWR J2 ...

Page 225: ...Removal and Installation 8 13 HP DesignJet CP Series Printers Installation J2 J15 HDD PWR J22 Hard Disk Drive 10 Perform the C10 Font Type Set calibration page ...

Page 226: ...8 14 Removal and Installation HP DesignJet CP Series Printers ...

Page 227: ...8 15 Removal and Installation HP DesignJet CP Series Printers Window and Top Cover Removal Switch off the printer and remove the power cord Loosen Installation ...

Page 228: ...8 16 Removal and Installation HP DesignJet CP Series Printers ...

Page 229: ...Removal and Installation 8 17 HP DesignJet CP Series Printers ...

Page 230: ...Trim Assembly Removal Switch off the printer and remove the power cord Be careful not to drop the cover once the securing fasteners have been removed Support the cover throughout the next step Note To remove the Cover Sensor disconnect it from position J6 DOOR SW on the Refill Interconnect PCA ...

Page 231: ...Removal and Installation 8 19 HP DesignJet CP Series Printers 2 0 1 1 1 2 0 2 0 1 0 1 1 0 2 ...

Page 232: ...8 20 Removal and Installation HP DesignJet CP Series Printers ...

Page 233: ... cable J1 FRONT PANEL J2 ON STBY Note Position the pinchĆarm lever at half way to enable you to perform the next step item 2 Be careful not to drop the cover item 7 once the securing fasteners have been removed Support the cover throughout the next step The right hand cover and window sensors can be removed by disconnecting them from the front panel assembly ...

Page 234: ...the cable clamps on the inside of the cover Note 2 At the rear of the right hand side chassis is a hole for the cables to go through If the cables are not through this hole the cover cannot be installed 2 0 0 1 1 small Note Position the pinchĆarm lever item 2 at half way to enable you to perform the next step 1 0 2 0 J9 FRONT PANEL 2 1 J2 ON STBY 0 1 1 0 2 ...

Page 235: ...Removal and Installation 8 23 HP DesignJet CP Series Printers ...

Page 236: ...8 24 Removal and Installation HP DesignJet CP Series Printers Front Panel and StandĆby Button Removal Switch off the printer and remove the power cord Installation ...

Page 237: ...Removal and Installation 8 25 HP DesignJet CP Series Printers ...

Page 238: ...nters Note for HP DesignJets 3500CP 3000CP Make sure you disconnect the Media Button Cable Item 10 from the Service Station Interconnect PCA Note To remove the primer assembly from the service station assembly refer to the primer removal procedure page 8Ć29 ...

Page 239: ...e service station assembly to the right hand side chassis Note Be careful not to damage the service station flag while performing the following procedure 0 2 2 Note Make sure the tubes item 8 are not bent or twisted 0 Note for HP DesignJets 3500CP 3000CP Make sure you reconnect the Media Button Cable Item 10 to the Service Station Interconnect PCA 2 0 0 1 0 0 0 ...

Page 240: ...8 28 Removal and Installation HP DesignJet CP Series Printers Figure 8 Service Station Assembly ...

Page 241: ...embly Only Applicable to HP DesignJets 2500CP 2000CP NOTE FOR HP DESIGNJETS 3500CP 3000CP IF THE PRIMER ASSEMBLY FAILS YOU MUST REPLACE THE COMPLETE SERVICE STATION Removal Switch off the printer and remove the power cord 1 2 3 4 5 6 J8 PRIMER STEPPER 7 J4 PRIMER SENSOR 8 9 ...

Page 242: ...8 30 Removal and Installation HP DesignJet CP Series Printers ...

Page 243: ...Removal and Installation 8 31 HP DesignJet CP Series Printers Figure 9 Primer Assembly Only Applicable to HP DesignJets 2500CP 2000CP ...

Page 244: ...s 10 and 11 Removal Switch off the printer and remove the power cord 1 1 Window and Top Cover page 8Ć15 2 Right Hand Cover page 8Ć21 3 Left Hand Cover page 8Ć18 Care should be taken while performing the following procedure the encoder strip has sharp edges and could cause injury 2 3 4 5 6 7 8 ...

Page 245: ...llation Care should be taken while performing the following procedure the encoder strip item 6 has sharp edges and could cause injury 1 2 1 0 0 3 0 4 1 1 5 1 6 7 0 0 0 8 1 Left Hand Cover page 8Ć18 2 Right Hand Cover page 8Ć21 3 Top Cover and Window page 8Ć15 9 10 1 1 ...

Page 246: ...8 34 Removal and Installation HP DesignJet CP Series Printers ...

Page 247: ...Removal and Installation 8 35 HP DesignJet CP Series Printers ...

Page 248: ...ries Printers Trailing Cable Refer to figure 12 Removal Switch off the printer and remove the power cord 1 1 Electronics Module page 8Ć6 2 Window and Top Cover page 8Ć15 3 Right Hand Cover page 8Ć21 2 3 4 5 6 7 8 9 1 J3 MISC 2 J5 DATA 3 J10 SUPPLY 10 ...

Page 249: ...stallation 8 37 HP DesignJet CP Series Printers Installation 1 2 3 4 5 6 7 8 1 Electronics Module page 8Ć6 2 Right Hand Cover page 8Ć21 3 Window and Top Cover page 8Ć15 9 1 J3 MISC 2 J5 DATA 3 J10 SUPPLY 10 11 12 4Ć6 ...

Page 250: ...8 38 Removal and Installation HP DesignJet CP Series Printers ...

Page 251: ...ower cord 1 1 Window and Top Cover page 8Ć15 2 Right Hand Cover page 8Ć21 3 Left Hand Cover page 8Ć18 The spring item 1 in the next step is under high tension and could spring out of the YĆaxis tensioner holder item 2 Caution Cup your hand over the YĆaxis tensioner holder in the next step to avoid losing the spring 2 3 4 5 ONLY REPLACED 6 7 ...

Page 252: ... belt is not twisted 3 4 5 The spring is under high tension and could spring out of the YĆaxis tensioner holder Caution Cup your hand over the YĆaxis tensioner holder in the next step to avoid losing the spring 6 7 1 Left Hand Cover page 8Ć18 2 Right Hand Cover page 8Ć21 3 Window and Top Cover page 8Ć15 8 ...

Page 253: ...Removal and Installation 8 41 HP DesignJet CP Series Printers ...

Page 254: ...1 1 Left Hand Cover page 8Ć18 2 Window and Top Cover page 8Ć15 3 Right Hand Cover page 8Ć21 4 Service Station Flag page 8Ć26 5 Encoder Strip page 8Ć32 6 YĆAxis Belt page 8Ć39 2 3 4 Caution The rear bushing item 2 on the carriage assembly is tensioned with a spring item 3 When removing the carriage assembly hold the rear bushing on the carriage assembly 5 6 ...

Page 255: ...ssembly 3 4 5 6 7 1 YĆAxis Belt page 8Ć39 2 Encoder Strip page 8Ć32 3 Service Station Flag page 8Ć26 4 Right Hand Cover page 8Ć21 5 Window and Top Cover page 8Ć15 6 Left Hand Cover page 8Ć18 8 9 1 C01 Carriage page 5Ć6 2 C02 Refill page 5Ć8 3 C03 Line Sensor page 5Ć9 4 C05 Printheads Alignment page 5Ć12 5 C06 Printheads Check page 5Ć13 6 C07 Color Calibration Only for HP DesignJet 2500CP 3500CP pr...

Page 256: ...8 44 Removal and Installation HP DesignJet CP Series Printers ...

Page 257: ...rinters YĆAxis Motor Assembly Refer to figure 16 Removal Switch off the printer and remove the power cord 1 Window and Top Cover page 8Ć15 2 Right Hand Cover page 8Ć21 3 Left Hand Cover page 8Ć18 4 Encoder Strip page 8Ć32 5 YĆAxis belt page 8Ć39 J2 Y MOTOR ...

Page 258: ...Removal and Installation HP DesignJet CP Series Printers 1 YĆAxis belt page 8Ć39 2 Encoder Strip page 8Ć32 3 Left Hand Cover page 8Ć18 4 Right Hand Cover page 8Ć21 5 Window and Top Cover page 8Ć15 page 4Ć11 ...

Page 259: ...Removal and Installation 8 47 HP DesignJet CP Series Printers ...

Page 260: ...es Printers Cutter Assembly Only Applicable to HP DesignJets 2500CP and 2000CP Removal Switch off the printer and remove the power cord Installation Note Make sure you install the front wheel of the media cutter under the lip of the starguard assembly ...

Page 261: ...Removal and Installation 8 49 HP DesignJet CP Series Printers Figure 17A Cutter Assembly Only Applicable to HP DesignJets 2500CP and 2000CP ...

Page 262: ...8 50 Removal and Installation HP DesignJet CP Series Printers Cutter Assembly Only Applicable to HP DesignJets 3500CP and 3000CP Removal Switch off the printer and remove the power cord Installation ...

Page 263: ...Removal and Installation 8 51 HP DesignJet CP Series Printers Figure 17B Cutter Assembly Only Applicable to HP DesignJets 3500CP and 3000CP ...

Page 264: ...f the printer and remove the power cord Note To gain access to the screws securing the elevator assembly to the left hand side chassis it may be necessary to manually raise the elevator assembly This can be done by turning the motor gear under the elevator assembly J5 PLATEF SENSOR J9 ELEV STEPPER ...

Page 265: ...on 8 53 HP DesignJet CP Series Printers Installation Note At the same time as performing step one install loose cables into the cable clamp which is located on the left hand side chassis 0 0 J5 PLATEF SENSOR J9 ELEV STEPPER ...

Page 266: ...8 54 Removal and Installation HP DesignJet CP Series Printers ...

Page 267: ...stallation HP DesignJet CP Series Printers Refer to figure 19 1 Window and Top Cover page 8Ć15 2 Left Hand Cover page 8Ć18 1 Valve sensor cable in position 2 Door Sensor cable in position 3 Refill Sensor Cable in position ...

Page 268: ... Printers Installation 0 1 0 1 0 1 0 1 1 Valve sensor cable in position 2 Door Sensor cable in position 3 Refill Sensor cable in position 1 1 Window and Top Cover page 8Ć15 10 Perform C02 Refill Service Calibration page 5Ć8 1 1 Left Hand Cover page 8Ć18 ...

Page 269: ...Removal and Installation 8 57 HP DesignJet CP Series Printers ...

Page 270: ...Printers Bail Assembly and Star Wheel Assemblies Refer to figure 20 Removal Note If the mark encoder which is glued to the drive roller obstructs the removal of the bail assembly press Form Feed and Cut this will move the drive roller around Installation ...

Page 271: ...Removal and Installation 8 59 HP DesignJet CP Series Printers ...

Page 272: ...ters Refer to figure 21 1 Window and Top Cover page 8Ć15 2 Left Hand Cover page 8Ć18 3 Right Hand Cover page 8Ć21 4 Refill Assembly page 8Ć55 1 Refill Assembly page 8Ć55 2 Right Hand Cover page 8Ć21 3 Left Hand Cover page 8Ć18 4 Window and Top Cover page 8Ć15 ...

Page 273: ...Removal and Installation 8 61 HP DesignJet CP Series Printers ...

Page 274: ...rs Bail Stepper Motor Refer to figure 22 Removal Switch off the printer and remove the power cord 1 Left Hand Cover page 8Ć18 2 Bail Arm Assembly page 8Ć58 J7 STEPPER MOTOR Installation J7 STEPPER MOTOR 1 Left Hand Cover page 8Ć18 2 Bail Arm Assembly page 8Ć58 ...

Page 275: ...Removal and Installation 8 63 HP DesignJet CP Series Printers ...

Page 276: ...8 64 Removal and Installation HP DesignJet CP Series Printers Refill Interconnect PCA Removal Switch off the printer and remove the power cord Installation ...

Page 277: ...Removal and Installation 8 65 HP DesignJet CP Series Printers Figure 23 Refill Interconnect PCA ...

Page 278: ...et CP Series Printers XĆAxis Assembly Refer to figure 24 Removal Switch off the printer and remove the power cord 1 Right Hand Cover page 8Ć21 2 Window and Top Cover page 8Ć15 3 Service Station Assembly page 4 Left Hand Back Cover J7 X MOTOR ...

Page 279: ...esignJet CP Series Printers Installation 1 0 1 0 1 1 0 0 1 1 1 0 1 J7 X MOTOR 1 1 Service Station Assembly page 1 2 Right Hand Cover page 8Ć21 3 Window and Top Cover page 8Ć15 4 Left Hand Back Cover 1 1 1 C08 Service Accuracy page 5Ć16 ...

Page 280: ...8 68 Removal and Installation HP DesignJet CP Series Printers ...

Page 281: ...2500CP and 2000CP Refer to figure 25A Switch off the printer and remove the power cord 1 Window and Top Cover page 8Ć15 2 Left Hand Cover page 8Ć18 3 Right Hand Cover page 8Ć21 4 Bail Arm Assembly page 8Ć58 5 Cutter Assembly page 8Ć48 To remove the Drive Roller only 1 XĆAxis Motor Assembly page 8Ć45 2 Service Station Assembly page ...

Page 282: ...g the next step 1 Service Station Assembly page 2 XĆAxis Motor Assembly page 8Ć45 Installation of the overdrive assembly 1 Cutter Assembly page 8Ć48 2 Bail Arm Assembly page 8Ć58 3 Right Hand Cover page 8Ć21 4 Left Hand Cover page 8Ć18 5 Window and Top Cover page 8Ć15 1 C08 Service Accuracy Calibration page 5Ć16 1 D11 Bail Service Test page 5Ć11 2 D05 Service Station Service Test page 4Ć15 ...

Page 283: ...Removal and Installation 8 71 HP DesignJet CP Series Printers Figure 25A Overdrive Assembly Only Applicable to HP DesignJets 2500CP and 2000CP ...

Page 284: ...3500CP and 3000CP Refer to figure 25B Switch off the printer and remove the power cord 1 Window and Top Cover page 8Ć15 2 Left Hand Cover page 8Ć18 3 Right Hand Cover page 8Ć21 4 Bail Arm Assembly page 8Ć58 5 Cutter Assembly page 8Ć50 To remove the Drive Roller only 1 XĆAxis Motor Assembly page 8Ć45 2 Service Station Assembly page ...

Page 285: ... Media Button Cable is positioned as shown on figure 25B If it is not correctly positioned it will get trapped between the Overdrive Assembly and the chassis and will become damaged Also make sure that the Media Button is routed correctly as shown on Figure 25C page 8Ć76 1 1 1 0 0 1 0 0 1 Note Make sure that you install the first screw item 10 on the right hand side first before installing the sec...

Page 286: ...that there is a gap of approximately 3mm between the Overdrive Shim Item 1 and the Cutter Assembly Shim Item 3 as shown on Figure 25D 2 Peel the paper from the back of the second Overdrive Shim Item 1 and install it on the Linear Blade Item 2 of the Overdrive Assembly on the rightĆhand side of the Printer Refer to Figure 25E Make sure that when you install the Overdrive Shim item 1 that there is a...

Page 287: ...Removal and Installation 8 75 HP DesignJet CP Series Printers Figure 25B Overdrive Assembly Only Applicable to HP DesignJets 3500CP and 3000CP ...

Page 288: ...8 76 Removal and Installation HP DesignJet CP Series Printers Figure 25C Media Button Cable Routing Only Applicable to HP DesignJets 3500CP and 3000CP ...

Page 289: ...ail Assembly Cutter Assembly Shim Item 4 z 3mm Minimum Screw Item 3 Figure 25D Overdrive Shims Only Applicable to HP DesignJets 3500CP and 3000CP Overdrive Shim Item 1 Linear Blade Item 2 Bail Assembly Cutter Assembly Shim Item 4 Screw Item 3 Overdrive Shim Item 1 z 3mm Minimum Figure 25E Overdrive Shims Only Applicable to HP DesignJets 3500CP and 3000CP ...

Page 290: ... figure 26 Removal Switch off the printer and remove the power cord 1 Window and Top Cover page 8Ć15 2 Left Hand Cover page 8Ć18 3 Right Hand Cover page 8Ć21 J6 MEDIA Care should be taken while performing the following procedure the entry platen has sharp edges and could cause injury ...

Page 291: ...e injury Note On the inside of the left and right hand side chassis there are locating pins item 4 The correct locating pin for the entry platen is located just below the starguard assembly Caution Be careful not to drop the entry platen Support the entry platen throughout the next step J6 MEDIA 1 Right Hand Cover page 8Ć21 2 Left Hand Cover page 8Ć18 3 Window and Top Cover page 8Ć15 ...

Page 292: ...8 80 Removal and Installation HP DesignJet CP Series Printers ...

Page 293: ...eries Printers Roll Cover and Roll Feed Assemblies Refer to figure 27 Removal Switch off the printer and remove the power cord 1 Window and Top Cover page 8Ć15 2 Left Hand Cover page 8Ć18 3 Right Hand Cover page 8Ć21 4 Service Station Assembly page ...

Page 294: ...8 82 Removal and Installation HP DesignJet CP Series Printers 1 Service Station Assembly page 2 Right Hand Cover page 8Ć21 3 Left Hand Cover page 8Ć18 4 Window and Top Cover page 8Ć15 ...

Page 295: ...Removal and Installation 8 83 HP DesignJet CP Series Printers ...

Page 296: ...or Switch off the printer and remove the power cord 1 Right Hand Cover page 8Ć21 2 Service Station Assembly page 8 26 J8 PINCH Removal of the pincharm assemblies and the pincharm shaft 1 Window and Top Cover page 8Ć15 2 Left Hand Cover page 8Ć18 3 Right Hand Cover page 8Ć21 4 Service Station Assembly page 8Ć26 5 Overdrive assembly and Drive roller page 8Ć69 loosen ...

Page 297: ...CH 1 Right Hand Cover page 8Ć21 2 Service Station Assembly page 8 26 Installation of the pincharm assemblies and the pincharm shaft 1 Overdrive Assembly and Drive Roller page 8Ć69 2 Service Station Assembly page 8Ć26 3 Left Hand Cover page 8Ć18 4 Right Hand Cover page 8Ć21 5 Window and Top Cover page 8Ć15 ...

Page 298: ...8 86 Removal and Installation HP DesignJet CP Series Printers Figure 28 Pincharm Assemblies ...

Page 299: ...r to figure 29 Switch off the printer and remove the power cord Removal of the refill interconnect cable 1 Electronics Module page 8Ć6 2 Left Hand Cover page 8Ć18 3 Right Hand Cover page 8Ć21 J1 Removal of the service station interconnect cable 1 Right Hand Cover page 8Ć21 J11 SRVCE STN ...

Page 300: ...rs Installation of the service station interconnect cable J11 SRVCE STN 1 Right Hand Cover page 8Ć21 page 4Ć6 Installation of the refill interconnect cable J1 REFILL STATION 1 Electronics Module page 8Ć6 2 Left Hand Cover page 8Ć18 3 Right Hand Cover page 8Ć21 ...

Page 301: ...Removal and Installation 8 89 HP DesignJet CP Series Printers Figure 29 Interconnect Cables ...

Page 302: ...8 90 Removal and Installation HP DesignJet CP Series Printers Media Button Only Applicable to HP DesignJets 3500CP and 3000CP Removal Switch off the printer and remove the power cord Installation ...

Page 303: ...Removal and Installation 8 91 HP DesignJet CP Series Printers Figure 30 Media Button Only Applicable to HP DesignJets 3500CP and 3000CP ...

Page 304: ......

Page 305: ...9 1 HP DesignJet CP Series Printers ...

Page 306: ...t the Printer from the power source prior to performing any cleaning DO NOT allow liquid to run on to electrical components or circuits or through openings in the enclosure as this can create a shock hazard leading to death or injury W A R N I N G General Cleaning 1 2 3 ...

Page 307: ...nly by HP trained personnel otherwise personal injury may occur 4 1 0 1 0 0 0 not 1 2 1 0 0 O 3 2 1 4 1 3 3 1 1 4 Enter 1 4 Arrow 1 3 1 Enter 1 0 1 0 3 5 Arrow 1 3 1 Enter 6 Arrow 1 3 1 Enter 7 Up Arrow 0 1 Enter Diagnostics D15 Clean Roller 8 3 1 4 9 3 1 4 Up Arrow 0 Down Arrow 4 0 10 0 0 1 1 0 1 4 1 0 1 1 11 Previous 0 1 3 1 4 12 0 0 13 0 1 ...

Page 308: ...3 1 1 3 3 423 1 3 2 3 1 3 1 3 3 7 4 4 1 1 32 3 3 3 3 1 4 43 62 7 8 1 3 3 3 2 3 2 2 3 423 1 14 2 3 1 3 04 38 1 2 3 4 42 1 3 1 41 2 41 2 2 4 1 5 3 5 3 2 3 5 3 2 41 2 9 241 1 1 41 3 1 4 3 Level of Printer Usage 1 1 3 1 42 2 5 1 1 32 6 3 1 1 3 3 1 3 1 8 3 1 32 1 2 1 3 3 2 3 4 1 2 1 8 1 1 1 42 3 2 3 6 1 7 3 8 8 12 1 3 1 3 1 2 3 3 1 3 1 2 42 1 3 3 1 42 3 2 3 3 6 3 2 15 4 1 1 04 3 8 3 4 3 12 2 22 3 4 3 3...

Page 309: ...P Series printers Preventive Maintenance Kit Ć Part Number C4704Ć60284 Only Applicable to HP DesignJets 2500CP 2000CP Preventive Maintenance Kit Ć Part Number C4723Ć60141 Only Applicable to HP DesignJets 3500CP 3000CP YĆaxis Maintenance Parts ...

Page 310: ...9 6 Preventive Maintenance HP DesignJet CP Series Printers ...

Page 311: ...10 1 HP DesignJet CP Series printers ...

Page 312: ... Standby Media Pinch Service Station Stepper Motor X Axis Service Station Stepper Motor Z Axis Primer Assembly Stepper Motor Motor X Axis Assembly Pinch Wheel Sensor Media Sensor Button Standby Station Service Service Station Refill Interconnect Cable Cable Trailing Panel Front Code ROM Data DRAM Refill Interconnect Cable X Axis Motor X Axis Encoder Electronics Module Interconnect Cable Elevator S...

Page 313: ... 256 24 1 6924 9 3428 5 6 6 62 34 16 342 55 1 2 6 5 6 5 3 4 240 6 6 5 56 0 6 342 5524 6 21642 1 6 0 024 342 55 6 5 6 1 5 16 62 6 44 1 6 34 16 5 8 6 94 6 1 5 56 0 9 6 6 5 0 6 0 6 026245 1 6 26 4 5 56 05 4 21642 6 3 4 3 4 21642 44 211 6 62 6 0 1 8 6 64 1 34 16 6 1 329 4 20 5 420 6 0 1 44 216 15 692 5 24 4 8 1 6 274 34 16 5 52 21 6 44 4 1 2 7 62 6 218 46 45 5 5 021 624 6 34 16 5 6 6 03 4 674 1 70 6 5...

Page 314: ...10 4 Functional Overview HP DesignJet CP Series printers YĆAxis Assembly Carriage YĆaxis belt and YĆaxis belt tensioner YĆaxis motor assembly Encoder Strip ...

Page 315: ...Functional Overview 10 5 HP DesignJet CP Series Printers Trailing cable Service Station Assembly Primer Assembly Refill Assembly ...

Page 316: ...emoval and installation of the four ink cartridges The XĆaxis assembly is located on the right hand side of the printer and contains a dc motor This turns the drive roller via a worm drive and a helical gear Most of the electronics used by the printer are located in the electronics module This enables the electronics to be repaired by simple removing the whole module and replacing it with a new on...

Page 317: ...Functional Overview 10 7 HP DesignJet CP Series Printers ...

Page 318: ...10 8 Functional Overview HP DesignJet CP Series printers ...

Page 319: ...Glossary 1 HP DesignJet CP Series Printers ...

Page 320: ...inding Obstruction to movement Bi Tronics A parallel interface standard _C Degree s Celsius CAD Computer Aided Design Calib Calibration CAM Computer Aided Manufacturing Carriage Axis The axis along which the car riage moves Y axis Carriage LED Line sensor Cartridge Print cartridge pen Centronics A parallel interface standard Checkout Of nozzles testing of nozzles by fir ing them one by one Checksu...

Page 321: ...eed to be rasterized by the plotter itself ft foot feet Halftoning The placement of dots to create a visual effect of different colors or different shades of gray Hard Disk Held in the Electronics Module in a moulded foam It has 2GB of memory Helical Gear Right hand drive roller gear HP Hewlett Packard HP GL Precursor of HP GL 2 HP GL 2 Hewlett Packard s standard graphics language for its plotters...

Page 322: ...that indicates to the plotter that it will receive all data already in the order in which it should be plotted Nozzles 240 holes in the printhead through which ink is fired onto the media Off axis Ink System A system whereby ink is pumped to the cartridges from a reservoir that does not move with the carriage PAL Programmable Array Logic Palette A set of pens for which width and shading are define...

Page 323: ...or defining a plot directly in terms of the pixels rather than as vectors Raster Image Processor Software that con verts graphics data to pixel format Refill Interconnect PCA The PCA located on the left hand side chassis It connects the Refill Assembly the Elevator Assembly Bail Motor and the Y axis Assembly all on to one PCA this is then connected to the main PCA via the Refill Interconnect Cable...

Page 324: ...eta z Error A print quality error caused when the nozzles on a printhead are not perpen dicular to the carriage axis The error shows up as jagged vertical lines Troubleshoot The system of finding the com ponent s which have failed Translucent Describes a type of media through which light passes UART Universal Asynchronous Receiver Transmitter Unidirectional Print Mode A print mode in which plottin...

Page 325: ...Index 1 HP DesignJet CP Series Printers ...

Page 326: ...vice 1Ć8 Cam Journal 8Ć86 Carriage noisy 1Ć9 Service Calibration 5Ć6 carriage noise 9Ć2 Carriage Assembly 8Ć42 Carriage Axis Service Test 4Ć11 Carriage Clamp 8Ć42 Clean Roller Service Test 4Ć28 Cleaning drive roller 9Ć3 Electrical Contacts 1Ć17 9Ć4 general 9Ć2 Printer 9Ć2 Color Service Calibration 5Ć15 Color Alignment Quality Test Pattern 6Ć14 Color Variation Test Pattern 6Ć16 Cover Sensors proble...

Page 327: ...ge 1Ć13 Ink System 1Ć13 Interconnect Cables 8Ć89 Internal Prints 1Ć18 Left Hand Cover 8Ć18 Left Hand Lateral Cover 8Ć6 8Ć10 Left Hand Side Plate 8Ć18 Lens Maintenance problem 1Ć10 Line Sensor 8Ć45 problem 1Ć12 Service Calibration 5Ć9 Service Test 4Ć9 Liquids 8Ć4 Mains 8Ć4 Maintenance scheduled 9Ć4 Service Calibration 5Ć18 Media 6Ć2 6Ć17 Media advance problems Banding 6Ć10 Media Axis Service Test 4...

Page 328: ... 1Ć10 Banding 6Ć8 Cover Sensors 1Ć10 Cutter 1Ć10 Image Quality 1Ć8 6Ć2 Lens Maintenance 1Ć10 Line Sensor 1Ć12 Media Loading 1Ć9 No Power ON 1Ć12 Print Quality 6Ć18 Refill 1Ć15 Programming Second Flash SIMM 1Ć6 Protective earth terminal 8Ć4 PSU Black Plastic Guard 8Ć12 Refill Service Calibration 5Ć8 Service Test 4Ć16 refill problems 1Ć15 Refill Assembly 8Ć57 Refill Interconnect 8Ć66 Refill Sensor C...

Page 329: ...uracy 5Ć16 Service Station 5Ć11 when required 5Ć2 Service Print 1Ć18 Service Station Interconnect Cable 8Ć26 8Ć27 Interconnect PCA 8Ć26 8Ć27 Motor Gear 8Ć26 Noisy 1Ć9 Service Calibration 5Ć11 Service Station Flag 8Ć26 Service Test 4Ć15 Service Tests 4Ć1 4Ć3 Bail 4Ć23 Carriage Axis 4Ć11 Clean Roller 4Ć28 Cutter 4Ć22 Electronics 4Ć6 entering 4Ć5 Erase EEROM 4Ć29 Front Panel 4Ć17 HDD Revision 4Ć31 Im...

Page 330: ...Ć7 2Ć2 Tests Service 1Ć7 Tools 8Ć5 Trailing Cable 8Ć36 8Ć42 Carriage Clamp 8Ć36 Ferrite 8Ć36 Trailing Cable Holder 8Ć36 Troubleshooting 1Ć1 Error Codes 2Ć3 Ink System 1Ć13 Media Jams 1Ć10 Printhead Crashes 1Ć10 Printheads 6Ć2 Troubleshooting Checklist Image Quality 6Ć2 Upgrading Firmware Revision 1Ć3 PostScript Revision 1Ć4 usage level of 9Ć4 Usage report 1Ć19 Using Image Quality Print 6Ć5 Valve S...

Page 331: ... HP C4704A C4703A C4723A C4724A HP DesignJet 2500CP 3500CP 2000CP and 3000CP Service Manual HP C4704A C4703A C4723A C4724A HP DesignJet 2500CP 3500CP 2000CP and 3000CP Service Manual ...

Page 332: ...A D HP DesignJet 2000CP printers model C4703A D HP DesignJet 3500CP printers model C4724A D HP DesignJet 3000CP printers model C4723A For information about using these printers refer to the corresponding user and quick reference guides The procedures described in this manual are to be performed by HP qualified service personnel only R ...

Reviews: