8Ć15
Troubleshooting
C4699Ć90000
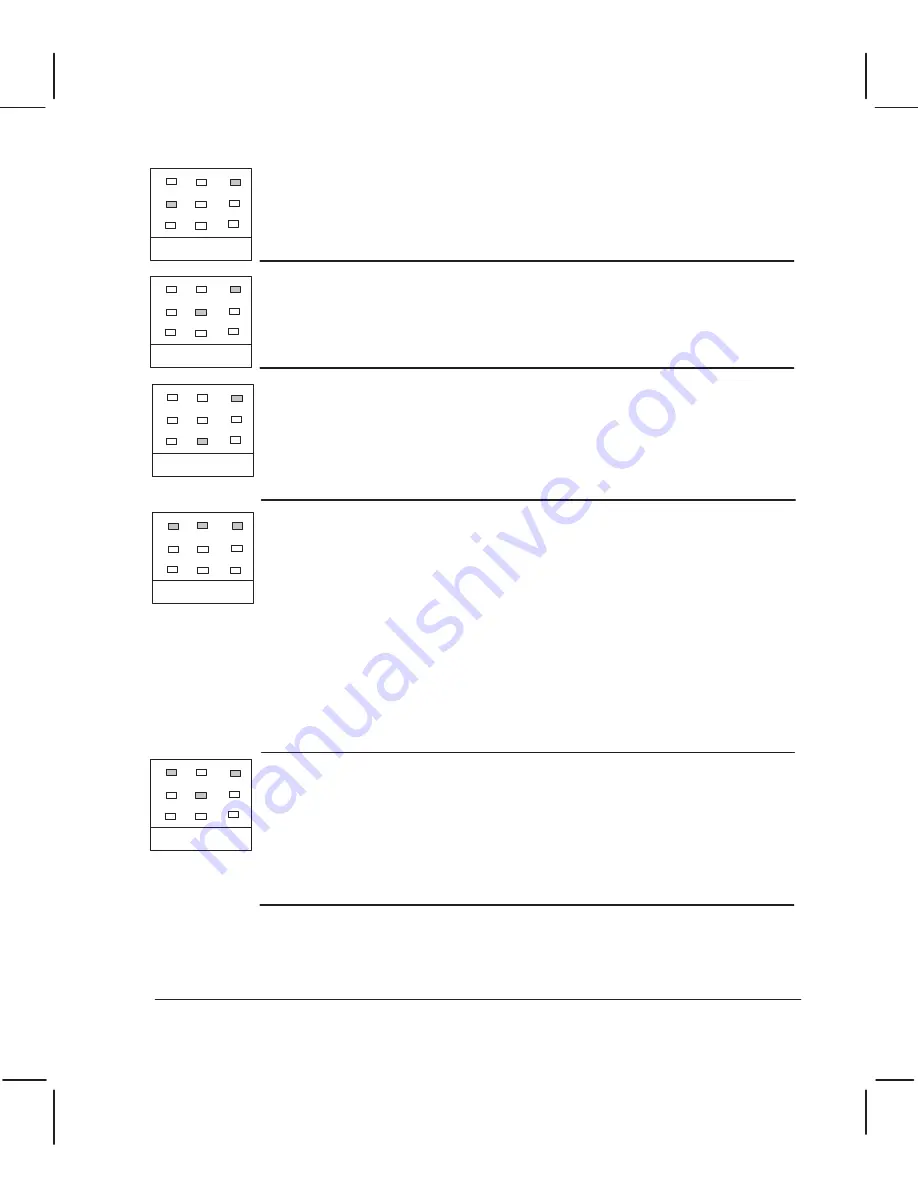
Error
Error + Normal
: Not enough memory to allocate internal data structures.
D
Turn the plotter off, and then on again to see if the problem disappears.
D
If the problem remains, consult recent service notes for a possible solution.
D
If no service note deals with this error, report the problem to your HP
Response Center. Note conditions and actions before error occurred. Include
setup sheet and service configuration plot in report.
Error + Film
: DRAM (onĆboard) or SIMM DRAM failure.
See
.
Error + Fast
: Swath RAM test failure.
Replace the electronics module.
Plain + Load Media + Error
: Servo error in the XĆaxis (media axis). Try one or
more of the following:
D
Clear any binding due to a media jam.
: Do not pull media along
the carriage axis - you could break the mediaĆsensor flags.
D
Perform the mediaĆaxis test and the servo/encoder test to check for
problems with the media motor and encoder, and the electronics module.
D
The mediaĆmotor worm and the right driveĆroller gear should have grease
on them. (Parts: Silicon grease: C3190Ć60155)
D
If necessary, remove the
right driveĆroller gear from the drive roller. Then, if you cannot manually
spin the roller, it is probably jammed.
D
Is the plotter located in an
environment of high temperature and humidity? Is this causing deformation
(flattening) of the pinchĆwheels?
D
Replace the media motor.
D
Replace the
electronics module.
For more precise troubleshooting
'
page 8Ć23,
w
System Errors.
Plain + Error + Fast
: Error detected in the EEROM. Possible causes are:
D
EEROM model ID not configured. Configure the EEROM with the correct
model ID (Instructions
'
page 8Ć28).
D
Power failure during the tests.
D
Faulty carriage PCA.
D
Faulty or badly connected trailing cable.
D
Faulty
electronics module.
D
Plotter is operating very near to powerful electrical
motors or machines.
For more information
'
page 8Ć27,
w
EEROM Errors.
For more precise troubleshooting
'
page 8Ć23,
w
System Errors.
Summary of Contents for Designjet 230
Page 1: ... ...
Page 3: ... ...
Page 13: ... ...
Page 18: ... ...
Page 19: ... ...
Page 22: ... ...
Page 23: ... ...
Page 25: ... ...
Page 28: ... ...
Page 29: ...3Ć7 Installation and Configuration C4699Ć90000 E A0Ćsize plotters only 32Kg 71 lb ...
Page 31: ... 2 1 ...
Page 32: ... ...
Page 33: ... ...
Page 39: ... ...
Page 43: ... ...
Page 59: ... ...
Page 63: ... ...
Page 64: ... Ensure that the cartridge caps are clean the wipers straight and the openings clear ...
Page 66: ... 2 1 ...
Page 69: ... ...
Page 73: ... Clip ...
Page 76: ... 5 5 mm Torx 15 ...
Page 78: ... Torx 15 Leave loose 5 5 mm Tighten slightly Torx 15 Tighten slightly ...
Page 81: ... Torx 20 ...
Page 93: ... Trailing cable under tabs ...
Page 96: ... ...
Page 103: ... the left and right sideĆplates or the lift mechanism will not work ...
Page 109: ... ...
Page 121: ... GO NO GO ...
Page 135: ... ...
Page 137: ... Flashing Can be On or Off Off On ...
Page 168: ... ...
Page 196: ... ...
Page 197: ... ...
Page 202: ... ...
Page 203: ... ...
Page 207: ... ...
Page 209: ...10Ć7 Parts and Diagrams C4699Ć90000 Top and Back Covers Electronics Trailing Cable ...
Page 211: ... ...
Page 213: ... ...
Page 215: ...10Ć13 Parts and Diagrams C4699Ć90000 CarriageĆAxis Right End ...
Page 217: ... ...
Page 219: ... ...
Page 221: ... ...
Page 223: ... ...
Page 225: ... ...
Page 227: ... ...
Page 233: ... ...
Page 242: ......
Page 243: ... ...
Page 249: ... ...


