8Ć30 Troubleshooting
C4699Ć90000
Troubleshooting Tips
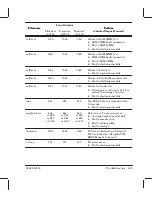
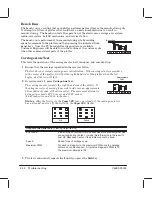
Diagnosing problems.
and
You can use
these plots to help diagnose problems. (See
pages 8Ć46 and 8Ć51).
FirmwareĆcode
revision level.
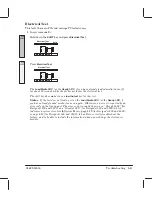
Print a
or a
to check the
firmwareĆcode revision level that the plotter is using. The plotter
may be using inĆbuilt firmware, or firmware from a flash ROM
SIMM. (Which firmware?
page 8Ć3).
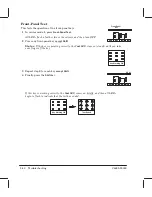
Repair and calibrate. After you have made a repair, consider whether any
have been affected.
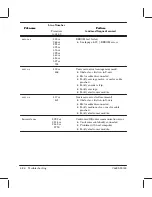
Cartridges fail
frequently.
One frequent cause of
cartridge problems is that the user has forgotten to remove the tape
from new cartridges. Remove the tape.
to clear nozzles
User's Guide.
When you prime cartridges, and there seems to be
no result, ensure that the primer tubes are not clogged up with ink.
Another frequent cause of apparent
cartridge failure may be a damaged encoder strip. If the small slots
on the strip are damaged, the plotter cannot position the carriage
correctly during cartridge checking. Try replacing the encoder
strip.
Some black cartridges (51640A) with USE
BEFORE dates of April '96 and earlier may have thinĆfilm damage.
This means that the material used for channeling ink behind the
nozzles can crack with aging. When this happens, ink seepage may
cause many nozzles to fail (eight or more). Replace the black
cartridge with one with USE BEFORE date of May '96 or later.
The connection between the carriage PCA and the
cartridge flex connector is made by means of a gold bubble on the
flex connector that touches a gold pad on the PCA. The Carriage
Test includes a test of this connection. When nozzle failures occur,
try cleaning the pads with isopropilic alcohol (warnings
page 6Ć2).
If the wipers in the service station are worn down,
they do not properly wipe the cartridge heads. Easy to replace.
Carriage sensor does
not correctly find
media edge.
Excessive ink deposits on the driveĆroller surface
can fool the sensor by reflecting the light. (Cleaning roller
chapter 4.)
The accuracy calibration
includes calibration of the optical sensor on the carriage. You must
use polyester film when performing the accuracy calibration.
Otherwise the optical sensor will have problems loading some types
of media.
Summary of Contents for Designjet 230
Page 1: ... ...
Page 3: ... ...
Page 13: ... ...
Page 18: ... ...
Page 19: ... ...
Page 22: ... ...
Page 23: ... ...
Page 25: ... ...
Page 28: ... ...
Page 29: ...3Ć7 Installation and Configuration C4699Ć90000 E A0Ćsize plotters only 32Kg 71 lb ...
Page 31: ... 2 1 ...
Page 32: ... ...
Page 33: ... ...
Page 39: ... ...
Page 43: ... ...
Page 59: ... ...
Page 63: ... ...
Page 64: ... Ensure that the cartridge caps are clean the wipers straight and the openings clear ...
Page 66: ... 2 1 ...
Page 69: ... ...
Page 73: ... Clip ...
Page 76: ... 5 5 mm Torx 15 ...
Page 78: ... Torx 15 Leave loose 5 5 mm Tighten slightly Torx 15 Tighten slightly ...
Page 81: ... Torx 20 ...
Page 93: ... Trailing cable under tabs ...
Page 96: ... ...
Page 103: ... the left and right sideĆplates or the lift mechanism will not work ...
Page 109: ... ...
Page 121: ... GO NO GO ...
Page 135: ... ...
Page 137: ... Flashing Can be On or Off Off On ...
Page 168: ... ...
Page 196: ... ...
Page 197: ... ...
Page 202: ... ...
Page 203: ... ...
Page 207: ... ...
Page 209: ...10Ć7 Parts and Diagrams C4699Ć90000 Top and Back Covers Electronics Trailing Cable ...
Page 211: ... ...
Page 213: ... ...
Page 215: ...10Ć13 Parts and Diagrams C4699Ć90000 CarriageĆAxis Right End ...
Page 217: ... ...
Page 219: ... ...
Page 221: ... ...
Page 223: ... ...
Page 225: ... ...
Page 227: ... ...
Page 233: ... ...
Page 242: ......
Page 243: ... ...
Page 249: ... ...


