8Ć40 Troubleshooting
C4699Ć90000
This tests the operation of the carriage sensor and the connection between the carriage flex
circuit and the cartridges.
Positionthe sensor over a white surface. (Simply place a piece of
white paper under the sensor.)
Inservice mode
, press
Carriage Test
.
The plottervaries the LED intensity between 255 and 0.
The plotter tests the connection between the carriage flex
circuit and the cartridges by getting the cartridge identification
and checking the electrical continuity for all nozzles.
The plotteralso tests the encodersensor. Because the encodersensoronly detects
motion, it is necessary to manually move the carriage along the encoder strip to
correctly perform the test.
During the test, the
Load Media
,
Error
and
Normal
LEDs turn on (steady) if
the carriage test has not found an error. If the test fails, one, two or all of these LEDs
flash as indicated below:
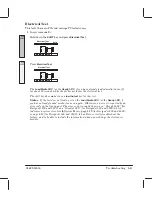
All OK
Optical Sensor
Failed
Flex-Circuit
Connection Failed
All Failed
Encoder
Sensor Failed
Output to the Serial Port (Viewing Output
'
8-36)
In order to send output to the serial port, it is necessary to set the Verbose mode ON.
This can be done using the
i
verbose 1
;
i
underware.
Error code:
If an error has occurred in the sensor test, this code specifies more
precisely what has gone wrong. Include this information in the
report to your HP Response Center, if the problem cannot be fixed.
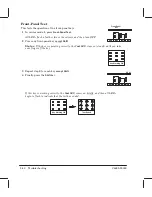
Pen 0 = Cyan; Pen 1 = Magenta; Pen 2 = Yellow; Pen 3 = Black.
Sensor sensitivity:
The sensitivity measured during the test. The figures should vary
from 255 to 0. Failure occurs when the sensitivity does not vary
(for example, it stays at 255).
Pen ID:
If a pen does not fail, the plotter outputs the pen ID.
The test continuously repeats itself until you
press the
Shift
key.
Carriage
Test
Shift
Summary of Contents for Designjet 230
Page 1: ... ...
Page 3: ... ...
Page 13: ... ...
Page 18: ... ...
Page 19: ... ...
Page 22: ... ...
Page 23: ... ...
Page 25: ... ...
Page 28: ... ...
Page 29: ...3Ć7 Installation and Configuration C4699Ć90000 E A0Ćsize plotters only 32Kg 71 lb ...
Page 31: ... 2 1 ...
Page 32: ... ...
Page 33: ... ...
Page 39: ... ...
Page 43: ... ...
Page 59: ... ...
Page 63: ... ...
Page 64: ... Ensure that the cartridge caps are clean the wipers straight and the openings clear ...
Page 66: ... 2 1 ...
Page 69: ... ...
Page 73: ... Clip ...
Page 76: ... 5 5 mm Torx 15 ...
Page 78: ... Torx 15 Leave loose 5 5 mm Tighten slightly Torx 15 Tighten slightly ...
Page 81: ... Torx 20 ...
Page 93: ... Trailing cable under tabs ...
Page 96: ... ...
Page 103: ... the left and right sideĆplates or the lift mechanism will not work ...
Page 109: ... ...
Page 121: ... GO NO GO ...
Page 135: ... ...
Page 137: ... Flashing Can be On or Off Off On ...
Page 168: ... ...
Page 196: ... ...
Page 197: ... ...
Page 202: ... ...
Page 203: ... ...
Page 207: ... ...
Page 209: ...10Ć7 Parts and Diagrams C4699Ć90000 Top and Back Covers Electronics Trailing Cable ...
Page 211: ... ...
Page 213: ... ...
Page 215: ...10Ć13 Parts and Diagrams C4699Ć90000 CarriageĆAxis Right End ...
Page 217: ... ...
Page 219: ... ...
Page 221: ... ...
Page 223: ... ...
Page 225: ... ...
Page 227: ... ...
Page 233: ... ...
Page 242: ......
Page 243: ... ...
Page 249: ... ...

