! #! "
&
Copyright HewlettĆ
Packard Company 1996
This document contains
proprietary information
that is protected by
copyright. All rights are
reserved. No part of this
document may be
photocopied, reproduced,
or translated into another
language without the prior
written consent of HewlettĆ
Packard Company.
HP internal order number
C4699Ć90000
Second edition, March
1996
Printed in U.S.A.
!!#&
The information contained
in this document is subject
to change without notice.
%##(! "
%!!#& &
%# !! # #"
#! $ $#
# # # #
%!!#"
!##&
#"" ! !#$!
$! "
HewlettĆPackard shall not
be liable for errors
contained herein or for
incidental or consequential
damages in connection
with the furnishing,
performance, or use of this
material.
The procedures described
in this manual are to be
performed by HPĆqualified
service personnel only.
#!
'!
Serious shock hazard
leading to death or injury
may result if you do not
take the following
precautions:
Ensure that the acpower
outlet (mains) has a
protective earth (ground)
terminal.
Disconnect the plotter
from the power source
prior to performing any
maintenance.
Prevent water or other
liquids from running
onto electrical
components or circuits,
or through openings in
the enclosure.
#!"## "!
Refer to the beginning of
Chapter 6 of this manual,
for precautions you should
take to prevent damage to
the plotter circuits from
electrostatic discharge.
#& &"
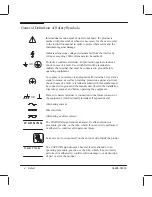
General definitions of
safety symbols are given
immediately after the table
of contents.
Learning Products, Barcelona Division
HewlettĆPackard Española, S.A.
Avda. Graells, 501
08190 Sant Cugat del Vallès
Spain
Summary of Contents for Designjet 230
Page 1: ... ...
Page 3: ... ...
Page 13: ... ...
Page 18: ... ...
Page 19: ... ...
Page 22: ... ...
Page 23: ... ...
Page 25: ... ...
Page 28: ... ...
Page 29: ...3Ć7 Installation and Configuration C4699Ć90000 E A0Ćsize plotters only 32Kg 71 lb ...
Page 31: ... 2 1 ...
Page 32: ... ...
Page 33: ... ...
Page 39: ... ...
Page 43: ... ...
Page 59: ... ...
Page 63: ... ...
Page 64: ... Ensure that the cartridge caps are clean the wipers straight and the openings clear ...
Page 66: ... 2 1 ...
Page 69: ... ...
Page 73: ... Clip ...
Page 76: ... 5 5 mm Torx 15 ...
Page 78: ... Torx 15 Leave loose 5 5 mm Tighten slightly Torx 15 Tighten slightly ...
Page 81: ... Torx 20 ...
Page 93: ... Trailing cable under tabs ...
Page 96: ... ...
Page 103: ... the left and right sideĆplates or the lift mechanism will not work ...
Page 109: ... ...
Page 121: ... GO NO GO ...
Page 135: ... ...
Page 137: ... Flashing Can be On or Off Off On ...
Page 168: ... ...
Page 196: ... ...
Page 197: ... ...
Page 202: ... ...
Page 203: ... ...
Page 207: ... ...
Page 209: ...10Ć7 Parts and Diagrams C4699Ć90000 Top and Back Covers Electronics Trailing Cable ...
Page 211: ... ...
Page 213: ... ...
Page 215: ...10Ć13 Parts and Diagrams C4699Ć90000 CarriageĆAxis Right End ...
Page 217: ... ...
Page 219: ... ...
Page 221: ... ...
Page 223: ... ...
Page 225: ... ...
Page 227: ... ...
Page 233: ... ...
Page 242: ......
Page 243: ... ...
Page 249: ... ...


