ii Using this Manual
C4699Ć90000
Using this Manual
This manual contains information necessary to test, calibrate and service:
D
HP DesignJet 230 plotters (models C4694A and C4695A)
D
HP DesignJet 250C plotters (models C3190A and C3191A)
D
HP DesignJet 330 plotters (models C4701A and C4702A)
D
HP DesignJet 350C plotters (models C4699A and C4700A)
For information about using these plotters, refer to the corresponding user and
quickĆreference guides.
The procedures described in this manual are to be performed by HPĆcertified service
personnel only.
The HP ongoing training course CEV2ĆTIJ provides training for HP Customer Engineers and
Authorized Dealers, on servicing the complete HP DesignJet series of largeĆformat,
thermalĆinkjet plotters.
Part numbers for plotter options, accessories and service parts are located in chapter 10.
This manual contains information for the monochrome HP DesignJet 230 and 330 plotters
and the color HP DesignJet 250C and 350C plotters. To highlight the differences between the
various plotters the following symbols will be used in the left margin:
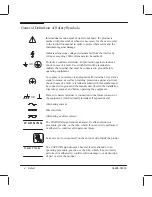
This symbol indicates the information specific only to the HP DesignJet 230 and 250C.
This symbol indicates the information specific only to the HP DesignJet 330 and 350C.
All other information not marked by these symbols is applicable to all plotters.
The term
refers generically to models C3190A, C4694A, C4699A and C4701A.
The term
refers generically to models C3191A, C4695A, C4700A and C4702A.
A small arrow
'
is used to indicate other parts of the Service Manual or User's Guide where
you can find information related to the topic you are consulting.
The
w
symbol is used to indicate the name of a referenced paragraph.
Summary of Contents for Designjet 230
Page 1: ... ...
Page 3: ... ...
Page 13: ... ...
Page 18: ... ...
Page 19: ... ...
Page 22: ... ...
Page 23: ... ...
Page 25: ... ...
Page 28: ... ...
Page 29: ...3Ć7 Installation and Configuration C4699Ć90000 E A0Ćsize plotters only 32Kg 71 lb ...
Page 31: ... 2 1 ...
Page 32: ... ...
Page 33: ... ...
Page 39: ... ...
Page 43: ... ...
Page 59: ... ...
Page 63: ... ...
Page 64: ... Ensure that the cartridge caps are clean the wipers straight and the openings clear ...
Page 66: ... 2 1 ...
Page 69: ... ...
Page 73: ... Clip ...
Page 76: ... 5 5 mm Torx 15 ...
Page 78: ... Torx 15 Leave loose 5 5 mm Tighten slightly Torx 15 Tighten slightly ...
Page 81: ... Torx 20 ...
Page 93: ... Trailing cable under tabs ...
Page 96: ... ...
Page 103: ... the left and right sideĆplates or the lift mechanism will not work ...
Page 109: ... ...
Page 121: ... GO NO GO ...
Page 135: ... ...
Page 137: ... Flashing Can be On or Off Off On ...
Page 168: ... ...
Page 196: ... ...
Page 197: ... ...
Page 202: ... ...
Page 203: ... ...
Page 207: ... ...
Page 209: ...10Ć7 Parts and Diagrams C4699Ć90000 Top and Back Covers Electronics Trailing Cable ...
Page 211: ... ...
Page 213: ... ...
Page 215: ...10Ć13 Parts and Diagrams C4699Ć90000 CarriageĆAxis Right End ...
Page 217: ... ...
Page 219: ... ...
Page 221: ... ...
Page 223: ... ...
Page 225: ... ...
Page 227: ... ...
Page 233: ... ...
Page 242: ......
Page 243: ... ...
Page 249: ... ...


