4Ć2 Preventive Maintenance
C4699Ć90000
Moisture on Plotter
Users should use the plotter in an environment between 5% and 95% relative humidity. To
recover from moisture condensation, turn the plotter off, and, using the main roller as a
reference, wait until the plotter is completely dry before using it again. (Other environmental
specifications
chapter 2.)
Level of Plotter Usage
To achieve good performance and long lifetime of the HP DesignJet 230/250C and
HP DesignJet 330/350C plotters, users should limit use to the following recommendations
(duty cycle):
Average number of plots per day
Maximum number of plots per day
10 E/A0 CAD plots
20 E/A0 CAD plots
The service configuration plot gives an indication of how much the plotter has been used:
number of plots, number of cartridges, number of times the plotter has been turned on.
(Details
page 8Ć49/8Ć50.)
Friction on Slider Rod
The carriage bushings are made of a porous composite material. Oil stays inside them by
means of capillary action. Never place the bushings on an absorbant material. To prevent
friction of the bushings on the slider rod, remove dirt from the slider rod and chassis beam.
Apply oil (Anderol 4068, HP part number: 6040Ć0858) to the slider rod (
3 drops) and to the
bushings if they are running dry.
Noisy Carriage Wheel
To prevent noisy movement of the carriage, remove aluminum or dust particles from the
wheel at the back of the carriage, and from the slider path along which the wheel moves.
Summary of Contents for Designjet 230
Page 1: ... ...
Page 3: ... ...
Page 13: ... ...
Page 18: ... ...
Page 19: ... ...
Page 22: ... ...
Page 23: ... ...
Page 25: ... ...
Page 28: ... ...
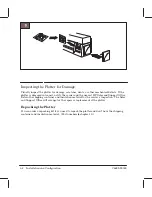
Page 29: ...3Ć7 Installation and Configuration C4699Ć90000 E A0Ćsize plotters only 32Kg 71 lb ...
Page 31: ... 2 1 ...
Page 32: ... ...
Page 33: ... ...
Page 39: ... ...
Page 43: ... ...
Page 59: ... ...
Page 63: ... ...
Page 64: ... Ensure that the cartridge caps are clean the wipers straight and the openings clear ...
Page 66: ... 2 1 ...
Page 69: ... ...
Page 73: ... Clip ...
Page 76: ... 5 5 mm Torx 15 ...
Page 78: ... Torx 15 Leave loose 5 5 mm Tighten slightly Torx 15 Tighten slightly ...
Page 81: ... Torx 20 ...
Page 93: ... Trailing cable under tabs ...
Page 96: ... ...
Page 103: ... the left and right sideĆplates or the lift mechanism will not work ...
Page 109: ... ...
Page 121: ... GO NO GO ...
Page 135: ... ...
Page 137: ... Flashing Can be On or Off Off On ...
Page 168: ... ...
Page 196: ... ...
Page 197: ... ...
Page 202: ... ...
Page 203: ... ...
Page 207: ... ...
Page 209: ...10Ć7 Parts and Diagrams C4699Ć90000 Top and Back Covers Electronics Trailing Cable ...
Page 211: ... ...
Page 213: ... ...
Page 215: ...10Ć13 Parts and Diagrams C4699Ć90000 CarriageĆAxis Right End ...
Page 217: ... ...
Page 219: ... ...
Page 221: ... ...
Page 223: ... ...
Page 225: ... ...
Page 227: ... ...
Page 233: ... ...
Page 242: ......
Page 243: ... ...
Page 249: ... ...

