2–20
Company confidential. Pelican User’s Guide, Ed 1, Final. Freeze Status: frozen
This is the cyan on page 2–20 (seq: 60)
This is the black on page 2–20 (seq: 60)
5
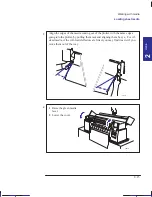
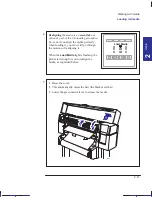
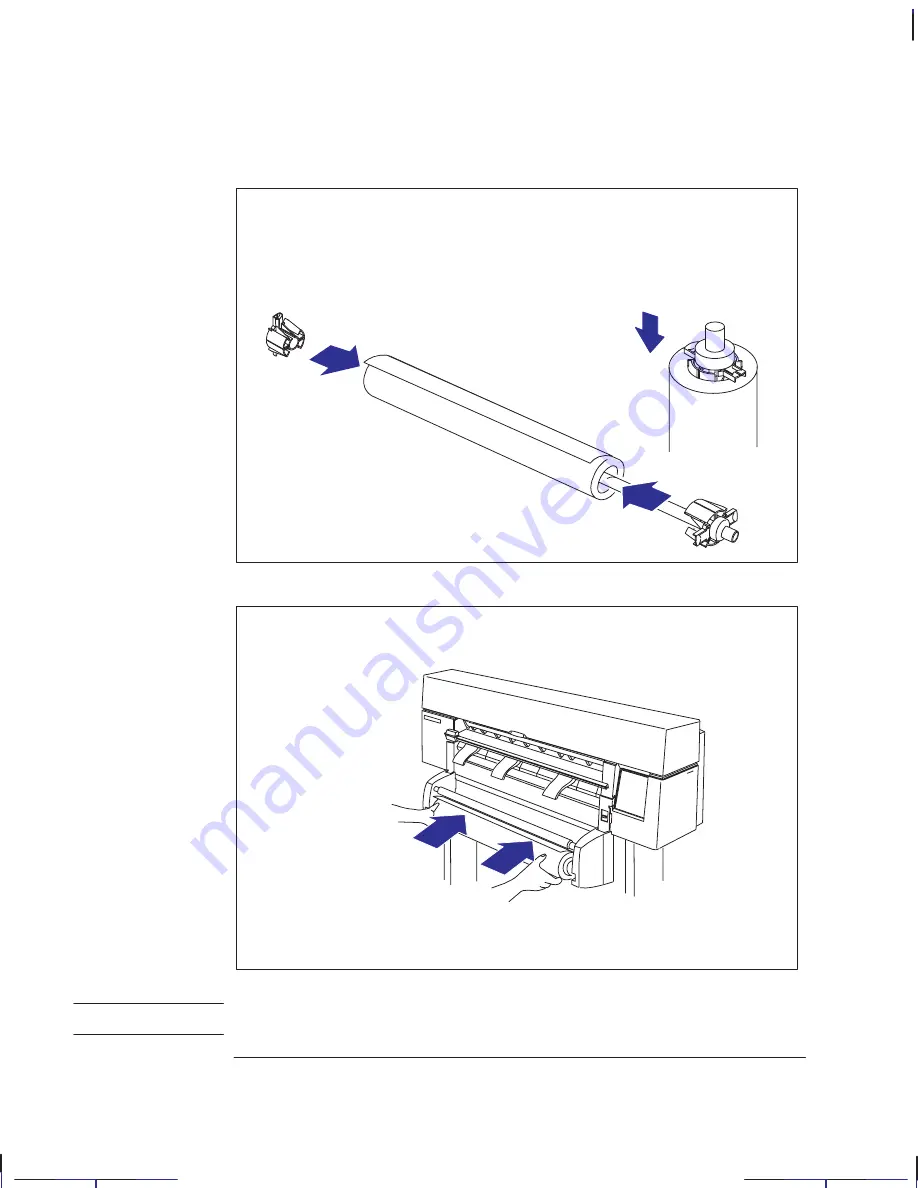
Remove the new roll from its wrapping, Place it on the spindle, so that, as the
media winds up from behind the roll, the media stop still on the spindle is on
the right. Push the right media stop so that it is flush against the end of the roll
(2 in the graphic below). Then insert the left media stop on the left end of the
spindle.
3
1
2
1922b
1930
6
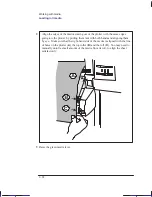
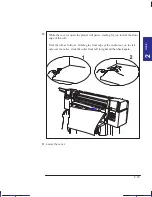
Put the loaded spindle back in the plotter, pushing first the right side into place
and then the left.
Make sure that each end of the spindle slots firmly into place with an audible
“click”.
1921a
1
2
It is important to make sure that the spindle is firmly in place, otherwise it
could fall off the plotter.
Working with media
Loading roll media
Localization Note. .Treat as new.
W A R N I N G
Summary of Contents for Designjet 330
Page 1: ...C4699 90031 English HP DesignJet 330 and 350C Plotters User s Guide ...
Page 4: ...iv ...
Page 14: ...xiv ...
Page 92: ...4 4 ...
Page 114: ...6 12 ...
Page 124: ...7 10 ...
Page 125: ...8 1 FRONT PANEL 8 LIGHTS Front panel lights 8 ...
Page 150: ...9 20 ...
Page 170: ...10 20 ...
Page 171: ...11 1 GLOSSARY 11 Glossary 11 ...
Page 180: ......


