Using external AC power
External AC power is supplied through one of the following devices:
WARNING!
To reduce potential safety issues, use only the AC adapter provided with the
computer, a replacement AC adapter provided by HP, or a compatible AC adapter purchased
from HP.
●
AC adapter included with the computer
●
Optional docking device or expansion product
●
Optional power adapter
Connect the computer to external AC power under any of the following conditions:
●
When you are charging or calibrating a battery
WARNING!
Do not charge the computer battery while you are onboard aircraft.
●
When you are installing or modifying system software
●
When you are writing information to a CD or DVD
When you connect the computer to external AC power, the following events occur:
●
The battery begins to charge.
●
If the computer is turned on, the battery meter icon in the notification area changes appearance.
When you disconnect external AC power, the following events occur:
●
The computer switches to battery power.
●
The display brightness is automatically decreased to save battery life. To increase display
brightness, press the
fn+f8
hotkey or reconnect the AC adapter.
Connecting the AC adapter
WARNING!
To reduce the risk of electric shock or damage to the equipment:
Plug the power cord into an AC outlet that is easily accessible at all times.
Disconnect power from the computer by unplugging the power cord from the AC outlet (not by
unplugging the power cord from the computer).
If provided with a 3-pin attachment plug on the power cord, plug the cord into a grounded (earthed)
3-pin outlet. Do not disable the power cord grounding pin, for example, by attaching a 2-pin
adapter. The grounding pin is an important safety feature.
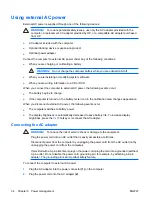
To connect the computer to external AC power:
1.
Plug the AC adapter into the power connector
(1)
on the computer.
2.
Plug the power cord into the AC adapter
(2)
.
34
Chapter 3 Power management
ENWW
Summary of Contents for DV3610EA
Page 1: ...Notebook PC User Guide User Guide ...
Page 6: ...vi ENWW ...
Page 46: ...5 Tighten the hard drive cover screws 3 40 Chapter 4 Drives ENWW ...
Page 73: ......

