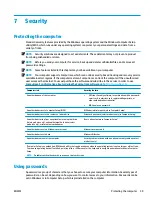
Disabling Automatic DriveLock
To disable Automatic DriveLock, follow these steps:
1.
Start Computer Setup.
●
Computers or tablets with keyboards:
1.
Turn off the computer.
2.
Press the power button, and when the HP logo appears, press
f10
to enter Computer Setup.
●
Tablets without keyboards:
1.
Turn off the tablet.
2.
Press the power button in combination with the volume down button until the Startup menu
is displayed, and then tap f10 to enter Computer Setup.
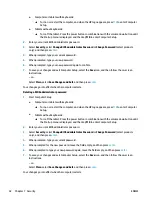
2.
At the BIOS administrator password prompt, enter the BIOS administrator password, and then press
enter
.
3.
Select Security, select Hard Drive Utilities, select DriveLock/Automatic DriveLock, and then press
enter
.
4.
Select an internal hard drive, and then press
enter
.
5.
Use the
enter
key, left mouse click, or touch screen to clear the Automatic DriveLock check box.
6.
To save your changes and exit Computer Setup, select the Save icon, and then follow the on-screen
instructions.
– or –
Select Main, select Save Changes and Exit, and then press
enter
.
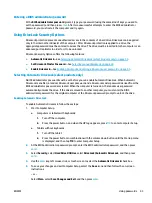
Entering an Automatic DriveLock password
While Automatic DriveLock is enabled and the drive remains attached to the original computer, you will not be
prompted to enter a DriveLock password to unlock the drive. However, if the drive is moved to another
computer, or the system board is replaced on the original computer, you will be prompted to provide the
DriveLock password.
If this happens, at the DriveLock Password prompt, type the BIOS administrator password for the original
computer (using the same kind of keys you used to set the password), and then press
enter
to unlock the
drive.
After three incorrect attempts to enter the password, you must shut down the computer and try again.
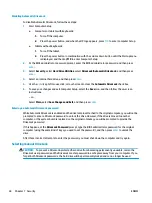
Selecting manual DriveLock
CAUTION:
To prevent a DriveLock-protected hard drive from becoming permanently unusable, record the
DriveLock user password and the DriveLock master password in a safe place away from your computer. If you
forget both DriveLock passwords, the hard drive will be permanently locked and can no longer be used.
44
Chapter 7 Security
ENWW
Summary of Contents for EliteBook 820 G4
Page 1: ...User Guide ...
Page 4: ...iv Safety warning notice ENWW ...
Page 6: ...vi Processor configuration setting select products only ENWW ...
Page 12: ...xii ENWW ...

