3.
Disconnect the power from the computer by first unplugging the power cord from the AC outlet,
and then unplugging the AC adapter from the computer.
4.
Remove the battery (see
Battery on page 60
).
5.
Remove the following components:
a.
Bottom door (see
Bottom door on page 66
).
b.
Hard drive (see
Hard drive on page 71
)
c.
Optical drive (see
Optical drive on page 67
)
d.
WLAN module (see
WLAN module on page 78
)
e.
WWAN module (see
WWAN module on page 76
)
f.
Fan (see
Fan on page 87
)
g.
Heat sink (see
Heat sink on page 89
)
h.
Keyboard (see
Keyboard on page 95
)
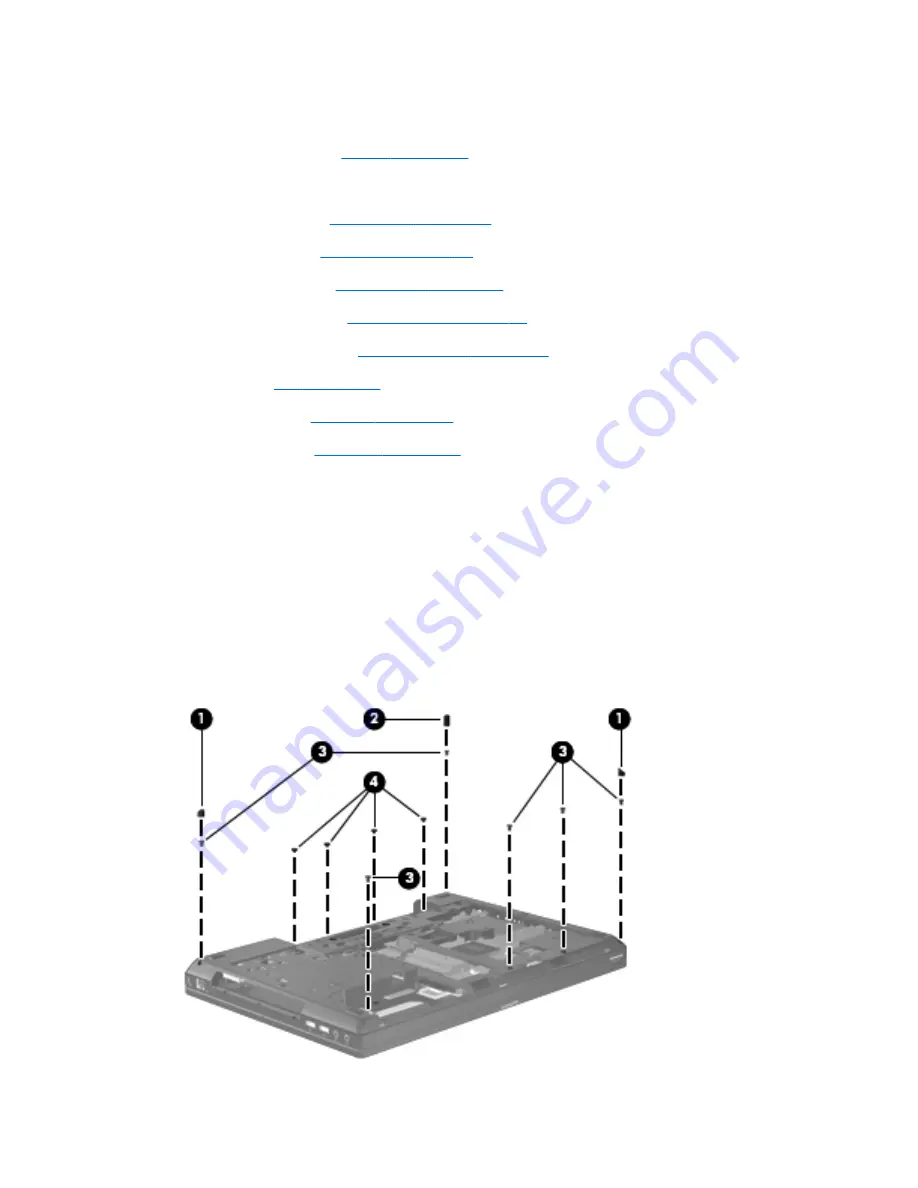
Remove the bottom cover:
1.
Position the computer upside-down with the front toward you.
2.
Remove the following covers and screws that secure the bottom cover to the computer:
(1)
2 small rubber screw covers
(2)
1 large rubber screw cover
(3)
6 Torx PM2.5×6.0 screws
(4)
4 Phillips PM2.5×3.0 screws from the battery bay
98
Chapter 4 Removal and replacement procedures


