Replacing the service door
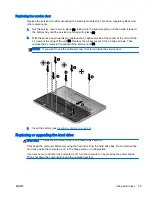
Replace the service door after accessing the memory module slot, hard drive, regulatory label, and
other components.
1.
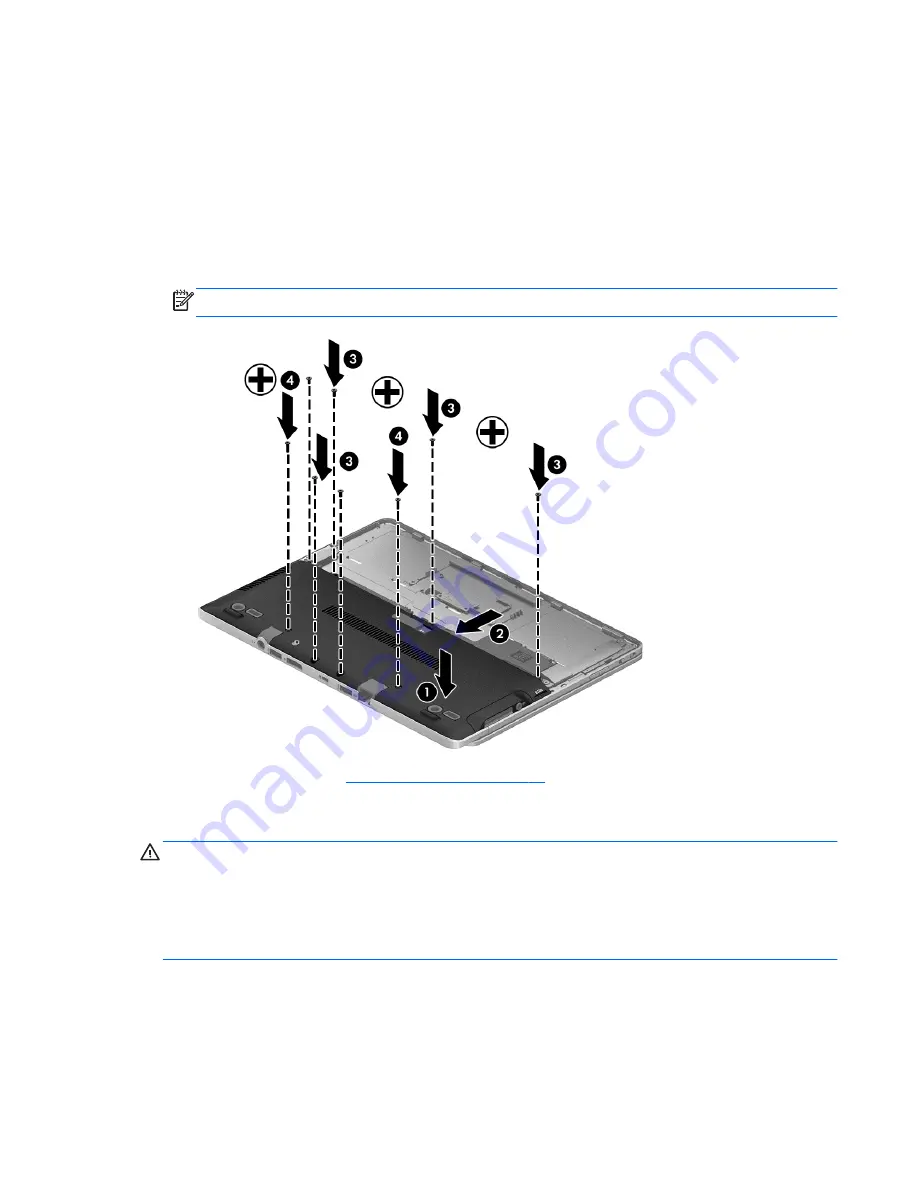
Set the service cover down in place (1), taking care to align it properly, and then slide it toward
the battery bay until the service door snaps into place (2).
2.
With the service bay towards you, replace the 3 captive screws at the center of the unit and the
2 screws at the edge of the unit (3). Replace the rubber covers for the 2 edge screws. Then
replace the 2 screws in the middle of the service door (4).
NOTE:
If you want to use the optional screw, it is stored inside the service door.
3.
Insert the battery (see
Inserting a battery on page 44
).
Replacing or upgrading the hard drive
CAUTION:
To prevent information loss or an unresponsive system:
Shut down the computer before removing the hard drive from the hard drive bay. Do not remove the
hard drive while the computer is on, in the Sleep state, or in Hibernation.
If you are not sure whether the computer is off, turn the computer on by pressing the power button.
Then shut down the computer through the operating system.
ENWW
Using hard drives 55
Summary of Contents for EliteBook Revolve 810 G2 Tablet
Page 1: ...User Guide ...
Page 4: ...iv Safety warning notice ENWW ...
Page 14: ...4 Chapter 1 Welcome ENWW ...
Page 32: ...22 Chapter 3 Connecting to a network ENWW ...
Page 44: ...34 Chapter 4 Navigating using the keyboard touch gestures and pointing devices ENWW ...
Page 58: ...48 Chapter 6 Power management ENWW ...
Page 68: ...58 Chapter 8 Drives ENWW ...
Page 84: ...74 Chapter 10 Maintenance ENWW ...
Page 96: ...86 Chapter 12 Computer Setup BIOS MultiBoot and HP PC Hardware Diagnostics UEFI ENWW ...
Page 100: ...90 Chapter 13 Support ENWW ...
Page 101: ...14 Specifications Input power Operating environment ENWW 91 ...
Page 104: ...94 Chapter 14 Specifications ENWW ...
Page 112: ...102 Appendix C Electrostatic discharge ENWW ...
Page 116: ...106 Index ENWW ...

