background image

D

Accessibility

HP designs, produces, and markets products and services that can be used by everyone, including people with 

disabilities, either on a stand-alone basis or with appropriate assistive devices.

Supported assistive technologies

HP products support a wide variety of operating system assistive technologies and can be configured to work 

with additional assistive technologies. Use the Search feature on your device to locate more information 

about assistive features.

NOTE:

For additional information about a particular assistive technology product, contact customer support 

for that product.

Contacting support

We are constantly refining the accessibility of our products and services and welcome feedback from users. If 

you have an issue with a product or would like to tell us about accessibility features that have helped you, 

please contact us at (888) 259-5707, Monday through Friday, 6 a.m. to 9 p.m. Mountain Time. If you are deaf 

or hard-of-hearing and use TRS/VRS/WebCapTel, contact us if you require technical support or have 

accessibility questions by calling (877) 656-7058, Monday through Friday, 6 a.m. to 9 p.m. North American 

Mountain Time.

NOTE:

Support is in English only.

46

Appendix D   Accessibility

Summary of Contents for Engage Go Convertible System

Page 1: ...Hardware Reference Guide HP Engage Go Convertible System HP Engage Go Mobile System HP Engage Go Dock ...

Page 2: ...atures are available in all editions or versions of Windows Systems may require upgraded and or separately purchased hardware drivers software or BIOS update to take full advantage of Windows functionality Windows 10 is automatically updated which is always enabled ISP fees may apply and additional requirements may apply over time for updates Go tohttp www microsoft com To access the latest user g...

Page 3: ... Indicates information considered important but not hazard related for example messages related to property damage An Important alert warns the user that failure to follow a procedure exactly as described could result in loss of data or in damage to hardware or software Also contains essential information to explain a concept or to complete a task NOTE Contains additional information to emphasize ...

Page 4: ...iv About This Book ...

Page 5: ...rinter and advanced I O connectivity base 11 Cable matrix for HP Engage Go Convertible System without I O connectivity base 12 Cable matrix for HP Engage Go Convertible System with I O connectivity base 13 Cable matrix for HP Engage Go Convertible System with basic I O connectivity base and standalone printer 14 Cable matrix for HP Engage Go Convertible System with advanced I O connectivity base a...

Page 6: ...rinting features 33 When to change the receipt paper 34 Loading the printer receipt paper 34 Thermal paper specifications 35 Qualified paper grades 35 Troubleshooting the printer 37 Printer tone and green light 37 Printing issues 37 Printer does not function 38 Latch failsafe 39 5 Configuring the software 40 Touch screen calibration for Windows 10 Professional and Windows 10 IoT Enterprise for Ret...

Page 7: ...Cleaning I O ports 45 Updating drivers and firmware 45 Shipping preparation 45 Appendix D Accessibility 46 Supported assistive technologies 46 Contacting support 46 Index 47 vii ...

Page 8: ...viii ...
Page 9: ...d mate magnet assisted one handed docking experience Optional countertop mounting bracket Low profile electromechanical attach point for the convertible dock enabling connectivity to a smart locking system and POS peripherals Indicator light that shows status of the locking state Optional HP peripherals Carrying case with shoulder strap for hands free retailing or extended use outdoors Integrated ...

Page 10: ...m 4 Webcam light 13 Barcode scanner button 5 Webcam 14 SIM card door 6 Charging light 15 Volume down button 7 USB SuperSpeed charging ports 2 16 Volume up button 8 Barcode scanner button 17 Audio jack 9 Fingerprint reader optional NOTE You cannot have a WWAN LTE module and a barcode scanner in the same unit You can have neither or either but not both 2 Chapter 1 Product overview ...

Page 11: ... Case 2 HP ElitePOS Integrated Column Printer 6 Integrated MSR 3 Docking lock release button 7 HP ElitePOS Biometric Fingerprint Reader 4 Choice of two ElitePOS I O Connectivity Bases The display panel is an anti glare WLED SVA 400 nits panel NOTE The nits rating indicates the typical brightness of the panel prior to anti glare coating Integrated features 3 ...

Page 12: ...c components 1 Cash drawer jack 7 USB Type C port 2 Power connector 8 RJ 45 network jack 3 USB Type C power port 9 Security cable slot 4 Powered serial ports 3 10 MicroSD card reader 5 USB 2 0 ports 4 11 Audio out headphone Audio in microphone jack 6 USB 3 0 ports 2 IMPORTANT To avoid damage to the system DO NOT plug a telephone cable into the cash drawer jack 4 Chapter 1 Product overview ...

Page 13: ...3 Powered USB 24 V port 9 RJ 45 network jack 4 Power connector 10 Security cable slot 5 USB Type C power port 11 MicroSD card reader 6 Powered serial ports 2 12 Audio out headphone Audio in microphone jack IMPORTANT To avoid damage to the system DO NOT plug a telephone cable into the cash drawer jack HP ElitePOS Advanced I O Connectivity Base components 5 ...

Page 14: ...ter to the power connector on the I O connectivity base 3 To connect an AC adapter to the mobility system when it is not connected to an I O connectivity base connect the AC adapter to a grounded AC outlet 1 and then connect the power adapter s USB Type C connector to the USB Type C power port on the underside of the dock s column 2 NOTE The image below is shown with a stability base 6 Chapter 1 P...

Page 15: ...ned off and power is available only from the I O connectivity base s USB Type C port that connects to the mobility head unit That port remains powered so that it can continue to communicate with the mobility head unit and allow the I O connectivity base to turn back on when the mobility head unit is turned on After the system has been turned off you can press the power button on the underside of t...

Page 16: ...ad unit You can tilt and swivel the mobility head unit to set it to a comfortable viewing angle The angle can be set between 50 and 60 The mobility head unit can be swiveled 180 in either direction 8 Chapter 1 Product overview ...

Page 17: ...er service for assistance I O connectivity base serial number location Each I O connectivity base has a unique serial number and a product ID number that are located on the exterior of the I O connectivity base Keep these numbers available for use when contacting customer service for assistance Regulatory information is located in the base plate Install the base plate back if it is removed Mobilit...

Page 18: ... 1 Column printer AC power cord 5 I O connectivity base mini USB Type B to USB Type A data cable 2 Column printer AC adapter cable 6 I O connectivity base USB Type C cable 3 Cash drawer cable purchased separately with cash drawer 7 I O connectivity base 120 W AC power cord 4 Column printer cash drawer cable 10 Chapter 2 Cable routing configurations ...

Page 19: ...ctivity base 180 W AC power cord 4 Column printer 24 V PUSB power and data Y cable 2 Cash drawer cable purchased separately with cash drawer 5 I O connectivity base USB Type C cable 3 Column printer cash drawer cable Cable matrix for HP Engage Go Convertible System with integrated column printer and advanced I O connectivity base 11 ...

Page 20: ...Cable matrix for HP Engage Go Convertible System without I O connectivity base Cables 1 AC power cord 12 Chapter 2 Cable routing configurations ...

Page 21: ...I O connectivity base USB Type C cable 5 USB C mini dock captive USB Type C cable 3 Advanced I O connectivity base 180 W AC power cord NOTE In the European region the USB C mini dock is sold as an aftermarket option kit only In all other regions the USB C mini dock is sold as drop in box option Cable matrix for HP Engage Go Convertible System with I O connectivity base 13 ...

Page 22: ...USB Type A to Type B data cable 2 Basic I O connectivity base 120 W AC power cord 5 Basic I O connectivity base USB Type C cable 3 Printer serial data cable IMPORTANT Connect either the serial data cable 3 or the USB Type A data cable 4 between the I O connectivity base and the printer Do not connect both 14 Chapter 2 Cable routing configurations ...

Page 23: ...y base 180 W AC power cord 5 Advanced I O connectivity base USB Type C cable 3 Printer 24 V PUSB power cable IMPORTANT Connect either the 24 V PUSB power and data Y cable 1 or the 24 V PUSB power cable 3 and serial data cable 4 between the I O connectivity base and the printer Do not connect all three Cable matrix for HP Engage Go Convertible System with advanced I O connectivity base and standalo...

Page 24: ...ables Arrange them so that no one may accidentally step on or trip over them Do not pull on a cord or cable When unplugging from the AC outlet grasp the cord by the plug To reduce the risk of serious injury read the Safety Comfort Guide It describes proper workstation setup and provides guidelines for posture and work habits that increase your comfort and decrease your risk of injury It also provi...

Page 25: ...head unit NOTE Both authentication methods can be used or there can be no authentication method required to unlock the mobility head unit No authentication required is the default method The light on the dock s lock release button indicates the locking status Amber The mobility head unit is locked and can not be unlocked without the proper Windows login permission White The mobility head unit is l...

Page 26: ... the mobility system properly through the operating system and turn off any external devices 2 Disconnect the power cord from the mobility system IMPORTANT Regardless of the power on state voltage is always present on the system board as long as the system is plugged into an active AC outlet You must disconnect the power cord and wait approximately 30 seconds for the power to drain to avoid damage...

Page 27: ...nd then tilt the MSR 2 up slightly and pull the MSR 3 from the USB Type C port and clips Attaching the carry case to the mobility head unit You can help protect your mobility head unit from accidental drops and bumps with the optional carry case The carry case also allows you to attach a shoulder strap for hands free retailing and add a magnetic stripe card reader MSR 1 Remove the mobility head un...

Page 28: ...obility head unit 3 out of the carry case Replacing the hand strap on the mobility head unit Follow the procedure below if you must replace the integrated hand strap on the rear of the mobility head unit 1 Remove the mobility head unit from the dock if it is attached 2 Turn off the mobility head unit properly through the operating system 3 Lift the hand strap up 1 4 To remove the hand strap slide ...

Page 29: ...and strap with the screws 1 on each side of the mobility head unit Then replace the screw covers by pressing the covers 2 down onto the mobility head unit and then sliding the covers forward Replacing the hand strap on the mobility head unit 21 ...

Page 30: ... power on state voltage is always present on the system board as long as the system is plugged into an active AC outlet You must disconnect the power cord and wait approximately 30 seconds for the power to drain to avoid damage to the internal components 3 Remove the cover on the I O connectivity base by removing the four screws on the underside of the I O connectivity base 1 and then lifting the ...

Page 31: ...ectivity base and the dock s column 6 To connect and secure the USB Type C power cable attach the cable clip to the cable 1 insert the cable tie into the hole 2 below the USB Type C port on the hub and then slide the cable clip onto the cable tie and connect the cable to the port 3 7 Connect the I O connectivity base s AC adapter to the I O connectivity base and a grounded AC outlet See Connecting...

Page 32: ...ity base 4 Connect the I O connectivity base s power supply to the I O connectivity base and a grounded AC outlet See Connecting an AC adapter to power on page 6 Configuring the I O connectivity base s powered serial ports The serial ports can be configured as standard non powered serial ports or powered serial ports Some devices use a powered serial port If the serial port is configured as a powe...

Page 33: ...ive AC outlet You must disconnect the power cord and wait approximately 30 seconds for the power to drain to avoid damage to the internal components of the I O connectivity base 3 Remove the five screws on the underside of the I O connectivity base 1 that secure the bottom plate to the I O connectivity base and then remove the bottom plate from the I O connectivity base 2 4 Adjust the voltage sele...

Page 34: ...ollow the procedure below to connect a standalone fingerprint reader to the I O connectivity base 1 Turn off the mobility system properly through the operating system and turn off any external devices 2 Disconnect the power cords from the mobility system and I O connectivity base IMPORTANT Regardless of the power on state voltage is always present on the system board as long as the system is plugg...

Page 35: ...ch the fingerprint reader to either side of the I O connectivity base but if you attach it to the left side of the I O connectivity base the fingerprint reader covers the microSD slot and the headset jack on the I O connectivity base 1 Turn off the mobility system properly through the operating system and turn off any external devices 2 Disconnect the power cords from the mobility system and I O c...

Page 36: ...B cable to the fingerprint reader 1 and route the cable under the routing clip on the fingerprint reader 2 Remove the mounting screw 3 from the underside of the I O connectivity base and then attach the bracket on the fingerprint reader assembly to the underside of the I O connectivity base 4 using the screw that was removed from the base and the short screw included in the kit 28 Chapter 3 Hardwa...

Page 37: ...ional countertop mounting bracket to mount the mobility system s column to a countertop NOTE The mounting bracket requires an 80 mm hole in the countertop The thickness of the countertop must be 10 mm to 50 mm 1 If the dock s stability base is attached to the column remove the screw on the underside of the column 1 and then remove the base 2 from the column Mounting the HP Engage Go Convertible Sy...

Page 38: ...le to connect 3 Hold the top piece of the mounting bracket against the bottom of the column route the cables through the hole in the mounting surface and then place the column over the hole on the mounting surface 4 The bottom piece of the mounting bracket can be oriented in two ways depending on the thickness of your mounting surface Orient the bracket properly for your application before attachi...

Page 39: ...ighten the wing nut 5 on the screw to fasten the bracket to the mounting surface Installing a security cable lock on the I O connectivity base You can secure the I O connectivity base to a fixed object with an optional security cable lock available from HP Insert the security cable lock into the security cable slot Then lock it in place with the key NOTE The security cable lock is sold separately ...

Page 40: ...e lock and security cable extension are sold separately as an aftermarket option kit only 1 Remove the screw from the bottom of the column 1 2 Attach the security cable extension to the bottom of the column using the tamper resistant screw 2 included with the security cable extension 3 Secure the other end of the security cable extension with a security cable lock 3 and then lock it in place with ...

Page 41: ...932 Kanji 949 Korean 936 Simplified Chinese and 950 Traditional Chinese Integrated barcodes Code 39 Code 93 Code 128 UPC A UPC E JAN8 EAN JAN13 EAN Interleaved 2 of 5 Codabar Code 128 PDF 417 two dimensional Code 128 extended GS1 Databar QR code and Datamatrix Print Monochrome in either 44 standard or 56 compressed columns on 80 mm wide thermal paper Paper path 80 0 mm Roll Diameter 50 8 mm max 2 ...

Page 42: ...the printer runs out of paper The printer may continue to accept data from the host system even though it is unable to print Data may be lost as a result Loading the printer receipt paper 1 Open the receipt cover by pushing up evenly on each side of the cover 1 until it unsnaps 2 Remove the test printout or used paper roll if necessary 3 Place the receipt paper into the paper compartment on the sp...

Page 43: ...ore diameter of 22 0 5 mm 0 87 outside and 11 5 0 5 mm 0 45 inside Qualified paper grades Contact the manufacturer of your choice to order paper HP recommends the following paper grades produced by their respective manufacturers There are a number of paper manufacturers qualified to provide this paper provided the POS paper rolls are from the recommended grades for monochrome black ink paper Quali...

Page 44: ...2 614656 KT55 F20 Koehler AG Hauptstr 2 4 D 77704 Oberkirch Germany http www koehlerpaper com en Voice 49 7802 81 0 Fax 49 7802 81 4330 KT55 F20 Mitsubishi Int l Corp USA 655 Third Ave New York New York 10017 http www mitsubishicorp com us en Voice 212 605 2000 Fax 212 605 2597 P 5035 T 8051 TP 8065 PP 5051 OJI Paper Company Ltd Ginza 4 chome Tokyo 104 Japan http www ojipaper co jp english Voice 8...

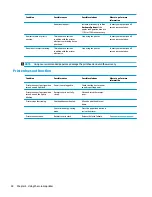
Page 45: ...quency high frequency Printer has been turned on and is ready to operate No action is required Printer beeps and the green light flashes in various combinations These all indicate a serious condition Stop using the printer Contact your authorized HP service representative Printing issues Condition Possible causes Possible solutions Where to go for more information Colored stripe on the receipt Pap...

Page 46: ...horized HP service representative NOTE Using nonrecommended paper may damage the printhead and void the warranty Printer does not function Condition Possible causes Possible solutions Where to go for more information Printer does not function when turned on and light is off Power is not plugged in Check that the host or power supply is getting power Printer does not function when turned on and the...

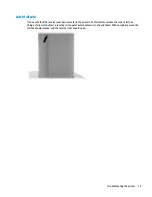
Page 47: ... stuck the printer has a failsafe to release the cover s latches Using a thin pointed object press the rectangular button adjacent to the printhead With enough pressure the latches should release and the receipt cover should open Troubleshooting the printer 39 ...

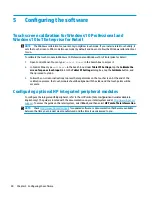
Page 48: ...PC Settings dialog box tap the Calibrate button and then proceed to step 3 3 Follow the on screen instructions to press the target marks on the touch screen At the end of the calibration process the touch module should be aligned with the video and the touch points will be accurate Configuring optional HP integrated peripheral modules To configure the integrated USB peripheral refer to the HP Poin...

Page 49: ...he MSR has optional encryption functionality HP has partnered with IDTECH Products to perform key injection services remotely For more information about their service contact the IDTECH Products sales team at Sales idtechproducts com 41 ...

Page 50: ...several methods for grounding Use one or more of the following methods when handling or installing electrostatic sensitive parts Use a wrist strap connected by a ground cord to a grounded workstation or computer chassis Wrist straps are flexible straps with a minimum of 1 megohm 10 percent resistance in the ground cords To provide proper ground wear the strap snug against the skin Use heelstraps t...

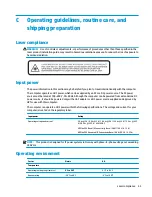
Page 51: ... DC power source it should be powered only with an AC adapter or a DC power source supplied and approved by HP for use with this computer The computer can operate on DC power within the following specifications The voltage and current for your computer is located on the regulatory label Input power Rating Operating voltage and current 5 V dc 3 A 9 V dc 3 A 10 V dc 5 A 12 V dc 5 A 15 V dc 4 33 A 20...

Page 52: ... operating system or other software including sleep states Turn off the mobility system before you do either of the following Wipe the exterior with a soft damp cloth as necessary Using cleaning products may discolor or damage the finish Occasionally clean the air vents on all vented sides of the mobility system Lint dust and other foreign matter can block the vents and limit the airflow NOTE For ...

Page 53: ...are HP recommends that you regularly download and install the latest drivers and firmware updates to help enhance system performance resolve known issues and avoid replacing parts unnecessarily Go to http www hp com support to download and install the latest drivers and BIOS updates for your specific Retail Point of Sale model Shipping preparation Follow these suggestions when preparing to ship th...

Page 54: ...ion about a particular assistive technology product contact customer support for that product Contacting support We are constantly refining the accessibility of our products and services and welcome feedback from users If you have an issue with a product or would like to tell us about accessibility features that have helped you please contact us at 888 259 5707 Monday through Friday 6 a m to 9 p m...

Page 55: ...onnectivity base advanced components 5 attaching fingerprint reader 27 attaching to mobility system 22 basic components 4 connecting power 6 connecting to mobility system 24 Input power 43 installation guidelines 16 L laser compliance 43 locking and unlocking mobility head unit 17 M mobility head unit adjustment 8 MSR attaching 18 encryption 41 maintenance 45 removing 19 O operating environment 43...

Reviews: