background image

User Guide

Summary of Contents for ENVY dv6-7200

Page 1: ...User Guide ...

Page 2: ...tional warranty HP shall not be liable for technical or editorial errors or omissions contained herein First Edition September 2012 Document Part Number 692784 001 Product notice This guide describes features that are common to most models Some features may not be available on your computer Software terms By installing copying downloading or otherwise using any software product preinstalled on thi...

Page 3: ...other hard surface such as an adjoining optional printer or a soft surface such as pillows or rugs or clothing to block airflow Also do not allow the AC adapter to come into contact with the skin or a soft surface such as pillows or rugs or clothing during operation The computer and the AC adapter comply with the user accessible surface temperature limits defined by the International Standard for ...

Page 4: ...iv Safety warning notice ...

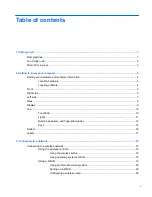
Page 5: ...ront 4 Right side 5 Left side 7 Rear 8 Display 9 Top 10 TouchPad 10 Lights 11 Buttons speakers and fingerprint reader 12 Keys 14 Bottom 16 Labels 17 3 Connecting to a network 18 Connecting to a wireless network 18 Using the wireless controls 18 Using the wireless button 19 Using operating system controls 19 Using a WLAN 19 Using an Internet service provider 20 Setting up a WLAN 20 Configuring a wi...

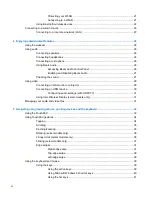
Page 6: ...nitor or projector 28 Connecting an HDMI device 30 Configuring audio settings with HDMI TV 31 Using Intel Wireless Display select models only 31 Managing your audio and video files 31 5 Navigating using touch gestures pointing devices and the keyboard 32 Using the TouchPad 33 Using TouchPad gestures 34 Tapping 34 Scrolling 35 Pinching zooming 35 Rotating select models only 36 2 finger click select...

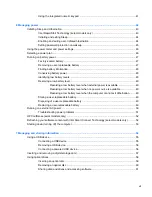
Page 7: ...Resolving a low battery level when no power source is available 49 Resolving a low battery level when the computer cannot exit Hibernation 49 Storing a user replaceable battery 49 Disposing of a user replaceable battery 49 Replacing a user replaceable battery 49 Running on external AC power 50 Troubleshooting power problems 51 HP CoolSense select models only 52 Refreshing your software content wit...

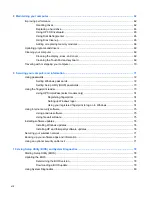
Page 8: ...ords 73 Using the fingerprint reader 73 Using HP SimplePass select models only 74 Registering fingerprints 74 Setting up Windows logon 74 Using your registered fingerprint to log on to Windows 74 Using Internet security software 75 Using antivirus software 75 Using firewall software 75 Installing software updates 76 Installing Windows updates 76 Installing HP and third party software updates 76 Se...

Page 9: ...verything and reinstall Windows 85 Recovering using HP Recovery Manager 86 What you need to know 86 Using the HP Recovery partition to recover a minimized image select models only 87 Using HP Recovery media to recover 87 Changing the computer boot order 87 Removing the HP Recovery partition 88 12 Specifications 89 Input power 89 Operating environment 90 13 Electrostatic Discharge 91 Index 92 ix ...

Page 10: ...x ...

Page 11: ...quickly return to the computer Start screen from an open app or the desktop press the Windows logo key on your keyboard Pressing the Windows logo key again will return you to the previous screen If you haven t already done so connect to a wired or wireless network See details in Connecting to a network on page 18 Become familiar with the computer hardware and software Go to Getting to know your co...

Page 12: ...talk radio from all over the world See Using audio on page 26 You know you can create a powerful presentation with Microsoft apps But did you know you can also connect to a projector to share your ideas with a group See Connecting a VGA monitor or projector on page 28 Experience music the way the artist intended with deep controlled base and clear pure sound See Using Beats Audio on page 26 Use th...

Page 13: ...t the HP Support Assistant app on the Start screen select My computer and then select User guides Important regulatory notices including proper battery disposal information Limited Warranty To access this guide select the HP Support Assistant app on the Start screen select My computer and then select Warranty and services or go to http www hp com go orderdocuments Specific warranty information abo...

Page 14: ...d in your computer Locating software To find out what software is installed on your computer from the Start screen right click using the mouse or swipe from the top of the TouchPad to display the Apps and then select the All apps icon Front Component Description Digital Media Slot Supports the following digital card formats Secure Digital SD Memory Card Secure Digital High Capacity SDHC Memory Car...

Page 15: ...ion on page 43 2 Hard drive light Blinking white The hard drive is being accessed Amber HP 3D DriveGuard has temporarily parked the hard drive NOTE For information on HP 3D DriveGuard see Using HP 3D DriveGuard on page 65 3 USB 3 0 port Connects an optional USB 3 0 device and provides enhanced USB power performance NOTE For details about different types of USB ports see Using a USB device on page ...

Page 16: ...the battery is charging Off The computer is using DC power 9 Power connector Connects an AC adapter 10 Security cable slot Attaches an optional security cable to the computer NOTE The security cable is designed to act as a deterrent but it may not prevent the computer from being mishandled or stolen 6 Chapter 2 Getting to know your computer ...

Page 17: ... 3 0 ports 2 Connect optional USB 3 0 devices and provide enhanced USB power performance NOTE For details about different types of USB ports see Using a USB device on page 55 6 Audio in microphone jack Connects an optional computer headset microphone stereo array microphone or monaural microphone 7 Audio out headphone jack Connects optional powered stereo speakers headphones earbuds a headset or a...

Page 18: ...w to cool internal components NOTE The computer fan starts up automatically to cool internal components and prevent overheating It is normal for the internal fan to cycle on and off during routine operation 8 Chapter 2 Getting to know your computer ...

Page 19: ...t screen type c and then select CyberLink YouCam 4 Webcam light On The webcam is in use 5 Speakers 2 Produce sound The antennas are not visible from the outside of the computer For optimal transmission keep the areas immediately around the antennas free from obstructions For wireless regulatory notices see the section of the Regulatory Safety and Environmental Notices that applies to your country ...

Page 20: ...hPad is off Off The TouchPad is on 3 TouchPad zone Moves the on screen pointer and selects or activates items on the screen 4 Left TouchPad button Functions like the left button on an external mouse 5 Right TouchPad button Functions like the right button on an external mouse 10 Chapter 2 Getting to know your computer ...

Page 21: ...ature is enabled at the factory Rapid Start Technology allows your computer to resume quickly from inactivity For more information see Initiating Sleep and Hibernation on page 43 2 Mute light Amber Computer sound is off Off Computer sound is on 3 Wireless light White An integrated wireless device such as a wireless local area network WLAN device and or a Bluetooth device is on Amber All wireless d...

Page 22: ...topped responding and Microsoft Windows shutdown procedures are ineffective press and hold down the power button for at least 5 seconds to turn off the computer NOTE For select models the Intel Rapid Start Technology feature is enabled at the factory Rapid Start Technology allows your computer to resume quickly from inactivity For more information see Initiating Sleep and Hibernation on page 43 To...

Page 23: ...Component Description 2 Speakers 2 Produce sound 3 Fingerprint reader Allows a fingerprint logon to Windows instead of a password logon Top 13 ...

Page 24: ...he fn key Beats Audio is an enhanced audio feature that provides a deep controlled bass while maintaining a clear sound Beats Audio is enabled by default Opens Beats Audio Control Panel which allows you to view and control all audio settings NOTE To open Beats Audio Control Panel from the Start screen type c select Control Panel select Hardware and Sound and then select Beats Audio Control Panel 5...

Page 25: ...al function indicated by the directional arrows on the keys NOTE The keypad function that is active when the computer is turned off is reinstated when the computer is turned back on 8 Integrated numeric keypad Set at the factory to function like an external numeric keypad To alternate between this numeric function and the navigational function indicated by the directional arrows on the keys press ...

Page 26: ...ess compartment and memory module compartment The service door provides access to the hard drive bay wireless compartment and memory module compartment CAUTION To prevent an unresponsive system replace the wireless module only with a wireless module authorized for use in the computer by the governmental agency that regulates wireless devices in your country or region If you replace the module and ...

Page 27: ...upport The service label is affixed inside the battery bay Regulatory label Provides regulatory information about the computer The regulatory label is affixed inside the battery bay Wireless certification label or labels Provide information about optional wireless devices and the approval markings of some of the countries or regions in which the devices have been approved for use If your computer ...

Page 28: ...e select models only A wireless wide area network WWAN device that gives you wireless connectivity over a much larger area Mobile network operators install base stations similar to cell phone towers throughout large geographic areas effectively providing coverage across entire states regions or even countries Bluetooth device Creates a personal area network PAN to connect to other Bluetooth enable...

Page 29: ... operating system controls 1 From the Start screen type n and then select Settings 2 Type network and sharing in the search box and then select Network and Sharing Center For more information from the Start screen type h and then select Help and Support Using a WLAN With a WLAN device you can access a wireless local area network WLAN which is composed of other computers and accessories that are li...

Page 30: ...urchased separately A wireless computer 3 NOTE Some modems have a built in wireless router Check with your ISP to determine what type of modem you have The illustration below shows an example of a wireless network installation that is connected to the Internet As your network grows additional wireless and wired computers can be connected to the network to access the Internet For help in setting up...

Page 31: ...e device is on the wireless light is on If the wireless light is off press the wireless button NOTE On some models the wireless light is amber when all wireless devices are off 2 From the Desktop tap or click the network status icon in the notification area at the far right of the taskbar 3 Select your WLAN from the list 4 Click Connect If the WLAN is a security enabled WLAN you are prompted to en...

Page 32: ...llowing Computers desktop notebook PDA Phones cellular cordless smart phone Imaging devices printer camera Audio devices headset speakers Mouse Bluetooth devices provide peer to peer capability that allows you to set up a personal area network PAN of Bluetooth devices For information about configuring and using Bluetooth devices see the Bluetooth software Help 22 Chapter 3 Connecting to a network ...

Page 33: ...se a LAN connection if you want to connect the computer directly to a router in your home instead of working wirelessly or if you want to connect to an existing network at your office Connecting to a LAN requires an 8 pin RJ 45 network cable To connect the network cable follow these steps 1 Plug the network cable into the network jack 1 on the computer 2 Plug the other end of the network cable int...

Page 34: ...adphones monitor projector TV and on select models high definition devices Here are some of the entertainment features on your computer Multimedia Features Component Description 1 Internal microphones 2 Record sound 2 HP TrueVision HD Webcam Records video captures still photographs allows you to video conference and chat online using streaming video To use the webcam from the Start screen type c a...

Page 35: ... allows you to view and control all audio settings NOTE To open Beats Audio Control Panel from the Start screen type c select Control Panel select Hardware and Sound and then select Beats Audio Control Panel 10 fn key Enables or disables Beats Audio when pressed in combination with the b key 11 Audio out headphone jack Produces sound when connected to optional powered stereo speakers headphones ea...

Page 36: ...acturer s instructions To connect high definition speakers to the computer see Configuring audio settings with HDMI TV on page 31 Before connecting audio devices be sure to adjust the volume Connecting headphones You can connect wired headphones to the headphone jack on your computer To connect wireless headphones to your computer follow the device manufacturer s instructions WARNING To reduce the...

Page 37: ...ect any sound event such as a beep or alarm and then click Test You should hear sound through the speakers or through connected headphones To check the recording functions on your computer follow these steps 1 From the Start screen type s and then select Sound Recorder 2 Click Start Recording and speak into the microphone Save the file to your desktop 3 Open a multimedia program and play the recor...

Page 38: ...g the correct cable Check the device manufacturer s instructions if you have questions Connecting a VGA monitor or projector To see the computer screen image on an external VGA monitor or projected for a presentation connect a monitor or projector to the computer s VGA port To connect a monitor or projector 1 Connect the VGA cable from the monitor or projector to the VGA port on the computer as sh...

Page 39: ...al device especially if you choose the Extend option From the Start screen type c and then select Control Panel from the list of apps Select Appearance and Personalization Under Display select Adjust screen resolution for best results Using video 29 ...

Page 40: ...age between 4 display states PC screen only View the screen image on the computer only Duplicate View the screen image simultaneously on both the computer and external device Extend View the screen image extended across both the computer and external device Second screen only View the screen image on the external device only Each time you press f4 the display state changes NOTE Adjust the screen r...

Page 41: ... Click Set Default and then click OK Using Intel Wireless Display select models only Intel Wireless Display allows you to transmit your computer content wirelessly to your receive display device such as HDTV monitor projector game console Blu ray player or DVR by using an optional wireless adapter purchased separately For details about using the wireless adapter see the manufacturer s instructions...

Page 42: ...mouse purchased separately can be connected to one of the USB ports on the computer Review the Windows 8 Basics guide included with your computer The guide provides information on common tasks using the TouchPad touch screen or the keyboard Select computer models have special action keys or hot key functions on the keyboard to perform routine tasks Some computer models may also have an integrated ...

Page 43: ...pe c to display the Apps list Select Control Panel and then select Hardware and Sound Under Devices and Printers select Mouse Turning the TouchPad off or on To turn the TouchPad off or on quickly double tap the TouchPad on off button The TouchPad light is off when the TouchPad is on The TouchPad supports a variety of gestures that let your fingers scroll swipe pinch and rotate to manipulate items ...

Page 44: ...aptics TouchPad 3 Click a gesture to activate the demonstration To turn a gesture off or on 1 From the Synaptics TouchPad screen select or clear the check box next to the gesture that you want to turn on or off 2 Click apply and then click OK Tapping To make an on screen selection use the tap function on the TouchPad Point to an item on the screen and then tap one finger on the TouchPad zone to ma...

Page 45: ...then drag them up down left or right Pinching zooming Pinching and zooming allow you to zoom in or out on images or text Zoom in by placing two fingers together on the TouchPad zone and then moving your fingers apart Zoom out by placing two fingers apart on the TouchPad zone and then moving your fingers together Using TouchPad gestures 35 ...

Page 46: ...tion move your forefinger from 3 o clock to 12 o clock NOTE Rotate is intended for specific apps where you can manipulate an object or image Rotate may not be functional for all apps 2 finger click select models only 2 finger click allows you to make menu selections for an object on the screen Place two fingers on the TouchPad zone and press down to open the options menu for the selected object 36...

Page 47: ...rs in a light quick motion up down left or right Edge swipes Edge swipes allow you to perform tasks such as changing settings and finding or using apps Right edge swipe The right edge swipe reveals the charms which let you search share start apps access devices or change settings Slide your finger gently from the right edge to display the charms Using TouchPad gestures 37 ...

Page 48: ...es depending on the app Slide your finger gently from the top edge to display available apps Left edge swipe The left edge swipe reveals thumbnails of your open apps so that you can switch to them quickly Swipe from the left edge of the TouchPad to switch between apps 38 Chapter 5 Navigating using touch gestures pointing devices and the keyboard ...

Page 49: ...r instructions on opening Setup Utility BIOS and then follow the instructions at the bottom of the screen To activate the assigned function after you have disabled the action key feature you must press the fn key in combination with the appropriate action key CAUTION Use extreme care when making changes in Setup Utility Errors can prevent the computer from operating properly Icon Key Description f...

Page 50: ... up before a wireless connection is possible Using Microsoft Windows 8 shortcut keys Microsoft Windows 8 provides shortcuts to perform actions quickly Several shortcuts will help you with Windows 8 functions Press the Windows logo in combination with the key to perform the action For additional information on Windows 8 shortcut keys go to Help and Support From the Start screen type h and then sele...

Page 51: ...ht on or off fn spacebar Turns the TouchPad accent light on or off when the TouchPad is on NOTE To extend battery life turn off the TouchPad accent light Using the integrated numeric keypad The computer includes an integrated numeric keypad and it also supports an optional external numeric keypad or an optional external keyboard that includes a numeric keypad Component Description num lock key Con...

Page 52: ...n battery power and an AC power source is not available to charge the battery it is important to monitor and conserve the battery charge Your computer supports power plans to manage how your computer uses and conserves power so that you can balance computer performance with power conservation 42 Chapter 6 Managing power ...

Page 53: ...isc or an external media card NOTE You cannot initiate any type of networking connection or perform any computer functions while the computer is in the Sleep state or in Hibernation Intel Rapid Start Technology select models only For select models the Intel Rapid Start Technology RST feature is enabled by default Rapid Start Technology allows your computer to resume quickly from inactivity Rapid S...

Page 54: ...our Windows password before the computer will return to the screen Enabling and exiting user initiated hibernation You can enable user initiated Hibernation and change other power settings and timeouts using Power Options 1 From the Start screen type power select Settings and then select Power Options from the list of apps 2 In the left pane click Choose what the power button does 3 Click Change S...

Page 55: ...lick Require a password on wakeup 3 Click Change Settings that are currently unavailable 4 Click Require a password recommended NOTE If you need to create a user account password or change your current user account password click Create or change your user account password and then follow the on screen instructions If you do not need to create or change a user account password go to step 5 5 Click...

Page 56: ...battery level Selecting a power plan A power plan manages how the computer uses power and helps you conserve power and maximize performance To change the power plan from the Start screen type power select Settings and then select Power Options The following power plans are available HP Recommended recommended Automatically balances performance with energy consumption on capable hardware Power save...

Page 57: ...ry Check in HP Support Assistant To access battery information select the HP Support Assistant app on the Start screen and then select Battery and performance If Battery Check indicates that your battery should be replaced contact support Removing a user replaceable battery WARNING To reduce potential safety issues use only the user replaceable battery provided with the computer a replacement batt...

Page 58: ...em Disconnect unused external devices that are not plugged into an external power source such as an external hard drive connected to a USB port Stop disable or remove any external media cards that you are not using Before you leave your work initiate Sleep or shut down the computer Identifying low battery levels When a battery that is the sole power source for the computer reaches a low or critica...

Page 59: ... for more than 2 weeks remove the battery and store it separately in a cool dry place to prolong the battery charge A stored battery should be checked every 6 months If the capacity is less than 50 percent recharge the battery before returning it to storage Disposing of a user replaceable battery WARNING To reduce the risk of fire or burns do not disassemble crush or puncture do not short external...

Page 60: ...nditions WARNING Do not charge the computer battery while you are onboard aircraft When charging or calibrating a battery When installing or modifying system software When writing information to a disc select models only When running Disk Defragmenter on computers with internal hard drives When performing a backup or recovery When you connect the computer to external AC power The battery begins to...

Page 61: ...puter and then plug it into an AC outlet 4 Turn on the computer If the power lights turn on the AC adapter is working properly If the power lights remain off check the connection from the AC adapter to the computer and the connection from the AC adapter to the AC outlet to make sure the connections are secure If the connections are secure and the power lights remain off the AC adapter is not funct...

Page 62: ... on follow these steps From the Start screen type cool select Settings and then select HP CoolSense Refreshing your software content with Intel Smart Connect Technology select models only When the computer is in the Sleep state Intel Smart Connect Technology periodically causes the computer to exit Sleep Smart Connect then updates the content for certain open applications and reinitiates Sleep As ...

Page 63: ...he recommended procedure is to use the Windows Shut down command NOTE If the computer is in the Sleep state or in Hibernation you must first exit Sleep or Hibernation before shutdown is possible by briefly pressing the power button 1 Save your work and close all open programs 2 From the Start screen point to the upper right or lower right corner of the screen 3 When the charms list opens click Set...

Page 64: ...xternal drive purchased separately such as an optical drive or hard drive or insert a digital storage card directly from your phone or camera A USB flash drive connected to the Universal Serial Bus USB port on your computer also allows quick data transfer Some devices use the computer s power to run others have their own power source Some devices come with software that must be installed NOTE For ...

Page 65: ...nsfers data at 60 MB s USB 3 0 Transfers data at 640 MB s USB 3 0 ports also known as SuperSpeed ports are also compatible with USB 1 0 and 2 0 devices Connecting a USB device CAUTION To reduce the risk of damage to a USB connector use minimal force to connect the device Connect the USB cable for the device to the USB port NOTE The USB port on your computer may look slightly different from the ill...

Page 66: ...ly Remove Hardware and Eject Media displays Follow the on screen instructions Connecting a powered USB device CAUTION To reduce the risk of damage to the equipment when connecting a powered device be sure that the device is turned off and its AC power cord is unplugged 1 Connect the device to the computer 2 Plug the device power cord into a grounded AC outlet 3 Turn on the device To disconnect an ...

Page 67: ...the device has been detected To remove a digital storage card CAUTION To reduce the risk of loss of data or an unresponsive system use the following procedure to safely remove the digital card 1 Save your information and close all programs associated with the digital card 2 From the Desktop click the remove hardware icon in the notification area at the far right of the taskbar Then follow the on s...

Page 68: ...formation many times to the CD Information on the CD can be erased DVD A digital video disc is a high capacity optical disc It can store more information than a CD A double sided DVD can store up to 17 GB The following DVD formats are available DVD Recordable DVD R or DVD R which allow the computer to read information and to record information one time on the DVD After the information is recorded ...

Page 69: ...ut the tray 2 4 Hold the disc by the edges to avoid touching the flat surfaces and position the disc label side up over the tray spindle NOTE If the tray is not fully accessible tilt the disc carefully to position it over the spindle 5 Gently press the disc 3 down onto the tray spindle until the disc snaps into place NOTE If the tray is not fully accessible tilt the disc carefully as you remove it...

Page 70: ...the disc 3 from the tray by gently pressing down on the spindle while lifting the outer edges of the disc Hold the disc by the edges and avoid touching the flat surfaces NOTE If the tray is not fully accessible tilt the disc carefully as you remove it 3 Close the disc tray and place the disc in a protective case 60 Chapter 7 Managing and sharing information ...

Page 71: ...nd then click Add 4 Click Share and then follow the on screen instructions To share information from your Local Disk 1 On the Desktop open File Explorer 2 Click Local Disk C on the Libraries window 3 Click the Share tab and then click Advanced sharing 4 On the Local Disk C Properties window select Advanced Sharing 5 Check Share this folder To share drives on the same network 1 On the Desktop right...

Page 72: ...wn the computer If you are unsure whether the computer is off or in the Sleep state turn the computer on and then shut it down through the operating system Before handling a drive discharge static electricity by touching the unpainted metal surface of the drive Do not touch the connector pins on a removable drive or on the computer Do not use excessive force when inserting a drive into a drive bay...

Page 73: ...computer If you are unsure whether the computer is off or in the Sleep state turn the computer on and then shut it down through the operating system 1 Save your work and shut down the computer 2 Disconnect all external devices connected to the computer 3 Unplug the power cord from the AC outlet 4 Turn the computer upside down on a flat surface 5 Remove the battery from the computer NOTE For more i...

Page 74: ...rd drive itself 6 Remove the 4 screws 1 from the hard drive bracket 7 Remove the hard drive bracket 2 from the hard drive 8 Disconnect the hard drive cable 3 from the hard drive To install a hard drive reverse this procedure NOTE When installing the second hard drive carefully insert the hard drive cable under the cable clips before connecting the hard drive cable 64 Chapter 8 Maintaining your com...

Page 75: ...les and folders on the hard drive so that the system can run more efficiently NOTE It is not necessary to run Disk Defragmenter on solid state drives After you start Disk Defragmenter it works without supervision However depending on the size of your hard drive and the number of fragmented files Disk Defragmenter may take more than an hour to complete HP recommends defragmenting your hard drive at...

Page 76: ...can damage electronic components Before beginning any procedure ensure that you are discharged of static electricity by touching a grounded metal object NOTE To use a dual channel configuration with a second memory module be sure that both memory modules are identical To add or replace a memory module CAUTION To prevent information loss or an unresponsive system Shut down the computer before addin...

Page 77: ...e hold the memory module by the edges only Do not touch the components on the memory module a Align the notched edge 1 of the memory module with the tab in the memory module slot b With the memory module at a 45 degree angle from the surface of the memory module compartment press the module into the memory module slot 2 until it is seated c Gently press the memory module 3 down applying pressure t...

Page 78: ...9 Replace the service door 10 Replace the battery 11 Turn the computer right side up and then reconnect external power and external devices 12 Turn on the computer 68 Chapter 8 Maintaining your computer ...

Page 79: ...ne chloride and hydrocarbons which can permanently damage the surface of the computer Cleaning the display sides and cover Gently wipe the display using a soft lint free cloth moistened with an alcohol free glass cleaner Allow the display to dry before closing the computer cover Use a pre moistened germicidal wipe to clean the sides and cover Fibrous materials such as paper towels can scratch the ...

Page 80: ...damage drives If you plan to use the computer during a flight listen for the in flight announcement that tells you when you are allowed to use your computer In flight computer use is at the discretion of the airline If the computer will be unused and disconnected from external power for more than 2 weeks remove the battery and store it separately If you are shipping the computer or a drive use sui...

Page 81: ...of malicious code IMPORTANT Some security features listed in this chapter may not be available on your computer Computer risk Security feature Unauthorized use of the computer Power on password Fingerprint reader Computer viruses Antivirus software Unauthorized access to data Firewall software Unauthorized access to Setup Utility BIOS settings and other system identification information Administra...

Page 82: ...rds in a file on the computer When creating passwords follow requirements set by the program Change your passwords at least every three months An ideal password is long and has letters punctuation symbols and numbers Before you send your computer for service back up your files delete confidential files and then remove all password settings For additional information about Windows passwords such as...

Page 83: ...rator password can be used in place of the power on password NOTE A power on password is not displayed as it is set entered changed or deleted To set change or delete an administrator or power on password in Setup Utility BIOS 1 To start Setup Utility BIOS turn on or restart the computer quickly press esc and then press f10 2 Use the arrow keys and follow the on screen instructions When the Startu...

Page 84: ...t screen type simple and then select HP SimplePass 2 When the HP SimplePass welcome screen displays click Get Started It s Easy 3 HP SimplePass prompts you to swipe your right index finger over the sensor 4 Swipe your finger 3 times to finish the registration A green circle is displayed on the finger if it is registered successfully 5 Select one of the following options Set up Windows logon Allows...

Page 85: ...tion abnormally Antivirus software can detect most viruses destroy them and in most cases repair any damage they have caused For more information about computer viruses from the Start screen type h and then select Help and Support Using firewall software Firewalls are designed to prevent unauthorized access to a system or network A firewall can be software you install on your computer and or netwo...

Page 86: ...e u select Settings and then select Windows Update Run Windows Update monthly thereafter Obtain updates to Windows and other Microsoft programs as they are released from the Microsoft website and through the updates link in Help and Support Installing HP and third party software updates HP recommends that you regularly update the software and drivers that were originally installed on your computer...

Page 87: ... deterrent but it may not prevent the computer from being mishandled or stolen Security cable locks are only one of several methods that should be employed as part of a complete security solution to help maximize theft protection The security cable slot on your computer may look slightly different from the illustration in this section For the location of the security cable slot on your computer se...

Page 88: ... the BIOS Updated versions of the BIOS may be available on the HP website Most BIOS updates on the HP website are packaged in compressed files called SoftPaqs Some download packages contain a file named Readme txt which contains information regarding installing and troubleshooting the file Determining the BIOS version To determine whether available BIOS updates contain later BIOS versions than tho...

Page 89: ...locate the update later after it has been downloaded to your hard drive b Follow the on screen instructions to download your selection to the hard drive If the update is more recent than your BIOS make a note of the path to the location on your hard drive where the BIOS update is downloaded You will need to access this path when you are ready to install the update NOTE If you connect your computer...

Page 90: ...ng properly To start System Diagnostics 1 Turn on or restart the computer quickly press esc and then press f2 2 Click the diagnostic test you want to run and then follow the on screen instructions NOTE If you need to stop a diagnostic test while it is running press esc 80 Chapter 10 Using Setup Utility BIOS and System Diagnostics ...

Page 91: ... proper working state or even back to the original factory state all with simple steps This chapter provides information about the following processes Creating recovery media and backups Restoring and recovering your system NOTE This guide describes an overview of backing up restoring and recovering options For more details about the tools provided see Help and Support From the Start screen type h...

Page 92: ...at a specific time A system restore point contains information that Windows uses such as registry settings Windows creates a system restore point for you automatically during a Windows update and during other system maintenance such as a software update security scanning or system diagnostics You can also manually create a system restore point at any time For more information and steps for creatin...

Page 93: ...h drive If your computer does not include an integrated optical drive with DVD writer capability but you would like to create DVD recovery media you can use an external optical drive purchased separately to create recovery discs or you can obtain recovery discs for your computer from the HP website For U S support go to http www hp com go contactHP For worldwide support go to http welcome hp com c...

Page 94: ...rmation settings or apps that came preinstalled on your computer or were purchased from the Windows Store consider using Windows Refresh This option does not require backing up data to another drive See Using Windows Refresh for quick and easy recovery on page 85 If you want to reset your computer to its original state Windows provides an easy way to remove all personal data apps and settings and ...

Page 95: ...t corner of the screen and then select General from the PC settings screen 4 Under Refresh your PC without affecting your files select Get started and follow the on screen instructions Remove everything and reinstall Windows Sometimes you want to perform detailed reformatting of your computer or you want to remove personal information before you give away or recycle your computer The process descr...

Page 96: ...erating system and the software that was installed at the factory The HP Recovery partition select models only allows Minimized Image Recovery What you need to know HP Recovery Manager recovers only software that was installed at the factory For software not provided with this computer you must either download the software from the manufacturer s website or reinstall the software from the media pr...

Page 97: ... first HP Recovery disc you created into the optical drive on your computer or into an optional external optical drive and then restart the computer or Insert the HP Recovery USB flash drive you created into a USB port on your computer and then restart the computer NOTE If the computer does not automatically restart in HP Recovery Manager change the computer boot order See Changing the computer bo...

Page 98: ...ws option or the HP Recovery Manager option for minimized image recovery Create HP Recovery media before removing the Recovery partition to ensure you have recovery options see Creating HP Recovery media on page 83 Follow these steps to remove the HP Recovery partition 1 From the Start screen type recovery and then select HP Recovery Manager 2 Select Remove Recovery Partition and follow the on scr...

Page 99: ...ce supplied and approved by HP for use with this computer The computer can operate on DC power within the following specifications Operating voltage and current varies by platform Input power Rating Operating voltage and current 18 5 V dc 3 5 A 65 W or 19 5 V 3 33 A 65 W 19 V dc 4 74 A 90 W or 19 5 V 4 62 A 90 W 18 5 V dc 6 5 A 120 W or 19 5 V dc 6 15 A 120 W DC plug of external HP power supply NO...

Page 100: ...95 F Nonoperating 20 C to 85 C 4 F to 185 F Relative humidity noncondensing Operating 5 to 95 5 to 95 Nonoperating 5 to 95 5 to 95 Maximum altitude unpressurized Operating 15 m to 3 048 m 50 ft to 10 000 ft Nonoperating 15 m to 15 240 m 50 ft to 50 000 ft 90 Chapter 12 Specifications ...

Page 101: ... or installation instructions direct you to unplug the computer unplug it after being properly grounded and before removing a cover Keep components in their electrostatic safe containers until you are ready to install them Avoid touching pins leads and circuitry Handle electronic components as little as possible Use nonmagnetic tools Before handling components discharge static electricity by touch...

Page 102: ...an update 79 updating 78 Bluetooth device 18 22 Bluetooth label 17 boot order changing HP Recovery Manager 87 buttons left TouchPad 10 optical drive eject 5 power 12 right TouchPad 10 C cables USB 55 caps lock light identifying 11 caring for your computer 69 checking audio functions 27 cleaning your computer 69 components bottom 16 display 9 front 4 left side 7 rear 8 right side 5 top 10 computer ...

Page 103: ...4 fn 14 25 num lock 15 Windows apps 14 Windows logo 14 L labels Bluetooth 17 regulatory 17 serial number 17 service 17 wireless certification 17 WLAN 17 latch battery release 16 lights AC adapter 6 caps lock 11 fingerprint reader 11 hard drive 5 mute 11 optical drive 5 power 5 11 TouchPad 10 webcam 9 24 wireless 11 low battery level 48 M maintenance Disk Cleanup 65 Disk Defragmenter 65 memory modu...

Page 104: ...ting 82 restoring 84 T temperature 49 testing an AC adapter 51 TouchPad buttons 10 TouchPad accent light hot key 41 TouchPad gestures pinching 35 rotating 36 scrolling 35 zooming 35 TouchPad light 10 TouchPad on off button 10 TouchPad zone identifying 10 traveling with the computer 17 49 70 turning off the computer 53 U unresponsive system 53 USB 2 0 ports identifying 5 25 USB 3 0 port identifying...

Reviews: