Installing an optical drive (desktop configuration)
1.
Disconnect power from the system (
Predisassembly procedures on page 69
),
2.
Remove the side access panel (
Removing the side access panel on page 72
),
3.
If your system has an airflow guide, remove it (see
Removing the airflow guide on page 92
).
4.
Remove the front bezel (see
Removing the front bezel on page 75
),
5.
Remove the bezel blank where the drive is being added.
6.
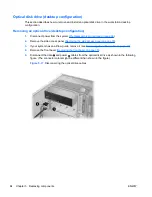
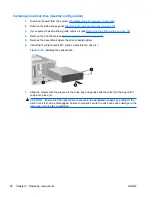
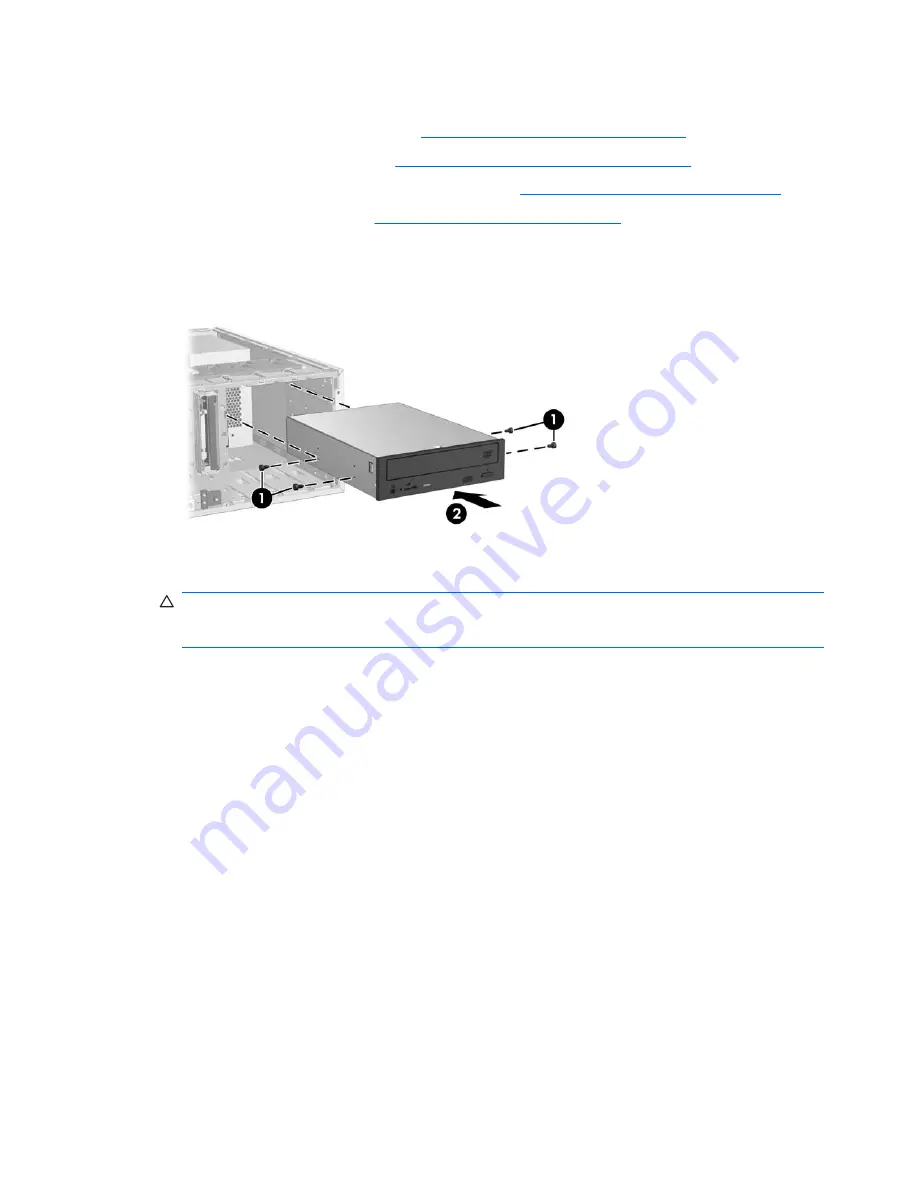
Install the four black metric M3 guide screws into the drive (1).
Figure 5-20
Installing the optical drive
7.
Align the screws with the grooves in the drive bay and gently slide the drive into the bay until it
snaps into place (2).
CAUTION:
Ensure that the optical drive is secure in the workstation chassis by pulling on the
drive to see if it can be disengaged. Failure to properly secure the drive can cause damage to the
drive when moving the workstation.
86
Chapter 5 Replacing components
ENWW


