Server/Utility Shelf kit 113
1.
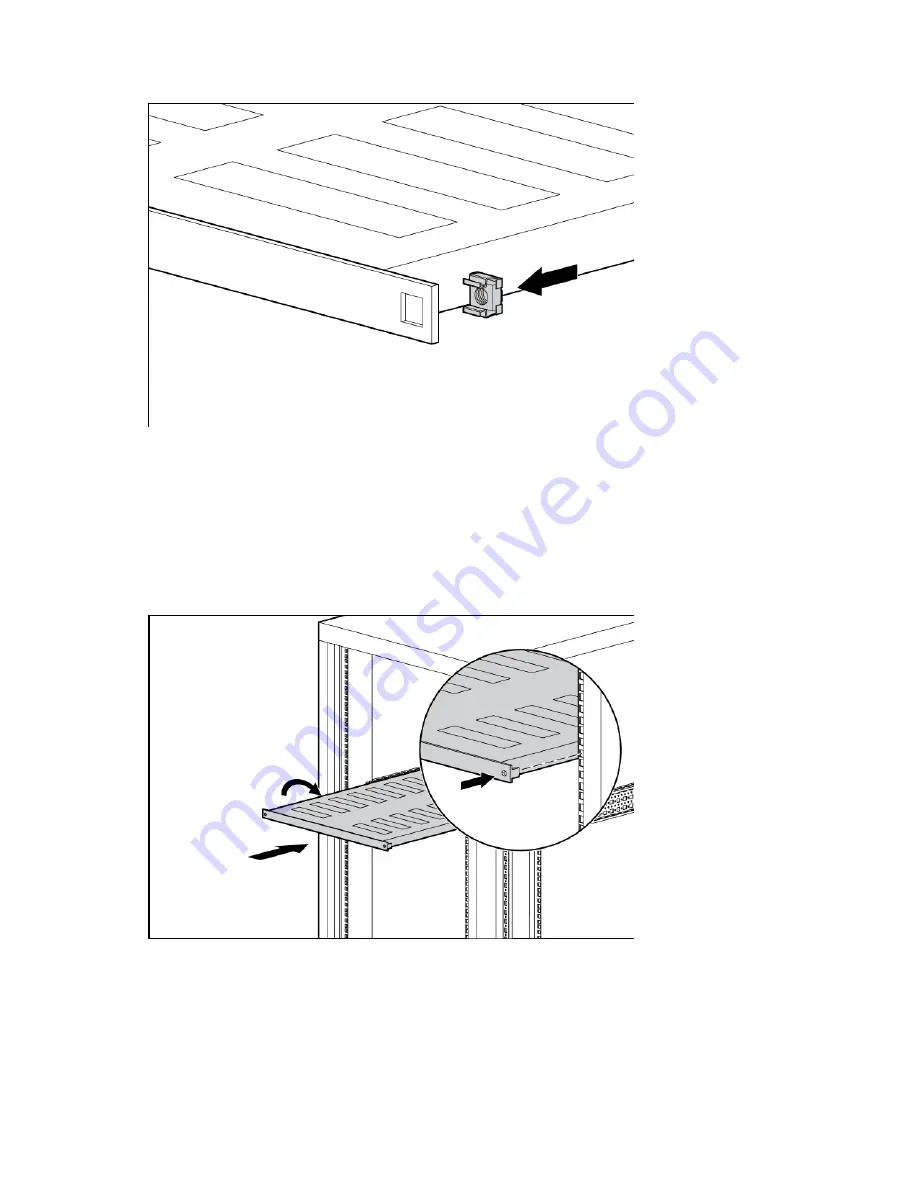
Align the cage nuts with the square-rail perforations on the front of the shelf.
2.
Use the cage nut insertion tool (not included) to secure each cage nut to the shelf.
a.
Hook the bottom lip of the cage nut in the square-rail perforation.
b.
Insert the tip of the insertion tool through the perforation, and then hook the top lip of the cage nut.
c.
Pull the cage nut through the square-rail perforation until the top lip snaps into position.
3.
Firmly hold the shelf, and then insert the shelf into the rack, tilting the shelf slightly so that the rear teeth
on the shelf clear the rear of the rack.
4.
Straighten the shelf, and then insert the rear teeth into the mounting holes on the rear of the rack.
Summary of Contents for HP 10000 G2 Series
Page 35: ...Cable Management Bracket kit 35 Installation is complete ...
Page 74: ...Hook and Loop Cabling Strap Clip kit 74 ...
Page 75: ...Hook and Loop Cabling Strap Clip kit 75 Installation is complete ...
Page 104: ...Rack Air Duct kit 104 For more information see Baying kit on page 25 ...
Page 125: ...Vertical PDU Mounting kit 125 HP monitored PDU 2 Install the PDU The installation is complete ...


